
Likes
Comments
Share


@Grnhead
Follow
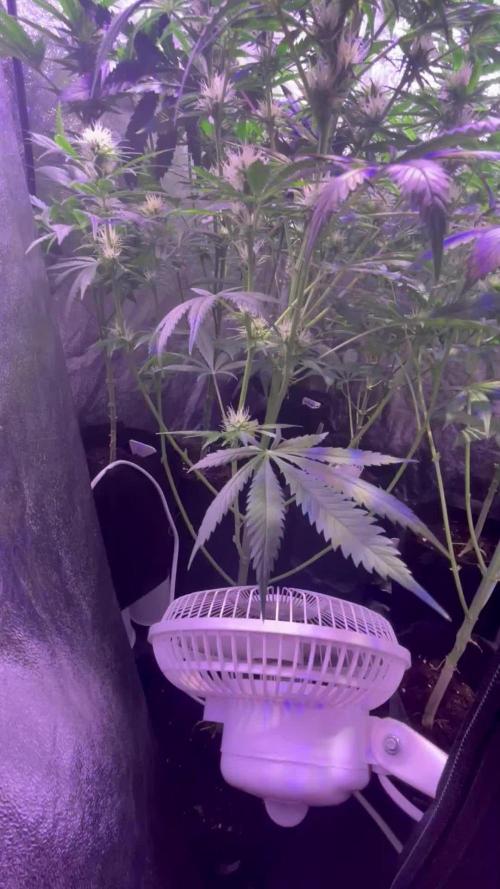
After flushing multiple times, and checking the ppm of the removed water, I realized how much nutrient build up I was subjecting the plant to. Big lesson learned that I need to add ph’d water without nutrients more often and check the ppm after I mix it back in.
Leaves are starting to lighten up from dark green and I noticed very slight deficiency on one or two leaves. Now I’m at 25% nutrient strength and it is starting to grow noticeably faster.

Likes
1
Share

@JorgeNitales420
Follow
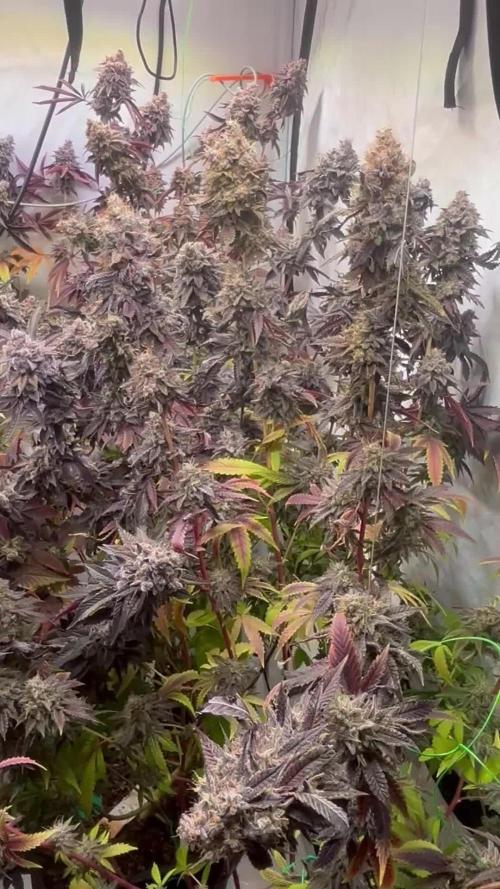
Week 5 of flower
Buds started to pack up in size, they started to smell like good shi
Tested the runoff a couple days ago and it eas around 4 EC, way to fkn much. Don't know if uptake did his job or this plants are so fkn resilient to hold 4 EC with no burned tip or another symptom
Anyways, watered with 600ppm till 20-30% of the runoff to control this, but since they dont have any symptom am not gonna do a hard flush

Likes
5
Share


@Willy_Balls
Follow
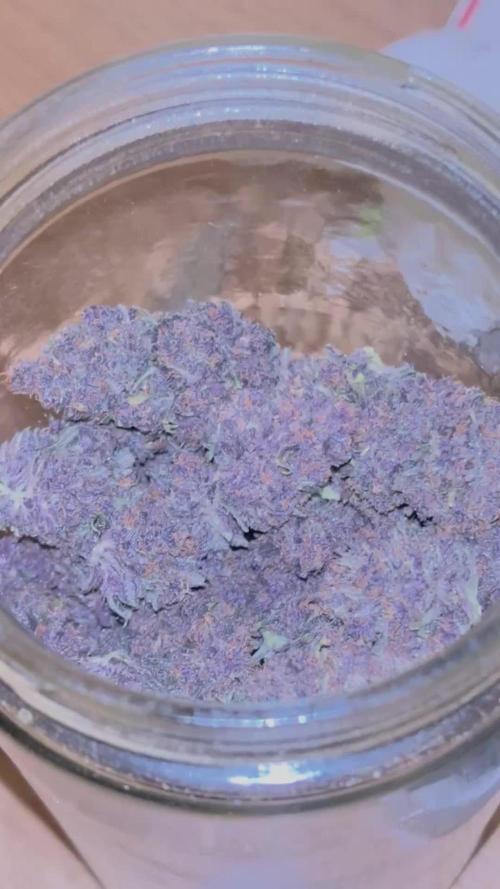
Beautiful spot on finish.
Fade is going on beautifully
This Mokum’s Tulip specimen I managed to save in reveg project is a true gem.
Gelato x sherbert go in tandem to create a creamy thin mint taste with hint of lemon zest. It’s astonishing.


Likes
4
Share


@Growstopher
Follow
4.21.25
3rd week of veg started today and the tie down method is starting to payoff!
Hoping to get another week or 2 of veg get some more green growth we will see.
Thanks for checking out grow have good week!

Likes
6
Share


@FrostyAutoflowersTV
Follow
I continued to renew the stakes, every 3-5 days and watered when dry. Btw I don't water every day, more like every 2-4 days, when the soil dries out. I started seeing white pistols in this week, so I knew the GC is in preflower. Thats why I fed the GC with 1ml/L of BioBizz Bio-Bloom and 1ml/L of BioBizz Bio-Grow to help with the pk demand. I also broke another note off, but the branch was still slightly attached, so I tried to glue it back on with some scotch tape and it worked out just fine. Incredible how robust this plant is and how much stress it can take for an autoflower


Likes
14
Share


@KannaKullektiv
Follow
Aloha Freunde der Sonne 😊
Obwohl die Mädels immer noch kein Dünger bekommen haben, geht es Ihnen so gut wie noch nie. Sie fühlen sich mehr als wohl bei mir.
Viel Spaß🙏


Processing
Likes
63
Share


@AsNoriu
Follow
Day 71. Yesterday girls got 950 ppm, its my first attempt to feed them full so early, but Gorillas looked to bright and i dont care about Cookies anymore.
At the moment Cookies are overfed and with biggest inner nodes that i ever grew. I knew that this strain is far from being compact, but not like this....
Tomorrow they will be striped, just not the NotFloweringCookie and all girls from control garden.
Lets see...
Day 72. Defoliation and all related...
Hope they will like it...
If all 4 Cookies you would put into one bundle, any Gorilla would be bigger.... Waist of time... Check Control Garden size, its 3 weeks veged plants vs Cookie.....
Day 73. Girls are happy and hopefully will start to bulk up, smell is getting stronger... They took defoliation as champs! Heavy feeding for next two weeks, with only one pure watering inbetween...


Likes
8
Share


@Northstar_cannabis
Follow
LSD-25 by far my favorite plant I've ever grown. It's colors are so beautiful, it's growth is exciting to watch. Fastbuds really out did themselves on this one! I love it.
Likes
37
Share


@Ruediger
Follow
Tag 34 - Die kleinen gedeihen prächtig 😁
Bin mir allerdings nicht sicher wie lange ich sie noch in der Wachstumsphase lassen sollen, habe die Befürchtung dass das Zelt bald voll ist 😅
Habe heute die Triebe wieder zurechtgerückt um alles möglichst gleich hoch wachsen.
Und hab heute ca. 1,5l gegossen.
Tag 35 - ich Kapp denen jetzt jeden Tag 2 Stunden Licht um sie langsam auf die Blüte vorbereiten, also ab heute bekommen sie 16/8
Likes
10
Share


@CURATI_DA_SOLO
Follow
Questa varietà e la nuova di anesia! Con 29 % di THC! E rimasta più piccola del resto della coltivazione ma forse è proprio per questione di grandezza di genetica anche perché lei sta benissimo....e bello forte e robusta ed ha resistito benissimo ai 3 topping...adesso ha 8 apicali e non è ancora entrata in fioritura...le radici hanno già oltrepassato il vaso in tessuto geotessile...una bomba! Ringrazio indoorline per i fertilizzanti biomabno del quale sono molto orgoglioso! Prodotti italiani di primissima qualità e te ne accorgi anche da.alcune bottiglie che si restringono...simbolo di un fertilizzante pregiatissimo! (Ricco di batteri ecc) li ringrazio anche per quanto riguarda l'aspirazione della growbox in quanto mi ha fatto testare coon piacere il secret Jardin df16...il loro catalogo e infinito e i prezzi molto accessibili! Passate a dare un occhiata trovarete di tutto e lavorando in team ti assicurano un assistenta clienti perfetta!Ringrazio anesia per questa genetica.... e tutto il pubblico di growdiaries per supportarmi nei miei lavoretti! All prossimo aggiornamento 💪🏼💪🏼💪🏼

Likes
10
Share


@TegridyCal
Follow
We have prepared the ground with Easy Boost following the indications on the quantity and using the official vessel found in the contest package. For germination we used Easy start but we put the germination cube directly in the ground because we do not like very much the pouring with the small and delicate seedling.
The baby was born little late but she go very good, see you next week.
Processing
Likes
93
Share


@Ferenc
Follow
Week 10, so from today I stopped watering the Gelato Cookie D'ohpe and on Saturday no more light as well. Sunday is harvest day finally. Not much changed, I raised up the water with 25ml so the Purple Punch gets 200ml 2 x a day. That's all, since last week I started giving 13 hours darkness and 11 hours light and from Monday will be 12/12 after I harvested the Gelato Cookie D'ohpe and I can use the tent only for her. Fertilization will happen on the same days. Sunday fun day, Gelato Cookie D'ohpe is harvested. Purple Punch left alone. From tomorrow I will switch the light schedule 12/12. End of the week Purple Punch is 43 cm.
Likes
1
Share


@VividLeaf
Follow
Water only! Except for the dry mother in the back 😂😂 I did eventually water her by the way!
Harvesting is coming soon, just waiting for more amber trichomes. The large pot really takes long to mature 😂
Likes
65
Share


@Dendegrow
Follow
Woche 4 bricht an und es läuft hervorragend! Die Orange Sherbet bekommt diese Woche frischen Boden: eine Mischung aus Bio-bizz All-Mix und Greenhouse-Feeding, perfekt für die letzten Vegetationswochen und blüte. Zudem hat sich die Orange Sherbet sehr gut mit dem Backhefe-Buttermilch-Melasse-Experiment entwickelt, was zu einem starken CO2-Anstieg auf bis zu 1500 ppm geführt hat. 💨 Ich bin gespannt, wie sie sich in der neuen Umgebung entwickeln wird. Auf der anderen Seite explodieren die Frozen Black Cherries förmlich in der Hydroponik! 🌱 Die Entwicklung ist beeindruckend, und ich könnte nicht zufriedener sein mit ihrem Fortschritt. Die Blütephase rückt näher, und ich bin gespannt, wie sich alles weiterentwickelt! Ich halte euch auf dem Laufenden! 🚀
Week 4 is here, and things are going great! The Orange Sherbet is getting new soil this week—a blend of Bio-Beth All-Mix and Greenhouse-Feeding, setting her up perfectly for the final weeks of vegetation and . Additionally, the Orange Sherbet has responded well to the back yeast-buttermilk-molasses experiment, resulting in a significant CO2 increase of up to 1500 ppm. 💨 I'm excited to see how she adapts to her new environment. Meanwhile, the Frozen Black Cherries are absolutely thriving in hydro! 🌱 Their growth has been phenomenal, and I couldn't be more impressed with their progress. The flowering phase is getting closer, and I can't wait to see how everything unfolds! I'll keep you updated! 🚀
Likes
12
Share


@TgOgFaRms
Follow
Hey there, lads! 👋🌱 It's time for the final update as we enter week 10 of this LED MephistoGenetics Grow. We're on the brink of harvest, and the excitement is Real! 🌿🌸🌞
The majority of my plants are reaching their peak and will be ready for harvest very soon. However, it seems that the Pink Panama and Tooth Decay strains require a few extra weeks to reach their full potential. 🌿🌱⏳
In the meantime, I've already commenced the drying process for my other plants—the beloved Copy Cat Genetics strains & ETHOS—within the tent. In a day or two, they will be eagerly awaiting their new home in designated jars. Proper drying is crucial to preserving the amazing aromas and aromas we've worked tirelessly to cultivate. 🌿🍃🌬️
When comparing this grow to my previous one, which utilized the Lumatek HPS lights, I must say that the buds under the LED lights have truly impressed me with their vibrant colors. The canopy is now a mesmerizing display of the full rainbow, boasting pink, purple, orange, white, Reds. and some exceptionally frosty buds. It's an awe-inspiring sight! 🌈🌿❄️
Today was the last day of providing nutrients, and from now on, I'll be giving them only water with a small dose of connoisseurs to maintain a pH level of 6.33 and a TDS of 50. The long-awaited harvest should take place within a couple of days. Meanwhile, tomorrow, I'll be transferring the Copycat Genetics grow from the drying tent to the jars. We're currently on day 65 of this Mephisto Grow.
I'm beyond thrilled to finally harvest these ladies, especially the ones that have been under the LED lights. Their intense aromas fill the air, creating a tantalizing atmosphere in the grow room. 🌿🌸✨🌿
That's all for now, lads! Stay green, stay positive, and may your buds be fire. Cheers and happy growing, lads! 🌿🌼🌟🌿🔥🌿
Likes
3
Share


@Huckleberry39
Follow
She is thriving so far. Can't wait to see how it goes. Thanks again @
