
Likes
Comments
Share


@Naujas
Follow
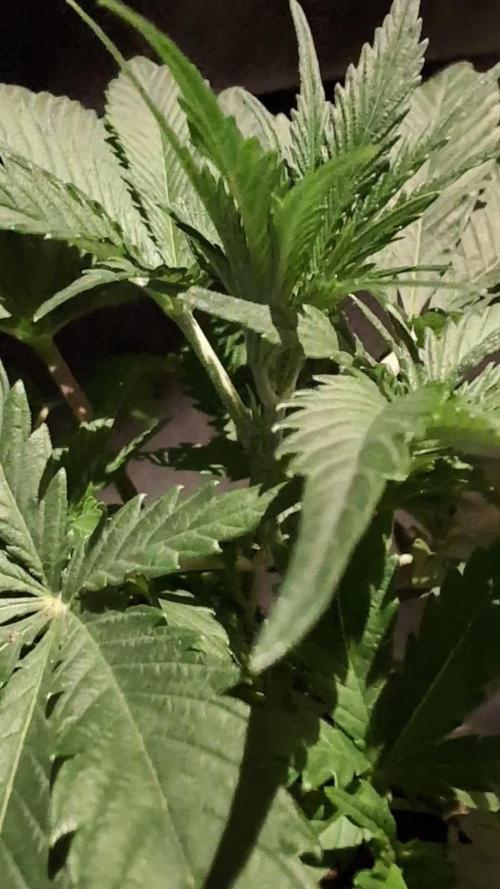
There are no photos for a few days, I was away on a short vacation :) when I returned, I immediately started working with her, I cut off the single leaves, and used a little LST, Overall, the girl looks really beautiful;) strong, thick branches, I think she will give really tasty buds :) It is an autoflower, but it is not blooming yet, I think it will start soon, all my auto strains that I have grown before, started really earlier, but it is not a problem for me, and maybe even + she will be bigger with bigger flowers :) good luck to everyone :).

Likes
24
Share


@PrairieFrostGrow
Follow
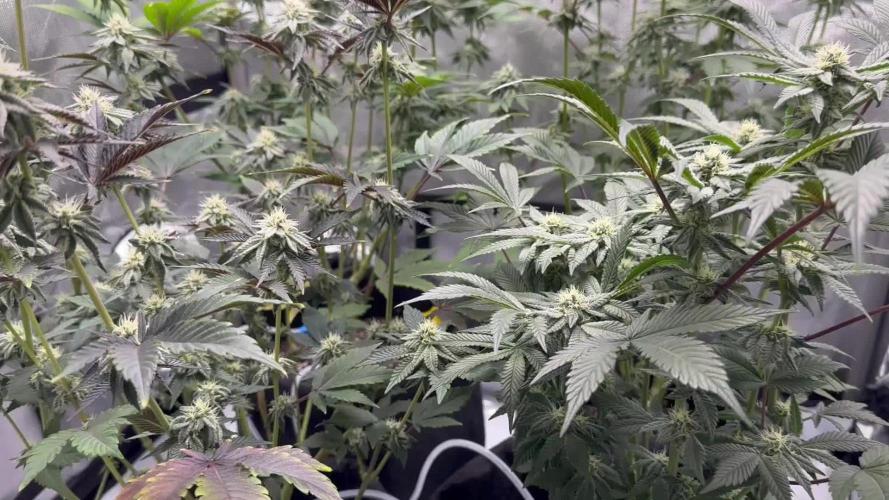
***** Week 10 growth - February 6 to 12, 2021 - Week 1 Flower *****
Here we go.......on to flower now. Last week was transition week and bud sites are setting on the girls now.
Lights flipped a week ago to 12/12.......typical flower.
Stretch is starting this week now. Last week was marginal height growth.
Nutrients switched over to flower schedule and following week 1 again this week. Next week will move up the ppm more and start on bud enhancers. More microbes and sweetener this week. Silica ppm also increasing now as not looking to bend branches much more now.
Decided to throw Scottie Real some support and Recharge arrived this week so switching microbes for the rest of the run👍💪
Have a hole in the canopy that I am just going to need to live with. GSCHB and MM2 did not growth as expected. They are not reaching up as tall as the others and stretch is slow. Not looking like they will catch up in next couple of days☹️☹️☹️ Also thinking of increasing some fulvic acid for this girl and see if it helps her stretch....Gold Storm.
Little more detail.......
Feb 6/21 - Day 1
- been drying for 2 days now so water day with some supplements
- 3L with CalMag @ 2ml, AN B52 @ 1.5ml (using up an old bottle to finish), Enzymes @ 1ml
- 575ppm and 5.9pH
- Need to start increasing silica. Using up some B52 which has some silica in it.......and other vitamins so its all good😀
Feb 7/21 - Day 2
- Leaves up today and praying nicely.
- dry out day
- stretch is going now and the girls are growing hard.....this girl is still working on setting buds
Feb 8/21 - Day 3
- Feed day again, going to stay with week 1 flower nutrients, same as last week.
- IPP Grow @ 1ml, Micro @ 2ml, Bloom @ 2ml, Black Storm @ 3ml, Sea Storm @ 5ml, B+ @ 0.5ml, Red Sun @ 0.5gr, Carbs @ 1ml, Natures Candy @ 1ml, Piranha @ 1ml, Microbes @ 2ml.
- 4L.......yeah, took a little longer to mix up this feed😀
- 1350ppm and 5.9pH
- no run off from the girls today......little light on the water, they should have had 5L each.
- last feed with bud starter, Red Sun, next will be Bud Fusion for bud booster next week.
Feb 9/21 - Day 4
- no run off yesterday so adding more water today......plain tap water.....no additives
- 5L for each girl. 225ppm and 6.0pH
- good run off today.
Feb 10/21 - Day 5
- Nothing today......watered two days in a row
- ready for more silica!! Branches need to firm up.......this girl has some very soft branches still!!!
Feb 11/21 - Day 6
- Recharge arrived today!!!!!! Time for more microbes and sweetener😀💪
- purple stripes on main stems so adding more magnesium through Epsom salts
- 4L mixture for the girls with Epsom Salts @ 0.5Tbsp, Silica @ 1.5ml, IPP Carbs @ 1ml, Recharge @ 1 tsp
- 1,000ppm and 5.9pH
- different microbes now and excited!
Feb 12/21 - Day 7
- Nothing again today.......give them watering tomorrow morning.
- Wondering if their leaves are a little dark........consider bring down ppm next week.......it was hard this week at 1300ppm........water is 250 on its own so around 1100ppm nutes added.
- she is not stretching much but looking very happy......suspect she will have large colas......hopefully👊
Looking good ETS......the girls are doing very well overall. This girl is very happy and looking healthy, branching a little soft, stretch has been minimal so far but might take off more next week with silica being increased. She grows some HUGE fan leaves😀😀
Likes
12
Share


@Lonelygrass
Follow
I am really happy that the plant is so beautiful. I am 100% sure that in better conditions it can give even more, now there is little time left to harvest. bye growers
OKeyyy now the harvest day is 23/05! i love this strain ! looking for the second plant ;D

Likes
9
Share


@TheWeedPimp
Follow
She’s still a little burned.
But growing very slow. Not much sun... cold, wet and windy Weather 👎🏻 Close to - 1 this morning... Think i gonna chop her Down before the rainy weather or the cold one kills her...
But the buds are still so tiny
Need a least 1 month😕
Any inputs guys?


Likes
17
Share


@JonnyKush
Follow
hey guys sorry for the absence but in this period I have had a lot to do with my work and I have not been able to bring a good detailed diary, but finally now the holidays will start and I will be able to dedicate myself 110% to a new crop and new ones diaries. having said that, I think I will leave him a week at the most and finally reap the benefits 💚🌳💚🌳maybe my fault the RQS slow release nutrients did not perform as much as the ADVs in my tent, you can see it from the video of 27/07/22 where you can see that 2 out of 6 plants are visually leaner and less compact to the touch , I wanted to try on the same varieties in order to have feedback. I think it could also be caused by the crowding of the tent but with the ADV I have not encountered any problems. I will definitely try them again, giving them much more attention.


Likes
228
Share


@StarLorr
Follow
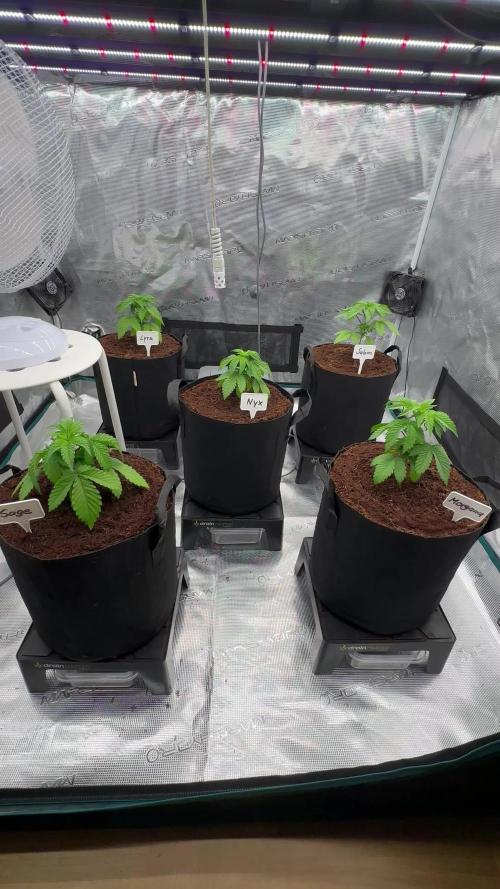
Welcome to my Pablø Ęscøbar diary.
In this diary:
Seeds: sponsored by Ðivine Șeeds
Media: Promix HP
Nutrients: Advanced Nutrients, Diablo Nutrients, Gaia Green Power Bloom.
Light and Weather: Şun☀️and Mother Earth.🌎
___________________________
Feeding:
Tue 17Sep: 8L water not pH'd
Thu 19Sep: 4L Flawless Finish not pH'd
Fri 20Sep: 4L Flawless Finish not pH'd
Sat 21Sep:4L water not pH'd
___________________________
*please note that watering are from the top.....since i smashed the saucers with the weed wacker*🤦🏻♂️
______________________________
Amazing weather throughout the week! Again☀️Sunny 26°C 😎"Except for today Monday 23-Sep-24 as per cloudy☁️photoshoot🙃😄
______________________________
Did my flushing thing, it's happening😉
______________________________
Thanks for stopping by, likes and comments are appreciated!👊🏻😎
Keep on growin!
Keep on tokin!!!
😙💨💨💨💨💨


Likes
10
Share


@valiotoro
Follow
Hello everyone 🤩
she grew fast and with a beautiful green colour on the leaves!
She has responded superbly to low stress training and topping & i defoliated her aswell and seems didn't even notice 😎
For the nutrient half grow half bloom and power buds 1ml/L
Spider Farme SE7000 70%
Wish you all a good day and happy growing 😎
Likes
18
Share


@Italianganya88
Follow
Die Plants wurden umgetopft und sind unter der grossen lampe gekommen, haben etwas stress anzeichen was normal beim umtopfen ist ,ansonsten sehen sie gut aus .

Likes
8
Share

@GoodTimesOrganics
Follow
Hi liebe Community and Welcome Back! 💚
Nach der vierten Wachstumswochen entwickelt sich die Orange Bud solide. Sie legt jetzt richtig mit der Wachstumsphase los.
Die neuen Blätter sehen sehr Gesund aus und insgesammt hat sich die Pflanze gut entwickelt.
Die Seittriebe beginnen nun in die Breite zu gehen und kommen allmählich gut hervor.
Die Umgebungsgegebenheiten sind aktuell gut:
—————
🌞 Temp: 21
🌚 Temp: 18°C bis 19°C
💨 RH: 48%
VPD: 1,00 kPa
💡ppfd: 330 mpm
—————
Viele Grüße 👋

Likes
14
Share


@GodZilla_Owner
Follow
Week 11 Update – Harvest Time Approaching! 🌱✂️
BioBizz#1 – BT51
She’s done! She hasn’t had any water for the past five days and will be harvested later this week.
AN#4 – BT51
She still needs a little more time—probably another 1-2 weeks before she’s fully ready.
AN#3 – BT47
Somehow, she’s managing despite the extremely close distance to the light. I haven’t held back on PPFD at all, but she’s handling it like a champ. Super curious to see what kind of yield she’ll bring in! 😅
Likes
4
Share


@PizzaMan024
Follow
These ladies have really been through it, they had beed getting fed everyday by my roommate in what I can only assume was an attempt to hill them because my plants looked better than his. I've been trying to baby them and slowly they are bouncing back
Likes
2
Share


Likes
10
Share


@Barcelona_Farmers710
Follow
Buenas Farmers!
Otra semana más y pasaremos a Flora, esperando a ver si podemos obtener nuevo equipo de @todoGrowled para llevar el verano más llevadero... Después de recuperase de las Plagas empieza coger buen color esto.🍁
Likes
5
Share


@LevanteCultiva420
Follow
Aquí os dejo fotos de los días 16 y 18 desde que salieron! Hasta el momento cumpliendo los parámetros y no están respondiendo nada mal!! Hos iré contando qué tal evolucionan!!
Buenos humos!!


Likes
2
Share


@stggenetix
Follow
massive growth in this girl. i decided to flip them both cuz they are in a 2x2. trying to get 12 tops. 6.3 ph 1800 ppm run off. the one girl goy reckt by knats so her roots got stunted. haven't decide what to do. toped her and she grew strange. gonna bump up the lights a bit maybe she streached out to much. topped one last time in the 3 gal. cal mag and silica only for now.