Likes
Comments
Share
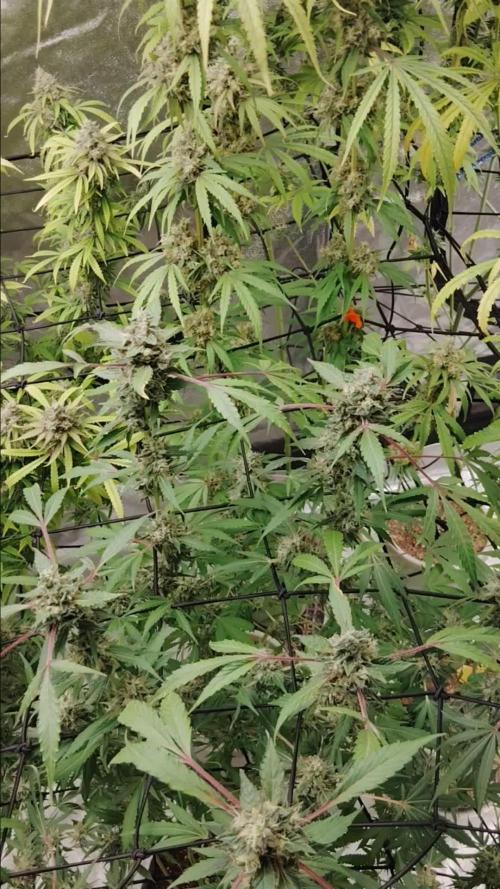
It's Saturday night as i type this. Week 7 doesn't officially begin till Monday but i fed tonight cuz they needed it so i decided to get this over with tonight. Runtz is billed as a 9 week finish. So these girls are still putting on weight so it may very well be 9 to finish. Tonight i staked all the plants and tied up sagging branches. Plants again fed full dose of bloom nutrients. There's noticeable Thrip damage on lower leaves, but the crop is close and the lady bugs have kept those little fuckers in check. When i found out i had a Thrip infestation in late summer i was pondering killing all my mothers and cleaning everything and have my operation sit idle for a month to knock out any and all Pests. Fortunately i opted to go the lady bug route. I released 700 lady bugs into my operation and have harvested the bugs off the last crop and deployed them to the next crop. I've been soaping my mother's but i'm not consistent in doing that so the Thrips persist. Next crop will be i think 6 Zake in 5 gal fabric pots in Coco.
Likes
Comments
Share
@Ensign420
Follow
|»» LOG DISCLAIMER: Not intended as a grow guide. Grow log entries are usually posted 3 weeks later and are for my learning reference. ««| Introduction - Week 15 Summary - Ensign's log, stardate 17711.1, Been a great week in the garden! Wow the 4x4 tent is thriving and the canopy is full of tops! By the end of the week, all phenos have begun to show signs of flowering! Growth has continued to stretch so added the second scrog frame and netting. By the end of the week, the canopy has stretched through the second layer and looking green and healthy! In the veg tent, been tending to solo cup waterings as needed. Also up-potted Chill Out OG into a 3-gal pot (with BluMat watering). Took more veg cuttings and now have them in Coco Coins rooting and looking healthy! Onwards to next week! [START OF WEEK 15] ========================================================== ---------- [ 3x3 VEG TENT - GR7 / GR3 ] ---------- TKO #2 - WEEK 07 - Full Veg Gorilla Goat #1 - WEEK 07 - Full Veg Chill Out OG #3 - WEEK 04 - Full Veg Chill Out OG #2 - WEEK 00 - Transplant ---------- [ 4x4 MAIN TENT - GR30 ] ---------- Chill Out OG #2 - WEEK 15 - Full Bloom Wk1 TKO #2-2 - WEEK 09 - Full Bloom Wk1 Heady OG BX1 #1 - WEEK 11 - Full Bloom Wk1 02/09/26 → 02/15/26 [WEEK 15] This Week's Estimated Goals ---------------------------------------------------------------------------------------------- DLI: ~13 mol/m²/d PPFD: ~300 μmol/m²/s VPD: ~1.2 kPa This Week's Meter Readings & Averages ---------------------------------------------------------------------------------------------- Light On/Off: 16:00 - 10:00 | Wattage: ~386.3W [LV05] Distance From Canopy: ~[22”, 13”, 13”] Plant Height: ~[30”, 39”, 39”] Max Plant Height: ~52” [Lamp-to-Soil Distance] DLI: ~16.80 mol/m²/d PPFD: ~389 μmol/m²/s VPD: ~0.89 kPa Soil %: ~[47.9, 47.1, 43.3, 53.0, 48.3, 63.4, 47.1, 61.9, 48.6, 72.3] ========================================================== Day 01 - Monday - 02/09/26 - Total Days: 096 ----------------------------------- Daily Averages ~[+01:00] - Temps: 81.1°F [27.3°C] - Humidity: 74.4% - VPD: 0.92 kPa - Soil %: [48, 47, 44, 51, 49, 66, 48, 65, 50, 75] ----------------------------------- - [22:14]: Night check on the 4x4 tent. --- Garden is full of tops and the canopy is getting taller! --- Chill Out OG #2 is getting taller, but is staying shorter than Heady OG BX1 #1 and TKO #2. --- The under canopy is looking clean and all pots are clean and no signs of flooding. - [22:17]: Checked on the BluMat soil moisture sensors: ------ Chill Out OG #2 » 46mbars ------ Heady OG BX1 #1 » 42mbars ------ TKO #2 » 49mbars --------- Watering Range: [Too Wet] ~25mbars «| [Ideal Target] ~40-80mbars |» ~125mbars [Too Dry] --------- BluMat Max Values: [10mbars «||» 750mbars] - [22:24]: Checked the Ecowitt soil moisture sensor data: ------------------ [ 3x3 VEG TENT – GR7 / GR3 ] ---------------- ------ 45% - [CH01 » M1 » VBL – TKO #2] ------ 46% - [CH02 » M2 » VBR – Gorilla Goat #1] ------ 44% - [CH03 » M3 » VFL – Chill Out OG #3] ------ 51% - [CH04 » M4 » VFR – Dry Soil] ----------------- [ 4x4 MAIN TENT – GR30 ] --------------- ------ 49% - [CH05 » P1 » FLT – Chill Out OG #2] ------ 66% - [CH06 » P1 » FLB – Chill Out OG #2] ------ 47% - [CH07 » P2 » BLT – TKO #2-2] ------ 64% - [CH08 » P2 » BLB – TKO #2-2] ------ 51% - [CH09 » P3 » FRT – Heady OG BX1 #1] ------ 75% - [CH10 » P3 » FRB – Heady OG BX1 #1] --------- Veg: ~38%-45% | Flower: ~45%-55% --------- General: ~30% [Dry] «| ~45-60% [Moist] |» ~70% [Wet] - [22:27]: Checked the 3x3 veg tent. --- Wow the veg garden is blowing up with growth! --- All mothers and clones are perky and getting tall! Definitely need to top soon, but not today! --- A Chill Out OG #2 clones needs watering! - [22:33]: Here is the starting initial watering range: ------ Chill Out OG #2 » 267.3g → 301.0g --------- General Weight Range: [Dry] ~275g «| [Dryback] ~300g |» ~325g-400g [Wet] --- Been 2 days since the last watering. --- Took the starting weight before watering, ------ Chill Out OG #2 » 289.2g --- While on a scale, --- Evenly misted the top of the cup with RO water. --- Did not spray the top growth. --- Misted 10-20 sprays. Waited a moment, then misted again. --- Repeated this process until the cup weighted at least 300g. --- There was no runoff. - [22:44]: Took the saturated weight after watering, ------ Chill Out OG #2 » 390.7g --- Updated the wet weight and watering date. --- Placed the cup back into the tent. --- All veg clones in the propagation tray look great and no need to water! - [22:53]: Checked the humidifiers. --- Tanks are still full and no leaks found. Day 02 - Tuesday - 02/10/26 - Total Days: 097 ----------------------------------- Daily Averages ~[+01:00] - Temps: 81.0°F [27.2°C] - Humidity: 76.9% - VPD: 0.83 kPa - Soil %: [50, 47, 44, 51, 49, 64, 47, 63, 50, 74] ----------------------------------- - [21:06]: Night check on the 4x4 tent. --- Ca-Caw! Wow the garden soaring upwards with healthy tops! --- Heady OG and TKO are stretching up at equal heights and are almost tall enough to begin the second level or netting. Nice! --- Chill Out OG is chilling and staying squat, but looking perking! - [21:12]: Checked on the BluMat soil moisture sensors: ------ Chill Out OG #2 » 48mbars ------ Heady OG BX1 #1 » 44mbars ------ TKO #2 » 56mbars --------- Watering Range: [Too Wet] ~25mbars «| [Ideal Target] ~40-80mbars |» ~125mbars [Too Dry] --------- BluMat Max Values: [10mbars «||» 750mbars] - [21:16]: Checked the Ecowitt soil moisture sensor data: ------------------ [ 3x3 VEG TENT – GR7 / GR3 ] ---------------- ------ 47% - [CH01 » M1 » VBL – TKO #2] ------ 49% - [CH02 » M2 » VBR – Gorilla Goat #1] ------ 43% - [CH03 » M3 » VFL – Chill Out OG #3] ------ 51% - [CH04 » M4 » VFR – Dry Soil] ----------------- [ 4x4 MAIN TENT – GR30 ] --------------- ------ 48% - [CH05 » P1 » FLT – Chill Out OG #2] ------ 64% - [CH06 » P1 » FLB – Chill Out OG #2] ------ 47% - [CH07 » P2 » BLT – TKO #2-2] ------ 63% - [CH08 » P2 » BLB – TKO #2-2] ------ 51% - [CH09 » P3 » FRT – Heady OG BX1 #1] ------ 74% - [CH10 » P3 » FRB – Heady OG BX1 #1] --------- Veg: ~38%-45% | Flower: ~45%-55% --------- General: ~30% [Dry] «| ~45-60% [Moist] |» ~70% [Wet] - [21:21]: Checked the 3x3 veg tent. --- Woah! The veg garden is stretching upwards and has reached the grow light! --- Time to top! --- Also going to take more Gorilla Goat clones. Not too sure on the current one in the tray, so cutting a couple more just in case. - [21:33]: Filled a measuring cup with 2 cups of RO water. ------ Added 1/8tsp of Horticultural Aloe --- Mixed the solution and poured it straight into a clear solo cup. --- Made sure the PVC tube on the rig had the correct names marked. --- Placed the rig into the cup just above the aloe water. --- Okay! Time to take the cuttings! --- Using a pair of clean trimmers, - [22:05]: Topped and defoliated each mother plant. --- Removed a decent amount of growth (a good 7-8 inches of top growth). --- Mulched the trimmings. - [22:07]: Also cut several Gorilla Goat #1 clonal cuttings. --- Made sure to trim most of the branches leaving a top node or two. --- Did not cut any leaf fingers and made sure to cut the tip of the stalk (about 45-degree) before placing each cutting into the cup of aloe solution. - [22:09]: Placed the cup into the veg tent. --- Have the cup resting on top of the drip tray (front left pot). --- Okay! Let the soaking begin! - [22:10]: Decided to cull the Gorilla Goat #1-2 clone in the propagation tray. --- Mulched the entire cup. - [22:18]: Checked the humidifiers. --- Tanks are still full and no leaks found. Day 03 - Wednesday - 02/11/26 - Total Days: 098 ----------------------------------- Daily Averages ~[+01:00] - Temps: 81.7°F [27.6°C] - Humidity: 76.9% - VPD: 0.85 kPa - Soil %: [47, 47, 43, 50, 48, 64, 47, 62, 50, 74] ----------------------------------- - [16:09]: Evening check on the 3x3 veg tent. --- Veg garden is looking nice and clean! --- The growth is still recovering from the topping, but all mothers and clones look great! - [16:22]: Okay! Time to transplant Chill Out OG #2 into a 3-gal pot! --- The 3-gallon pot has been already pre-amended and prepped for a fresh transplant. --- Will also be installing the BluMat watering carrot before connecting it to the water source loop. - [16:46]: Took a 3-gallon pot out of the veg tent and set it on a drip tray. ------ Removed the drip tray and Ecowitt soil sensor. --- Loosened the soil and made a hole in the center of the pot. ------ Set a clear cup into the center of the pot. --- Tucked the sides of the cup in snug with the surrounding soil. --- Gently removed the clear cup from the fabric pot leaving a perfect hole. ------ Sprinkled 1/16tsp of Great White ------ Sprinkled 1/32tsp of Beauveria Bassiana Plus - [17:06]: Dusted the sides of the hole. --- Also sprinkled a bit around the top soil. --- Great! Time to transplant! --- Chill Out OG #2 weighed 291.2g and was watered 2 days ago. --- To loosen and unstick the rootball from the cup, I gently squeezed the sides before pressing the bottom upwards. - [17:14]: Once fully loosened, I simply Vulcan-gripped the base of the plant before flipping her upside down. --- Ooo yea! Nice pearly white roots! --- She’s more than ready for a larger pot! --- Did not break up the rootball. - [17:16]: Gently set her straight into the pre-inoculated hole. --- Pressed and evened out the top soil. - [17:22]: Using fresh BuildASoil Organic Straw Mulch, --- Covered the top soil with straw. - [17:35]: Then using a fully filled 5" BluMat watering carrot (pre-soaked and set to gold for gravity feed) along with a 5" drip ring, --- Placed the drip ring around the base of the plant. --- Then gently inserted the BluMat carrot into the soil near the drip ring's fill tube before connecting it with a 3mm connector. - [17:58]: Also set the Ecowitt soil sensor back. --- Placed the fabric pot back into the Veg tent. --- Shut off all flow-valves and made sure the (8mm) water source loop had no water pressure. --- Then cut the tubing and installed an RO valve-rig (with 3mm T-fitting). - [18:12]: Finally connected the watering carrot's 3mm fill tube to the valve-rig before turning all flow-valves back on. --- Ca-Caw! Done with the transplant! --- The soil moisture was pretty wet so decided to not water. --- Will continue to check and will water if needed. - [18:20]: Decided to also cull the extra Heady OG BX1 clones. --- Mulched the trimmings and soil. - [18:54]: Checked the Ecowitt soil moisture sensor data: ------------------ [ 3x3 VEG TENT – GR7 / GR3 ] ---------------- ------ 52% - [CH01 » M1 » VBL – TKO #2] ------ 50% - [CH02 » M2 » VBR – Gorilla Goat #1] ------ 43% - [CH03 » M3 » VFL – Chill Out OG #3] ------ 56% - [CH04 » M4 » VFR – Chill Out OG #2] ----------------- [ 4x4 MAIN TENT – GR30 ] --------------- ------ 48% - [CH05 » P1 » FLT – Chill Out OG #2] ------ 64% - [CH06 » P1 » FLB – Chill Out OG #2] ------ 47% - [CH07 » P2 » BLT – TKO #2-2] ------ 62% - [CH08 » P2 » BLB – TKO #2-2] ------ 51% - [CH09 » P3 » FRT – Heady OG BX1 #1] ------ 74% - [CH10 » P3 » FRB – Heady OG BX1 #1] --------- Veg: ~38%-45% | Flower: ~45%-55% --------- General: ~30% [Dry] «| ~45-60% [Moist] |» ~70% [Wet] --- Also updated the soil sensor names a bit. - [19:07]: Checked the 4x4 tent. --- Ooo yea! The garden is thriving and the canopy is still stretching upwards! --- All phenos are looking great and will need to set the second scrog frame layer soon. Nice! --- Not too sure if Chill Out OG will make it to the second netting, but she’s looking healthy and perky so not a big deal. --- Stoked that the under canopy is clean and looking healthy! - [19:17]: Checked on the BluMat soil moisture sensors: ------ Chill Out OG #2 » 51mbars ------ Heady OG BX1 #1 » 46mbars ------ TKO #2 » 53mbars --------- Watering Range: [Too Wet] ~25mbars «| [Ideal Target] ~40-80mbars |» ~125mbars [Too Dry] --------- BluMat Max Values: [10mbars «||» 750mbars] --- All veg clones and cuttings are looking great! --- Need to change the Gorilla Goat cutting’s aloe water out. Also a couple clones need watering. --- Filled a clear cup with fresh RO water (1.5cups). - [20:21]: Gently lifted the PVC rig out of the cup of aloe water and set it gently into the RO cup. --- Going to let these soak for another day before transplanting into Coco Coins for rooting. --- Two clones need watering! - [20:34]: Here are the starting initial watering ranges: ------ TKO #2-1 » 290.7g → 340.5g ------ Gorilla Goat #1-1 » 279.9g → 340.6g --------- General Weight Range: [Dry] ~275g «| [Dryback] ~300g |» ~325g-400g [Wet] --- Both cups were last watered 8 days ago. --- Took the starting weight of both clones before watering, ------ TKO #2-1 » 289.8g ------ Gorilla Goat #1-1 » 295.6g --- While on a scale, --- Evenly misted the top of both cups with RO water. --- Did not spray the top growth. --- Misted 10-20 sprays. Waited a moment, then misted again. --- Repeated this process until both cups weighted at least 300g. --- There was no runoff. - [21:06]: Took the saturated weight of both cups after watering, ------ TKO #2-1 » 355.5g ------ Gorilla Goat #1-1 » 355.4g --- Updated the wet weight and watering dates for both cups. --- Placed both cups back into the tent. - [21:36]: Checked the humidifiers. --- Tanks are still full and no leaks found. Day 04 - Thursday - 02/12/26 - Total Days: 099 ----------------------------------- Daily Averages ~[+01:00] - Temps: 81.5°F [27.5°C] - Humidity: 75.3% - VPD: 0.91 kPa - Soil %: [49, 48, 43, 56, 47, 63, 46, 62, 50, 73] ----------------------------------- - [16:01]: Evening check on the 3x3 veg tent. --- Veg garden is looking incredible and growth is recovering nicely! --- Also veg clones and cuttings are looking good! - [17:03]: Okay! Time to start the rooting process! --- Filled a measuring cup with 1.5 cups of RO water. ------ Added a pinch of Quillaja Saponaria Extract [60] ------ Added 1/64tsp of Horticultural Aloe ------ Added 1/32tsp of Mycrobe Complete --- Mixed the solution thoroughly. - [17:04]: Dropped 2 Coco Coins into the measuring cup. --- The coins immediately started to expand. ------ [» ~5 MINUTES LATER «] --- Placed each fully saturated Coco Coin into half-cut solo cups. - [17:25]: Using a squeeze bottle filled with Clonex, --- Gently filled each pre-made hole with Clonex rooting gel. - [17:38]: Time to plant the cuttings! --- Using a pair of clean trimmers, made a final 45° cut. --- Also stripped and scrapped some of the stem’s outer membrane. --- To help with planting, gave each Coco Coin a squeeze to loosen the coco. --- Made sure to insert each stem straight and snug with the tip about a 1/4 inch from the bottom of the Coco Coin. --- Also secured the stem by pinching and pressing in the top of the Coco Coin. --- Once each cutting was planted, - [18:11]: Placed each Coco Coin into the propagation dome’s tray. --- Made sure to keep each cutting properly tagged. --- Did not spray the top growth with any water, but did fill the bottom of the tray with RO water. --- As far as PPFD, --- At the lowest light intensity (and raised ~14 above the tray), the PPFD is around 42 μmol/m²/s which gives a DLI of 2.72 mol/m²/d under an 18/6 light cycle - [18:18]: Decide to cull TKO #2-2 along with the spare Gorilla Goat cutting. --- Going to mulch the trimmings, but going to add something more to the mulch pot. - [18:23]: Since I also make and drink my own F1 kombucha (helps to maintain healthy gut bacteria along with a great way to lose weight), I have a decent amount of spare scobys. --- Placed a few spare scoby pellicles into a plastic bin. --- Using scissors, chopped up the scoby pellicles into smaller chunks and added the soil and trimmings from the culled clone and cutting. --- Set the container aside. Will top dress the mulch bin in the main tent later. --- Might move the mulch bit to the front of the tent for the next cycle and am thinking about turning it into a potential worm bin. --- Anyways! - [18:41]: Checked the Ecowitt soil moisture sensor data: ------------------ [ 3x3 VEG TENT – GR7 / GR3 ] ---------------- ------ 49% - [CH01 » M1 » VBL – TKO #2] ------ 45% - [CH02 » M2 » VBR – Gorilla Goat #1] ------ 43% - [CH03 » M3 » VFL – Chill Out OG #3] ------ 55% - [CH04 » M4 » VFR – Dry Soil] ----------------- [ 4x4 MAIN TENT – GR30 ] --------------- ------ 47% - [CH05 » P1 » FLT – Chill Out OG #2] ------ 63% - [CH06 » P1 » FLB – Chill Out OG #2] ------ 46% - [CH07 » P2 » BLT – TKO #2-2] ------ 62% - [CH08 » P2 » BLB – TKO #2-2] ------ 50% - [CH09 » P3 » FRT – Heady OG BX1 #1] ------ 72% - [CH10 » P3 » FRB – Heady OG BX1 #1] --------- Veg: ~38%-45% | Flower: ~45%-55% --------- General: ~30% [Dry] «| ~45-60% [Moist] |» ~70% [Wet] - [19:05]: Checked the 4x4 tent. --- Ca-Caw! Let’s go ladies! Wow the garden is looking incredible! --- Growth is ramping up and the canopy is definitely in full stretch! --- The under canopy is looking clean and pots all look great! - [19:09]: Nice! All phenos are showing clear signs of bud crowning! --- Chill Out OG seems to be further along than the rest of the cultivars, flower has officially begun! --- Heady OG and TKO has slight signs of crowning, but will continue to stretch for a few more days. I think. --- Anyways! - [19:17]: Quickly checked on the RO reservoir and auto-watering system. --- Reservoir looked good and no leaks detected. - [20:14]: Took the kombucha top dressing from earlier and spread the mix top of the mulch bin (in the back right of the tent). --- Spread the top dressing out evenly. Since kombucha is naturally and acidic ferment, going to let the top dressing dry out a bit (smells great too). --- Will continue to add leaves and trimming on top after defoliation and toppings. - [20:21]: Okay time to build the second scrog frame layer and re-string the second level of netting! --- Prepped and built the PVC scrog frame outside of the tent. --- Using mason string, restrung the netting and double-looping each screw. --- Once the frame was fully assembled and re-strung, - [22:21]: Placed the PVC riser poles and installed the second scrog frame into the 4x4 tent. --- The first scrog layer is currently about 18.5" from the top soil. --- The second scrog layer is currently about 35" from the top soil. --- Done! - [22:59]: Checked the humidifiers. --- Tanks are still full and no leaks found. Day 05 - Friday - 02/13/26 - Total Days: 100 ----------------------------------- Daily Averages ~[+01:00] - Temps: 82.2°F [27.9°C] - Humidity: 75.7% - VPD: 0.91 kPa - Soil %: [46, 47, 43, 55, 47, 63, 46, 61, 48, 71] ----------------------------------- - [21:16]: Night check on the 4x4 tent. --- Wow the garden is raging with growth! --- The second layer is almost pretty much already full! --- Chill Out OG is chilling in between the netting and looking healthy with signs of bud crowning starting to swell up! --- Both Heady OG and TKO are also continuing to stretch with slight signs of crowning. Nice! --- Let’s go my girls! - [21:24]: Checked the Ecowitt soil moisture sensor data: ------------------ [ 3x3 VEG TENT – GR7 / GR3 ] ---------------- ------ 46% - [CH01 » M1 » VBL – TKO #2] ------ 50% - [CH02 » M2 » VBR – Gorilla Goat #1] ------ 43% - [CH03 » M3 » VFL – Chill Out OG #3] ------ 55% - [CH04 » M4 » VFR – Chill Out OG #2] ----------------- [ 4x4 MAIN TENT – GR30 ] --------------- ------ 47% - [CH05 » P1 » FLT – Chill Out OG #2] ------ 62% - [CH06 » P1 » FLB – Chill Out OG #2] ------ 46% - [CH07 » P2 » BLT – TKO #2-2] ------ 60% - [CH08 » P2 » BLB – TKO #2-2] ------ 48% - [CH09 » P3 » FRT – Heady OG BX1 #1] ------ 71% - [CH10 » P3 » FRB – Heady OG BX1 #1] --------- Veg: ~38%-45% | Flower: ~45%-55% --------- General: ~30% [Dry] «| ~45-60% [Moist] |» ~70% [Wet] - [21:26]: Checked the 3x3 veg tent. --- The veg garden is looking nice and perky with healthy growth! --- A Garlic Budder clone needs watering. Let’s go Ensign! - [21:37]: Here is the starting initial watering range: ------ Garlic Budder OG#1-1 » 299.1g → 340.6g --------- General Weight Range: [Dry] ~275g «| [Dryback] ~300g |» ~325g-400g [Wet] --- Been 8 days since the last watering. --- Took the starting weight before watering, ------ Garlic Budder OG#1-1 » 298.5g --- While on a scale, --- Evenly misted the top of the cup with RO water. --- Did not spray the top growth. --- Misted 10-20 sprays. Waited a moment, then misted again. --- Repeated this process until the cup weighted at least 300g. --- There was no runoff. - [21:43]: Took the saturated weight after watering, ------ Garlic Budder OG#1-1 » 355.6g --- Updated the wet weight and watering date. --- Placed the cup back into the tent. --- Gorilla Goat cuttings are looking great in the propagation tray! No need to spray or water. Great! - [22:04]: Checked the humidifiers. --- Tanks are still full and no leaks found. Day 06 - Saturday - 02/14/26 - Total Days: 101 ----------------------------------- Daily Averages ~[+01:00] - Temps: 80.9°F [27.2°C] - Humidity: 75.7% - VPD: 0.88 kPa - Soil %: [48, 47, 43, 54, 48, 62, 47, 60, 47, 70] ----------------------------------- - [19:01]: Night check on the 4x4 tent. --- Ooo yea! The garden is looking healthy and looking great! --- Ca-Caw! Heady OG is still raging upwards and stretching through the netting - [17:14]: Checked the Ecowitt soil moisture sensor data: ------------------ [ 3x3 VEG TENT – GR7 / GR3 ] ---------------- ------ 52% - [CH01 » M1 » VBL – TKO #2] ------ 50% - [CH02 » M2 » VBR – Gorilla Goat #1] ------ 43% - [CH03 » M3 » VFL – Chill Out OG #3] ------ 54% - [CH04 » M4 » VFR – Chill Out OG #2] ----------------- [ 4x4 MAIN TENT – GR30 ] --------------- ------ 46% - [CH05 » P1 » FLT – Chill Out OG #2] ------ 61% - [CH06 » P1 » FLB – Chill Out OG #2] ------ 46% - [CH07 » P2 » BLT – TKO #2-2] ------ 60% - [CH08 » P2 » BLB – TKO #2-2] ------ 47% - [CH09 » P3 » FRT – Heady OG BX1 #1] ------ 70% - [CH10 » P3 » FRB – Heady OG BX1 #1] --------- Veg: ~38%-45% | Flower: ~45%-55% --------- General: ~30% [Dry] «| ~45-60% [Moist] |» ~70% [Wet] - [19:18]: Checked the 3x3 veg tent. --- Veg garden is looking great and growth is healthy and green! --- A Garlic Budder clone needs watering! - [19:25]: Here is the starting initial watering range: ------ Garlic Budder OG#1-2 » 279.2g → 340.3g --------- General Weight Range: [Dry] ~275g «| [Dryback] ~300g |» ~325g-400g [Wet] --- Been 9 days since the last watering. --- Took the starting weight before watering, ------ Garlic Budder OG#1-2 » 297.3g --- While on a scale, --- Evenly misted the top of the cup with RO water. --- Did not spray the top growth. --- Misted 10-20 sprays. Waited a moment, then misted again. --- Repeated this process until the cup weighted at least 300g. --- There was no runoff. - [19:40]: Took the saturated weight after watering, ------ Garlic Budder OG#1-2 » 355.5g --- Updated the wet weight and watering date. --- Placed the cup back into the tent. - [20:01]: Checked the humidifiers. --- Tanks are still full and no leaks found. Day 07 - Sunday - 02/15/26 - Total Days: 102 ----------------------------------- Daily Averages ~[+01:00] - Temps: 80.8°F [27.1°C] - Humidity: 76.2% - VPD: 0.85 kPa - Soil %: [47, 47, 43, 54, 50, 62, 49, 60, 45, 69] ----------------------------------- - [19:04]: Night check on the 4x4 tent. --- Ooo yea! Let’s grow my ladies!! --- The canopy is packed with bud top crowns and the mid canopy (in between the netting) is getting really dense! --- Plan to do a deep defoliation soon, but going to let everything grow and stretch upwards for now. --- Grow strong my girls! - [19:11]: Checked on the BluMat soil moisture sensors: ------ Chill Out OG #2 » 38mbars ------ Heady OG BX1 #1 » 93mbars ------ TKO #2 » 43mbars --------- Watering Range: [Too Wet] ~25mbars «| [Ideal Target] ~40-80mbars |» ~125mbars [Too Dry] --------- BluMat Max Values: [10mbars «||» 750mbars] - [19:14]: Decided to make a slight adjustment to Heady OG’s watering carrot. --- Using the provided allen key, increased the water moisture by turning the BluMat’s tension cap slightly counter-clockwise. - [19:18]: Checked the Ecowitt soil moisture sensor data: ------------------ [ 3x3 VEG TENT – GR7 / GR3 ] ---------------- ------ 44% - [CH01 » M1 » VBL – TKO #2] ------ 47% - [CH02 » M2 » VBR – Gorilla Goat #1] ------ 43% - [CH03 » M3 » VFL – Chill Out OG #3] ------ 54% - [CH04 » M4 » VFR – Chill Out OG #2] ----------------- [ 4x4 MAIN TENT – GR30 ] --------------- ------ 51% - [CH05 » P1 » FLT – Chill Out OG #2] ------ 63% - [CH06 » P1 » FLB – Chill Out OG #2] ------ 50% - [CH07 » P2 » BLT – TKO #2-2] ------ 60% - [CH08 » P2 » BLB – TKO #2-2] ------ 45% - [CH09 » P3 » FRT – Heady OG BX1 #1] ------ 69% - [CH10 » P3 » FRB – Heady OG BX1 #1] --------- Veg: ~38%-45% | Flower: ~45%-55% --------- General: ~30% [Dry] «| ~45-60% [Moist] |» ~70% [Wet] - [19:22]: Checked the 3x3 veg tent. --- Veg garden is looking great and all top growth is green and perky! --- Clones are also looking good and don’t need watering. Nice! --- Gorilla Goat cutting in the propagation tray look green and healthy! --- Easy night in the veg garden! - [20:15]: Checked the humidifiers. --- Tanks are still full and no leaks found. --- Another grow week done! --- The main tent has begun to flower and the stretch has started to slow down for the most part. Almost time for a top dressing! --- Probably need to defoliate again soon. Just stoked that growth is all around healthier than ever! --- As for the veg garden, there’s work to be done and plan to overhaul the veg garden to be able to better preserve my current (and future) genetics. --- Anyways, onwards to next week Ensign! [END OF WEEK 15]
Processing
Likes
Comments
Share
Processing
Likes
4
Share
Começamos a 3° semana no domingo está agora com 18 dias a correr bem, vou dar continuidade ao lst ate à 5 ou 6 semana e mudar o ciclo pra floração As mais pequenas no vídeo uma tem agora 12 dias e a outra está com 15 no fim da segunda semana começou hj o lst
Likes
48
Share
June 29: looking good at the start of a new week. Hot again and risk of thunderstorms so the plants are up against the house tonight. Plant has reached lowest of three rungs on the tomato cage and I’m trying to get a few colas to go around on the outside. July 1: Happy Canada Day. Warm again today with a risk of thunderstorms. July 2: cool today (about 12 C high) so watered with 27 C water in morning to help keep things growing. Also topped fourth time to make the 16 cola manifold. This is the best way to shape photoperiod plants…all the work is up front and it produces nice uniform buds that are easy to process during harvest. Two stems on the piece that broke are healthy but smaller than the others. Should even out with time. Watered with full nutrient mix. July 5: looks good. I was gone for a couple of days after the last round of topping and just noticed today that I had done seven and had missed one which has now been dealt with.
Likes
11
Share
Hi 😊✌️💚 The FatMonkeyAuto is in the final stages of waiting for 20% brown trichomes and then it's harvest time. I can only recommend the FatMonkeyAuto. It has good growth and is better for outdoor use or tents over 2m high. Because in a 180cm tent you quickly reach the limits. It smells spicy and fruity and the buds are nice and compact. Thank you for your time 😊👍 For more just follow and like 💚 Thanks
Likes
38
Share
@Tesla
Follow
We're almost there. There're some amber trichomes, just a few. I'm gonna wait a few more days to harvest it. It smells nice! :) And there's sign of nuts deficiency, and some light purple tones.
Likes
174
Share
@DreamIT
Follow
😬😆UnCoNvEnTiOnAl GrOwTh 😆😬 ____________________________________________________________________________________ 🤪 24.3... 🤪 25.3 Almost completely regular, I let the smallest dry too much and it suffered a little, but by now I know the genetics, tomorrow it will be pretty sprightly. 🤪 26.3 🤪 27.3 🤪 28.3 we're halfway there, yeah 🤪 29.3 🤪 30.3 ____________________________________________________________________________________ 📜👀 A look at the details of what I'm growing 👀📜 🍊💚 Red Mandarine F1 🍊💚🌱🍭 Sweet Seeds 🍭🌱 📋 Details 📋 ⚧ Gender ▪️ Feminised ➰ Genes ▪️ 55% Indica / 45% Sativa 🎄 Genetics ▪️ Red Poison Auto (SWS39) хCalifornia Orange x Skunk hybrid) 🚜Harvest ▪️ 400 - 500 g / m² 🌷Flowering ▪️ 49 - 63 days ✨THC ▪️ 16% ✅CBD ▪️ 0,2% 🏡Room Type ▪️ Indoor 🌄Room Type ▪️ Outdoor 🕋Room Type ▪️ N/D 🎂Release Year ▪️ 2019 ___________________________________________________________________________________________ 👀📷🥇 Follow the best photos on Instagram 🥇📷👀 https://www.instagram.com/dreamit420/ 🔻🔻🔻Leave a comment with your opinions if you pass by here🔻🔻🔻 🤟🤗💚Thanks and Enjoy growth 💚🤗🤟
Likes
14
Share
The Amnesia haze 2 is turning light green yellowish some told me it could be deficiency or it could be just flowering taking energy from the leaves but I’m not sure I used Gaia green bloom recently thinking it would help I’m going to too water that haze from here out the other have and sour I’m going to continue to bottom feed I took some trichome pics I don’t think there ready yet but I think I’m getting close to the date I feel the the amnesia haze 2 is going to hit 90+ days tho kind of hope not cause the other haze and sour are probably going be done sooner I want to fry them all at the same time March 7th I think the haze #2 and Sour d is ready but the other Haze is not I’m pretty sure I have another week pre maybe even two for it to be near ready I need the tent to harvest and dry what’s ready I’m going try leave the ready ones in for another week in hope it doesn’t mess them up
Likes
52
Share
Flowering day 25 since time change to 12/12 h. Hey guys :-) . The ladies are developing more and more beautiful and fat week after week 😊. The tent fills up perfectly 👌. I removed the bottom shoots to allow the energy to flow to the top buds. This week it was watered 3 times with 1.3 l each (nutrients see table above) Otherwise everything was cleaned and checked. Have fun and stay healthy 💚🙏🏻 👇🏼👇🏼👇🏼👇🏼👇🏼👇🏼👇🏼👇🏼👇🏼👇🏼👇🏼👇🏼 You can buy this Nutrients at : https://greenbuzzliquids.com/en/shop/ With the discount code: Made_in_Germany you get a discount of 15% on all products from an order value of 100 euros. 👇🏼👇🏼👇🏼👇🏼👇🏼👇🏼👇🏼👇🏼👇🏼👇🏼👇🏼👇🏼 You can buy this strain at : https://www.ripperseeds.com/en/feminized/kmintz-feminized-cannabis-seeds Water 💧 💧💧 Osmosis water mixed with normal water (24 hours stale that the chlorine evaporates) to 0.2 EC. Add Cal / Mag to 0.4 Ec Ph with Organic Ph - to 5.8 - 6.5 MadeInGermany
Likes
3
Share
La settimana sta andando bene qualsiasi Consiglio su come migliorare è ben accetto
Likes
129
Share
@GuavaBoy
Follow
Day 15 ready for the transplant tomorrow. Just watered each with 1/3 cup of water. It was the first watering since the initial one 15 days ago. My basement is very humid. All 4 are growing pretty strong. The 2 on the left and right are the Guavo Autos and the other 2 are Sticky Soul Photos. They will continue their life outside starting tomorrow. Day 16 and all 4 plants have been transplanted into their final 3 gallon pots. What I did was water each cup yesterday with 1/3 cup of water. Today I drilled some holes in the 3 gallon pots. I filled it with a small amount of build a soil light mix and the rest with happy frog. I poured 2 cups of water into the new soil. I made a hole. I added 2tbspns of Mykos to each pot. I slid the plants out of the cups into the hole. I watered those in with 3 cups of water each. A little ran off through the bottom. I’m going to keep them in the shade for a few days then toss them in the sun. Stay tuned! Day 20 and we are looking really good. Check the video above.
Likes
32
Share
@BigDaddyK
Follow
Looking lush, smaller one is now being dragonforced, the big one needs at least 3 more weeks. Enjoy the pics Mery Xmas all :) Centre cola is enormous Change reservoir every Monday
Likes
8
Share
@madlangs
Follow
All going well. No problems. Smoothie and strawberry nuggets have about a week left and looking nice
Likes
28
Share
Just gave the girls a haircut to expose all the bud sites.
Likes
15
Share
Human Body 65% Oxygen (in all liquids and tissues, bones, and proteins) 18% Carbon (everywhere) 10% Hydrogen (in all liquids and tissues, bones, proteins 3% Nitrogen (in all liquids and tissues, proteins 1,5% Calcium (lungs, kidney, liver, thyroid, brain, muscles, heart, bones) 1% Phosphorus (urine, bones, DNA) 0,35% Potassium (enzymes) 0,25% Sulphur (proteins) 0,15% Sodium (in all liquids and tissues) (in terms of salt) 0,05% Magnesium (lungs, kidney, liver, thyroid, brain, muscles, heart) The average adult male contains about 140 g of K(Potassium); the level varies with body weight and muscle mass. We ingest about 2.5 g per day of K from our food and excrete about the same amount. 0.0118 % of that is K40 The answer is that they were present when our earth was formed. Any radioactive material originally present at the formation of the earth would have decayed and disappeared if its half-life was short compared to the age of the earth. However, if its half-life were long, close to or greater than the age of the earth, then such materials would not have disappeared but are still with us today. There are several radioelements in this category, such as the well-known elements uranium and thorium. Thorium (Th232) has a half-life of 14,000,000,000 years, uranium has two long-lived radioisotopes; U238 has a half-life of 4,500,000,000 years, and U235 has a half-life of 710,000,000 years. These give rise to the radium and thorium atoms found in all humans, acquired from the food we eat. That food, of course, obtained these materials from the soil in which it grew or on which it grazed. Potassium is also in this category. There are actually three potassium isotopes: K39, a stable isotope, is the most abundant, at 93.26 % of the total; K41 is next in abundance at 6.73 % and is also a stable isotope. The potassium isotope of interest is a radioactive isotope, K40. It is present in all potassium at a very low concentration, 0.0118 %. It has a very long half-life, 1,260,000,000 years. When it decays 89 % of the events give rise to the emission of a beta ray with maximum energy of 1.33 MeV. The other 11 % of the decays produce a gamma-ray with an energy of 1.46 MeV The forces required to forge thorium 232 can only be harnessed when traveling close to or at the speed of light, so essentially what I'm getting at is 0.0118% of every person alive is formed of the same element that was forged in the anvil of creation itself. We are all one & the same German chemist Johann Wolfgang Dobereiner attempted to classify elements with similar properties into groups of three elements each. These groups were called ‘triads’. Dobereiner suggested that in these triads, the atomic mass of the element in the middle would be more or less equal to the mean of the atomic masses of the other two elements in the triad. An example of such a triad would be one containing lithium, sodium, and potassium. The atomic mass of lithium 6.94 and that of potassium is 39.10. The element in the middle of this triad, sodium, has an atomic mass of 22.99 which is more or less equal to the mean of the atomic masses of lithium and potassium (which is 23.02). 9 controls the 6 and 3. The Limitations of Dobereiner’s Triads are : All the elements known at that time couldn’t be classified into triads. Only four triads were mentioned – (Li,Na,K ), (Ca,Sr,Ba) , (Cl,Br,I) , (S,Se,Te). 2. Newland’s Octaves English scientist John Newlands arranged the 56 known elements in increasing order of atomic mass in the year 1866. He observed a trend wherein every eighth element exhibited properties similar to the first. Azomite contains 180ppm of thorium. Your plant will thank you, you are welcome. Most farmers do have not a proper understanding of what is Azomite and how to use it in gardening, especially if they practice organic farming. Continuous propagation and leaching effects of water deplete the essential minerals and micro-nutrients from the soils. Such soils remain weak, not able to support the production of fruits and vegetables. Azomite mineral contains micronutrients that supplement the soil. It also balances the minerals for growth and overall productivity. Constant use of this mineral rejuvenates your soil renewing its potency again. Azomite is a naturally mined mineral product that is ready to use. It’s a unique rock that comes from a mine in central Utah. Azomite requires no mixing or special preparation before use. It is derived from volcano ash that spewed out millions of years ago. It contains the widest range of minerals of all the rock dust in the world. Azomite provides plants with 70% essential elements. These elements include magnesium, calcium, potassium, and silicon for plant growth. Facts About Azomite Fertilizer It’s a natural mineral – 100% natural with no fillers or additives Does not contain any harmful elements Requires no special preparation before use It’s odorless – very friendly to use Does not restrict water penetration or aeration Is easily broken down and absorbed into the soil Does not burn plants.
Likes
3
Share
Likes
13
Share
JOANNE'S CBD / ROYAL QUEEN SEEDS WEEK #9 OVERALL WEEK #8 VEG This week she starting to look much healthier and she growing at a nice rate overall a good week! Stay Growing!! Thank you for stopping by and taking a look it's much appreciated!! Thank you ROYAL QUEEN SEEDS!! JOANNE'S CBD / ROYAL QUEEN SEEDS
Likes
21
Share
@BruWeed
Follow
Esta planta estuvo dos semanas en etapa de enraizamiento, tres en crecimiento y ocho semanas en floración. No tuvo ningún problema con nada, me resultó de fácil cultivo. En esta cosecha obtuve ciento cuarenta y siete g en total. Utilice una maceta Root House de 10L. El sustracto que utilice fue de Nube Verde, en su composición se incluye turba de categoría, perlita, humus, compost, tierra, dolomita y vermiculita. Sin duda volvería a probar esta genética otra vez, supero mis expectativas.