
Likes
Comments
Share


@lozaa111
Follow
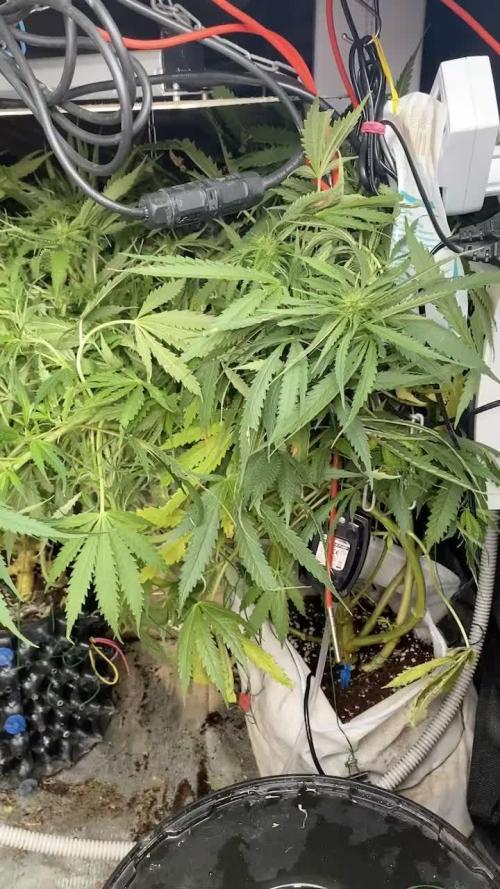
I left my brother to mist the seedlings whilst i was in amsterdam for 4 days, got back expecting growth but found the plants have stretched and looked leggy and not much growth apart from stretch…(should have took photos before repot)
I planted the seedlings in clear plastic cups with holes punched into the bottom, the medium was very moist and wasn’t seeming to dry out soo i decided i would repot in red cups as i heard clear cups are bad for roots…(feed the girls very lighly was due to bad drainage more then over watering)…
I used fresh coco and pulled away as much moist coco as possible without disturbing roots, i added great white to the medium and root balls of the seedlings and repotted burying the stretched stem as much as possible…
I didn't water the coco prior or after the repot as i didn’t want to stress the plant further if the roots have been getting drowned by excess water in the coco due to poor drainage, i sprayed mist above all seedlings when all was transplanted very very lightly with a micro dose of rhizotonic by canna…
1 blueberry muffin seedling looks like its going to die the other 2 are okay. I have attached photos after transplant should have photographed before transplant but didn’t 😅
When should i water next seedlings are hard work i usually runs clones that come of a defent size and root structure…🤷♂️
My ppm is 150 tds from the tap
Ec is 0.4 out the tap
Im dechlorising my water with tap safe for 24 hours before use.
I have been recommended to ph to 5.8 is this correct ?
My temps are around 23-28 degrees
And humidity around 55% - 80%
Love for reading this far, i will be posting a update every week, Any help or advise would be greatly appreciated 👊❤️


Processing
Likes
17
Share


@Easygrower
Follow
Hello growers I’m back with sweet seeds genetics I must say a massive shout out to @sweetseeds for sending me these seeds it’s very much appreciated iv never tried sweet seeds before and the fact they send me seeds to try for free with free p&p is banging 2 big thumbs up from me👍🏻👍🏻 Now it’s day 7 and the girls are looking good just keeping them moist with tap water I will continue to do so for the next week after that I’ll hit em with some juice until next week be safe and happy growing ✌️

Likes
14
Share


@BoboLacetti
Follow
The two Red Hot cookies were by far the fastest strains in this run. And also simply beautiful.
Bag appeal: 10/10
Yield: 8/10 Pheno #1 47 gram dry
Taste:?
High: ?
Once I did a smoke test. I will add the missing information! Pheno number #2 has significantly more yield than Pheno #1.
Pheno #2 smells like bubble gum, I've never had that smell with a strain before. If I had room for a mother tent, pheno#2 would have gotten a spot there.
I'm looking forward to the next harvests !:)


Likes
1
Share

@HoneyBlunt42
Follow
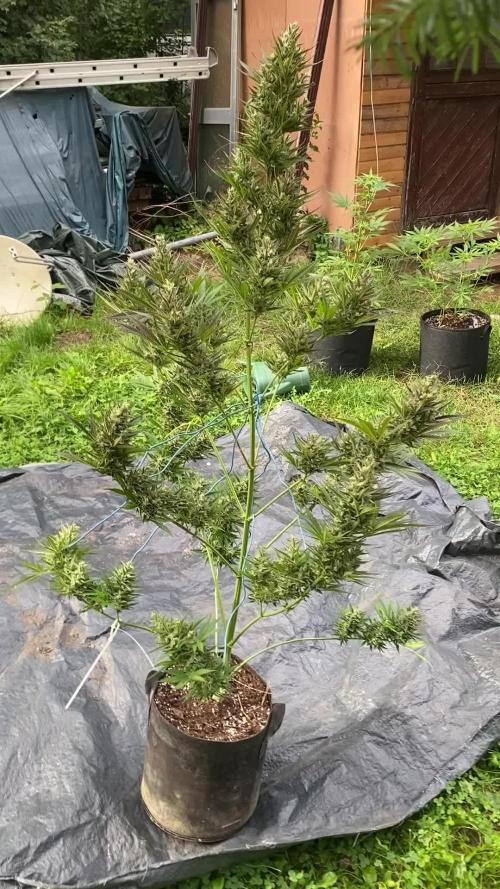
Day 84
The Durban plants are actively growing foliage and reaching for the light, despite being bent. Every day after the lights go out, I bend their tops parallel to the floor (training). Sometimes the stems break slightly, but they are still flexible enough to recover. In 2-3 weeks, I plan to transplant them to a permanent location, where there will be 20-30 cm of space above the tops for ventilation.
In the next cycle, I think four weeks of vegetation will be enough for ripening. At Gordem Delicatesies (GD), Brazilians have stretched in 20 weeks, sometimes faster. For me, this variety develops more slowly; I'm not chasing maximum speed. Meanwhile, the Jack Herer is ripening in the box above them.
I'm waiting for a manicure table (thanks to Mila for the tip!). As soon as it arrives, I'll start harvesting. I'm glad that with this device I can meet the deadlines precisely.
Day 87
They hit a lamp and set one top on fire. The others miraculously survived. Today I tied the plants to their pots again with wire. I bent them so they were 10-15 cm from the lamp.
Some were tighter. I cut out a 5-liter bag containing the lower branches, which were turning yellow from lack of light, and the leaves the plant had shed on its own. Watering was light but regular.
I watered 3 liters by hand on top of the automatic watering. I added 1.5 liters of Simplex Taste and 1.5 liters of Simplex Aroma Punch. I started adding Simplex SilliX again—organic silicon is needed to strengthen the stems. Right now they look rather stiff; they bend easily by hand. This is a plus in my situation, but in a couple of weeks I want to see stronger, more vigorous central colas in the box.
Mold was appearing on the dry leaves at the bottom that I didn't remove in time. I took out all the bushes and carefully removed all the dry and yellow leaves. I chose the ones that came off without effort. Their plant has already finished growing. After this procedure, the fan was able to blow air through the base, meaning less mold.
Young buds are ripening on both plants, about 1 cm in diameter. The upper leaves and flowers are healthy; they were eating the lower burdock leaves. It's interesting to watch the biofertilizer from Greens work. I'll add Simplex Mass and Simplex Power separately in the next few days. And after that, HB-101. I'll water with Fitosporin at least once. I also want to add "33 Bogatyrs" bacteria – @NBRZ recommended it.
Once a week, I manually pour a liter of solution with Simplex Taste (very similar to horse manure from the garden) and Simplex Aroma Punch – a potassium-sulfur additive to enhance aroma and flavor.
Likes
12
Share


Likes
4
Share


@Big0zGrower420
Follow
Learned a lot from this grow and am very happy with the results. Pulled 2.8 Oz and 1.1 Oz of trim/popcorn buds in a one gallon pot. Definitely wont be doing that again, but had a lot of fun throughout the entire process. Going to be starting another grow soon! Very excited for that.

Likes
8
Share


@Spliffi
Follow
Heya👍🤙👍🌱
Almost Done. I like early Harvest.
Check out my Facebook profile:
https://www.facebook.com/share/v/H6PnoahTHrEzm63U/?mibextid=oFDknk
Big BIG BIG thank you to Sebastien, Heather from Fastbuds420. You guys are the best. Can't wait for the next live.
Even Bigger shout out to Hydroponic.co.za. My local Hydro Shop and Sponsor. Thank you Sir.
👍🤙👍🌱
Likes
14
Share


@GoldenWeedGrower
Follow
D78/F34 - 17/06/23 - I changed light schedule hoping she's going better. (6 only red ligh and 7 red-white)
D79/F35 - 18/06/23 - New lights schedule is running
D80/F36 - 19/06/23 - Added water and integrators EC 1.0 and pH 6.4
D81/F37 - 20/06/23 - Nothing to report
D82/F38 - 21/06/23 - Added water and nutes EC 1.0 and pH 5.7
D83/F39 - 22/06/23 - Temp is too high for both water and environment. I see signals of suffering on the flowers (foxtailing)
D84/F40 - 23/06/23 - I'm trying to keep the Tremp under control but isn't easy. To lowering water temp (that now is about 26 °C) I'm adding some ice to the water
Likes
16
Share


@Tony_Ista
Follow
Währ auch zu schön gewesen um wahr zu sein, dass alles glatt läuft 😌
Das Setup wird weiter und weiter an die Bedürfnisse der Pflanzen angfepasst und verfeinert.
Der Luftbefeuchter ist jetzt nach draußen gewandert damit ich mehr Platz im Zelt Gewinne.
Er läuft jetzt einfach dauerhaft auf Stufe 1-3, Statt nach Luftfeuchtigkeitsmessung.
Ich habe die Gießmengen jetzt auf 500ml erhöht. Anfang der Woche noch mit 2ml Calmag pro Liter.
Mit der MH App habe ich mir eine Art Tag-Nacht-Simulation gebastelt. PPFD liegt bei etwa 350-410.
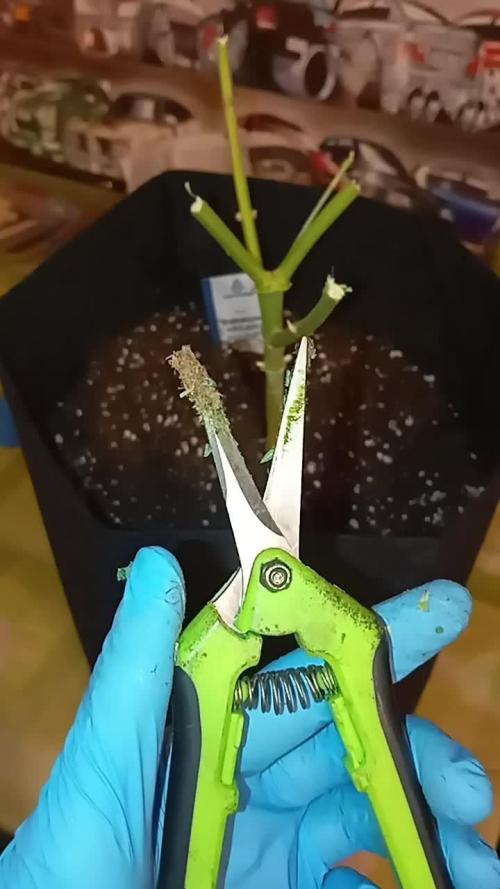
Am 18.03.2025, etwa mitte Woche 3, habe ich über der 4. Nodie die beide Fastbuds einem F.I.M.ing unterzogen. 😱
Ich bin mir nicht zu 100% sicher ob ich alles richtig gemacht habe. In meinem Kopf müsste es aber passen. 👉👈
Die 2 Tage nach dem Fiming verhalten sie sich trotzdem sehr gesund und machen einen fItten Eindruck. 💪
Gewachsen sind sie auch ein Stück. Ich bin mir nur nicht sicher was daraus jetzt erwächst 😵
Etwa zur gleichen Zeit verwandelte sich meine Bruce Banner in eine Zombie-Pflanze. 👽
Sie sieht aus als würde sie jeden Moment umkippen. Werder Tot noch lebendig. 💀
Dabei sah sich ein Paar Stunden zuvor noch recht Fitt aus. Keine Ahnung woran das liegt... 😟
In den 2 Tagem danach, wuchs sie nur minimal... besser als gar nichts...
Ich werde sie weiterhin bis in die Blüte mitschleifen und gucken was passiert. 😒
Tja... Momentan ist dieser Grow eine einzige Wundertüte... 💩
Das stresst mich manchmal mehr als es sollte 😑 😅
Wünscht mir Glück 😇
Likes
6
Share


@Kannamar
Follow
Well that was a special day, it always make me sad in a way, but this time, I enjoyed the moment a lot.
As I wrote in a reply to a comment, things can always be better, and they are with good decisions at the right time.
This is the middle plant, not planned for this cycle but one of the 3 Tropicana didn't germinate so I took the Gorrilla Girl I had left from the last cycle, and I'm quite thankful for that!
It's so nice to have these geneti contrasts, colors, aromas, shapes.
Many thanks for all the help you gave, precious.
19/04/2024 lower popcorn buds seems dried already! But still branches don't crack on bends. Will check again on Monday.
Likes
11
Share


Likes
20
Share

@ElBrujoTHC_Official
Follow
✂️ Harvest Day – Permanent Marker (Zamnesia)
Cosecha de las fotodependientes.
Ha llegado el momento de cosechar las Permanent Marker fotodependientes.
Tras un final de floración largo y bien controlado, con lavados de raíces y una maduración sin prisas, se ha tomado la decisión de cortar en el punto exacto que buscaba para esta genética.
Las plantas ya se encontraban a punto de caramelo desde hace varios días, pero se decidió esperar un poco más para aumentar el porcentaje de tricomas ámbar y terminar de redondear tanto el efecto como el perfil terpénico.
🔬 Motivo de la cosecha
La decisión se ha basado en la observación directa de tricomas, no en el calendario:
-Tricomas mayoritariamente lechosos.
-Presencia clara de tricomas ámbar, especialmente en las flores superiores.
-Pistilos prácticamente oxidados.
-Cogollos completamente formados, densos y duros.
+Aroma intenso y bien definido.
En este punto, la planta ya no estaba produciendo masa floral nueva, sino afinando resina, terpenos y madurez, señal clara de que era el momento correcto para el corte.
🌿 Estado de las plantas en cosecha.
Las Permanent Marker han llegado al final del ciclo:
-Con lavado de raíces completado.
-Sin signos de estrés.
-Hojas perdiendo color de forma progresiva y natural.
-Energía completamente enfocada en las flores.
Todo indica que el cierre del cultivo se ha hecho de forma progresiva y controlada, respetando los tiempos de la genética.
✂️ Proceso de corte.
La cosecha se ha realizado con calma, cuidando cada planta y evitando manipulaciones innecesarias para proteger la resina.
A partir de aquí comienza una fase tan importante como el cultivo: el secado, donde se buscará conservar al máximo todo el trabajo realizado durante la floración.
Muy satisfecho con el resultado de estas Permanent Marker y con cómo han llegado al final del ciclo 🌿🔥
Likes
9
Share

@Mimi420
Follow
Week 4 of Flowering – Post-Vacation Update & The Auto-Drip Setup
What’s up, grow family!
Just touched down from my trip and I’m buzzing to see the girls looking absolutely fire! Leaving them for a few days is always a bit stressful, but I had a solid plan in place.
The Irrigation Setup:
To keep them happy while I was away, I put together a custom drip system using irrigation bags from Amazon. I used two drip emitters per plant, each dialed in to a flow rate of approximately 25ml/h. To prep, the night before I left, I gave each lady a heavy 4-liter feed with my full nutrient mix (Bio Grow, Bio Heaven, Bio Bloom, Top Max, and Green Sensation). This was the perfect "insurance policy"—it ensured they had enough hydration and nutrients to stay happy and thriving the entire time I was gone.
The Ladies:
The stretch is officially over, and the girls are now entering full-blown "fattening" mode.
Nebula 1: She’s the leader of the pack—the tallest in the tent. She’s really pushing for the light and has some serious, heavy colas starting to form. The vigor on this one is insane.
Nebula 2: On the shorter side, but she’s a dense little monster! She’s packing on mass with super tight, rock-solid flower clusters. She might be the shortest, but she’s making up for it in density.
Caramba: Looking just as healthy and vibrant as the others! She’s settling in nicely with the rest of the crew and responding great to the feeding schedule. She’s got a beautiful structure and is definitely ready to pack on weight.
Did some light maintenance today—trimmed off some of the lower, older fan leaves to improve airflow and direct all that energy into the main tops. The tent is smelling absolute gas, and the structure is looking exactly how I want it for the second half of flowering.
Everything is dialed in, and the Spider Farmer gear is doing its thing. Time to watch these flowers swell up!
Stay growing, fam! 🌴🔥


Likes
2
Share


@DogDoctorOfficial
Follow
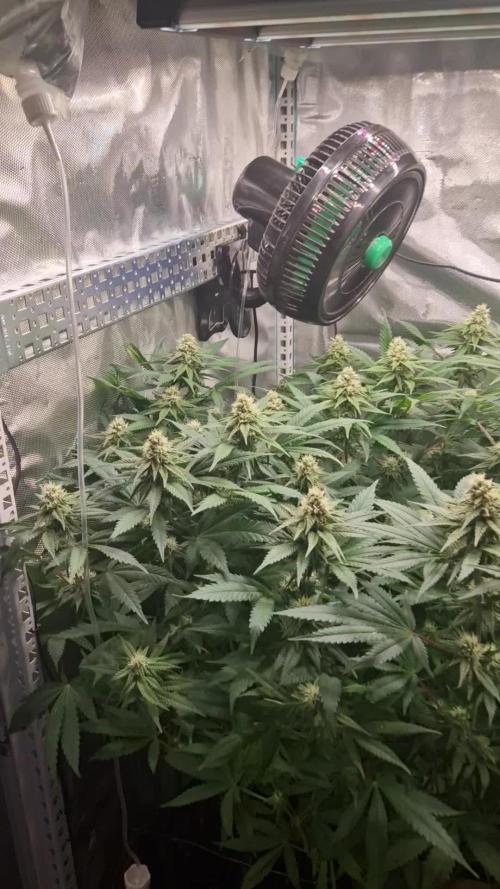
🥒 Project Blue Tent – Week 4
Pickle Lemon Haze F1 – Pheno B (Folder 14B)
Hello everyone, and welcome back to another chapter of Project Blue Tent! 💙🌱
For those joining the adventure for the first time, this project follows four individual plants, each grown under exactly the same conditions while being documented separately from seed to harvest. By giving every phenotype its own diary, we get to appreciate how different personalities can emerge even when genetics, lighting, nutrition, and environment remain identical.
Today we're visiting Pickle Lemon Haze F1 – Plant B.
⸻
🌱 Week Four – Trusting the Process
Last week was an exciting one for this beautiful lady.
After showing excellent structure and vigorous lower branching, she received her very first topping, redirecting her energy away from a single dominant leader and encouraging a wider, more balanced canopy.
This week, however, wasn't about making more cuts or introducing new training techniques.
Instead, it was about stepping back.
After putting a plant through any high-stress training, I always like to give her time to recover naturally before asking anything else of her. Healthy plants often know exactly what to do when we simply provide the right environment and stay out of their way.
Plant B proved that once again.
Rather than slowing down, she responded with impressive vigour, pushing both new leaders upward while the surrounding side branches continued filling out beautifully.
Sometimes the best training technique is simply patience.
⸻
🌡️ Environmental Conditions
Consistency remains one of the biggest goals inside Project Blue Tent.
Stable environmental conditions allow the plants to recover quickly while maintaining uninterrupted vegetative growth.
This week's average conditions were:
• 🌡️ Day temperature: 27°C
• 🌙 Night temperature: 25°C
• 💧 Relative humidity: 68%
• 🥥 Root zone temperature: 24°C
• 💦 Nutrient solution: 18°C
• ⚗️ pH: 5.8
• ⚡ EC: 1.88 mS/cm
• 💨 CO₂: approximately 450 ppm
• 💡 Light schedule: 18/6
The combination of stable temperatures, proper irrigation, and the even light distribution from the Phytonaut LED continues creating an ideal environment for vigorous vegetative growth.
⸻
🥥 Feeding Adjustments
Over the last couple of weeks, all four plants developed a slightly lighter shade of green.
Since every plant displayed the same colour while remaining healthy and growing vigorously, it became clear that they weren't struggling—they were simply asking for a little more food as their metabolism accelerated.
Rather than waiting for deficiencies to develop, I responded by increasing the base nutrients slightly.
Current feeding now consists of:
• Plagron Hydro A — 1.8 ml/L
• Plagron Hydro B — 1.8 ml/L
• Plagron Hydro Roots — 1 ml/L
By the end of the week, the results were already becoming visible. The newest growth across the room is gradually deepening in colour while maintaining the vigorous pace of development that has characterised this project from the beginning.
It's always satisfying when small adjustments produce exactly the response you were hoping for.
⸻
🌿 Pickle Lemon Haze F1 – Plant B
Plant B continues proving why every phenotype deserves its own diary.
Although she shares the same genetics as her sister, she's expressing herself in her own unique way.
Her recovery after topping has been incredibly smooth, and the two new dominant tops have quickly established themselves. Around them, the secondary branches are climbing confidently, creating a naturally balanced and increasingly bushy structure.
One of the things I enjoy most about this phenotype is how symmetrical she has become. Looking down from above, it's easy to see the canopy beginning to spread evenly in every direction, giving her the kind of architecture that should work beautifully once future training begins.
Her stem continues thickening nicely, the internodal spacing remains compact, and the leaves stay upright throughout the day, showing no signs of stress following last week's topping.
The lighter green colour that was present earlier is already beginning to improve following the feeding adjustment, while the constant production of fresh growth leaves no doubt that she's thriving.
Healthy plants have a way of speaking without words.
This one certainly looks happy.
⸻
🔍 Looking Ahead
With the topping now fully behind her, the next stage will simply be allowing this beautiful framework to continue developing.
The goal is to let both new leaders strengthen naturally while encouraging the lower branches to catch up, creating the even canopy that will later make training and flowering far more efficient.
For now, there is no need to rush.
She's building exactly the kind of foundation I was hoping for, and sometimes letting the plant dictate the pace is the smartest decision a grower can make.
Every day she becomes a little fuller, a little stronger, and a little more interesting.
⸻
💙 Thank You
A huge thank you goes to Zamnesia for the incredible Pickle Lemon Haze F1 genetics and for providing the complete ecosystem that makes Project Blue Tent possible.
Another heartfelt thank you goes to Plagron for supplying the Premium Coco Growbags together with the Hydro nutrient line, helping these ladies develop strong roots and healthy growth week after week.
I'd also like to thank GrowDiaries for giving growers around the world a place to share knowledge, document their journeys, and inspire one another every single day.
And finally, thank you to everyone following this project.
Whether you've been here since germination, recently joined the adventure, leave comments every week, or simply enjoy watching these plants evolve, your support truly means a lot.
Project Blue Tent is about learning together, celebrating every stage of the grow, and showing that every phenotype has its own story worth telling.
I hope you're all having an amazing week, and I can't wait to share the next chapter with you.
Until next time...
Growers Love, happy growing, and take care everyone! 💚🌱


Likes
13
Share


@HIAZ_urbanbudfarmer
Follow
Removed the 2 Xs 1500's (300watts) & replaced them with 2 P1000 (200watts) lights, now running 680 watts.
These lights fit in better & have air space all around to help cool them, these lights run a lot cooler than the xs 1500s & only get warm not hot.
Started some clones.
Processing
Likes
Comments
Share


@Pixie
Follow
I am only using tap water half soil half perlite no nutes no ph or ppm tester £70 led from Amazon.had problems earlier but realised that I had no ventilation so I drilled 3holes and put 2 fans facing backwards and put a air vent in the other and the seem to be loving it
Likes
10
Share

