Likes
Comments
Share
Likes
14
Share
@Lazuli
Follow
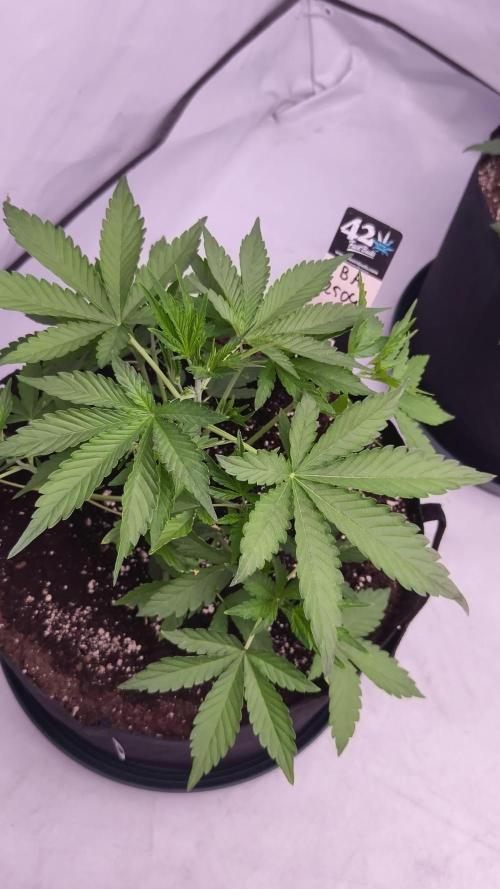
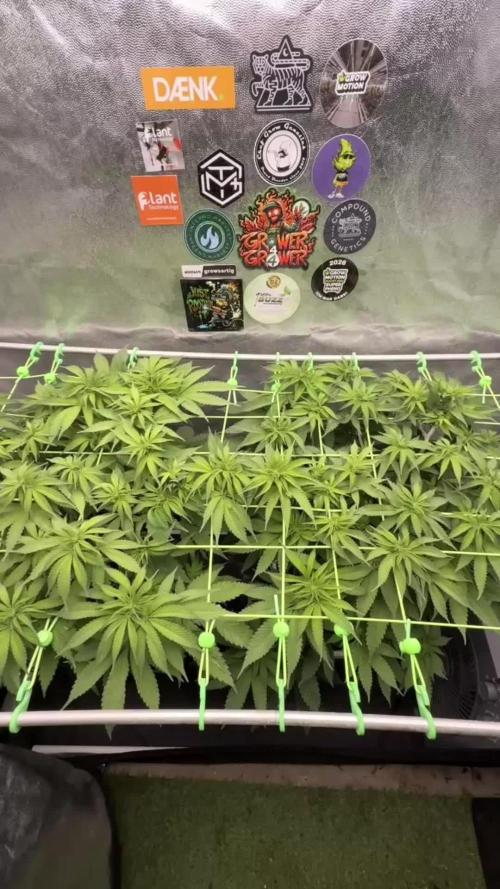
The pictures and video are from day 15 since the flip. however i think the plant is now really in day 7 flower as i flipped early to keep the flower space under one square meter. so the plants vegged another week after the 12/12 anyway as you can see they have 0 defincies and a very nice even cannopy, not much space between the nodes is what i like a lot.
Likes
22
Share
I started feeding liquid nutrients this week. Although I’m using Nature’s Living Soil Super Soil Autoflower Concentrate mixed with Fox Farm Ocean Forest—so technically I could water only until harvest—I decided to begin liquid feeding in Week 3 at half the recommended dose. I also have a Tray2Grow Autopot system for automatic bottom feeding, but I haven’t activated it yet. When using liquid nutrients via top feeding, I’d need to turn the Autopot system off and wait until the plants absorb all the water in the tray before feeding from the top. Afterward, I’d have to manually turn the system back on. That seems like a hassle compared to just hand-watering and feeding. I could technically add the liquid nutrients to the Autopot reservoir, but that somewhat defeats the purpose of the system. The tank holds 25 gallons—enough to last a few weeks—but if I want to change or rotate nutrients weekly, I’d have to dump the remaining water and remix the solution each time. If I wanted to feed nutrients every other watering, I’d be changing out the tank every 3 days. Plus, liquid nutrients can cause buildup, so I’d need to clean the reservoir and all the tubing regularly. For now, I’ll stick with hand-watering and top feeding. I’ll only switch to the Autopot system if I need to leave town.
Likes
11
Share
👑Actualización Jardin 30-33 días . 6 macetas de 18 , 4 genéticas . ⌛️Videos , en este orden : Primer Video 🎥 🎥🎥🎥🌬️🌬️ 🌱Slurricane x Tropicanna Cookies F2 @crisol_seeds 🌱Og Strawberry Starkiller x Tropicanna Punch F3 @secretfile.cl 🌱Gorilla Glue 4 @bsfseeds @bsfseeds.usa Segundo Video 🎥 🎥🎥🎥🌬️🌬️ 🌱 Gorilla Glue 4 @bsfseeds @bsfseeds.usa 🌱 Skywalker Haze @dutchpassion.official 🌱 Skywalker Haze @dutchpassion.official 📸 Fotos : 📸Todas 📸Gorilla Glue 4 📸 Og Strawberry Starkiller x Tropicanna Punch F3 📸 Slurricane x Tropicanna Cookies F2 🌱Hoy foleo a sustrato : King Crab 👑 0,5 ml en 1 litro . Ec : 0,5 Ph: 6,2 🌱metimos más amarres al y full lst , y podas . 🌱 @baconlinecl @bac_online_nl
Likes
16
Share
This girl has definitely stopped stretching, so now almost all of the growth is going to be located at the buds. I plant to increase nutrient concentration, but also light intensity (this one by pulling the LEDs closer to the canopy). This week it will hang at 30 cm from the top of the canopy, maybe next I will push it further to 20 cm next week... By the way, the thunderstorms are over so now I can consistently keep the humidity around 45% with just the 3 cpu fans ;) I am experimenting with trying to clone some branches even after 5 weeks of flowering. It's just for the LoLs, and to learn a little bit. I took a lot of clones from the bottom of this plant before with great success during defoliation, so I decided to up the challenge. I know you shouldn't stress the plant too much during flower, but she seems healthy enough to take it without a problem. // on the nutes of this week// So this week I decided to up the nutes again to 1.0, as the lower leaves are showing deficiencies, and this time the EC of the runoff is low (plus I've been feeding only 0.8EC or 400ppm, which is much less than people generally feed at this stage), so I'm more confident that it's not a nutrient lock out. We will see how she likes it. Remember that my noob friendly approach is that keeping my plant on a diet is better than killing it by overfeeding it.
Likes
14
Share
Week 6 down and the OG Kush has been moved into the big girl tent to start her flower cycle. All 8 tops are fairly even and even throwing pitils. Leaves are getting a stronger, skunk aroma which has me very excited to smell the terps on the flower. Maintenance was minimal, just watering when light. Side note, I missed a day on pics...my bad 😊
Likes
6
Share
She's getting heavy. Buds are a bit too puffy for my taste. They feel hard and got plenty of mass but inside there are lots of tiny air pockets.
Likes
42
Share
Hi guys Within 48 hours all 3 broke the soil, just waiting on the blackberry moonrock to make a appearance. Not much to say at the moment but ill keep you updated on the blackberry moonrock from tastebud genetics. Happy growing gang 💚💪👌 Hey guys so the blackberry moonrock from tastebuds has decided to pop out the soil today 😀 so 4 out of 4 the freebie was a late starter lol. Its ment to be a 33% thc indica so hopefully i can hit the high 20z. Happy growing guys 💚👌
Likes
13
Share
My Ladies definitely love their new Homes 👌🏼 now the BioTab is activated, i guess. Have a better Plan how to water them
Likes
14
Share
🌬️ Avg. VPD: 1.4 kPa 🔆 Lichtintensität (PPFD): 738 µmol/m²/s 📊 pH (Autopot Tank): 6,1 ⚗️ EC (Autopot Tank): 2,3 mS/cm 🌊 Wassertemperatur: 21 °C 👁️ Pflanzenzustand: Der EC von 2,3 mit Autopot scheint zu stark. Ich werde den Tank neu ansetzen bei einem EC von 1,8 bis 2,0. 📝 Besonderheit: Athena Düngermischung wird nach Schema gemischt und mit Leitungswasser auf den passenden EC verdünnt. Danach wird der PH Wert im Tank justiert.
Likes
4
Share
@Ensign420
Follow
|»» LOG DISCLAIMER: Not intended as a grow guide. Grow log entries are usually posted 3 weeks later and are for my learning reference. ««| Introduction - Week 16 Summary - Ensign's log, stardate 17547.8, Wow what a great week in the garden! By the end of the week, the main tent has pretty much doubled in size! Upgraded the scrog frame and now have a second layer of netting about 14in above the original netting which is already filling in and looking incredible! The tent’s floor slightly flooded, but fixed it. Also trying Stash Blend for the first time! As for the veg tent. To preserve the genetics, started the mother plant cycling process and took more clone cuttings (which were rooting in Coco Coins by the end of the week). To make more room, also bonsaied all mother plants. The stretch is starting to slowing down and next week begins the first week of bloom! Ca-Caw! Let’s go! Onwards Ensign! [START OF WEEK 16] ========================================================== ---------- [ 4x4 MAIN TENT ] ---------- Heady OG BX1 #1 [Round4 ~Wk9] - WEEK 16 - Pre-Bloom [Stretch Wk2] TKO [Round2 ~Wk14] - WEEK 16 - Pre-Bloom [Stretch Wk2] ----------- [ 3x3 VEG TENT ] ------------ Garlic Budder OG#1 - WEEK 09 - Full Veg Garlic Budder OG#2 - WEEK 09 - Full Veg Gorilla Goat #1 - WEEK 09 - Full Veg Gorilla Goat #2 - WEEK 09 - Full Veg 08/04/25 → 08/10/25 This Week's Estimated Goals ---------------------------------------------------------------------------------------------- DLI: ~13 mol/m²/d PPFD: ~300 μmol/m²/s VPD: ~1.0 kPa This Week's Meter Readings & Averages ---------------------------------------------------------------------------------------------- Light On/Off: 19:00 - 07:00 | Wattage: ~326.5W [LV04] Distance From Canopy: ~31”, 27” DLI: ~15.60 mol/m²/d PPFD: ~361 μmol/m²/s VPD: ~0.69 kPa Soil %: [40.7, 47.0, 38.1, 56.6, 41.9, 42.7, 42.9, 43.9] ========================================================== Day 01 - Monday - 08/04/25 - Total Days: 113 ----------------------------------- Daily Averages ~[+01:00] - Temps: 83.6°F [28.7°C] - Humidity: 83.6% - VPD: 0.66 kPa - Soil %: [49, 37, 45, 60, 44, 43, 43, 45] ----------------------------------- - [+00:14]: Night check on the 4x4 tent. --- Holy Cannoli! Wow! These girls are in full stretch! --- Both cultivars have grown beyond the netting and have stretched beyond the (green) Vivosun’s CFM bars! Heady is a bit low on the left, but the canopy is pretty even and perky! --- Ca-Caw! Let’s go cuddies! --- Heady OG (BX1 #1) is starting off shorter than TKO, but am pretty confident that she’ll catch up. --- TKO is looking incredibly healthy! She’s the larger plant, but also in the smaller 20-gallon pot. Well she is 5 weeks older than Heady OG so makes sense. Regardless of the growth difference, absolutely stoked for this grow cycle!! - [+12:19]: Checked the Ecowitt soil moisture sensor data: ------------------ [ 4x4 MAIN TENT ] --------------- ------ 46% - [CH01 FT » G30 - Heady OG BX1 #1] ------ 37% - [CH02 FB » G30 - Heady OG BX1 #1] ------ 48% - [CH03 BT » G20 - TKO] ------ 62% - [CH04 BB » G20 - TKO] ------------------ [ 3x3 VEG TENT ] ---------------- ------ 41% - [CH05 BL » GR7 - Garlic Budder OG#1] ------ 44% - [CH06 BR » GR7 - Garlic Budder OG#2] ------ 40% - [CH07 FL » GR7 - Gorilla Goat #1] ------ 50% - [CH08 FR » GR7 - Gorilla Goat #2] --------- Veg: 38% - 45% | Flower: 45% - 55% --------- General: 30% [Dry] «| 45 - 60% [Moist] |» 70% [Wet] - [+00:14]: Checked the 3x3 veg tent. --- Ooo yea! The veg garden is looking incredible! --- All mamma plants are looking bushed out and beautiful! - [+00:37]: Super-cropped and bend the canopy down a bit. --- Lowered the canopy down a few inches. Really need to defoliate soon. The top growth is bushing out and getting really thick! --- Clones are also looking incredible and both are rotting along beautifully! Heady is going to make it and she is looking great! - [+00:38]: The cuttings are looking good for the most part. One is looking pretty droopy (damnit Ensign). --- Misted the cups with RO water. --- Think the RH may not be consistent enough and the cups might be drying out too quickly. - [+00:41]: Checked the humidifiers. --- Tanks are still full and no leaks found. --- Another day done! --- Okay! Since growth is raging upwards, decided to upgrade the scrog frame and plan to add a second layer tomorrow. --- Ahh yea! This grow is turning out to be an epic one! Day 02 - Tuesday - 08/05/25 - Total Days: 114 ----------------------------------- Daily Averages ~[+01:00] - Temps: 83.3°F [28.5°C] - Humidity: 83.3% - VPD: 0.67 kPa - Soil %: [49, 38, 47, 62, 41, 43, 43, 45] ----------------------------------- - [16:25]: Evening check on the 3x3 veg tent. --- Ooo yea! The clones are looking incredible! --- The cuttings still seem to be struggling. --- Hmm. - [16:27]: Misted the cups with RO water. --- Made a slight modification and wrapped the top of both cups with plastic wrap. --- Cut a slit from the middle to the edge. Misted the cup through the slit with RO water (2-3 sprays each). --- Then gently slipped the cups over each cutting. --- Also slightly misted each Coco Coin with RO water. --- Great! This should hopefully make a better seal and will keep the RH higher. I think. --- Anyways! --- The mother garden is vegging along beautifully! --- Growth is getting really bushy and need to do a heavy defoliation soon. - [16:56]: Checked the Ecowitt soil moisture sensor data: ------------------ [ 4x4 MAIN TENT ] --------------- ------ 48% - [CH01 FT » G30 - Heady OG BX1 #1] ------ 36% - [CH02 FB » G30 - Heady OG BX1 #1] ------ 47% - [CH03 BT » G20 - TKO] ------ 61% - [CH04 BB » G20 - TKO] ------------------ [ 3x3 VEG TENT ] ---------------- ------ 41% - [CH05 BL » GR7 - Garlic Budder OG#1] ------ 43% - [CH06 BR » GR7 - Garlic Budder OG#2] ------ 41% - [CH07 FL » GR7 - Gorilla Goat #1] ------ 49% - [CH08 FR » GR7 - Gorilla Goat #2] --------- Veg: 38% - 45% | Flower: 45% - 55% --------- General: 30% [Dry] «| 45 - 60% [Moist] |» 70% [Wet] - [19:03]: Night check on the 4x4 tent. --- Ooo yea! Wow these girls are stretching! --- Growth has clearly grown since the last checkup and getting taller! --- Ca-Caw! Let’s go ladies! - [19:14]: Wait. Uh-Oh! --- The tent seemed to have flooded slightly.. DAMNIT ENSIGN! ------ [» A FEW HOURS LATER.. «] --- Okay! Think I figured out why the tent flooded and how to fix it. --- The main reason was the new soil sensor which was probably not in proper contact with the soil. --- Fixed this by re-seating the unit. Also adjusted the drip ring a bit. --- Also poured about a cup of water straight onto new sensor. This should make the surrounding soil wetter and will hopefully fix the dry pocket. I think. --- For added redundancy, added additional trigger conditions to both Ecowitt WittFlows (TKO and Heady OG). - [23:45]: Adjusted the watering triggers for the auto-watering system for TKO. --- Changed the ON trigger from: --------- When CH3 soil moisture is under 45% ------------ Updated to: --------------- When CH3 soil moisture is UNDER 45% --------------- AND When CH4 soil moisture is UNDER 50% --- Changed the OFF trigger from: --------- When CH3 soil moisture is OVER 50% ------------ Updated to: --------------- When CH3 soil moisture is OVER 50% --------------- OR When CH3 soil moisture is OVER 50% --- Applied similar watering triggers for Heady OG. --- Changed the ON trigger from: --------- When CH1 soil moisture is under 45% ------------ Updated to: --------------- When CH1 soil moisture is UNDER 45% --------------- AND When CH2 soil moisture is UNDER 50% --- Changed the OFF trigger from: --------- When CH1 soil moisture is OVER 50% ------------ Updated to: --------------- When CH1 soil moisture is OVER 50% --------------- OR When CH2 soil moisture is OVER 50% --- Will check back daily to make sure the flooding has completely stopped. --- Well that pushed everything back a bit. --- Okay! Anyways, - [23:57]: Time to both build and install the second frame and netting. Let’s go! --- Got four 1in PVC corner fittings (local Lowes) along with four 1in PVC pipes (10ft long each). Also got more self-tapping screws. --- For the netting, using mason string. Usually use the braided nylon, but the twisted variant is a lot cheaper. --- To build the frame, I cut the 1in PVC pipes down to two different lengths: ------ [» x2 @ 42.5in «] – Front / Back ------ [» x2 @ 44in «] – Left / Right --- This makes the frame slightly thinner from left to right. --- Saving the extra piping for future projects. - [+04:04]: Okay! The new frame is built and looking sturdy! --- Did not use any glue and simply dry fitted each component. --- For easier fitting, smoothed the ends of each pipe with sand paper. --- Also marked each pipe to indicate the front, back, left, and right sides. --- For the fittings, used corner fittings and have open slot facing downwards. This way I can add the legs. --- After the frame was built, marked and drilled screws about 3in apart (self-tapping). Made sure to mirror the screw spacing on the opposite side. --- Time to weave the netting! - [+04:06]: Using some mason string, --- Started at one corner and strung all the horizontal lines. --- Double-wrapped each screw. --- After the horizontal lines were strung, continued and wrapped the vertical lines. - [+04:44]: Now that the frame is built and the netting fully weaved, time to install the frame! --- First the support poles. Cut and sanded more 1in PVC piping. ------ [» x4 @ 14in «] – Vertical Support - [17:56]: Installed the back support poles before the front ones. --- Temporarily removed the front CFM bar and had to raise the fan up a bit (was not easy, but got it done). --- Once the support poles were installed, gently set the new frame on top. - [+06:07]: Done and wow she’s a beauty! --- Well that took a bit longer than anticipated (also the flooding did not help), but glad the frame fit perfectly and the netting looks great! - [+06:12]: Checked the humidifiers. --- Tanks are still full and no leaks found. --- Ooo yea! What a day! Day 03 - Wednesday - 08/06/25 - Total Days: 115 ----------------------------------- Daily Averages ~[+01:00] - Temps: 83.9°F [28.8°C] - Humidity: 83.1% - VPD: 0.69 kPa - Soil %: [42, 54, 43, 60, 42, 43, 43, 45] ----------------------------------- - [+00:17]: Night check on the 4x4 tent. --- Ca-Caw!! Let’s go cuddies! Growth is looking beautiful and green! --- The second layer of scrog netting was not the easiest to install, but wow the garden is looking incredible! --- Both Heady OG and TKO are still stretching upwards with new nodes branching out everywhere! --- The canopy hasn’t reached the top net yet but hoping a few will make it. --- Regardless, absolutely hyped for this flower cycle! - [+00:23]: Checked the 3x3 veg tent. --- Looking beautiful in the veg garden! --- Wow the mothers have bushed out and have reached the grow light! - [+00:32]: Super-cropped and lowered the canopy --- The canopy is getting really thick! Plan to do a pretty heavy defoliation tomorrow. --- Clones look great and stoked that both Heady OG and TKO seem to be rooting along in the cups. Need to check the weights. Let’s go! - [+00:37]: Here are the starting initial watering ranges: ------ Heady OG BX1 » 261.4g → 301.2g ------ TKO » 240.9g → 301.4g --------- General Solo Range: [Dry] «| [Initial Cup Weight] + ~55-100g |» [Wet] --- All cups were last watered 5 days ago. - [+00:37]: Took the starting weight of both clones before watering, ------ Heady OG BX1 weighed 250.4g ------ TKO weighed 240.9g --- Oops! Probably should have watered earlier, sorry ladies! --- Stoked that Heady OG is clearly going to make it! Also good to know the soil dryback can be at least 10g from the initial pre-saturated weight. --- Anyways! --- While on a scale, --- Gently misted the straw mulch of both cups with RO water. --- Focused on the straw and sprayed as evenly as possible. --- Misted 10-20 sprays. Waited a moment, then misted again. --- Made sure to reference the watering weights. --- Repeated this process for both cups. --- There was no runoff. - [+01:08]: Took the saturated weight of both clones after watering, ------ Heady OG BX1 » 335.5g ------ TKO » 345.1g --- Marked the final wet weight on the back of each cup. Also marked the watering date on the front. --- Placed both phenos back into the tent. --- Cuttings are looking better! --- Glad that the slight modification to the cups helped to keep the moisture in (covered both with plastic wrap). --- Gently removed both cups and re-misted each with RO water (~2 mists). --- Carefully placed the cups back onto the cuttings. - [+01:21]: Checked the Ecowitt soil moisture sensor data: ------------------ [ 4x4 MAIN TENT ] --------------- ------ 34% - [CH01 FT » G30 - Heady OG BX1 #1] ------ 52% - [CH02 FB » G30 - Heady OG BX1 #1] ------ 39% - [CH03 BT » G20 - TKO] ------ 58% - [CH04 BB » G20 - TKO] ------------------ [ 3x3 VEG TENT ] ---------------- ------ 44% - [CH05 BL » GR7 - Garlic Budder OG#1] ------ 47% - [CH06 BR » GR7 - Garlic Budder OG#2] ------ 41% - [CH07 FL » GR7 - Gorilla Goat #1] ------ 46% - [CH08 FR » GR7 - Gorilla Goat #2] --------- Veg: 38% - 45% | Flower: 45% - 55% --------- General: 30% [Dry] «| 45 - 60% [Moist] |» 70% [Wet] - [+01:23]: Checked the humidifiers. --- Tanks are still full and no leaks found. Day 04 - Thursday - 08/07/25 - Total Days: 116 ----------------------------------- Daily Averages ~[+01:00] - Temps: 84.9°F [29.4°C] - Humidity: 82.0% - VPD: 0.75 kPa - Soil %: [32, 51, 37, 57, 42, 43, 43, 45] ----------------------------------- - [09:42]: Quickly checked on the propagation dome (in the 3x3 veg tent). --- Nice! Clones are both looking great! --- Heady OG is clearly recovering and looking better! --- Wow! TKO is looking incredibly healthy! Top growth has perky leaves with a few nodal growth sites starting to stretch. As far as cloning, she has been healthiest with no issues the entire way! --- Both Heady OG cuttings are looking beautiful and should be rooting. Plan to check for roots in a few days. --- Plan to do a pretty heave defoliation today. --- Also going to start the mother plant cloning process. - [17:12]: Evening check on the 3x3 veg tent. --- Mother garden is looking beautiful and the canopy is bushy with growth! --- Both Heady OG and TKO clones also look green and healthy! --- My main focus for today is the veg garden and the preservation of the genetics . --- Lots of work to do and time to also start the mother cycling process! --- This time, going to do a pretty heavy defoliation! --- Going to pretty much bonsai each mother while taking a few clones to preserve the genetics. --- Let’s go Ensign! - [17:58]: Filled a measuring cup with 1.5 cups of RO water. ------ Added 1/8tsp of Horticultural Aloe --- Mixed the solution and poured it straight into a clear solo cup. --- Repeated this process until 4 cups were filled. - [18:05]: Also marked each cup with the corresponding mother plant name. --- Time to defoliate and take the clone cuttings! - [18:07]: Using a pair of trimmers (AC Infinity), --- Bonsaied each mother plant. Removed over 75% of overall growth leaving several branches and nodes. - [19:44]: Done and wow what a difference! --- Pretty much removed all growth leaving a few nodal growth sites to heal. --- This is my first time going this heavy and am hoping that they recover. --- If this bonsai defoliation heals up with healthy growth, this can also be an alternative to a full plant cycling. --- Anyways! - [19:46]: To preserve the genetics, made sure to cut clone cuttings from each mother plant. --- To ensure successful rooting, took several cuttings. --- Made sure to clean each cutting by trimming most of the branches off leaving the top one or two nodes. --- Did not cut any leaf fingers and made sure to cut the tip of the stalk (about 45°) before placing into the cup of aloe solution. - [19:55]: Placed the fresh cuttings into the 3x3 veg tent. --- Have each cup resting on top of the corresponding mother plant. --- Okay! Let the two-day soak begin! - [20:00]: Mulched the trimmings in a paper bag. --- Since the bottom of the paper bags tend to decompose, have the bag in a used BuildASoil soil bag which should not decompose (these are meant for soil). --- Also added a bit of Kashi Blend and worm castings to the bottom of the bag. --- Back to the Heady OG cuttings! --- Gently removed the cups and misted the inside of each with RO water (~2 mists each). - [20:02]: Carefully placed the new cups onto the cuttings. --- Great! Plan to check for roots soon. - [20:08]: Checked the Ecowitt soil moisture sensor data: ------------------ [ 4x4 MAIN TENT ] --------------- ------ 31% - [CH01 FT » G30 - Heady OG BX1 #1] ------ 51% - [CH02 FB » G30 - Heady OG BX1 #1] ------ 35% - [CH03 BT » G20 - TKO] ------ 56% - [CH04 BB » G20 - TKO] ------------------ [ 3x3 VEG TENT ] ---------------- ------ 41% - [CH05 BL » GR7 - Garlic Budder OG#1] ------ 40% - [CH06 BR » GR7 - Garlic Budder OG#2] ------ 42% - [CH07 FL » GR7 - Gorilla Goat #1] ------ 44% - [CH08 FR » GR7 - Gorilla Goat #2] --------- Veg: 38% - 45% | Flower: 45% - 55% --------- General: 30% [Dry] «| 45 - 60% [Moist] |» 70% [Wet] - [20:12]: Checked the 4x4 tent. --- Ca-Caw! Ah yea! The garden is looking incredible and wow growth is raging! --- The tallest growth is just barely under the netting! --- Not much to do in the main tent now but to wait until the stretch slows down. --- Time to relax and let the grass grow! Let’s go! - [21:34]: Have an extra stainless steel rack and thought of a better way to hold the solo cups in the veg tent. --- The cups are balancing on the edge of the pots am concerned that they may tip over. --- Carefully too each cup out of the tent. - [21:36]: Placed the rack upside-down in the middle of the tent. --- Have the rack positioned on top of all 4 pots just above the center floor fan. - [21:39]: Gently placed each cutting cup onto the rack. --- The floor fan can easily still blow through the grid of the rack. Great! --- This should be way more stable while still allowing decent airflow. - [21:40]: Checked the humidifiers. --- Tanks are still full and no leaks found. Day 05 - Friday - 08/08/25 - Total Days: 117 ----------------------------------- Daily Averages ~[+01:00] - Temps: 84.5°F [29.2°C] - Humidity: 82.5% - VPD: 0.72 kPa - Soil %: [32, 50, 30, 53, 40, 42, 41, 42] ----------------------------------- - [23:02]: Night check on the 4x4 tent. --- Ahh yea! The garden is thriving! --- Both Heady OG and TKO are still stretching upwards and the canopy is getting dense! --- Wow! TKO has reached the top netting! Heady OG is just under the top netting. --- Ca-Caw! Let’s go ladies! - [23:11]: Checked the 3x3 veg tent. --- The veg garden is looking great! --- The bonsaied mother plants are still recovering from the heavy defoliation. But growth is looking a lot better than I would expect from such a large biomass reduction. Nice! --- Cuttings are looking great as well! - [23:13]: Time to swap the aloe water out! --- Replaced each solo cup with a clean one filled with fresh RO water (1.5cups). --- Plan to start using the propagation dome soon! --- Going to let these soak for another day before transplanting into Coco Coins for rooting. - [+02:05]: Quickly checked on the auto-watering system. --- System is still charged and no leaks or kinks found in the tubing. - [+02:08]: Checked the humidifiers. --- Tanks are still full and no leaks found. Day 06 - Saturday - 08/09/25 - Total Days: 118 ----------------------------------- Daily Averages ~[+01:00] - Temps: 83.4°F [28.6°C] - Humidity: 83.3% - VPD: 0.67 kPa - Soil %: [32, 50, 35, 52, 41, 40, 41, 41] ----------------------------------- - [07:55]: Quickly checked on the 3x3 veg tent. --- Looking great in the veg garden! --- Mothers are all recovering nicely from the bonsai defoliation. Great! --- Cuttings also look healthy and ready for transplanting! --- Both Heady OG and TKO clones are looking perky and getting bigger! --- Heady OG cuttings also looking green and rooting! I think. Will check for roots in a few days. - [20:58]: Night check on the 4x4 tent. --- Ca-Caw! This is why we grow! Wow! --- Also hyped that the canopy is getting dense with nodal growth! --- TKO has more tops stretching through the top scrog netting! Heady OG has not reached the net yet. --- Stoked the 14in space in between the netting is filling quite nicely and just going to let everything grow! - [21:01]: Checked the Ecowitt soil moisture sensor data: ------------------ [ 4x4 MAIN TENT ] --------------- ------ 29% - [CH01 FT » G30 - Heady OG BX1 #1] ------ 50% - [CH02 FB » G30 - Heady OG BX1 #1] ------ 34% - [CH03 BT » G20 - TKO] ------ 53% - [CH04 BB » G20 - TKO] ------------------ [ 3x3 VEG TENT ] ---------------- ------ 40% - [CH05 BL » GR7 - Garlic Budder OG#1] ------ 40% - [CH06 BR » GR7 - Garlic Budder OG#2] ------ 40% - [CH07 FL » GR7 - Gorilla Goat #1] ------ 40% - [CH08 FR » GR7 - Gorilla Goat #2] --------- Veg: 38% - 45% | Flower: 45% - 55% --------- General: 30% [Dry] «| 45 - 60% [Moist] |» 70% [Wet] - [21:05]: Checked the 3x3 veg tent. --- Growth is still recovering quite nicely! This may be my solution to maintain mother plants longer between cycles. --- Mother clone cuttings are also looking healthy and ready to be rooted! --- Was originally planning on rooting all of the cuttings, but since the mother plants are recovering better than anticipated, just going to plant one of each pheno. --- Let’s go! - [21:23]: Filled a measuring cup with 1.5 cups of RO water. ------ Added a pinch of Quillaja Saponaria Extract [60] ------ Added 1/64tsp of Horticultural Aloe ------ Added 1/32tsp of Mycrobe Complete --- Mixed the solution thoroughly. - [21:26]: Dropped 4 Coco Coins into the measuring cup. --- The coins immediately started to expand. ------ [» ~10 MINUTES LATER «] --- Placed each fully saturated Coco Coin into half-cut solo cups. - [21:41]: Using a squeeze bottle filled with Clonex, --- Gently filled each pre-made hole with Clonex rooting gel. - [21:43]: Time to plant the cuttings! --- Using a pair of clean trimmers, made a final 45° cut. --- Also stripped and scrapped some of the stem’s outer membrane. --- To help with planting, gave each Coco Coin a squeeze to loosen the coco. --- Made sure to insert each stem straight and snug with the tip about a 1/4 inch from the bottom of the Coco Coin. --- Also secured the stem by pinching and pressing in the top of the Coco Coin. --- Once each cutting was planted, - [22:11]: Placed each pheno into the propagation dome’s tray. --- Made sure to keep each clone properly tagged. --- Added 1/4 cup of RO water to the bottom of the tray. --- Placed the side extensions onto the tray. - [22:15]: Misted the top of the propagation dome before covering the cuttings. --- Vents are fully closed. --- Also lowered the intensity from 5 to 1. --- At the current light intensity (LV1), the PPFD is around 110 μmol/m²/s which gives a DLI of 7.13 mol/m²/d under an 18/6 light cycle --- Will check back daily to cycle the air under the dome. - [22:17]: Placed the extra mother cuttings back on the rack. Will try to keep these cuttings alive until the planted ones root. --- Will need to change the water every day or two. --- Also need to water the Heady OG and TKO clones. --- Ca-Caw! Let’s go! - [11:33]: Here are the starting initial watering ranges: ------ Heady OG BX1 » 261.4g → 301.2g ------ TKO » 240.9g → 301.4g --------- General Solo Range: [Dry] «| [Initial Cup Weight] + ~55-100g |» [Wet] --- All cups were last watered 3 days ago. --- Took the starting weight of both clones before watering, ------ Heady OG BX1 weighed 257.0g ------ TKO weighed 259.7g --- While on a scale, --- Gently misted the straw mulch of both cups with RO water. --- Focused on the straw and sprayed as evenly as possible. --- Misted 10-20 sprays. Waited a moment, then misted again. --- Made sure to reference the watering weights. --- Repeated this process for both cups. --- There was no runoff. --- Also defoliated and removed the lowest growth on both clones. - [23:03]: Took the saturated weight of both clones after watering, ------ Heady OG BX1 » 345.3g ------ TKO » 355.4g --- Marked the final wet weight on the back of each cup. Also marked the watering date on the front. --- Placed both phenos back into the tent. Have them now resting on the rack (on drip trays). - [23:14]: Checked the humidifiers. --- Tanks are still full and no leaks found. Day 07 - Sunday - 08/10/25 - Total Days: 119 ----------------------------------- Daily Averages ~[+01:00] - Temps: 83.9°F [28.8°C] - Humidity: 83.6% - VPD: 0.66 kPa - Soil %: [49, 49, 30, 52, 43, 45, 46, 44] ----------------------------------- - [08:02]: Quickly checked on the 3x3 veg tent. --- Ooo yea! Looking great in the veg garden! --- All mothers are still green and recovering. New growth is starting to develop and growth is looking healthy! --- Quickly checked on the propagation dome. --- All clone cuttings are looking green and healthy! - [19:04]: Night check on the 4x4 tent. --- Ca-Caw! Ah yea! Heady OG has reached the top scrog net! --- TKO has several tops above the netting and she is raging with healthy! --- Canopy is also showing more signs of pistil crowning and vertical growth seems to be slowing down. I think. - [19:07]: Checked the Ecowitt soil moisture sensor data: ------------------ [ 4x4 MAIN TENT ] --------------- ------ 48% - [CH01 FT » G30 - Heady OG BX1 #1] ------ 49% - [CH02 FB » G30 - Heady OG BX1 #1] ------ 36% - [CH03 BT » G20 - TKO] ------ 55% - [CH04 BB » G20 - TKO] ------------------ [ 3x3 VEG TENT ] ---------------- ------ 41% - [CH05 BL » GR7 - Garlic Budder OG#1] ------ 43% - [CH06 BR » GR7 - Garlic Budder OG#2] ------ 43% - [CH07 FL » GR7 - Gorilla Goat #1] ------ 43% - [CH08 FR » GR7 - Gorilla Goat #2] --------- Veg: 38% - 45% | Flower: 45% - 55% --------- General: 30% [Dry] «| 45 - 60% [Moist] |» 70% [Wet] - [19:10]: Checked the 3x3 veg tent. --- The veg garden is recovering beautifully! --- Since the stretch seems to be slowing down in the main tent, going to give these ladies a little extra. - [19:17]: Going to feed some Stash Blend for the first time. --- This blend of beneficial microbes and mycorrhizal fungi also includes a bit of silica which should help during the bloom phase. --- Also shout out to Mr. Grow It, Rob (from CLTV), and Pigeons420! Stay lifted! - [19:19]: Filled a pitcher with 16 cups (1gal) of RO water. ------ Added 1/8tsp of Quillaja Saponaria Extract [60] ------ Added 1tsp of Stash Blend --- Mixed the solution before pouring 6 cups straight into a pump sprayer. --- Gave the sprayer a good shake before spraying the entire solution onto Heady OG’s straw mulch. - [19:52]: Repeated this process again for TKO. --- Depending on how growth develops, may start feeding these ladies weekly. --- From personal experience, the veg phase can easily be grown with straight RO water. --- Flower is probably the most important time to feed because there are more roots and the plants are trying to produce more biomass. I think. --- Anyways! - [20:10]: In the veg tent, repeated the watering process for all mothers (1 cup + 1 cup RO each). --- Focused mainly on the straw (2 cups each). - [20:13]: Checked the humidifiers. --- Tanks are still full and no leaks found. --- Wow what a grow week! --- The difference in growth from Monday until now has been incredible! [END OF WEEK 16]
Likes
5
Share
01/11 - No issues since transplant - dropped into a 7 gallon @ACINFINITYINC fabric pot - medium blend is Coco/Perlite/Worm castings/Myco/Silica/Microbores and Kelp 01/19 - Thus far no issue - laid her out flat for complete root and canopy coverage - she will be transferred into the 3x3 as soon as clones are dry - running high heat - high Humidity
Likes
19
Share
7/27/2023- Prep Tent and system are cleaned and ready to go from my last grow. I have submitted my Journa for the Diary of the Month Competition here is to hopeing for good resutls. 7/28/2023- Germination Day 0- Seed initiation Well lets get this new Grow started.. So My Dad Sent me a custom Landrace Strain that he wanted me to grow out and Breed for him. The Strain is Called Black African Magic: Black African Magic, Alson known as BAM, is a Sativa pure land race strain, It's classified under the Cannabis Sative species and its genetics come from Africa-the Ituri Forest in the Dmocratic Repoublic of Congo. The Effects are said to be Very Psychedelic, used for Stress managment and for better sleep and rest. This is my frist Land Race so we, will see how this goes together.. RO Water Used Added Hydrogen Peroxided 8/1/2023- Germination Achieved G-Day1 Popped her head above the root riot today to say hello.. Woot first challenge when dealing with an unknown seed and a new Strain is getting the seed to pop and the lady to show life. 8/2/2023- Germination Day 2 Took the root riot out today and it was soaked not good plant drowing again. I am still having a hard time finding the right blance for where the water should be to keep the root riot moist and not soaked. I had to drain some of the water out of the root riot plug to help give a little oxygen. I also removed some of the water. 8/3/2023- Germination Day 3 Looking good stretching her leaves out to let in the lights 8/4/2023- Germination Day 4 Looking good a few days until I put them into the RDWC System and get this thing rocking and rolling. 8/5/2023- Germinaiton Day 5 Looking good will probably plant tomorrow if the roots are still looking good. 8/6/2023- Plant Day- Germination Day 6 Planted into the RDWC System today. Joy when they go into the system as long as we dial that in right this will now be a great grow.. Survived the hard part.. 8/7/2023- Germination Day 7 Everything looks like it is going good, she is showing some damage on the lower leaves from the over watering in the cloning machine but right now I don't see any new damage. 8/8/2023- Germination Day 8 Added the first Nutes today, to help support root growth and to help give there first jump to growth. TPS SILICA GOLD-.5mil/Gal Root Drip- 1mil/Gal GH FLoraMicro-1mil/Gal GH FlroaGro-1mil/Gal GH FLroaBloom-1Mil/Gal ORCA-.5mil/Gal 8/9/2023 - Germination Day 9 Everything is looking good new growth looks like it is praying and they are looking happy. I will take off the damage leaves probably tomorrow. 8/10/2023- Germination Day 10 She looks like she is on track the roots are starting to come out of the basket very small but starting. 8/11/2023- Germination Day 11 Cleaned up the dead leaves... Day 1 VEG tomorrow.. Water Change Day and first real meal...
Processing
Likes
16
Share
@GRow_M8s
Follow
* Buds progressing good, no deficiencies except stomper #1 with burn tips , no stretch except stomper #3 the stressed one ( 👈 check week 3), SODK looking good 5 days later though. * LST stopped at day 35 ,🔅 lights still 24/7. Temps steady at 25 c° and humidity 50-60%. * Day 39 watering 1l /pot with active vera, EMs and co2 tablet. 🔅Lights 20h -> Days 38-39 Trying to control VPD, maybe 🤔 transpiration in the lasts weeks wasn't on good levels and missed some stretch.!? We ll try to understand what we missed or it's just the genetics under these circumstances! ⚠️ So Day 42 end of week 6, had low temps and high humidity later this week. As we cant check the grow tent all day except few hours per day we've missed some highs and lows of the temps and humidity but overall we were ok. After looking closely back in the dairy infos and the signs of the plants, the overall progress, our rich soil composition, early bloom phase etc, 🔜 We came out with some interesting thoughts to share with you about our meph heads organic try, stay tuned at the next update ( 1st update of week 7)⚠️ Last update--> Day 42 🔚
Likes
5
Share
Likes
12
Share
@ELPIRATA
Follow
13/05/2020 Ha comenzado una nueva semana; día a día aprendiendo del proceso, analizando las condiciones del clima. +Se sigue apreciando el desarrollo lento de la #3AutoLemonKix, una diferencia notoria con sus hermanas, pero se seguira insistiendo 💪 *El día de hoy 18/05/2020 se han regado 3 plantas en macetas de 11 litros: X2 Semillas Auto Lemon Kix= 500 ml[2mlKnactive+2mlDeeperUnderground+1ml/L ATAGrowth-C] PH 6.0 / EC=1.15 Tº=22 + Riego foliar [2mlxlitroKnactive+0.5MlDeeperUnderground] X1 Semilla Auto Tutankhamon= 500 ml[2ml/LKnactive+2ml/LDeeperUnderground+1ml/L ATAGrowth-C] PH 6.0 / EC=1.15 Tº=22 + Riego foliar [2mlxlitroKnactive+0.5MlDeeperUnderground] *El día de hoy se han regado 1 planta en macetas de 7 litros: X1 Semillas Auto Lemon Kix = 250ml [2mlKnactive+2mlDeeperUnderground+1ml/L ATAGrowth-C] PH 6.0 / EC=1.15 Tº=22+ Riego foliar [2mlxlitroKnactive+0.5MlDeeperUnderground] (Hasta el momento se esta ocupando Intraccion Pasiva + ventilador Pinza (Temperatura Controlada) QUE LES PARECE ?
Likes
9
Share
@Luv2Grow
Follow
Day 50 - Starting week 8 today and she’s looking beautiful. She definitely not as big as I was expecting but she’s really starting to fatten up, looking and smelling amazing. Can’t wait for these last couple weeks for her to finish and chop her. Day 51 - All is looking good and hoping by the end of week 10 she’ll be ready or close to ready for chopping. Starting to get milky trichomes but still quite a few clear. The next couple weeks are gonna be fun to watch her fatten up more. Day 52 - She definitely looking good and getting a lot of milky trichs but there’s still a bit of time before she’s ready to chop, at least that’s what I’m thinking. Might do a split harvest if she calls for it but hoping she’ll be ready by week 10 or 11 at the latest. Just need her to fatten up a bit in the middle. Day 53 - Gave her a feeding of water today and continuing to watch her fatten each day. She’s starting to get really frosty and smelly and I’m loving it! Excited for the last few weeks. Day 54 - All is looking good still and it’s like this girl is almost turning into one big giant frosty bud and couldn’t be happier with how easy she’s been to grow so far. Right now she’s almost 100% milky trichs and looks like she still has a little more time to go still. I’m going for a little more couch lock so need those ambers to start showing up. Day 55 - All is looking good still, just watching her fatten up everyday. Day 56 - Last day of week 8 and she’s smelling sooo sweet and getting frostier everyday. Thinking about just giving her pH’d water from here on out. I’m guessing another week or two and she should be finishing up but just gonna continue watching trichs. Waiting for them to start turning amber. Still a few clear in there but not many, mostly all cloudy now.
Likes
9
Share
Update day 10 of transition to bloom this Goofiez 2 it’s soy strong !!