
Likes
Comments
Share


@Ninjabuds
Follow
It's a nice change of pace to have these warmer temperatures, even if it's not quite spring yet. Low 40s during the day is a lot more comfortable than what we've been dealing with lately. Hopefully, this is a sign that spring's around
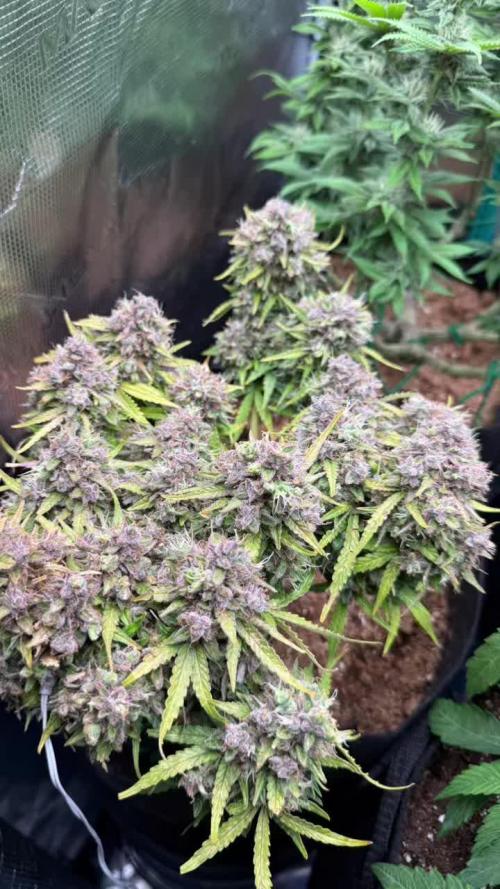
Those Bubble OG's are looking fantastic! It's awesome how two of them are starting to get that purple color – they look so cool. The third one might look a little different, but that just adds to the fun of growing them.


Likes
9
Share


@MosesLaker
Follow
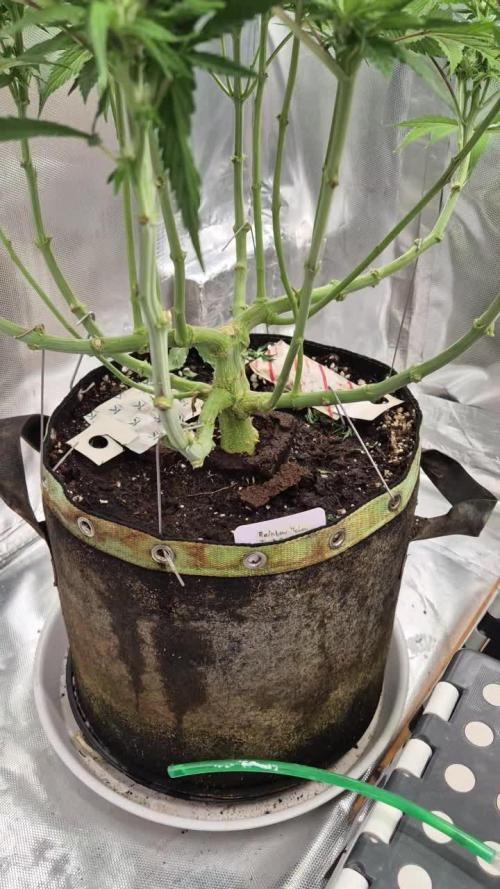
Well this week we moved all the leaves and stretched out the bitchs em out though.


Likes
20
Share


@Skunklerman
Follow
The week looked as such:
Nothing until Wednesday: 1 gal each pot water with gnarley barley ground and bubbled for 24 hours.
Topped each pot w ground gnarly barley, build a soil special blend, kashi and neem meal.


Likes
Comments
Share

@Dr_Zauberer
Follow
Day 57-63
My fungus problem again! Or is it?
Please let me know if u guys know those signs of problems on ur leaves and if u could figure out what it is. Thats why i am all about neemoil! Whenever i use it, this sort of stuff never happens tbh. Neemoil for the win baby. This time i didnt use it :(


Likes
574
Share


@TOTEM
Follow
Hello everybody! This week will be the hardest one. I’ll have to work a lot inside the room, and even on GD to document all the changes. Last week I topped for the last time (in reality this happened the first day of this week), and finally stopped with high stress training. From now on, our attention will fall totally on ScrOG.
Day 43: Topped the 4 colas at the extremities. Red blood came out from them (see the photos). Amazing! Sorry for the bad quality, but I got just the phone with me when I did the job. When I took the second photo (a few hours later), the plant had already sucked up all the lymph. You can still see the red blood by the way.
Day 44: Set the timer to start with 12/12 from midnight of day 45.
Day 45: SO MANY THINGS HAPPENED TODAY. Flowering started, baby! 🤩 Today, in the evening, I worked for about 4 hours to prepare the ScrOG environment.
- Improved the LST before placing the grid.
- Took some photos.
- Removed the humidifier.
- Since my LED panel has half of the blue lights broken (this happened three weeks ago), resulting in 100W less of total potency, I added 3 new lights pointing where the panel is broken (2x 36W led bulbs and 1x 30W COB led light). I uploaded a photo and a video to better understand what I’m talking about. I even tried changing the broken LED driver, but it didn’t work, so now I’ll have to wait until the end of this cycle to send it to maintenance.
- Put 20gr of BatMagno (which is bat guano), 10gr of “Farina di Neem” (Neem Flour), and 50gr of Alghe, all of them over the soil. I’ll write something about these fertilizers at the end of the comment.
- 4.5L of tap water (corrected to PH6.5), which gave zero runoff. Haha, she’s drinking like a camel.
- Placed the grid.
- Took a few photos.
- Little defoliation.
- Took all the other photos.
- There we go!
I preferred not to add the bloom fertilizer now because I’m a little worried about overfertilizing this baby. During veg, she showed me she doesn’t like nutrients, so I’m just listening to her requests. I’ll add the bloom one as soon as she seems hungry again. By the way she’s just 20cm tall (I’m so proud of this result) and the grid is located a few centimeters above her. Let’s see if I switched to 12/12 at the right time: I heard this strain usually stretches for about 6 weeks!!! 😱😱
Let’s talk about the ferts I placed on the surface of the soil.
- BatGuano: it’s a mixture of organic fertilizers of natural origin and suitable to produce a high amount of organic nitrogen and phosphorus that can be assimilated at 100%. It’s a natural slow-release fertilizer for flowering: the raw materials used (guano, dried borlanda with ammonium salts, kieserite of natural origin, flagpole, meat meal, bone meal and dried poultry) are the result of a careful selection which ensures a low salinity and a gradual transfer of the elements. The phosphorus content in BatMagno (being organic) does not undergo insolubilization.
- Alghe: they are a portentose substrate activator made of a mixture of algae of the species Ascophillum, Fucales and Laminariales, obtained through a process of dehydration and grinding without the use of any chemical substance. They can be used during the preparation of the soil, and increase and strengthen the formation of the root system, mobilize the nutrients in the soil, reinvigorate the plants, protecting them from adverse weather conditions, help plants to overcome stress conditions and improve the quantity and quality of production. All of this is possible thanks to the presence of betaine, cytokinins, vitamins, auxins and alginates polysaccharides.
- Farina di Neem (Neem Flour): it’s a vegetable product based on Neem seeds, obtained from the extraction of Neem Oil through a process of cold-squizzing out, which increases crops, improving both growth and flowering, as well as strengthening the roots of the plants. The Neem Flour is mixed with nitrogen fertilizers, that slow down the conversion and leaching of nitrogen. Repeated interventions improve the endogenous resistance of plants to pathogens, creating an unsuitable environment for the development of insects and cryptogams. Due to the presence of important trace elements for plant life, it prevents imbalances and nutritional disorders. It also protects plants from Nematodes, ants, insects and soil larvae.
Let’s say Alghe is the most smelly product. My room now smells like seaweed! I need to figure out how to give her water now that the grid is on. I think I’ll plug a 2m pipe at the end of my watering can. That’s the most easy and cheap way to fix this problem. I just need to find the right size of the pipe. I’ll show you my solution next week.

Likes
4
Share


@GREENPHOENIX6262
Follow
09/18 -Fastbuds - Cherry Cola (3) (Auto)
Day 1 germination dropped into coco coir plugs, in prop tent running under MarsHydro !50W LED, Humidity 99%.
09/23 - Germination week
Day 5 Germination - All 3 seeds have popped in coco coir pellets and are coming along accordingly. 1 of the 3 is a little delayed in releasing her leaves but they should spread within the next day or 2.
Likes
21
Share


@GODSGIFT_2005_JM
Follow
🍼Greenhouse Feeding BioGrow
⛺️MARSHYDRO
The ⛺️ has a small door 🚪 on the sides which is useful for mid section groom room work. 🤩
☀️ by VIPARSPECTRA (models: P2000 & XS 2000)

Likes
49
Share


@Roberts
Follow
I am attempting to germinate Fast Buds tester FBT 2401. I am dropping it in a cup of water first 24 to 48 hours. She will be growing under a Medic Grow Mini Sun-2. I will update picture when she sprouts. Then start my 1st vegging week shortly after. Thank you Fast Buds for the tester strain. 🤜🏻🤛🏻🌱🌱🌱
Thank you grow diaries community for the 👇likes👇, follows, comments, and subscriptions on my YouTube channel👇. ❄️🌱🍻
Happy Growing 🌱🌱🌱
https://youtube.com/channel/UCAhN7yRzWLpcaRHhMIQ7X4g
If anyone needs to purchase fastbuds here is a link for my affiliate program
https://myfastbuds.com/?a_aid=60910eaff2419
Likes
31
Share


@GanjaFarmerGrow
Follow
She is finishing up nice...
Great colors and amazing lemon, grape, sandlewood smell...
she has been only on water the last week...
Looking forward to choping her down and hanging her up 😉
Fingers crossed all goes well to the end...
🙏
Processing
Likes
16
Share


@Sur_cannabico
Follow
Partimos esta nueva semana transplantando nuestras green gelato de Rqs a su maceta definitiva de 7lts.
También subimos la dosis de nutrientes a 3ml de green grow y 2ml de gold sunshine de Quemanta Nutrientes.
Aprovechando el estres del transplante quitamos los primeros internodos de abajo para generar la concentración de energía en los nuevos brotes.

Likes
3
Share


@Philippovic
Follow
Am Ende wird doch alles gut… kann man so sagen! :)
Nach einer Woche ohne Wasser hat die Lady nochmal richtig zugelegt und an Duft gewonnen.
Jetzt 2 Wochen trocknenund ab in die Grovebags
Likes
4
Share


@Jaschkoo0
Follow
I will grow this plant again in a few days but this time without overfeeding.
Likes
128
Share


@Tropicannibis_Todd
Follow
💩Holy Crap We Are Back At It And Loving It💩
Growing in a 11 ounce pot 👈 👀 👀 👈
Growmies we are at DAY 56 and she's just killing💀it👌 TALK ABOUT FROSTY 👈 Amazing results thus far for the Tiny Pot 😀
👉Added straws within the Tiny pot to help watering in week 4 👈
So I'm starting to see she needs watering every single day and now need nutrients 🙃
Lights being readjusted and chart updated .........👍rain water to be used entire growth👈
WATERING SINGLE TO TWICE DAILY 😋
👉I used NutriNPK for nutrients for my grows and welcome anyone to give them a try .👈
👉 www.nutrinpk.com 👈
NutriNPK Cal MAG 14-0-14
NutriNPK Grow 28-14-14
NutriNPK Bloom 8-20-30
NutriNPK Bloom Booster 0-52-34
I GOT MULTIPLE DIARIES ON THE GO 😱 please check them out 😎
👉THANKS FOR TAKING THE TIME TO GO OVER MY DIARIES 👈
Likes
16
Share


@DWCGreenGrower
Follow
Still waiting on the replacement phone for my ph meter but I'm tired of waiting so I order one just to have as back up. Everything still looking good. I just wish I could have had my ph meter for the whole grow. Let me know what y'all think.


