Recommended
Likes
Comments
Share
@Kirsten
Follow
26.1.25: I have had a mistake 😕 i spilt some Fish Mix as I was experimenting with a syphon from some aquarium tubing I have. Unfortunately, I forgot to take the syphon out! Ugh 😣 However, it is fish emulsion and very thick consistency. Therefore, I was able to scrape it up with 2 of my business cards up off the counter. So added this extra into the next 2 ltr solution I mixed. All plants were watered with at least 1ltr of dechlorinated water PH'd to 6.3. Containing the following nutrients;- ♡ 3ml Seachem Seaweed ♡ 4ml Biobizz Fish Mix ♡ 4ml Biobizz Bio-Grow ♡ 3ml Biobizz Bloom ♡ 2ml Xpert Nutrients Bloom Booster ♡ 2ml Xpert Nutrients Cal-Mag ♡ .25g Ecothrive Biosys. ♡ 2.5g of Bicarbonate of Soda as PH UP. Unfortunately I have broken my PH pen too. Accidentally submerged it under water, then the readings went crazy. I'm leaving it to dry by standing it up but I'm most likely going to need a new one, which is extremely annoying 😑 I'm going start implementing the Scrog net probably some point next week if I let the plants that are in flower to just grow up now, as I do believe that I stunted Watermelon 🍉 by using too strenuous LST. Hopefully the plants still are able to grow upwards at this stage during flower for all the Purple Punch P1, P2 and P3. We will soon see! 28.1.25: My PH pen has packed up 😣 I've got to wait to get another. It's super annoying 😑 so I'm just judging by memory how to regulate it. Unfortunately, that's my only choice! I'm also out of the dechlorinator 😕 things are not going very well this week so far 😅 I guess we will have to make do, until I can get replenished. 29.1.25: I removed all the plants, hoovered, and disinfected the tent. There were several accidents when watering, causing some debris and splashes. I decided to just go ahead and get a few other things done. It's crazy how quickly things can become neglected! 😣 
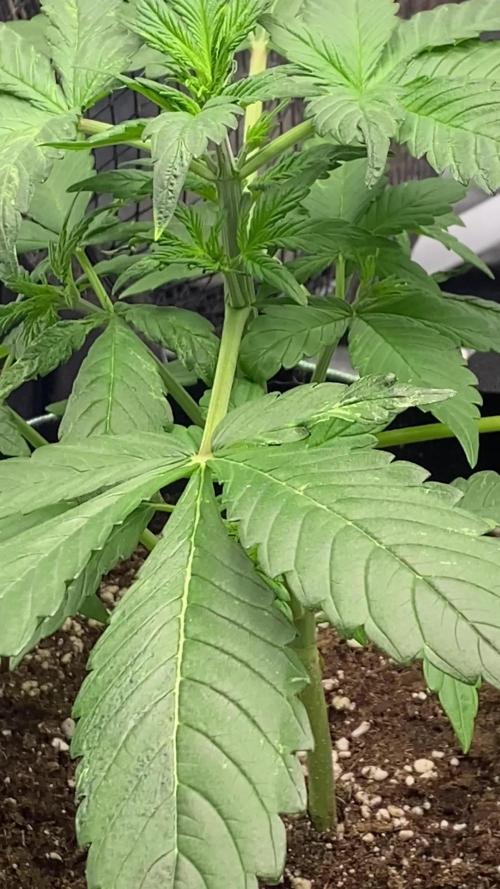
So I defoliated moderately on all plants except Gorilla Cookies seedling. I have absolutely dropped the ball on my lighting situation! My light was much further away than I thought! I turned it up to 100% and dropped it down to just under 2 feet away. After I reset the tent, I set up my scrog net. I removed 80% of all LST pegs. I am planning on letting the scrog net take over the training from here. I really want to minimise the risk of mould, so I decided to start using my dehumidifier. It has raised up to 73% RH this week, so it's necessary. Hopefully, I will be able to get my dechlorinator and PH pen soon! That's kind of essential to me. It's been a little bit of a stressful day in the garden, to be honest 😅 30.1.25: So I am expecting the arrival of my new PH pen today, as well as my new bottle of Ecothrive neutralise. It is supposed to measure the TDS and EC in addition to the standard TEMP and PH, which I had previously. Obviously, time will tell if it's any good or not. I realise, much too late now, that my lighting is very insufficient for this many plants. I need double the watts at least, and coverage is very poor. I remembered I had an old LED floor lamp, which was in a corner being unused. I decided to take the stand off, and Zip tied the pole onto the tent pole at the back left corner. I have no idea what the wattage is, and it's quite pathetic 😅 but I mean, I might as well use it, being as I definitely cannot afford more lights! 😣 Next grow, I will probably only grow 2 plants, max 4, and just use larger 7-10 Gallon pots. Being as I ran out of dechlorinator, I only watered some plants properly because I only had enough to make 6 litres. When my pen arrives, I will get everything properly watered. 31.1.25: 
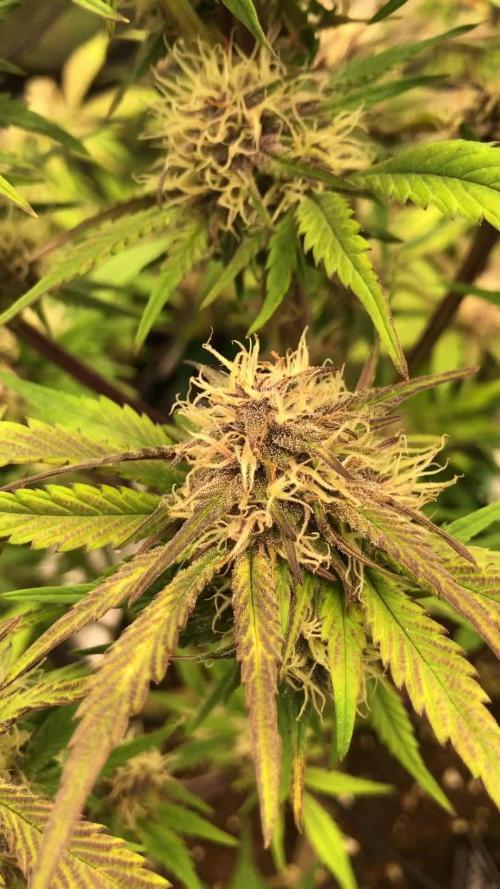
The leaves of several plants are showing signs of iron deficiency. This is likely due to my PH pen packing up earlier. I now have a new pen. Due to this, I decided to use my Seachem Prime, which I use for my aquariums. As I wanted to get them watered properly, and my Ecothrive Neutralise hasn't arrived yet. I watered each plant with 1ltr of dechlorinated water PH'd to 6.0. I added .25g Ecothrive Biosys to the water. May give them a breather on the nutes and just use the Cal-Mag and Biosys. Being as I've just topped dressed with rich fertilisers, I'm sure that will be OK for the next several waterings. Snipped another couple leaves which were annoying me 😅 I realised this is one of the pots I put my clay pebbles the bottom of. So I've probably not been watering enough, as she's right at the back, and assuming all was good because the pot was heavy. I went ahead and gave all the plants a thorough watering each with: 2ltrs of dechlorinated water, PH'd to 6.2 with:- ♡ 4ml of Xpert Nutrients Cal-Mag amino acids. ♡ 4ml Biobizz Bio-Grow ♡ 4ml Seaweed extract liquid Going to keep an eye out to see when they need more in next couple of days. They're all looking very well, except the slight colour fade on Bubble Kush
Likes
6
Share
Perfect strain to grow, easy, fast and sweet as sugar totally covered in trichomes. The plants showed a very equaled and stable genetics and are very generous with a little care, this strain is almost like walking directly into a dutch candy shop with all kind of winegum smells, simply perfect.
Likes
46
Share
@Capo420
Follow
This week has been great! 😁 Everything is going well... I really want to thank the GD Community for helping my first grow go so well. 🙏 Fingers crossed we can cruise to the finish line without any issues. Happy Growing! 💚💪🌱😎🌱💪💚
Likes
9
Share
Week 3 and a repot is done and now in day 3. Finally it’s settling down after the repot, which was not pretty at all😂 Hope to get some massive plants this run 🌱 ________________________________________________________________________________________ Light from @MedicGrowLED 😎 NEO 780 LED🔥 780 Watt⚡️💥 PPF of 2184 μmol/s & 2.8 μmol/J🔥 Full Spectrum V1/F1 🌈 WiFi smart connection & Smart Aura Control 😱
Likes
10
Share
@Xspellsx
Follow
Start of the second week of flower. Things are looking great these are from bag seeds so sexing has been well drama in the grow room to say the least. Much bigger then expected that was good and bad ive had one boy so far and one is questionable its in the pics also my punch breath still hasnt shown anything but its a beast and looks promising very female like growth patterns super stinky too she always was since her first set of real leaves she was a skunk
Likes
50
Share
An in to soil she and her sister testers go, i know that for know everything looks the same , apart from the photos, but this will start changing with them growing. For now all of them are growing pretty much the same and now that they move in to soil and start feedings they will start showing the phenotype and genetic differences, but for now all looking great , healthy and strong af!!! Haded a intro video from seed in to now, including how i transplant and what i use wen doing it so, and from here the moon is no limit for this babes i believe , so stay tuned as this testers they promise to be a interesting ride <3 <3 <3 She is moving fast and from all the tallest so far <3 <3 <3 need to keep this one under close attention <3 <3 <3 As always thank you all for stoping by and for supporting me on this journey, i am super passion about growing and fell blessed to have you all with me on this new journey <3 <3 <3 Genetics - Fast Buds Tester 08 09 10 11 Ligth - LUMATEK ZEUS 465 COMPACT PRO 
Food - APTUS HOLLAND #aptus #aptusplanttech #aptusgang #aptusfamily #aptustrueplantscience #inbalancewithnature #trueplantscience #fastbuds #dogdoctorofficial #growerslove With true love comes happiness <3 <3 <3 Always believe in your self and always do things expecting nothing and with an open heart , be a giver and the universe will give back to you in ways you could not even imagine so <3 <3 <3 
All info and full product details can be find in can find @ https://2fast4buds.com/ wen released 

https://aptus-holland.com/
 
https://autopot.co.uk/ 

https://lumatek-lighting.com/ <3 <3 <3 Growers love to you all <3 <3 <3
Processing
Likes
5
Share
@Mrg7667
Follow
Starting to smell so strong! Like chem candies for sure. Cant wait to see how it changes these last couple weeks, still been somewhat smokey as you can tell from the ash on her! Sun is red is certain pics. Its starting to get colder here at night for sure lows 50s going to get into 40s next week! Just started top max excited to see how that affects growth also noticed a little burn on some leaves from yhe fish mix did a week 6 leaf trim for light penetration. Just so little light on my pourch gotta utalize it well! Also did one more preventative spray with the growsafe
Processing
Likes
4
Share
@Fergie
Follow
hey guys so girls been transplant to new home for next few weeks to month all looking good under new LEDs . Got really nice node structure coming together on them and so far so good . Feeding them with plain r/o water with 5ml of calcium and magnesium supplements added to each 3 gallon bucket - started running my Aircon water back through my system as at current am recollecting around 20 litres a day with current temps outside soaring .til next week 😀
Likes
43
Share
Got some better shots without light and a little video my cam is a bit shit got a video of trichs also in there girls seem to be flushing well started flushing the quick one later than the others as wasn't as developed. Took the 2 tester buds of very bottom under the plants on the first day of flush to try estimate how long to flush for........last pic and vid before harvest next uploads will be harvest hopefully
Likes
58
Share
@Kmikaz420
Follow
La fin se rapproche pour la bannana x purple punch (je vien de lui donné sont premier rincage;) C est une plante vraiment facile à faire pousser elle peut encaisser de gros EC Et elle n à pas trop de feuille (facile à trimer ;) je pense donc que même un débutant peut avoir de très bon résultats avec cette souche il faudra juste la nourrir correctement (pas besoin de lst ou autre technique, juste lui laisser assez de place pour grandir (en hauteur comme pour les racines = big roots = big fruits ;) Pour la WEST COAST OG c est pareil on dirais elle sont en pilot automatique (tellement je n ai rien a faire a part arroser ) J ai au début mis 2 anneaux (technique que j aime bien quand j fais pousser une plante la première fois, au cas où il faudrait écarté les branches etc) mais la on en aurait presque pas besoin pareil que pour ka bannana il faut juste lui laisser assez de place pour les racines et lui laisser assez de place (largeur hauteur ) et des bon nutriment à bonne dose et normalement vous devriez avoir le même résultat que moi ;) Je doit dire que la west coast a une odeur magnifique et les photos pour toutes seul pour se qui est de la cristallisation :) Voilà les amis je m arrêt ici pour cette semaine on se retrouve pour la recolte de la bannana (la west coast à besoin de bien 10 jours encore avant le rincage)
Likes
4
Share
Darker coloring, and more distinct shapes from her sisters this girl grew on top something very cool Christmas tree shape and plump flowers well resined with one by one shape stems with 3 leaves and longer maturation time probably even new pistils more plant already fat and resinous so we can explore more of her.
Likes
4
Share
6.12.25 6th week flower started on 6.9. Just like my other 2 grows going right now this one got stunted really bad and started putting on flower way before recovery so here we have it another miniature plant, one of the smallest I ever grown maybe even seen! Oh well excited for next grow! Thank you for looking at grow I appreciate it!!!
Likes
18
Share
Processing
Likes
4
Share
Apresentou deficiência de magnésio em algumas ja corrigido com magnifical aguardando resultado
Likes
120
Share
Hi all the happy people here in GrowDiaries. This is my second cultivation ever and it will be fun to try a bigger space than my closet grows First, I'm just going to say I'm done with the construction of my new growroom. I put some pictures on the construction here in week one. The room is 2.14 meters by 1.7 meters and has a ceiling height of 2 meters. It provides a floor area of ​​3.6 square meters. I use a 54 Watt Lightwawe T5 for germination and 2 Pcs 400 Watt HPS lamps. I have a channel fan that replaces the room air about 40 times an hour to get a comfortable theme in the room, the air enters a fresh air intake from the outside. The air is purified through a carbon filter to then leave the room to the rest of the basement. Then I use that heat to heat the rest of the basement. I will use 8 pcs 15 liter Autopots to grow with and a 100 liter water tank that supplies the pots of water and nutrition. I will grow completely organically in soil and will watercure my buds to get the best possible medicine for me. But there are no cultivation rooms to be displayed here, so I continue with what is most important. Today I have put my seeds in my moisture dome and hope the seeds have germinated within a few days. I am very excited to see how the new growroom will work and how this CBD Fast Eddy plant from Royal queen seeds will turn out. CBD Fast Eddy Automatic is combining Cheese x Juanita la Lagrimosa x Ruderalis, Fast Eddy is a rapid growing, flavourful, and CBD-rich auto strain that goes from seed to harvest in 8-9 weeks, produce generous yields, and induce a clear, mellow, and most importantly, functional high. THC: 9% CBD: High Yield Indoor : 400 - 450 gr/m2 Yield Outdoor: 80 - 130 gr/plant Height Indoor: 60 - 100 cm Height Outdoor: 80 - 120 cm Flowering: 6 - 7 weeks Harvest month: 8-9 weeks after sprouting Genetic Background: Cheese x Juanita la Lagrimosa x Ruderalis Type: Sa 50% In 40% Ru 10% Effect: Clear, Painrelief Climate: Mild .............................................................................................................................................................................................................................................................................................................................................. Update 2017-08-15. Both seeds have germinated and planted in small pots inside the humidity dome. I'm so glad it worked so well and now it's just hoping they'll start growing and become 2 big healthy girls :) ............................................................................................................................................................................................................................................................................................................................................... Update 2017-08-16. I have mixed my own soil today. Its 40% sieved peat harrow H2-H4 0-30 mm, 45% sieved peat harrow H4-H6 0-30 mm. 5% sand and 10% of compost soil. And i use 15% of perlite and mix it all together. ............................................................................................................................................................................................................................................................................................................................................... Update 2017-08-20. These girls are much slower to germinate and to start growing than the other 6 girls I started at the same time. One of the germinated seeds split in half, so I had to take a new seed and germinate it. It took 2 days. It was just a smal taproots after germination with this strain as opposed to my Fastbuds cbd. But I hope everything goes well from now and that they live up to their name, Fast Eddy. ................................................................................................................................................................................................................................................................................................................................................ Update 2017-08-21. New pics. ................................................................................................................................................................................................................................................................................................................................................ 2017-08-22. Nr1 dident make it and died. Started germinate a new seed to get another Nr1. .............................................................................................................................................................................................................................................................................................. 2017-08-27. Nr 1 is in a small pot in humidity dome and i hope shes going to break the surface soon. Nr 2 is slow but doing fine. --------------------------------------------------------------------------------------------------------------------------------------------------------------------------------------- 2017-08-28. Nr2 is transplanted in 15 liter autopot. --------------------------------------------------------------------------------------------------------------------------------------------------------------------- 2017-08-29. New movie of the girls Nr2. Its no water for 3 days now so the roots develop more and match the plant above the soil. The temp controlled fan is awesome, its easy to set what temp you like to have in the room. Right now its 28 celcius. And humidity is 56%. ----------------------------------------------------------------------------------------------------------------------------------------------------------------------------------------------- 2017-08-29. Hello to you who read my diary, I just want to say that I am pleased that you have chosen to check in with me and in my diary. I just want to say that I do this for myself and for a steady flow of my medicine. Everything you read and see in my diary is 100% honest and I will never distort or beautify anything here. I document my crops so that I can learn from my mistakes and also to look back at those different crops. I try to update with pictures every day and with text if something special has happened in the garden. This is my strainhunt for the best medicine and the beginning of my journey with cannabis and the cultivation of it. ----------------------------------------------------------------------------------------------------------------------------------------------------------------------- 2017-08-30. Cleaned the room this morning, just vacuuming and cleaning with chlorine solution. Im testing the fan to control temp and humidity, it works great. Added a movie. Everything is looking great right now. ------------------------------------------------------------------------------------------------------------------------------------------------------------------------ 2017-08-31. 3 New pics. ------------------------------------------------------------------------------------------------------------------------ 2017-09-01. New pics and a video of the grow room from today. ---------------------------------------------------------------------------------------------------------------------- 2017-09-04. Week 2 starts now, new pics. -------------------------------------------------------------------------- 2017-09-05. KL 08.00. Cleaned the room this morning, just vacuuming and cleaning with chlorine solution. KL 12.00. The girl got 2 liters of water with nutes in it, added a video. ------------------------------------------------------------------------------------- 2017-09-06. KL 08.00. The girls woke up after their beauty sleep, the leaves are always a bit down after 6 h of darkness, but they will stretch now when the HPS lamp starts. Everything looks good and I keep trying to tuck the leaves so they get the maximum amount of light where needed. Added pics and video. -------------------------------------------------------------------------------------------------------------------------------------------------------------------------------------------- 2017-09-07. Day 17 from sprouting. I have never tested PH in my grows, when growing organic in soil iv learned that it adapt PH by it self. But im curious by nature so i had to test. Kl 10.00 Tested PH in the soil, it was 6.9 and tested my tap water and it was 6.8. Added video of the girl. Kl 22.30. New pics. ----------------------------------------------------------------------------------------------------------- 2017-09-08 KL 08.00. Good morning, added new video. 2017-09-08. Kl 23.50. Gave every girl 3 liters of water and nutes, added new video. ----------------------------------------------------------------------------------------- 2017-09-09. Kl 21.00. Defoliated a lot and added pics. ------------------------------------------------------------------------------------ 2017-09-10. Kl 08.00. Last day of week 2. New video. 2017-09-10. Kl 23.00. 3 new videos. --------------------------------------------------------------------------------------------------
Likes
9
Share
NORTHERN LIGHT AUTO (ROYAL QUEEN SEEDS) Descripción: Poco después de conquistar la escena del cannabis en Holanda, la Northern Lights se convirtió en el estándar del cultivo en interior. Su influencia se extendió por todo el mundo y acabaría convirtiéndose en uno de los pilares del desarrollo de cepas de cannabis modernas. Durante los últimos años, las técnicas de cultivo y reproducción han generado versiones de Northern Lights que mantienen las características de esta leyenda mientras añaden algo interesante a la fórmula. La Northern Light Automatic de Royal Queen Seeds es la combinación perfecta entre lo nuevo y lo viejo. Al tratarse de una cepa autofloreciente y feminizada, la Northern Light Automatic es una planta versátil, perfecta para cultivadores discretos de interior pero también para cultivadores de exterior a gran escala. Tras una breve fase vegetativa, la planta empieza a crecer y a producir gran cantidad de flores, terminando su ciclo de vida en solo 9 o 10 semanas desde que se planta la semilla. Día 0: He germinado la semilla en un papel humedecido a 30°C con un pH6 Día 1: La semilla abrió perfectamente y la trasplanté rapidamente a su maceta final de 15L geotextil de Royal Queen Seeds y he puesto en el agua de riego Deeper Underground 1ml/l y Atami NRG Roots-C 2ml/l. Día 2: La pequeña ha cogido 3cm y va creciendo rapidamente. Parece que los nutrientes hacen sus efectos perfectamente Día 3: después de alcanzar los 3cm hoy hemos regado con el enrraizador para su sistema radicular aportando 1ml/l Deeper Underground y 2ml/l de Atami NRG Roots-C
Likes
32
Share
Fast grow from day 7 till today day 14. I have added a humidifier to help get my RH up cause it was too low. It is still not as good as i would like, but its okay. I started doing some LST and leaf tucking on Day 12 on the biggest plants and those i felt like could benefit from it. Today i lowered my lights so now my MH 600w light is down to 50cm from the canopy and the LED is at 45cm. I also bought a Lux meter (Urceri Cloc – Lux Meter) to measure but im really confused about it after it showed that the LED puts out way more Lux than the 600MH but its supposed to be better at measuring HID light and not catch all the light from the full spectrum LED but still the LED seems to work better. You can judge yourself with the video ill post with this update. The 2 biggest plants is under the 600W bulb though, so there is alot to take in count at this moment. Also i removed one more plant, so now the total is 16 plants and i will continue experimint with the height of the lamps. I would love some feedback 😎 Day 15: I took both lights up to 64cm.. Changed the MH bulb to a Full spectrum Bulb which gives more light to my girls Day 20: posted new pictures, its going good until now, i just wish they were a little bigger but i have many different phenotypes it seems. When they go into flower i may add 400w more hps, but only if they will get big enough
Likes
5
Share
Was going to chop beginning of week 9, waiting is all.