


Likes
13
Share


@frenchysmoker
Follow
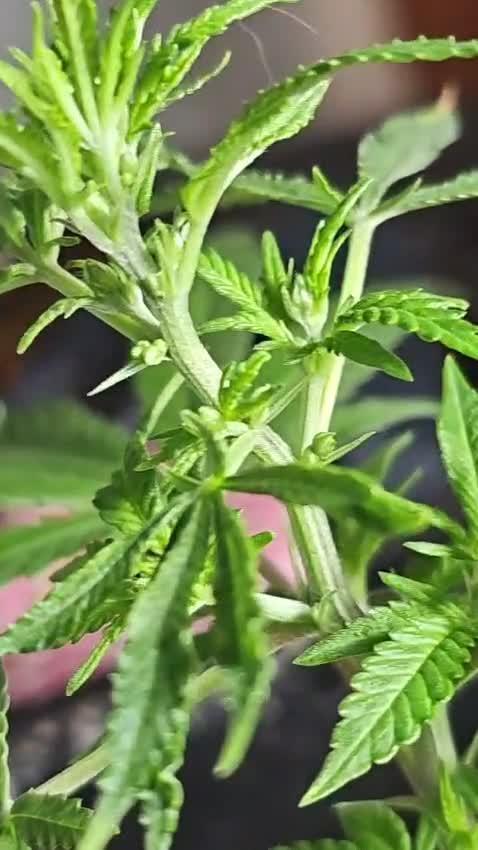
It went pretty good this week (*I'm sorry because of ly work I could not take pictures this week so you have 2 videos*). I will not cut anymore branches before turn into flowering next week, normally it will be a 20 week grow from seed to budd I hope great results with this Cheese from Greenhouse Seeds Company :)


Processing
Likes
6
Share


@Moss420
Follow
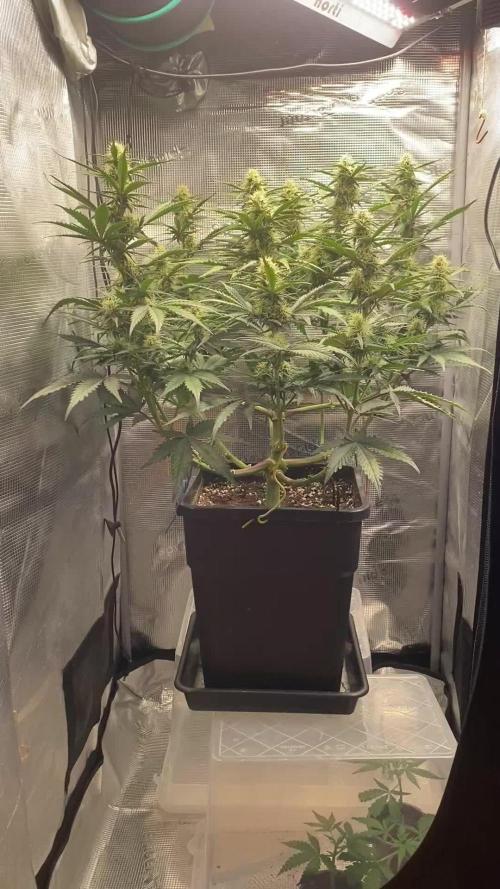
Added the first screen into the tent. Decided to kick Big Mumma out because she just wasn't growing any taller and the other plants were really over growing her.
For the new setup I used kitty litter trays and mesh to sit the plants on - each plant gets its own tray so I can track runoff EC individually and I cut little flaps in the mesh so I can wet vac the runoff. With this setup I shouldn't need to move the plants out of the tent until harvest.
For the scrog I just tied some builders rope around the poles of the tent and tied the trellis netting off with training wire. I've been manipulating the growth just to try and fill out the whole screen, I also gave them a good haircut because I plan on flipping them soon, don't want them to outgrow the tent.

Likes
13
Share


@Robeeriegenetics
Follow
Week 13 not a bad week if I do say so my self …guna tie down this week and begin spraying silver thiosulfate on donor plants then next week I’ll throw the donor plants into flower and begin the actual breeding project …which ever specimen reverses first shall be collected and used to pollinate which ever one doesnt will be killed and removed acord

Likes
1
Share


@InsideAz
Follow
Added a second scrog net for the taller plants last Friday. Constantly defoliating to increase light penetration but not trying to stress the plants. (Selective leaf picking, anything but the top 3 fan leaves are up for grabs if necessary)
Plants loved the tea I have them last week. Visual improvements in every plant 2 days later.
Top dressing later this week on 9/29:
5 tablespoons Gaia green 444
5 tablespoons Gaia Green 284
15 tablespoon Wiggle Worm Earth Worm Castings
Light increased to 75%

Likes
10
Share


@DeltaEye
Follow
I put the plants into an NFT system couple weeks ago. I could have waited a bit longer for the plants to develop a stronger root system before placing the rockwool cubes into NFT but I was being impatient because of the slow start and wanted to get the plants under proper light. Now two weeks later they are growing well with good root development.
I switched the lights to flowering cycle about a week ago so they should start stretching soon. No preflowers yet.

Likes
3
Share


@MisterFlavonoid
Follow
This one was great to grow. Great structure, great smel and taste, full of resin and beautiful colors. You could really feel the gelato in this runtz, with just enough of GMO to make you wonder what's the other taste you're getting.
Full hybrid, could really take the high each way I wanted! Loved it, hope to do this one again in the future (:

Likes
145
Share


@StarLorr
Follow
Welcome to My Pro~Mix
Open Top Grow Bag diary.
The end is near my friends😎
3-4 days at the most.
Feeding:
Sun 03Dec:3L water flawless pH'd 6.5
Wed06Dec:3L water flawless pH'd 6.4
Thanks for stopping by, likes and comments are duly appreciated 👊🏻😎
Keep on growin!
Keep on tokin!!!
😙💨💨💨💨💨

Likes
10
Share


@Eauderay
Follow
The end is in sight, likely in 2 weeks, they are producing compact and sticky buds, looks like it is going to be easy to trim, so little leaves in those buds!
They smell fruity, earthy, fuel and a very strong kush base with lemon on one of my pheno, the second one is a little smaller and she smells more like carame&peaches in a kush sauce lol absolute beauties!

Likes
40
Share


@MrJones
Follow
47th Parallel Crowly's Comet
🔹⊱╮🔹╰⊰🔹 GROW Started 03.10.24 INFORMATION 🔹╰⊰´🔹⊱╮🔹
🌞Environment - Maintaining 80F and 65%Humidity
🌾Training - Nothing this week, just letting the flowers stack up; they are getting fat, sticky, and stinky!
⚱️3-Gallon 📊6.2 PH
💧 Feeding - Using Horti Grow 8-11-21, Bloom 5-15-26, Late Bloom 0-24-26, Cal 12-0-0
🌞Medic Grow Smart 8 760 Watts
🕷️ IPM - CannControl from Mammoth and Mosquito Bits as needed
🔹⊱╮🔹╰⊰🔹 PLANT UPDATES 🔹╰⊰´🔹⊱╮🔹
📝 On 05.11.24, This week, we are on Auto-Pilot and just Fertigating as needed; the ladies are stacking up nicely. I am surprised, but they are looking great!
📝Fertigation injects fertilizers into an irrigation system to supply dissolved nutrients to crops.
🗓️05.11.24 Just feeding daily, sometimes twice; today, fed with Hort-Bloom @ 2.7 GRMS Per Gal and Horti-Cal @ 2.5 GRMS Per Gal.
🗓️05.12.24 Just feeding daily, sometimes twice; today, fed with Hort-Bloom @ 2.7 GRMS Per Gal and Horti-Cal @ 2.5 GRMS Per Gal.
🗓️05.13.24 Just feeding daily, sometimes twice; today, fed with Hort-Bloom @ 2.7 GRMS Per Gal and Horti-Cal @ 2.5 GRMS Per Gal.
🗓️05.14.24 Just feeding daily, sometimes twice; today, fed with Hort-Bloom @ 2.7 GRMS Per Gal and Horti-Cal @ 2.5 GRMS Per Gal.
🗓️05.15.24 Just feeding daily, sometimes twice; today, fed with Hort-Bloom @ 2.7 GRMS Per Gal and Horti-Cal @ 2.5 GRMS Per Gal.
🗓️05.16.24 Just feeding daily, sometimes twice; today, fed with Hort-Bloom @ 2.7 GRMS Per Gal and Horti-Cal @ 2.5 GRMS Per Gal.
🗓️05.17.24 Just feeding daily, sometimes twice; today, fed with Hort-Bloom @ 2.7 GRMS Per Gal and Horti-Cal @ 2.5 GRMS Per Gal.
╰⊰🔹╰⊰´🔹⊱╮🔹╰⊰🔹╰⊰🔹STRAIN INFORMATION🔹⊱╮🔹╰⊰🔹╰⊰🔹╰⊰🔹⊱╮
Crowley's Comet / https://www.47thgenetics.com/product-page/crowley-s-comet-10-fem-birdseeds
It's everyone's favorite piece of space rock, Crowley's Comet! The culmination of reversing our Matterhorn cut off Mr. Crowley to Intergalactic Runtz, and the results were out of this world (I had to do it). These ladies were slow to start, but once they hit their stride, they put any worries we had to rest. Compact, short-framed, and robust. They pack beautifully boulder-like flowers that reek of garlic and sickly sweet cotton candy. Dark green to a mosaic of purples, yellows, and silvers. Frost production is off the charts, the internode spacing is tight, and they certainly will impress in their last few weeks of flower. This is one of our favorite crosses in the new fem lineup. If you're looking for your hype fix, here you go.
Yield: Heavy to XL
Flower Time: 63 days
Feeding Schedule: Heavy


Likes
4
Share


@ThatoneAKguy
Follow
These are strong little autos! I got them topped last week and they are re starting to flower. They are under a little 90 watt HLG and I think I should be able to move them into one of the main tents as the timing is totally perfect with my others finishing just as these go into flower.
I’d rather be lucky than good ;)

Processing
Likes
3
Share


@Ogbangbang2981
Follow
I'm impressed with this C4 Auto, from fastbuds this is one of two plants I grew. This plant is a real indoor plant she grows lovely. The other plant is an outdoor plant it's pretty too don't get me wrong but where i thought the outdoors would produce a bigger plant i got the opposite of that, I got a Mutated plant, nice colored bud on here but she continues to mutate even in flowering stage my indoor plant is twice her height and size but love both my C4 Auto from fastbuds. Even if they broke my heart by changing payment policy, I'll never be able to get seeds from fastbuds again so I decided to spray my runt on the outdoors with tiresias mist feminized seed spray..... hopefully I get some pollen and able to pollinate my indoor C4 Auto..
Likes
43
Share


@biggreens420
Follow
dawgstar is in full flush still not ready just yet buds are huge and heavy the branches have gone weak and started to need support she's started to mature more over the last few days so should be within the next week for the chop scent is very strong but hard to describe not one iv smelt before should be interesting to try once finished not much else to say thanks for reading happy growing guys


Likes
Comments
Share


@PW216
Follow
Update in progress...
11/23/24 - Chopped and hung whole in closet.
11/29/24 - Trimmed and jarred. Early samples detect incredible taste and smell. The high is immediate and very energetic. Felt up front and in the face. Very pleased with the initial weights, although I will make certain they are accurate and final before posting numbers.
12/11/24 - No clue why it only gives me an option to log the wet bud weight but I put 3.55 oz for my final weight and that is dry.
Likes
21
Share


@NG420
Follow
I wasn't sure how to properly flush with flawless finish my girls so I followed different ways. For the TOP I just watered with flawless finish until I had 20% run off. For the FIM I watered with flawless finish double amount than usual and after 12 hours ph'd water until having clear running offs.I think I'm going to cut them off in the middle of next week.Can't wait!
