The Grow Awards 2026 🏆 


Likes
Comments
Share
@XaXaXa
Follow
On day 13 they recieved higher nutriens
EC 1
PH 6.4
Topped 4 plants on day 17
On day 17 I gave them another too hot nutrients solution
EC 1.8
PH 6.5
can see some problems (in my opinion its nuts burn due not me realizing that soil was already a bit pre-fertilized + pushing everything too far due to its my first grow
I found out at day 17, when I saw first signs - sadly I topped them that day and I brought them a lot more stress 😒
Transplanted plants into final 15l pots on day 20
Right now they are getting RO water only, will feed on day 22 again with EC of 0,9
I will aim for 6.2 PH as well
EDIT: couple of people confirmed nutrients burn, so since I transfered 1l pots into 15l fresh lighmix, I will not feed until day 26 - they will get only hydro roots with RO water
EDIT2: Forgot to write info about my light schedule - running lights at 240W and right now I am hitting around 375 PPFD with 18hrs on - so that is around 24.3 DLI :) I am checking it with LUX meter and converting to PPFD - then DLI


Likes
72
Share
@DreamIT
Follow
🐩👤Sirius Black👤🐩 by 🌍🌱WeedSeedsExpress🌱🌍
👤 23.2 and here we are again with the updates of this diary. Serious black has grown a lot, at the weekend it will be decanted and put into flowering ... yeah! Viparspectra P1500 works very well, soon fill the box again with lots of good stuff 😀
👤 24.2 all right, yeah
👤 25.2 Did you know that viparspectra, in addition to being a great grow light, is strong enough to use a helmet if you work under it? 🤣🤣🤣🦄
👤 26.2...
👤 20.2...
👤 27.2...
👤 28.2 We have reached the final racking, today it will be put into flowering, so as to start the new week in flowering. Viparspectra works excellently, the plants are beautiful to look at and are not bulging excessively. Viparspectra continues to earn points: D yeah!
____________________________________________________
👀Are you looking for a good lamp to start?👀
Viparspectra in my opinion has something more than the others, take a look at their site.
➡️ http://bit.ly/pro-seriesproductspro-series-p1500
⏩Use " GDVIP " for an extra discount💯
____________________________________________________________________________________
📜👀 A look at the details of what I'm growing 👀📜
🐩👤Sirius Black👤🐩 by 🌍🌱WeedSeedsExpress🌱🌍
📋 Details 📋
⚧ Gender
▪️ Feminised
➰ Genes
▪️ 70% Indica / 30% Sativa
🎄 Genetics
▪️ Sirius Black
🚜Harvest
▪️ 450 g / m²
🌷Flowering
▪️ 63 - 70 days
✨THC
▪️ 25.0%
✅CBD
▪️ 0.5%
🏡Room Type
▪️ Indoor
🌄Room Type
▪️ Outdoor
🕋Room Type
▪️ Greenhouse
🎂Release Year
▪️ 2020
____________________________________________________________________________________
👀📷 Follow the best photos on instagram 📷👀
https://www.instagram.com/dreamit420/
🔻Leave a comment with your opinions if you pass by here🔻
🤟🤗💚Thanks and Enjoy growth 💚🤗🤟

Likes
10
Share
@Fader1
Follow
I have some trouble with the leaves...especially the youngest...while the others react positively to watering, the younger ones still tend to the floor😒
I don't know how to act

Likes
113
Share
@Skunky
Follow
DAY 2
She's oh so slow to finish. Still more clear and cloudy than amber so i'll need to wait some more... I actually prefer the more amber type of high... I can wait... :)
Maybe I'll need to feed her plain ph'd water one more time but let's see...
Merry X-MAS to ALL! 👻
DAY 5
Wow... that was fast. She kinda turned amber in 2 days. The buds in the middle are now like a bit over-ripe, a lot of amber and the ones outside are just a little under-ripe. I'm done. No more waiting now. I thought about harversting only parts but I'm really done with this one. I'll leave her in the dark for 1 more day and then I'll chop her down. Luckily she's about to dry out completely so the drying process will work just fine... FINALLYYYYYYYYYY!!!!!!!!!!!!! 26 WEEKS MUAHAHA.... Next: back to autoflower... LOL!

Likes
47
Share
@Jimmy89
Follow
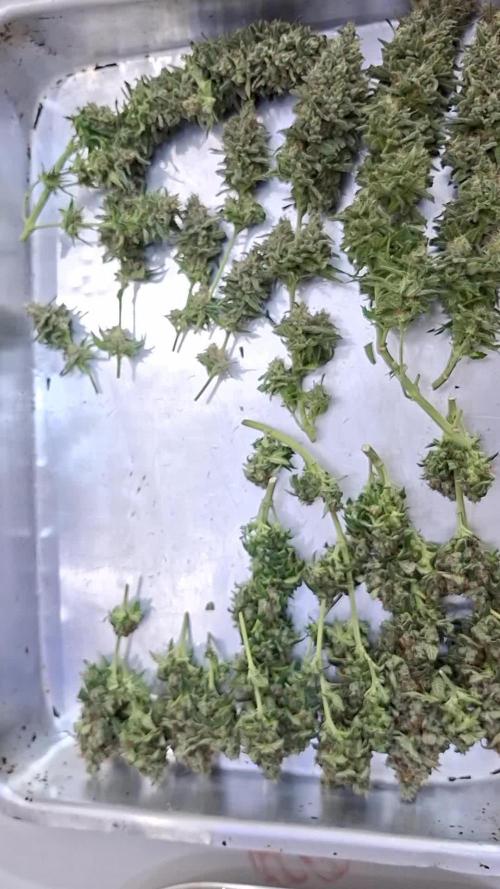
The the buds were small so it made trimming a nightmare! But it’s done and the end product is worth all the time. I have loads of trim and small popcorn buds that will be dry Ice sifted and pressed into a hash brick. Will update the diary when I have some bcp hash
Weighed up the trim at 588 grams, used my trim bins with dry ice to sift the trim and pressed it into blocks using a rosin pre press, I’ll now jar this and put it to one side. My first time doing this, definitely worth the effort!
Likes
91
Share
@Fire_Farmer
Follow
Week 1 Day 5 Flower
Hi Everyone 🖐️🏻
Thanks for looking in!
I switched to flower 5 days ago and the girls are filling out well each day.
I just today drilled a hole in the floor and inserted an iron rod into it which now pulls the net in a lot tighter and has allowed me to start tucking and guiding branches where they can get the best light and fill the net.
I have supported this with a bit of defoliation to get light to those lower branches and get them pushing growth towards the canopy.
As the next two weeks progress I will continue to defoliate and even remove some lower branches which aren't likely to benefit the canopy and in fact deprive the canopy of some energy.
The roots are looking good rapidly colonizing the tubs, I've had to return them to the trays from the reservoir below several times which is a headache I'm happy to have😂
I may have flipped too early and aren't likely to fill the area but it should still be a heavy crop and if rather have a manageable grow than a jungle.
If it proves way off then next time I grow the same strain using the same method I'll add another week to the veg.
Thanks for looking in GDCommunity and thanks in advance for any help, advice and general support
✌️🏻Peace
🔥Fire
👨🌾Farmer

Likes
13
Share
@Chubbs
Follow
420Fastbuds-Week9
Strain:FBT2311
What up grow fam. Weekly update for these gorgeous girls. They're definitely getting close to being done and getting the chop. I did a defoliation this week to allow the light down to the lower bud sites. All in all Happy Growing.

Likes
20
Share
@GrowinHome
Follow
DAY 30, LESSON LEARNED
It's been a tough few days for the ladies. But, what doesnt kill u makes u stronger😁💪🏾.
After my last post the plants started to show some nutrient burn.
I believe that happend because after my last defoliation post I gave the plants the same amount of water and nutrients as before. But ofcourse the plants were much smaller after the defoliation, so what I should have done was reduce the amount of water and nutrients.
So these last days it was just watching the plants and keeping a close eye on em.

Processing
Likes
2
Share
@smokeycropping
Follow
- LAS PLANTAS CONSUMEN BUENA AGUA, BAJAMOS LAS DOSIS DE FERTILIZACIÓN Y YA EMPEZAMOS SOLO A REGAR CON AGUA Y PRONTO LAVADO
- NO SE VEN CARENCIAS NI EXCESOS
- el HPS de 600 MANTIENE MI AMBIENTE SIN MAYORES INCONVENIENTES
-ESTAS SATIVAS TOMARON UNA DUREZA INCREÍBLE EN SUS FLORES
- SATIVAS DE LARGA DURACIÓN MUCHA PACIENCIA PARA CULTIVARLAS

Likes
15
Share
@BlaKX
Follow
Ajoooooo das ist bzw war mal ne lange check Liste..Gefällt mir definitiv:)
Die WW muss noch trocken habe sie Komplett Manikürt da vielen 30g Zucker Blätter nass ab und zu Butter verarbeitet
Schätze werden so 75g trocken.


Likes
31
Share
@BigBadLion
Follow
Heeey! 👋
Another update! :D
This week I made another transplant, this time from the drink cups to a small 3.5 liter pot and I also applied some more mycorrhizas to my babies! 😃 From both of them Pistachio seems to be the one who's developing faster and Matcha is trying to catch her sister. The plants ended with about 19500 lumens! Couldn't rise them more because of heat issues 😟
The only tricky part this week was when I decided to add a bit of growing nutrients to my plants so I ended up watering them a lot after the transplant and the results were quite shocking! I barely added 2ml of total nutrients per liter but the runoff water I got was around the 1400 ppm which all honestly scared me a lot! That's way too much for two young plants (and I believe some of the excess nutrients can be seen on Matcha) nonetheless they are still developing so I'll just continue with water for now till they start to lose color (the Light Mix I used should have enough 'food' for at least 2 weeks, so that's good I believe!
Besides that everything went well. I'm using tap water for my humidifier and its sediments are being thrown into the air by it, but so far it seems my plants are doing well.
During the last 4 days the plants developed a lot in their new pots so I'm quite happy for that! If things go well next week I'll be moving them to their final container!
Thanks everyone for reading! I hope you'll all enjoy my new timelapses and photos! :D

Likes
13
Share
@Prozak
Follow
the strain is really strong ,
low temperatures resist , 3 weeks around 12/16º graus and steell growing wel
nice new colos between week 4/6 in flowering.
really good strain to manipulate! 5 stars * * * * *

Likes
9
Share
@Naujas
Follow
whatever it is, it's a pity, but you can't fight with Nature :) as far as I can see from the drone flight, the girls are simply gone :D:D they are under water,.... it's a pity.... it rained a lot during the week, there is a river 300m away which flooded, here is the result: D I see this for the first time in 9 years .... well, nothing new automatic seeds, already thrown into the ground :) so I will wait for new girls :).

Likes
9
Share
@L8bloomr1008
Follow
Start of week 8 for DG. Buds are still filling out. Wondering when of if I should flush her before harvest? Only been using Cronk Nutrients for a couple of weeks so I don’t think there should be too much of salt build up. Haven’t tested and ppm from runoff. She still showing a little bit of bite or light burn so I fed her plain ph’d water for 2 feeds in a row so we’ll see.
The GWK is starting week 7. She’s taller but still has a lot of filling out to do. She also showed a few leaves of nute burn but I’m pushing her. She had one plain water feeding this past week. She’s looks great though.
Flush or no flush? I think I’m a couple weeks out from DG harvest.

Likes
12
Share
@Siriuz
Follow
Sorry for the delay on the updates guys
I am a daddy of a newborn baby boy and it's really time consuming plus the Mary ladies but we keep on the great work nothing wont stop us we go all the way up!
Alright here you go
Day 87 Starting week 13
Day 88 Gorgeous grapefruit smells like heaven
Day 89
Again sorry for the late update but being a first time daddy leaves you without time
Day 90
She's gorgeous isn't she?
(alright guys so what happened here was that I started flushing too early and took advise from other canngrower and instantly added again all nutes, that's why I left her a lil longer until week 14 when I started to flush again, we are going to show you very well what we did, since it was our first time we were unsure if flushing at week 11 was alright but then we decided at week 12 that she could stay longer and she did)
You might say we wasted some nutes but in terms of reality we did not, because we have a full bottle of 3.7gal mix with flora nova grow and flora nova bloom in the other, measuring ppm always to make sure we got the correct amount, otherwise we add more water or more nutes depending on the plant needs but we never waste away all precious nutes are precious resources, in this part of Latin America is really hard to find anything good, so we got to bring everything from Europe or United States that's why we doing the best we can with the money we got. Hey any donations are more than welcome if you guys like what we do, yeah it's risky around here but we don't give a F.
You know that patients need their medical cannabis and Id say I'm one of them
And by the way very proud
Peace and love canna growers
We will continue to fill the grow diaries
Likes
38
Share
@Oyziphar
Follow
DAY63 WEEK9 = Impatiently waiting till harvest time 😘 Beautiful to enjoy the plants ripening and finishing 😍😍😍
Congrats to BIOTABS, because their tablest are really superb 🙏 I'm super satisfied 😁😁😁
Wedding Gelato, Triple G, and Cookies Gelato are completely ripe.👍😃 All their buds are rockhard 💪😖
👉 Cookies Gelato have become completely purple with beautiful piled buds and orange pistils, and looks delicious. Smells of berries and 😵
👉 Wedding Gelato has round buds (easy to trim) with mixed colors : gold, brass, brown, yellow, red and green colors with orange pistils 😊 Fine and accessible smell, pleasant and no overbearing 😄 🙏
👉 Triple G will be the hardest to trim, because of her quirky shaped buds. She has big internodes and big buds scattered across her tall sturdy stalks. Beautiful buds, a pleasure for the eyes. Her smell is pungent, sometimes narcotic even. She will get you stoned in no time 😋
👉 Liberty Haze could have another week. But she lacks some nitrogen; watch her leaves turn yellow, and make her taste sooo soft 👻 She hasn't any purple or red colors, only green and yellow. Her buds are leafy, not that firm, but volumineus. She's soo sweet, with hints of lime. 😘
I defoliated the plants in week 3 because I had to treat the plants against spider mites. Because of this, the plants had fewer leaves, the light could penetrate much deeper and now the lower buds are ripen as well 🙏. I will continue to apply this technique in the future. 👍👍👍
These will be the last pictures before harvesting 😍

Likes
7
Share
@Leierkastenmann
Follow
Beide Runtz wurden an Tag 70 geerntet. Runtz #2 getoppt und nach dem Green House Feeding Auto-Schema gedüngt gefällt mir ein wenig besser. Die buds sind kompakter und die Farben sind schöner. Sie wurde im Dry Ferm Bag getrocknet und riecht nach dem trocknen fantastisch.
Runtz#1 hat mehr, kleinere buds ausgebildet, in Verbindung mit dem LST hätte ich sicher noch stärker lollipoppen können. Sie wurde im ganzen im Zelt getrocknet und überzeugt auch.


Likes
182
Share
@Bloombuster
Follow
Почки набухли как лицо астматика дяди Жоры, после того, как он покурит сушеных листьев клёна. Это критический прогресс в созревании. Выглядит многообещающе. На следующей неделе делаем Ripen и потираем руки в предчувствии скорого урожая. Но у меня с терпением всё в порядке и я хочу сделать эти цветы с максимально критическим эффектом. Я хочу назвать её "пол банки" или "курить лёжа" или "билет на Марс - раньше Илона". Запах сладкий, душистый, луговые цветы.
Опустил лампу на 10 сантиметров. Мощность лампы - 100%, от растения 50 сантиметров, 55000lux, лампа теплая.
https://www.viparspectra.com/products/xs-series-xs2000
при покупке примени код и получи скидку 😀👌
код: Itxsgdvip
Тех, кто посмотрит все фото, в конце Вас ждет видео!
Спасибо всем за поддержку и комментарии! 👊😁
Ищу спонсоров и предложения, для всех выгодное движение! 😀👌