


Likes
Comments
Share


@Elpicor
Follow
To get higher temperatures I placed the growbox near the radiator, dimmer still at 25%, boiled tap water also this week, this guaranteed me an ideal for the beginning, from now on I will use mountain water which will allow me to use less fertilizer.

Likes
39
Share


Likes
9
Share


@RunWithIt
Follow
Loving this new camera quality! Really brings out the green shine. Anyways they've all been loving the feeding regimen. Two feedings a week with 2 molasses feedings in between seems to do the trick at this stage.
Also wanted to mention the height is in reference to the tallest of the three BanDad's. Which is the one I topped surprisingly. For future reference, anybody following a similar formula to my grow will definitely want to top just once around week 2/3. She didn't even take a recovery period, really. Just chugged right back through, 3 days after. Now she dwarfs the other two BanDads quite immensely. Definitely been destroying my initial notion of not topping autos with this one.
Cheers everyone!

Likes
13
Share


@Popothamio
Follow
Esta semana he empezado a regar solo con agua en teoría las plantas son de 55-60 días aproximadamente y el día 19 cumplen 60 días.. aunque los tricomas están 50% blancos y 50%
transparentes espero que maduren un poco más durante esta semana por que ya tienen bastantes signos de carencia en las hojas que les quedan por que se le han caído bastantes también


Likes
6
Share


@midnitrtoker
Follow
This week has been awesome. Reservoir has been lasting is pretty well these 3weeks. I filled it with 10gals and have not had to top it up. Dropped the trellis net on the girls to get her to open up more, I will be adding 1-2 more layers of trellis just in case when we flower we make sure to really spread them out. I’m really loving this Autopot 10gals has really gone a long way I just make sure to check the ph and we are good. Next week I’ll be flipping so you will get to see what she looked like before the flip. Thank you all again for watching. See you all next week.
Likes
12
Share


@SSKNFbyHAZE
Follow
Throughout the week, I give compost tea, and fermented plant juice once each ^^
Hope you guys have a wonderful day today ^^v
*** Please Like, comment & share ***
Highly appreciated -----/-----<@

Likes
16
Share


@GreeneScene
Follow
This week made a few oopsies . I gave un-ph’d water to one of the plants “moving to fast” . Started defoliation during this week to attempt to redirect plant energy into establishing a full canopy since flowering has initiated.
Whilst defoliating I broke a branch that had to be taped to save it.
Humidity went out of whack when I stored 4 prepped 5 gal pots for transplant in the tent sooo I’ve got to buy a dehumidifier bc at one point all my plants fell out in a fit .
STILL haven’t filled these pots out, & I’m kinda sure/unsure it’s time to re-amend the soil for flowering. I’m conflicting on waiting until beginning/middle of week 7 so I can flush week 11 & 12 .
I think that covers it pretty well Week 5 in the 📚 📕 📖.

Processing
Likes
1
Share


@Soter
Follow
The past week I have adjusted the RO to contain 1.1 EC for the AH and the runoff is a bit lower. Don't know if this is a good thing or not. I have also increased the fertigation to 1,5 L twice a day.
I have set up the AC infinity inline Quiet T10, but the carbon filter has not yet arrived.
Overall all ladies are looking good. some minor Potassium, Calcium, and Phosphorous excess and deficiency are shown on a few leafs, but I think it's nothing to worries about
Day 68-70- the FB and SK were really taking off, especially the FB. omg they are beasts. I need to water them 3 times a day now.
due to the Bud rot I have found(see week 12) om the AH, I've decided to do some defoliation- big time- A lot of small nuggets(or popcorn's?) were in the bottom of all plants, also so many fan leafs that no air was circulating the plants. Also due to high outside humidity I was struggling to maintain- but was several times around 65%RH I think I've got it under control now. the weather has changes so RH% is around 45% outside. and I have the windows open to cool the garden as well


Likes
244
Share


@DogDoctorOfficial
Follow
And the time for Le Madame Freak Le Chick to come down as arrived!!! This was a wild ride , super emotional and repleted with amazing views, i totally advise everyone to try and grow this wild card , she is a treat and a blessing in our lives
As always thank you all for stopping by , for the love and for it all, i fell blessed to have you all with me for one more love journey, and a different one form the rest i did so far <3 <3 <3 Thank you Thank you Thank you , you guys are great and have been amazing , thank you for everything <3<3<3
#aptus #aptusplanttech #aptusgang #aptusfamily #aptustrueplantscience #inbalancewithnature #trueplantscience #dogdoctorofficial #growerslove
With true love comes happiness , Always believe in your self and always do things expecting nothing and with an open heart , be a giver and the universe will give back to you in ways you could not even imagine so <3 <3 <3
<3 <3 <3 Growers love to you all <3 <3 <3
Here are the words from this peace of art from nature creator Shapeshifter's @ HI-ELEVATION GENETICS <3 <3 <3
"FREQUENTLY ASKED QUESTIONS
Q. How did you create/breed Freakshow?
A. Methodical selection, line breeding, and culling is the short answer. Read our About page for more details.
Q. Is it an indoor or outdoor type?
A. Everything I've ever worked has been outdoors, including of course Freakshow. It has been our experience that outdoor (or sun grown, as it's recently being referred to) cultivars seem to perform extremely well under artificial conditions. This is true of seed starts or clones made from seed starts. The opposite is not always true; indoor clones often give an outdoor grower headaches because they don't always make the transition smoothly. This is due to light spectrum, temperature, and/or photoperiod changes. Yes, Freakshow will do exceedingly well indoors, and will thrive and mature just fine in a wide variety of natural environments as well, so it's definitely both and I think might even prove to be more resilient to those sorts of transitions.
Q. What are the potency and terpenoid levels?
A. Average 18-20% THCa, THC; negligible CBD, CBN with terps variable, averaging 2.5-3.5, primarily limonene and pinene, but this is variable, there was a lot of diversity in terp combinations and compositions in all the prior generations, it's just something that was left "as is" for now. The different parallel lines that we are developing can be directed in a few different pathways flavorwise.
Q. Why are the seeds white?
A. Why is the sky blue? No, the mature seeds are shrouded by a rice paper thin membrane which has coloring and mottling on it, but it's so fragile that it disintegrates in the process of shucking. Stripped of the outer layer the seeds are very pale, nearly white. It came as no surprise that this plant would have abnormal seeds.
Q. Is it a GMO?
A. Wow...? Well, it's seriously "modified" and the modifications are definitely genetic, and it is an organism. (Genuinely Modified Organically!) Uh, no. No radiation, no recombinant DNA, no gene splicing or editing, no TALEN or CRISPR! These biotechnologies don't belong in the food and medicine plant industries. Sadly, in the near future it will become commonplace and widespread in cannabis and other medicinal plants as it is already is with food crops and ornamentals. I'll avoid discussion on this topic for now, but we hope some people enjoy consuming Frankenbud!
Q. What's the floral period length?
A. 8-9 wks, finishes early Oct. at most latitudes and elevations.
Q. Is it a big producer?
A. Freakshow will produce nice, fat, dense colas (see gallery) with remarkable trichome coverage, and you can expect yields according to your veg. time, root space, and general knowledge and expertise as a gardener. The same set of variables apply to expected outcomes regarding cannabinoid levels and terpene profiles.
Q.What is the lineage?
A. (Bigbud x Skunk#1) x (Big Sur Holy Weed x Banana Kush). NLD("Sativa") dominant, but the afghanica influence is apparent. I'm pretty sure that Freakshow contains some Trainwreck and some Maui Wowie based on some research I did on the origins of the Pineapple Express. Interestingly Big Sur Holyweed, OG Kush, Banana, Trainwreck, and Maui Wowie are all of unclear origins. We have to remember that these are all just names and that they don't really mean much. The exact heritage of any cultivar today is impossible to determine accurately. Also, considering the amount of continuous shameless hybridization that has occurred in the last 40 yrs., any modern kind could easily contain over 40 kinds. In the case of Freakshow, it's much more limited because the ancestry is largely older "Sativas" that didn't go through as much outcrossing. In the 70s in Santa Cruz, Haze was a favorite among surfers for the pure energy and I still have (greatly improved) stock of it around, simply because even when I made hybrids with it I always kept the original in pure form for obvious reasons.
Q. What is the psychoactive effect like?
A. Like the flavors, many people have commented that the "buzz" is somewhat different than other mainstream types out there. It's not entirely out of the scope of imagination that given that this strain has new alleles in so many other respects, that it could also contain new, unique cannabinoids, as well as new and unique terpenoids, some of which may not even be among the standard 16 or so that the average lab is testing for. Aside from the up, cerebral, energetic boost, some report a mild time/space warp effect. Creativity and idea induction should be mentioned, for sure. Freakshow has the pure energy effect and greatly alters perception to the positive side, so definitely destroys depression. Appetite suppression is a side effect, but the enjoyment of food is enhanced. I personally will attest to all of the above. We all have different receptor profiles, so these are just generalizations. Couch unlock.
Q. Is it pest and mildew resistant?
A. Indeed it is. On many occasions in the last few years, it has been observed that when pest and mildew issues were affecting other plants adjacent to in the vicinity of Freakshow plants, for unknown reasons the freaks remained entirely unaffected. This includes 0botritis, PM, various mites and insects, soil fungus, etc. We haven't heard any complaints along those lines so far, so if anyone has any problems, especially with a rigorous IPM regimen in place, we would like to hear about it. And if anyone can attest to the extreme level of resistance it seems to have we'd love to hear about that as well.
Q. Does it contain web-leaf genetics?
A. I thought I better clarify this because there are a few people thinking that because of an article "Growing Marijuana that Doesn't look like Marijuana" that mentions that I had worked web-leaf types years ago and had eventually turned that into Freakshow. This is incorrect and I'm needing to get ahold of the writer to have him change it. When I read the piece and saw the mistake I figured it didn't matter that much, that the actual method of breeding could just remain a "trade secret". Recently, I noticed online that a posting, "Freakshow only exists because of duckfoot" by Curious Cannabis Connoisseur, where he explains how I developed Freakshow using Duckfoot. Let me explain, about 20 yrs. ago a friend gave me a jar of seeds labeled "BC Bigbud" and I sprouted flats of hundreds to look for oddities and had found one web-leaf pheno which we named Webster. It was a female so I bred it to a normal leaf male and began selecting and stabilizing a line of Webster. About 5 or 6 generations later I had nailed it to 100% webs and had also stabilized it for a deep purple color and a nice "gingerbread" terp profile. I was busy working other lines at that point so I put Webster in the library. Also, I was having a hell of a time getting a pheno of it that flowered to my satisfaction. (it seemed to finish with a limited number of calyxes). I knew I would have to outcross it to something with a big tasty bud and restabilize it for web-leaf, and I no longer had the original BC Bigbud. I still have the Webster seeds, and trust me the thought has crossed my mind to make the cross with Freakshow, but why? Why mess around crossing things just to create something even weirder? I have heard that the "Duckfoot" also doesn't bud up well so maybe there's a correlation there. Anyway, people can do what they want to and I will too, but crossing Freakshow with some low-THC crap like ABC is in my opinion idiotic. I worked extremely hard stabilizing and perfecting a beautiful new subspecies and I believe it should be kept pure. I won't go on a rant here about the rampant crossing and the lack of line-breeding in the cannabis world in the last several decades, or where this will eventually lead us, but I will say that it's not in a good direction. Bottom line....Freakshow has no web-leaf genes, it was made using top-grade tropical narrow-leaf drug (NLD) cultivars.
Q.Why is Freakshow patented?
A. Although I and most others (including all the folks at HSC) believe in and subscribe to the concept of "open sourcing" because sharing in cannabis genetics was always the cultural norm, it was decided that Freakshow should be protected (1) because it is a novel and unique, not a preexisting strain (or even subspecies), (2) To keep the greedy corporate big boys from exploiting it, (3) To maintain control of the genetic refinement of it in all future generations. We really can't wait to share it with the entire collective world of cannabis enthusiasts and invite experimental breeding for personal use and curiosity."
source https://freakshowcannabis.com

Likes
19
Share


@GrowMo
Follow
As she gets closer to the end these fat dense buds are filling out with a ton of trichomes that are so beautiful some almost look purple when the light hits just right. I can’t wait to try this bud out I’ve been so impatient about this cause it looks so good stay tuned for the chop soon only 2 more weeks!
Fed FloraFlex
B1 B2
3.0ec
6.0ph
No Cal-Mag
Likes
6
Share
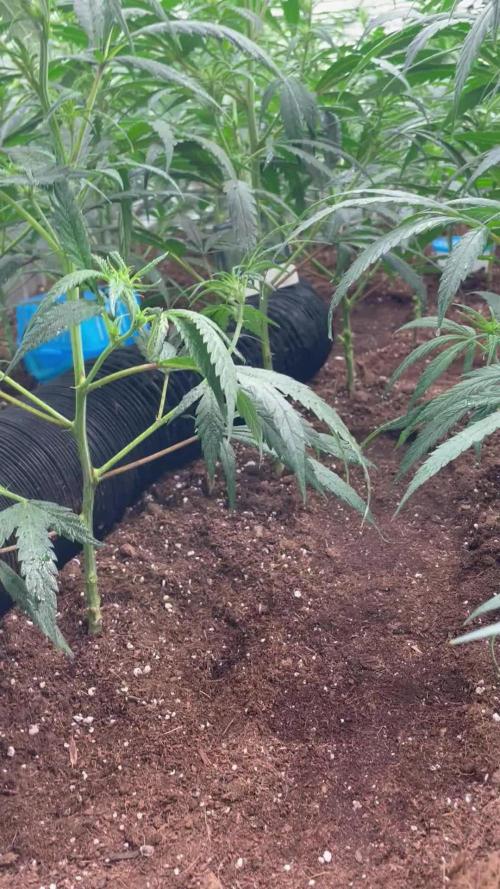

@carlitoshaze44
Follow
Así es como empezamos la tercera semana,seguimos con humedad alta pero la vamos controlando..
Estos días da buen tiempo la humedad en la calle será mucho más baja así podré meter aire sin tanta humedad..
De momento todo bien en el cultivo ningún problema hasta la fecha.
Ya podéis ver,y comentar sobre algo que veáis que yo no!
Como dicen! Ven veinte ojos mejor que dos!
🖖
Día 12
Último fungicida prevención mutritis,hongos humedad.
Primer riego foliar hormonas producción de flores.
🌹

Processing
Likes
11
Share


@MemesBeforeDreams
Follow
WW2 collapsed on itself and I didn’t notice for 2 days lmao... oops. All is well though I tied the buds up and added some support to help them stand.
The other Northern Lights has been harvested and dried, and is just entering curing now after a week and a half. Even after just a few days of jar time it’s got an amazing scent and flavour.
I think I dried WW#1 too much by burping too often and too much or something, smell is super light and bud is now pretty dry. However, it’s extremely smooth, has a good smell (just light). And it absolutely kicks my ass!
WW#2 in the tent has nice looking buds considering how yellow and defoliated she is super impressed!
The last NL has some funky buds going on compared to the last. Fox railing and such. Doesn’t bother me any but I’m wondering if it’s a sign of stress or genetics?


Likes
7
Share


@Staffedition
Follow
Привет друзья.
Наше знакомство продолжается с новым фотоцветущим растением от Smail_Seeds сорт ORIGINAL CHEMZKITTLEZ F1 reg.
Сегодня растению 99 дней.
Шишки наливаются уже тяжелей и тяжелей стоять малышки)
Перевёл на 12/12 1.10.2023
Растение очень хорошо развивается, ни каких сбоев в генетике не наблюдается😀
Сорт выводим сами.
Смотри мой профиль, у нас всегда есть что то интересное.
Не забудь поставить лайк❤️, если понравилась как прошла неделя
И читайте наш TELEGRAM: https://t.me/smail_seeds
#Smail_Seeds 😀
Likes
7
Share


@StickyFingah420
Follow
Día 73 desde su nacimiento y ya se ha dejado de abonar hace un par de días para obtener resultados más limpios de residuos.
El progreso está a la vista, flores muy densas que estaban doblando todas las ramas de esta planta por lo que tuve que agarrarla para ayudarlas a soportar el peso.
El nivel de tricomas es impresionante y desprende una fragancia dulce bastante agradables por toda la casa.
BUENOS HUMOS! 👽
Likes
87
Share

@squalino
Follow
📖 Chroniques de l'Oasis : La Marque Blanche
🐪 Chapitre 11 : Le Trésor de Cristal
Date : Mercredi 6 Mai 2026
Âge : J+77
Taille : 67 cm
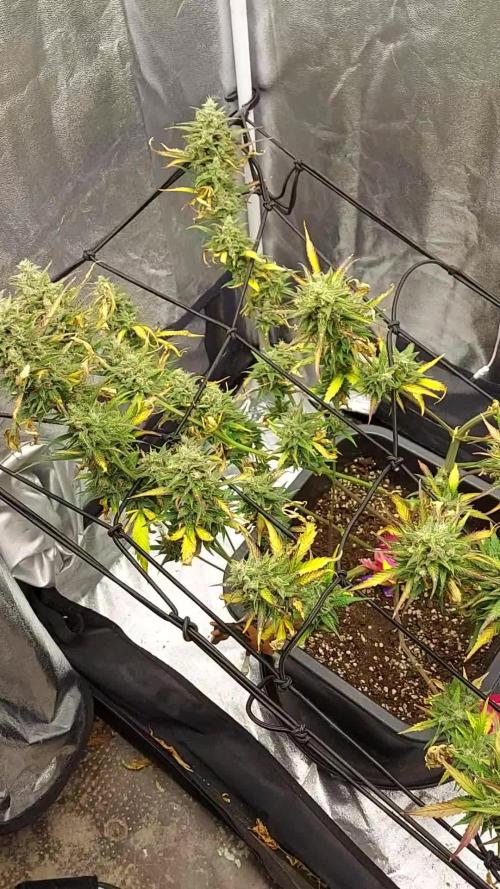
Le silence règne sur l'Oasis. La Sultane a cessé tout mouvement vers le ciel pour se consacrer entièrement à son couronnement. Ses têtes ont pris un volume spectaculaire, devenant des piliers de chair végétale qui semblent désormais trop lourds pour ses frêles épaules de reine.
En m'approchant, je scrute ses joyaux à la loupe : les trichomes, cette rosée céleste, sont encore majoritairement transparents, tels des diamants bruts.
Pourtant, ici et là, un léger voile laiteux commence à apparaître, signe que la magie opère et que l'élixir se concentre.
Elle se dénude de ses grandes feuilles, qui jaunissent et tombent comme des voiles inutiles, car toute sa force est maintenant dirigée vers ses sommets étincelants.
🏜️ Le Climat du Sanctuaire
Chaleur : 25°C le jour / 21°C la nuit.
Humidité : 50% (Le climat parfait pour la cristallisation).
Lumière : Intensité 75%, maintenue à 55 cm.
élixir de vie
n'a reçu encore que de l'eau 6,3 pour le moment quand le desert devenaient trop aride
Aujourd'hui, j'ai choisi la voie de la tempérance :
08/05
élixir de vie
dernier apport de 5 ml p-k 5-8 biotabs dans 1,5 litres d'eau PH 6,3
maintenant elle passe en mode rinçage pour 14 jours.
c'est bientôt la fin de l'aventure du nomade et de la sultane.
État :
Elle puise dans ses dernières réserves pour faire gonfler ses trésors, transformant le sacrifice de ses feuilles en volume floral.
🔬 L'Analyse
Volume Impérial :
Les sommets sont devenus massifs. On voit clairement sur les images que les fleurs s'agglutinent pour former de véritables massues de pistils et de résine.
La Robe de Diamant :
Bien que majoritairement transparents, les trichomes couvrent désormais chaque millimètre carré des fleurs. Cet aspect "givré" est la signature de la White Marker.
Sénescence Prononcée :
Le jaunissement est fort. La Sultane déplace tout son azote vers les têtes. C'est le moment où elle devient fragile visuellement, mais où son "trésor" devient le plus puissant.
Miroir de Soie :
Les pistils blancs sont encore très présents, ce qui confirme que le gonflement est toujours en cours. Elle n'a pas encore fini de construire son empire.
📜 L'Anecdote du Rif : Les Gardiens Invisibles de la Montagne
Au cœur du Rif, protéger les plantations contre les envahisseurs ailés et rampants sans produits chimiques était un art transmis de père en fils.
Le savoir ancestral :
Pour protéger les cultures des insectes, les tribus utilisaient le pouvoir des plantes compagnes et des alliés naturels.
Le Bouclier de Menthe et de Lavande :
Ils plantaient d'épaisses bordures de menthe sauvage et de lavande autour des parcelles. L'odeur puissante de ces plantes créait un "mur olfactif" qui désorientait les insectes ravageurs comme les pucerons ou les mouches blanches.
L'Épouvantail à Criquets :
Contre les insectes volants plus gros, ils accrochaient des éclats de miroirs ou des morceaux d'étain brillant aux branches des arbres environnants. Le reflet aléatoire du soleil effrayait les oiseaux et certains insectes migrateurs.
Les Gardiens du Sol :
Ils encourageaient la présence de crapauds et de lézards en laissant des tas de pierres creuses (les pierriers) à proximité. Ces petits prédateurs faisaient office de patrouilles nocturnes contre tout ce qui rampe.
Le Secret du Tabac
Sauvage : Parfois, ils faisaient bouillir du tabac de montagne et pulvérisaient cette eau amère sur le pourtour (jamais sur les fleurs !) pour repousser les plus téméraires.
Dans le Rif, on disait :
"Laisse la nature garder la nature, et elle te rendra le plus pur des miroirs.
Note du Nomade :
"Ses feuilles tombent comme les pages d'un livre déjà lu, mais ses fleurs écrivent une nouvelle légende de cristal. Le voyage touche à bientôt à sa fin."
à bientôt et un grand merci à vous tous

Likes
Comments
Share

@cdxxbuds
Follow
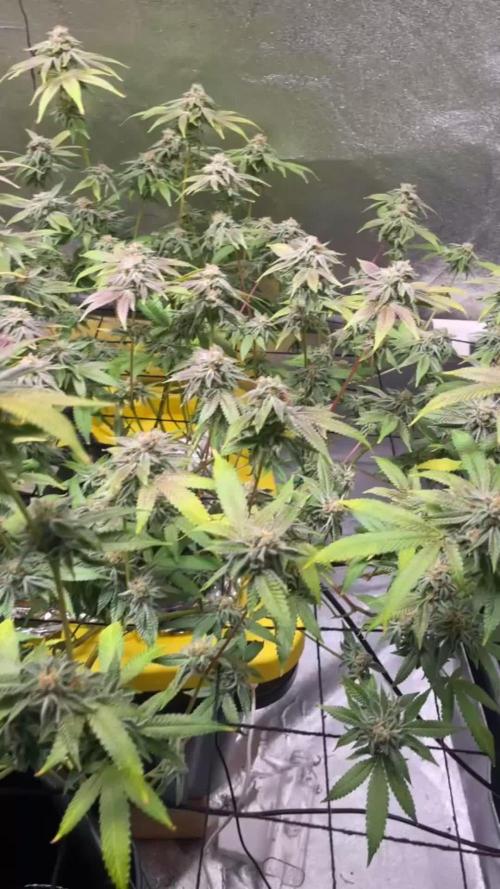
42/56 they iced the hell out snd the colors started showing a few days ago. Theh about to bulk up can't wait to see how they finish

Likes
7
Share

@420DeepGrow
Follow
📆 Semana 3
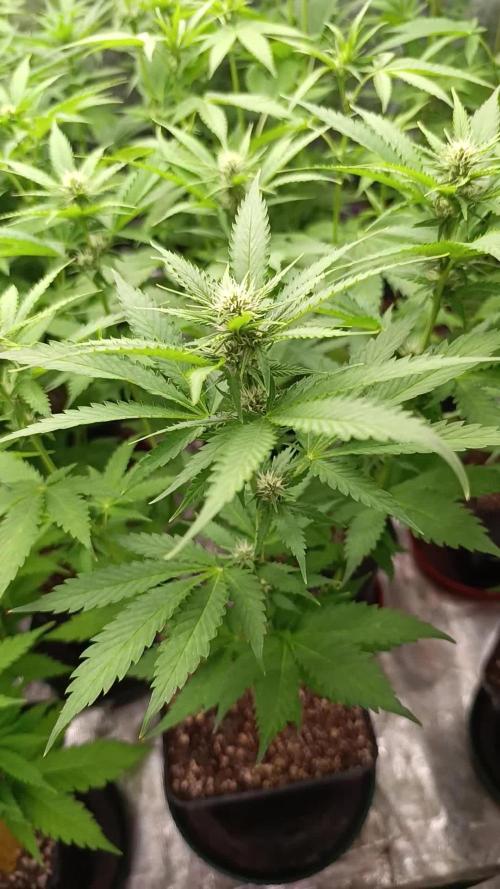
Las plantas continúan el stretch con gran vigor, ocupando rápidamente el espacio de cultivo y desarrollando una estructura muy uniforme. Las múltiples puntas generadas tras la poda apical reciben buena iluminación y comienzan a mostrar una floración cada vez más evidente.
La demanda de nutrientes sigue aumentando y las plantas están consumiendo con intensidad las hojas bajas de abanico, que amarillean progresivamente mientras la energía se dirige hacia el desarrollo de las flores.
⚡ EC: 1.8
💧 pH: 6.2 - 6.5
🌡️ Agua: 21°C
🌫️ Humedad: 50–55%
💡 Intensidad: 950–1050 PPFD
🔥 Nota de cultivo: El fuerte consumo de nutrientes y la buena distribución de las puntas indican una transición muy activa hacia la floración, preparando una estructura productiva para las próximas semanas.
Seguimos creciendo fuerte 💪!
Likes
10
Share


@TegridyCal
Follow
We have prepared the ground with Easy Boost following the indications on the quantity and using the official vessel found in the contest package. For germination we used Easy start but we put the germination cube directly in the ground because we do not like very much the pouring with the small and delicate seedling.
The baby was born little late but she go very good, see you next week.