The Grow Awards 2026 🏆 


Likes
Comments
Share
@JsIndoorGrow
Follow
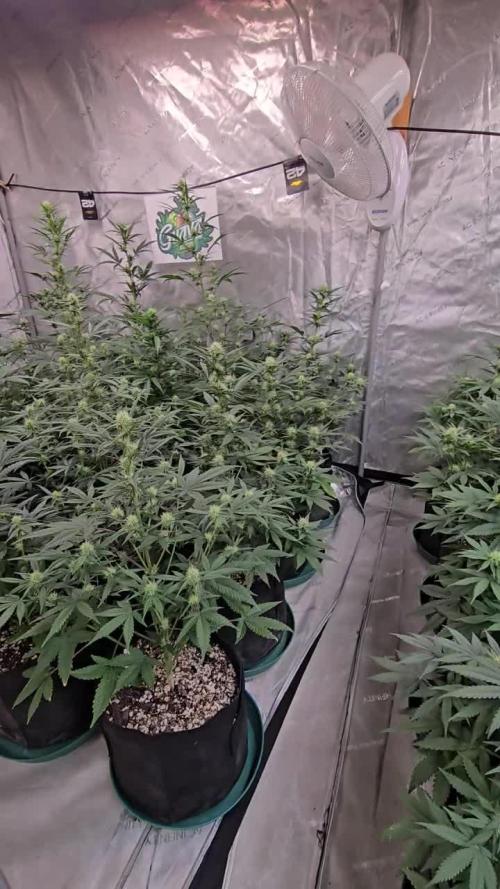
Since I'm playing catch up with documenting my first grow cycle, I'm going to combine weeks and just give updates. I mentioned in the last weekly comment about adding the wicking bases and how that can be potentially problematic. Well here's where I noticed the issue but mostly with the Orange Sherbet sativa. I started noticing changes in color and leaves that didn't look good to me. Fortunately, I have a couple of great friends who also grow and have been able to take advantage of their knowledge and experience along the way. I highly recommend doing this if you have friends who also grow. Anyway, I had one of my friends come over and it was determined that the issue was due mainly to overwatering. We decided that with the wicking bases in addition to the humidity level in the tent, that the plant was staying too wet. Catching this quickly and addressing it is huge with autos since they tend to be more delicate that regular plants (as I understand things anyway). To address the overwatering issue, I immediately stopped using the wicking bases and let the plants dry out for about a week. I did no watering at all for the week but kept the humidifier going. That really helped correct what was going on. I then decided that I was no longer going to use the wicking bases at all and only do top watering. You'll see as I move forward with documenting this grow cycle, that I changed my mind again on this once the plants went into flower. But hey, what do you expect, this was my first ever grow.

Likes
22
Share
@LegalGrowMyOwn
Follow
Today I spread eggshells and baking soda on the surface of the floor.
I watered until wastewater came out and then immediately measured the pH.
#1 drain ph 6.5
#2 drain ph 7
for both looking so sick, the pistils extremely large and resinous🤩 (Day 58)
The baking powder probably didn't do them any good.But they look very good and are covered in trichomes.Even the stems where the buds begin are covered with trichomes. (Day 60)
Watered 2500ml water and removed some dying leaves.(Day 62)


Likes
19
Share
@Paultemp
Follow
Hi all! 👊😊
This week i give 3L of water at 6.5ph !
Next week i will flush him with cold water..
I shop a little budz for try 😂
Not ready yet ahaha


Likes
22
Share
@GERGrowDesigns
Follow
Dear Growers ,
Welcome to Week 5 // Day 35-42from Narcos Seeds Kingping Kush .
Incase of Moving to a New Home . I Decided to skip 3-4 Weeks from every Diarie of the 12x12 Automatic Project . Everything should be Normal in the next Weeks .
Project Setup & Conditions:
• Brand/Manufacturer: Narcos Seeds
• Tent: 222cmx150cmx150cm
• Light: 2x 720 Watt Full Spectrum
• Humidity: 50%
• Soil: Narcos Organix Mix
• Nutrients: Narcos Products
• pH Value: 6
If you want Germinitation results like mine , check out Kannabia Seeds with my link [https://www.kannabia.com/de?ref=61966] and grab the germination device or the strains I used . Trust me – it’s worth it for sure !
Get another 20% Discount at all products using the code [GGD] at the Checkout .
Stay curious and keep up Growing —we look forward to welcoming you back for the next chapter soon!
Likes
15
Share
@DRO420
Follow
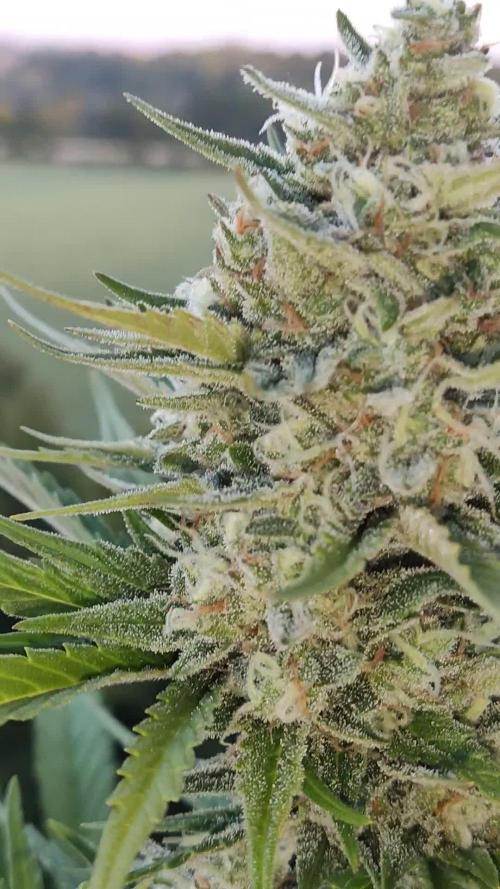
Coming into the final weeks of flower . Buds are fattening up and the hairs are changing color. Leaves are wilting and or changing color like they do in Fall. Looking very nice

Likes
12
Share
@w33dhawk
Follow
Tag 9 in der 2ten Woche und die wurzeln sprießen aus den jiffies. Hab die Mädchen direkt in die endtöpfe gesetzt (15 liter) Mills light mix, bin bis jetzt zufrieden mit allem


Likes
20
Share
@Excalibur
Follow
25th September 2018 -
Day 92 -
Buds looking good, decision made to flush from Weekend (T- 4 days)
Conditions are perfect.
Trichomes are looking impressive with some very dense buds.
Day 94 -
pH down added.
pH balanced water added
Day 96 -
Cold snap affecting her , and her roots. Heater added.
Fans removed
Day 97 -
Burn Evidence of the cold snap. Heater has helped.
***Flush begun***

Processing
Likes
3
Share
@Reaper
Follow
Start of week 3 flowering
i have to push this plant in a closet dring the 12h darkness because im still growing autos right now

Likes
7
Share
@Car1bGrow
Follow
First week went well, got two plants in coco coir and one in soil. One of the plants in potting soil came up a day after the other two but they’re doing fine
Likes
108
Share

Likes
37
Share
@420DeepGrow
Follow
La tercera semana ha ido bien, ya me respondió Biobizz y puedo usar toda su gama perfecta, a si que a partir de ahora irá todo mucho mejor.
Aparecen los primeros cogollines.
📅 Dia 22🔹 Continuo con el Low Stress hasta que dejen de crecer.
📅 Dia 23🔹Descanso ( no estoy en casa)
📅 Dia 24🔹Riego según la tabla de nutrientes, EC 1500 , PH 6.3 y un drenaje del 10%
Likes
10
Share
@HegauHillsFarmers_M11
Follow
Tag 56 - Ende der 8. Woche.
Die Blüten werden weiterhin dicker und nehmen langsam ihre Form an. In der nächsten Woche werde ich den Dünger nochmal anpassen und langsam aber sicher damit beginnen, die trichome zu kontrollieren um den Zeitpunkt für die Spülung nicht zu verpassen.
Wir beginnen nun mit der Blütewoche 6. Laut Hersteller dürfte die Pflanze noch etwa 2-3 Wochen brauchen, ich glaube das dürfte hinhauen.
An Tag 50 wurde die Pflanze gedüngt.
Nährstofflösung:
2 ml/l - B-52 Advanced Nutrients.
4 ml/l - pH Perfect Sensi Bloom Part A
4 ml/l - pH Perfect Sensi Bloom Part B
2 ml/l - Bud Candy Advanced Nutrients.
2 ml/l - Big Bud Advanced Nutrients.
Davon hat die Pflanze 1l an Tag 50 erhalten.

Likes
6
Share
@Discepolo
Follow
Last week, last round, last ride!
What a lovely journey till know.
I checked with my microscope the trichomes and are getting at right point cloudy.
My pistils are on that 70% mark I rate, and think that just got the timing right before I exit the apartment.
I also think that having a few days available I would have go on a little more.
Can't wait to harvest!!!😉
Likes
40
Share
@SubliminalSociety
Follow
Week 21 - It's a JUNGLE!
I'm back and OMG! She's so big! Not only tall.... but... ROUND!
I couldnt fit her into a picture, so did a video instead. Wow! She is really something!
My Gardena autmatic AI watering system is working wonders. Fed her some nutrients today but I'm not sure I want her to grow more.
The colas are taking shape, the buds are beginning to swell. Can't wait to taste these nugs

Likes
4
Share
@Chubbs
Follow
These girls are growing amazing. I did some defoliation and lollipopped them this week. Hopefully with more air flow at the canopy level and lollipopping, the tops and main colas can focus all the energy on growing some beautiful flowers. All in all Happy
Processing
Likes
15
Share
@GanjaFarmerGrow
Follow
The BEST plant From BIG SEEDBANK!!
Amazing genetics...
She is a heavy yielder...
Love the woody, fruity smell...
last week of feeding and then we go into flush...
fingers crossed she goes good until the end...🙏


Likes
4
Share
@Growstopher
Follow
6.6.25.
5th week of flower and not to much happening unless your a Smurf then you got a pound! Under performing and ready for next grow.