
Likes
Comments
Share


@PigBearMan
Follow
Hey there.
All photos and videos from flower day 27.
Plants are developing pretty good.
On flower day 26 (end of flower week 4) I started adding Green Sensation.
See you next week.


Likes
5
Share


@ChiloteAnonimo
Follow
- Día 1 de la segunda semana de flora con riego foliar de calmag
- Videos tomados día 2 de la segunda semana


Likes
1
Share


@CaliJ
Follow
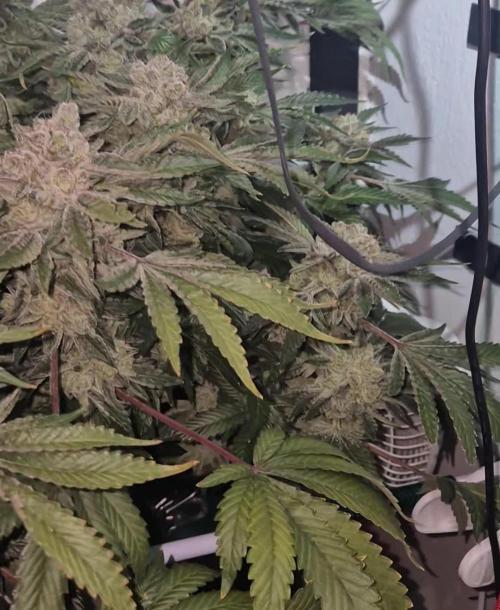
Day 50: Start of rinsing.
Day 54, the branches break under the weight of the heads, on day 56 it will be time to cut🍀
Processing
Likes
3
Share


@Therbalist
Follow
Thunderstorms for several days generally cloudy the rest of the time, sunshine on the horizon though!
Next week should be sunny hopefully! 🙏🙏🙏
Likes
6
Share


@MichaelMan
Follow
Switched to 24h light cycle for faster grow.
Added one 25€ 6500k 100w light for better veg. Took the warmer light bulbs away for lower electricity costs.
Started to low stress training few days ago. Thinking about defoliation.
Got the funny humidifier from my granny😆 It doesn’t work that well. Getting the right one soon.You can see it in the video.
I ordered some things: Co2 bag, larger textile pots, clip fan and 50L light soil mix.
I know that pots are getting tight for them and it seems that I have to buy larger pots from the local store bc shipping takes too long.

Likes
12
Share


Likes
11
Share


@Chubbs
Follow
420Fastbuds
FBT2309/Week 3
What up grow fam. Weekly update for these stunning girls. Up to this point they've been growing picture perfect . Not really doing anything special besides still feeding nutes every other watering 500ml. I'll double the feed this week taking it to 1000ml/1 liter per every other day. Not seeing any burn signs from introducing nutes so will keep that the same strength. All in all Happy Growing

Likes
82
Share


@DreamIT
Follow
💜🤜 Purple Punch OG by Sweet Seed 🤛💜
🤜22.8 new fertilizer tomorrow, I hope it will recover quickly
🤜23.8 Very clear, the flush has done its job, today we start with the new line of fertilizers 🤘🤘
🤜24.8 🤘🤘
🤜25.8 all great, it's getting longer, yeah!
🤜26.8 now ready to bloom 🤘🦄
🤜27.8 It shouldn't be long before it blooms. She seems to have recovered well from the flush and fertilizer change, I hope she starts soon
🤜28.8
__________________________________________
❓ Are you new to the world of the cultivation and don't know where to safely buy your seeds?
😮From SweetSeeds you can find award-winning, sweet, fast, fragrant, beautiful, and delicious genetics !!!
✅http: //bit.ly/SweetSeeds_
__________________________________________
👀 Are you looking for a good lamp to start with? 👀
🌞Viparspectra has something more than the others, take a look at their site.
⏩ Use "GDVIP" for an extra discount or "ViparDreamIT" for an extra 5 %% discount
👀 Search for it on Amazon
✅Amazon US: https://amzn.to/30xSTVq
✅Amazon Canada: https://amzn.to/38udUVe
✅Viparspectra UE: bit.ly/ViparspectraUE
👀 Watch my ViparSpectra XS1000 unboxing on YouTube, leave a like and write to the channel 🦄
✅http://bit.ly/UnboxingViparSpectraDreamIT
__________________________________________
📷🥇 Follow the best photos on Instagram 🥇📷
https://www.instagram.com/dreamit420/
🔻🔻Leave a comment with your opinion if you pass by here🔻🔻
🤟🦄💚 Thank you and enjoy the growth 💚🦄🤟

Likes
100
Share


@ILoVeThiSpLaNt
Follow
Eccola la Milk Monkey. Non riuscivo a capirla ma parlando con un amico e mostrandogli le foto e l'odore che ha quando la tocco(crema, vaniglia comunque dolce dolce) mi ha detto che ho trovato fenotipo Cookies&Cream
Le altre piante stanno abbastanza bene. Ultima settimana di fertilizzazione e poi due settimane di sola acqua.
Ci vediamo settimana prossima per altre foto 🖐️ 🤞


Likes
26
Share


@HowtoBubatz
Follow
This week, my cannabis plant is showing some signs of thirst. Unfortunately, I had to cut back on watering due to a small infestation of fungus gnats.
To combat the problem, I decided to apply nematodes. Hopefully, they will take care of the larvae in the soil.
Despite the reduced watering, the plant still looks strong and healthy overall. The buds are continuing to develop nicely.🌱🌱
I'm really curious to see how things progress in the coming weeks, especially now that the pest issue is being addressed.💚
Be excited for the coming weeks 💚🌱🌱
Likes
294
Share


@StarLorr
Follow
Welcome to my Ðivine ØĠ Ķush diary.
In this diary:
Seeds: sponsored by Ðivine Șeeds
Media: Promix HP
Nutrients: Advanced Nutrients, Diablo Nutrients, Gaia Green Power Bloom.
Light and Weather: Şun☀️and Mother Earth.🌎
___________________________
Feeding:
Wed 14Aug: 8L water not pH'd
Thu 15Aug: 10L water not pH'd
Fri 16Aug: 9L water not pH'd
Sat 17Aug: 10L water not pH'd
Sun 18Aug: 6L water not pH'd
Mon 19Aug: 2L water not pH'd
___________________________
*please note that most watering are from top now since topping with Gaia Green Power Bloom*
______________________________
Ķush Ķush got more defoliation treatment who required the stepladder last Friday Aug16th😅😂🤣mostly fan leaves and tiny branches.
_______________________________
Top dressing her with Gaia Green Power Bloom was a Sage move she seems to like it, haven't fed her with liquid nutrients this past week, was kinda concerned about over feeding her😬but will do later on this week.
______________________________
Thanks for stopping by, likes and comments are appreciated!👊🏻😎
Keep on growin!
Keep on tokin!!!
😙💨💨💨💨💨


Likes
3
Share


@GrowBro87
Follow
Ja das spülen ist in vollem Gange und zeigt bei der ersten Pflanze bereits Wirkung. Trichome sind überwiegend milchig, warte jedoch noch etwas ab und checke täglich. Die 2 Pflanze hängt der ersten seit Beginn an hinterher... ich denke diese wird etwa eine Woche länger brauchen als die 1 Pflanze. Schade eigentlich, da ich beide gemeinsam im Zelt trocknen wollte.


Likes
1
Share


@jojopfoh
Follow
they are all growing great and starting to get taller. a very robust plant and very easy to grow and maintain. they are getiing 1/2 the recommeneded dose of nutrients 3 times a week
Likes
53
Share


@Schnabeldino
Follow
end week 8.
------------
this week only water
from all Gorillas the buds look very sticky and frosty. when I open the tent, it smells very strong.
The 1 and 2 smelled pretty strong, chemically, the 3. more like citrus.
I will harvest
Gorilla 1 20.10.
Gorilla 2 22.10
Gorilla 3 23.10
I made videos and pictures of the trichomes.


Likes
14
Share


@GoldenWeedGrower
Follow
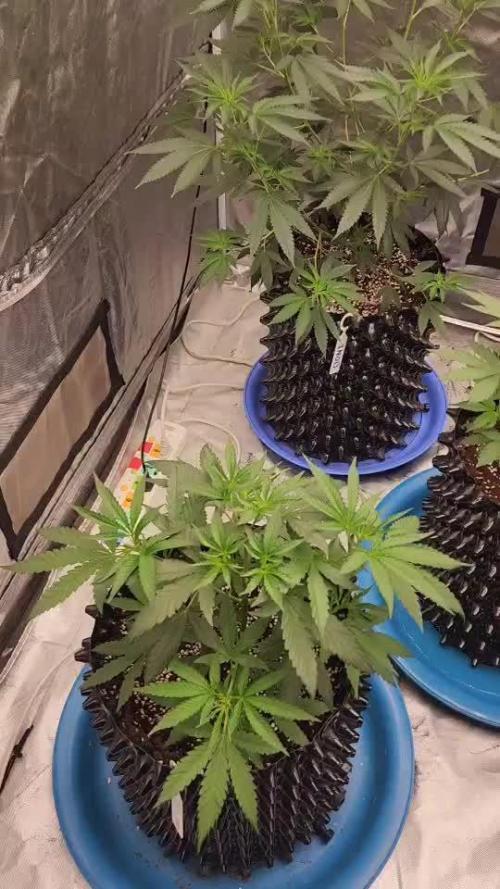
D36/V32 - 06/05/23 - SCROG net added. Some LST
D37/V33 - 07/05/23 - LST on SCROG
D38/V34 - 08/05/23 - LST on SCROG
D39/V35 - 09/05/23 - LST on SCROG
D40/V36 - 10/05/23 - LST on SCROG
D41/V37 - 11/05/23 - 👉 Water Change - Pure water for 2 days she's going to bloom
D42/V38 - 12/05/23 - 👉 second day of flush
Likes
Comments
Share


@Dankmark420
Follow
We cut her early due to a block off in the autopot system.. but she was frosty as a mofo for being cut way to early and the taste was surprisingly very sweet with a piney/spicy kind off aroma and taste
