
Likes
Comments
Share


@420DeepGrow
Follow
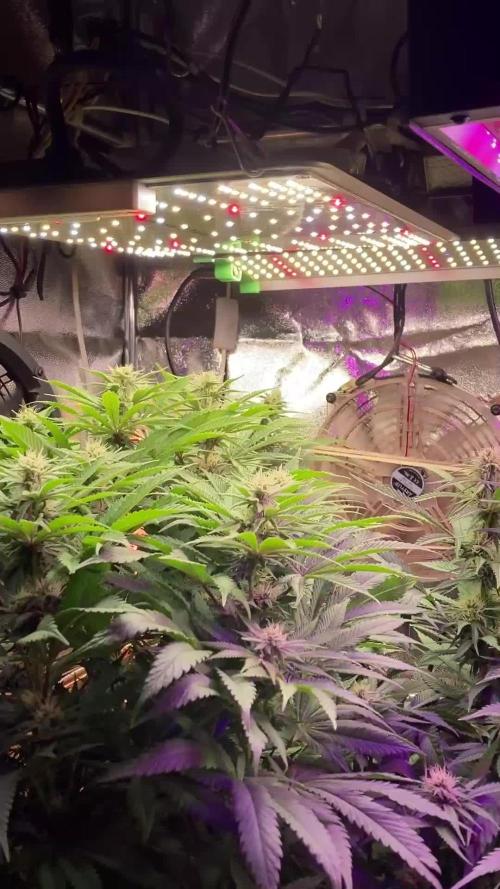
¡Estoy muy contento con los resultados de la cosecha de mi Hulkberry! Esta cepa de Royal Queen Seeds ha sido increíblemente resistente y productiva. Utilicé XpertNutrients durante todo el ciclo de cultivo y los resultados fueron notables. Desde la fase de vegetación hasta la floración, las plantas respondieron perfectamente a los nutrientes, mostrando un crecimiento robusto y saludable.
Los cogollos están densos, resinosos y con un aroma increíblemente afrutado, con toques de pino y tierra. La calidad de la cosecha ha superado mis expectativas, tanto en cantidad como en calidad. A lo largo del cultivo, XpertNutrients proporcionó una nutrición equilibrada, lo que permitió a la Hulkberry desarrollar su máximo potencial sin signos de deficiencias o excesos de nutrientes.
En resumen, si buscas una cepa fácil de manejar y con grandes rendimientos, la Hulkberry de Royal Queen Seeds es una excelente opción, y combinada con XpertNutrients, los resultados serán realmente impresionantes. ¡Totalmente recomenda.

Likes
10
Share


@valiotoro
Follow
Hello everyone 😎
Week 3 of flower for the Purple Lemonade auto from Fast Buds 💥
for the nutrient 4ml/L terra bloom & 1ml/L power buds from Plagron
Next week i will introduce Green
sensation💥
Spider Farmer SE-7000 70%
Have a nice day 😋

Processing
Likes
124
Share


@CRiSPrGrow
Follow
Auto cous kush is just coming onto it's own, making plant matter and working overtime in that slightly cold medium. I added aloe as a rooting agent, tried to ph it down to 6.5 using lemon juice (not doing that again lol?) and ended up catching the start of pH shenanigans so i started applying an amino acid spray onto the soil (not the plant!) . using my kelp extract concentrate at 1ml a L in my 250ml spray which means a 1/4ml , that gets sprayed once onto the plant. gonna top off the pots next watering. in soil ppm went from 360 to 420 , vpd went from 0.8 to 1.1.

Likes
5
Share


@Bamz84
Follow
No Complaints No Issues Or Problems In The Garden...just being watered PH 6.0 and cal mag for now☺️

Likes
75
Share


@Pungolian
Follow
Well post tropical storm Ophilia report. Made it through with only minor damage. Thank goodness! I had to laeve town for a wedding in NC over the weekend and realized i might not be able to get back in time to protect the girls. They did ok. Drinking a lot less water now that it has cooled down. From 4 gals/ day back to 2 gal / day! Ill update with some better pics later, happy growing all!


Likes
27
Share


@RDWCGrowing
Follow
6/13/2023
Week 10- Day 1 of Flower (Day 131 overall) (Day 70 of Flower)
Auto Pilot Day 6.. Checked the Trichomes and the bud density and both are looking good.. Definitely needs a little more time for the Trichomes to be where I like, so based on my check I think we are still looking right around the end of the competition 22June to be done and ready for harvest. I do like that the fade is coming in the leaves nicely, so my chart I think is dropping off the Nitrogen exactly like it is supposed to.
6/14/2023
Week 10- Day 2 of Flower (Day 132 overall)
Auto Pilot Day 7.. Decided I would take some contrasting pics today with my light up to 100 and my light all the way on Dim. I hope you enjoy the pics.
6/15/2023
Week 10- Day 3 of Flower (Day 133 overall)
Auto Pilot Day 8.. Decided to take a look at the Trichome's today and Check to see where they are at and honestly if I might ho ahead and start my flush tomorrow and harvest on Sunday.
6/16/2023
Week 10- Day 4 of Flower (Day 134 overall) (Day 74 of Flower)
Today I pulled an Armageddon however instead of darkness they are going to get 48 hours of light. The reason why they are going to get light instead of dark is when I was taking out the netting a lot of the buds were so heavy they fell over and exposed some areas I really want to get some light to... so 48 hours of light at 40% while I watch what should be a beautiful final fade as the plant eats up the last Nutes. If anything goes wrong I can abort take the photos and cut so will pay really close attention to how it is looking over the next 48 hours.
Added 30 Gallons of PH only Water.
Reduced Lighting to 40% removed program time off. 48 hours of light.
6/17/2023
Week 10- Day 5 of Flower (Day 135 overall) (Day 75 of Flower)
I had someone tell me that a few growers had done as I did and Gone Armageddon on the plants. Filling it with PH only and said the plants did not respond well and they were taken out of the comp at the very end because they felt like the pictures just wouldn't come out right. Even though I did go Armageddon, The PPM is at 353PPM with the residue of what was left in the buckets after draining as well as what I am getting from the TAP so I think they are doing good but I am checking them every few hours to see how they seem to be doing and I think they are doing good still and are on track.
I also started prepping the area for the pics tomorrow
T-24 Hours until Chop
6/18/2023
Week 10- Day 6 of Flower (Day 136 overall) (Day 76 of Flower) (Harvest Day)
What a day.. what a day.. what a day.. as I was setting up and trying to figure out how I was going to get my pics #3 stems started breaking, it fell over and other stems broke.. So no really stunning competition photo for her, she had such a nice purple fade.. #2 stayed up in the Tent so that is the one I had to go with to submit for the contest. I wet trimmed them as they went into the tent and they took up three rows hanging in tent. I also decided I wanted to try some so I put a little in the freeze dryer for a 48 hour smoke test.. I will weigh it and add that to my total weight for the plants when it is all done.

Likes
97
Share


@AsNoriu
Follow
Day 73. Girls are going great and mini shock is past , both look happier everyday, leaves stretch up and I am happy how it all went.
They can breath a lot better now, but still will do light defoliation session at begining of next week.
No feed for two weeks, transplantation should give them good boost, I put a lot of Worm Casting as extras ...
Happy Growing !!!

Processing
Likes
2
Share


Likes
16
Share


@Prototype0181
Follow
The purple punch x dos-si-dos are keepers for sure, they got such amazing tropical smell:)
Only downside is that i have 1 pheno that is a bit ahead of her sisters:(
The Diesel dipped coockies packed some size last week:) And the nuggs damn they are so dense it Just doesn't make sense;)
The glookies are still stacking💪 quite a good yielding strain im asuming. Nice Lemon smell on these


Processing
Likes
57
Share


@LockDownGrow
Follow
ok so everything has gone fantastic , no nutrient burns at all , and have been slowly creeping up the base nutrients , i have stopped the cal mag and now adding house and gardens bud XL at full strength these girls are now in full swing of flower and i bought a new ph stick this week ,
i have found when PHing the feed bucket that its best too have air stones in the bucket , add all nuts and then ph but do not use the feed that day as if you check the next day the ph is off again so i left it 24 hours after i add more ph down , and it seems too make the measurements alot easier and stable , i have bent down the main stems " without damaging them onto my netting too A keep the canopy all the same high so my lighting is covering all plants at the same distance and also it allowed the side stems too reach up too ,
i also was sponsored another new led light by kingbo this week so have added another 600watt led too the grow , so now have two 600's and one 900watt , and temps are still fine sitting at 24c lights on and 19-20 off , so am pleased with that , this lady is by far the bushyist plant with the most branches she also didn't stretch much and is packed with bud sites ,
Processing
Likes
51
Share


@Silverback_Guerilla
Follow
11/1:
I started a pair of each of the Wicked Stix beans, but had a couple of failures and ended up planting a Berry Bomb and a GG4 as replacements.
Sucrose Overdose (aka "Sugah") seeds are derived from a legendary InHouse Sugar Cane plant. They are F2's, selfed from possibly the frostiest cannabis plant on earth..so I'm pretty anxious to see how they, and her hybrids, do in my garden.
Muscadine Wine seeds are derived from a strategic cross between a delicious InHouse Black Cherry Punch and the aforementioned, legendary Sugar Cane plant.
Platonium seeds are derived from a strategic cross between a really gnarly InHouse Platinum Jelly and the aforementioned, legendary Sugar Cane plant.
Sucrose Breath / aka "Sugah Bref" seeds are derived from a strategic cross between a spectacular InHouse Velvet Breath and the aforementioned, legendary Sugar Cane plant.
SPECIAL THANKS go to Wicked_Stix for this incredible opportunity to grow real 🔥FIYAH🔥 🙌!!!
11/3:
Seeing sudden signs of an N deficiency on a Sucrose Overdose and a few other seedlings in the garden. Fed them for the first time and started foliar feeding with Microlife Super seaweed.


Likes
18
Share


@BufoAlvarez
Follow
Still nute burn on new growth even though I'm not feeding them at all. I just got a new water filter and thinking about a distiller. Previously was just letting the chlorine evap off by letting the water sit over time. Still havent tested my tap water yet but i assume its bad b/c i can feel that it is hard water for sure. Just rolling with the punches for now. Got my gf to take a decent pic of the most mature plant this week. It is almost ready i believe.


Likes
57
Share

@Silverback_Guerilla
Follow
2/8 - 2/14:
Still have the BJ's and GG's on plain water with Liquidsoil. I expect their last night alive will be next Friday.

Likes
27
Share

@deFharo
Follow
Bienvenidos cultivadores de marihuana! 🖐️ 👨🌾
Tercera semana de floración concluida con éxito! 😍
Esta planta faraónica avanza hacia su gloria, la exhuberante masa foliar se mantiene, los tricomas invaden el entorno, el consumo de agua es brutal, los inmaculados brotes florales tienen ahora todo el protagonismo... nada puede salir mal! 🤠
Esta semana he hecho tres riegos lentos y profundos, con poca concentración EC, para preparar a la planta para el gran juego de flor, donde subiré un poco las dosis de Bio Fertilizantes... la planta me hablará y yo contento y servil haré todo lo que me mande. 😏
😁 HASTA LA PRÓXIMA. SALUD Y SALUDOS PARA TODOS!
================================
Info de la cepa Tutankhamon x Cookies USA de Pyramid Seeds: https://www.pyramidseeds.com/es/gold-line-by-pyramid-seeds/219-tutankhamon-x-cookies-usa.html
"La unión de dos leyendas en una semilla..." Pyramid Seeds.
- Genética: Sativa 60%, Índica 40%
- Tiempo de Floración: 60-65 días
- Rendimiento en interior: 500 g/m²
- THC: 27%
- Aromas: Crema, Fruta, Terroso, Cítrico
================================


Likes
12
Share


@Aleks555
Follow
Eternity Grow Cup 2025 – Plagron & Zamnesia
Runtz by Zamnesia Seeds – 51 days from seed and 22 days into flowering. 🌱
Our girl is growing beautifully! One of the colas shot up around 20 cm taller than the rest, so we had to bend it down. Thanks to LST and careful pruning of branches and leaves, she’s taken on a really interesting shape. We’re planning another round of leaf defoliation soon to give her even more space to thrive. 🌿
She’s loving the Plagron nutrients, and it really shows – she looks absolutely fantastic! 🙌💚