
Likes
Comments
Share


@EZgrower
Follow
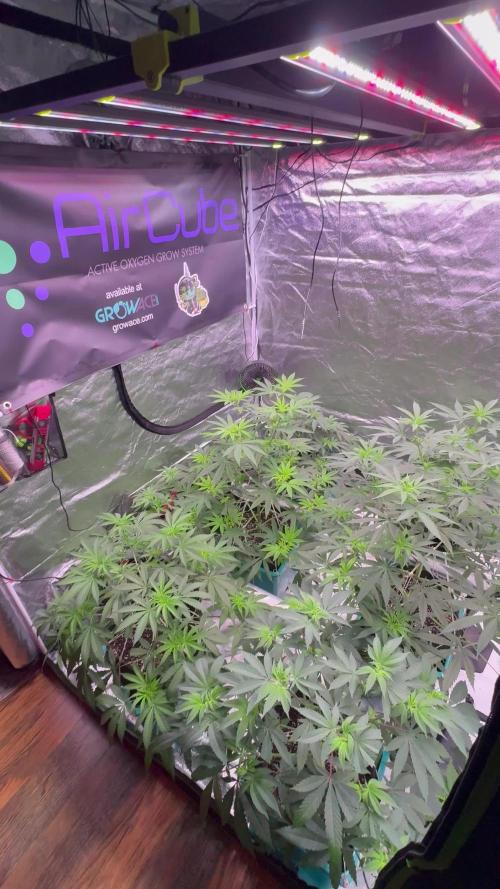
day 50 - everything going OK. im using only water right now.
day 52 - today I was in the local Grover's store where I was given a trial package of supplements 10 grams of powder feeding PK Booster. so today will be the first day of irrigation using PK Booster. dosage is 0.25 g per 1 liter - total ppm 140. (pure water ppm is 70)
day 54 - another defoliation

Likes
36
Share


@Salokin
Follow
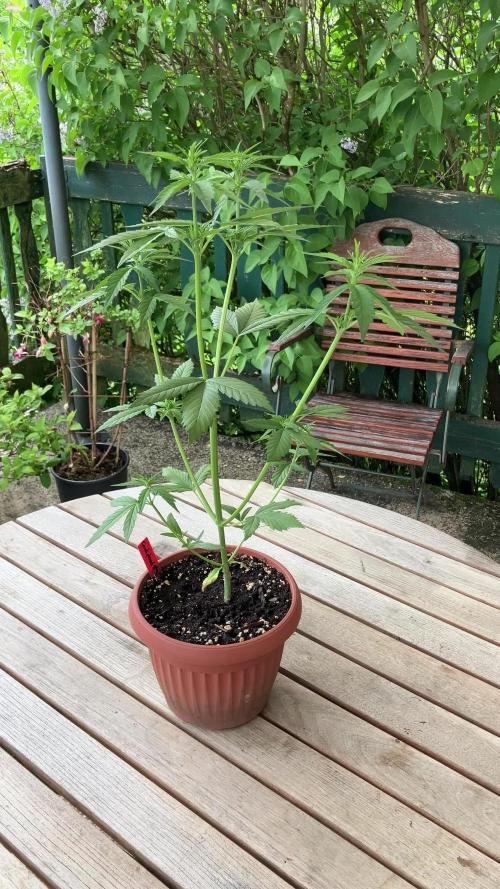
Love Glookies, Glookies is loving the ScrOG ;) super vigorous plant, that handled and repaired more than a few broken branches amazingly. The pheno is awesome, with buds being light green with a ton of purple hues in them. A powerhouse that I can highly recommend. Took a bunch of clones so that I can grow her again right away. She is a stretcher so beware and factor that in when growing her.

Likes
24
Share


Likes
Comments
Share


@TolaMcFly
Follow
Las plantas están en plena floración , con un leve amarillamiento en la mayoría de las hojas , creo que es exeso de intensidad lumínica o el ultravioleta debe estar afectando , en fin , el crecimiento no se ha visto comprometido y las plantas están comenzando a emanar un olor fuerte dulce , muy dulce con toques de golosina de manzana a mi parecer, vigor increíble de la cepa desde la germinación hasta ahora.
Likes
6
Share


@The_Doctor_Green
Follow
Hola a todos!!!😃😃😃.
Al fin llego el día tan esperado y odiado a la vez😅😅😅. El dia del corte, a esta strawberry gorilla auto se hizo el día n°84.
Excelente planta, fácil cultivo, bastante productiva, con un aroma y olor intenso..ese olor cítrico es para destacar.

Likes
7
Share


@Jays_Not_Here_Man
Follow
Fattening and Stacking! 😍Ladies are doing great, no pests, no extreme weather. Noticed a slight potassium deficiency in #2, will correct at next feed. Only about two weeks or so left! 🇨🇦❤️🌱😎💨
Likes
8
Share


@Mr_nugs_lover_David
Follow
Very good journey to me, she has responded very well to the lst training, providing me beautiful colas, enough for me to have nice clean organic nuggets to smoke. I would definitely would run this Ak420 by seedstockers again, the sweetest phenotype was the number #2 which you can take a look at here in my page!
Likes
58
Share


@GreenHouseLab
Follow
These are going to be some pretty in a month from now. The tallest is at approx 6” from the light at approx 380w so we’ll see so far no sign of light or heat stress.
Likes
5
Share


@Sorrnaparszarei
Follow
Whats is wrong with my plants?
I don't know
If you know please advise
Likes
21
Share


@MG2009
Follow
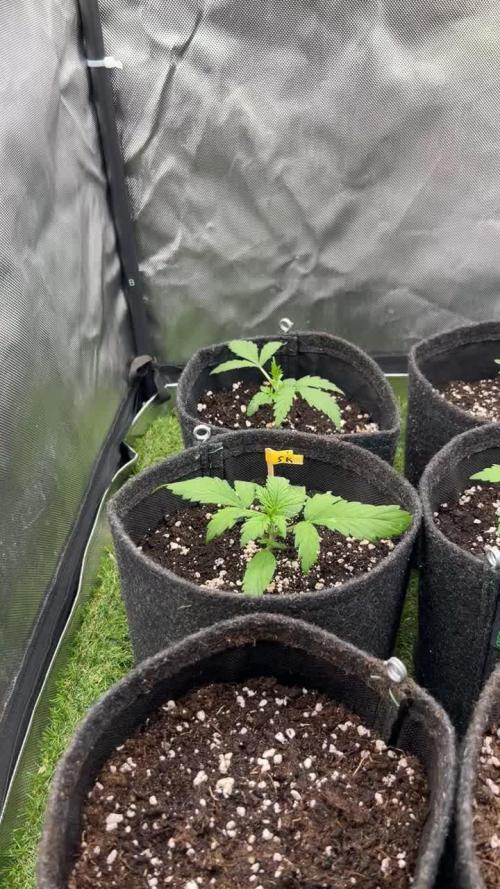
01/27/2021
Flowering going well
Flowering #2,#3,#6 #6 is a week ahead of#2,#3 will put others in on week 4 for a staggered harvesting
01/30/2022
watered with fungal tea and some aloe mixed in for amino acids and other goodness. Well see how she progresses in 4 days
Also working on some banana peel tea to give a boost of potassium if I do next week it should be available for week 6-7.
Ps.
Fuzzy Mellon (bag seed male)
I will pollinate one lucky branch on #6 as she is my favorite. But number 3(tall and lanky one) will get pollination of one branch as well.
I can't wait to see how they recombine with fuzzy melon smell mixed with burnt rubber and model glue and pine.
#2 no pollination (smaller one) #5 (bonsai) and #8 are males. So 3 female out of 8 seeds. Going to make some feminized seeds next time,so I'll have plenty of female's for a staggard harvest.
Likes
15
Share


@Nookandplant42o
Follow
"difficult week of change, mess more know when something says not to give up and you persist, if it is a dream something real go deep confident.
I set up the tent, even though the space was small, I didn’t give up until the end, with these, I don’t know if from now on I will continue this beautiful work, things became difficult. More in the meantime 😁 let's go for another week.
They are doing well, the best of what I imagined is a great genetics that has been dealing as a veteran, great strong smell, wide and thin leaves already creating the famous, THC terpenes, a robust plant.
I hope it is pleasing the community and whoever visits I always thank you for your time, thank you for visiting even for a moment.
Likes
1
Share

@Ninjabuds
Follow
BeLeaf is having a massive 50% OFF sale on all seeds across our entire website — starting today!
Whether you're stocking up for the season or trying something new, this is the perfect time to grab our premium genetics at an unbeatable price. Use code Hello2026 at checkout!
✔️ 50% OFF all seeds
✔️ Limited-time sale
✔️ Available while supplies last
✔️ Fast, discreet shipping
If you’ve been waiting for the right moment, this is it.
Visit our shop and take advantage of the sale before it ends:
🌿 Shop Now: www.boomfiya.com

Likes
4
Share


@NikoMew
Follow
Time to christen my brand new grow setup! I have only ever grown outdoors before (316g last year, for those wondering), so I’m excited about the possibilities of a controlled environment. I’ll be trying to tickle as much as I can out of this setup. First time doing a public diary too! I’ll be starting out with an easy (and cheap!) strain from my beloved RQS. But don’t you worry! I’ll be trying some different strains for sure, I’ve got my eye on some MSNL ones once I feel more confident. I started Germination with the good ol’ cup of water technique, my favourite since it’s easy and has never failed me. They all popped and were planted on the 5th. Wish me Luck!
Likes
7
Share


@Cthoff
Follow
Alright gents, it’s the 2 week homestretch!!!
Gonna start flushing with RO water and that’s it. Want to get rid of all the nutes I’ve been feeding for that nice smooth smoke.
pH of 6.2-6.4......temperature usually 72-76 F on the water.
I only have be defoliating the bright yellow/white leaves.
Today was my last feeding with nutes and I’m excited to see development without nutes.
Really happy so far with my first grow. Spent so much time on YouTube, reading articles, and scrolling through so many friggin forums.

Likes
27
Share


@ButterfliesLittleFarm
Follow
Hello Diary.
The fifth week of flowering is over, there is a real jungle on the “farm”, the two Haze Berries have grown quite large, especially for my box, but I think they are comfortable and nice together. 😀
It turned out to me that three plants were ideal for that space.👌
Haze Berries look really beautiful, the flowers are big, they look healthy, and they smell like forest fruits. The sweet-fruity scent overwhelms me as soon as I open the box. 😋
Haze Berry and Fat Banana who are on the “farm” have a fruity scent, although I have to say that Fat Banana still smells stronger. 😉
The flowers are not so hard and compact but there are plenty of them, so this will be one good harvest.🙏
Yellow spots have appeared on some leaves, it doesn't look worrying, although the end is in sight, I think they will stay a little longer on the farm than their roommate Fat Banana.
As we approached the end, I stopped adding nutrients and watered only with water to which I only regulated p.H. at 6.4. In my case, it's a reduction because my house water is around 7.5 - 8.1 p.H, so I use Plagron's Lemon Kick for the descent, which does a good job.👍
Here's what the week looked like.
15/11/2020 - Day 52.
Watering. Only water without any nutrients with regulated p.H. at 6.4
Temp / Humidity on the farm - 25.5 degrees and 47% humidity.
18/11/2020 - Day 55.
Watering. Procedure as three days earlier.
Temp / Humidity on the farm - 25.2 degrees and 48% humidity.
19/11/2020 - Day 56.
Photographing plants. As always, on the last day of the current week I am taking photos of “my little farm”. 😍
That’s it for this week, I think Fat Banana will be leaving the farm soon so Haze Berry will have a little more room. Thanks to everyone who takes a look at the diary and I hope that this information will be useful to someone. See you soon. 🙏


Likes
2
Share


@Monks_Garden
Follow
It down half the closet sherbet autos half left got about 2-3 weeks on them. Any questions feel free to ask n comment 🤙
Likes
22
Share


@CanarianGrow92
Follow
Another week for the persian pie 😁 so far so good, only 2 and half weeks left, we gave some candy and for the rest only water! Hopefully things continue to go good! She showed a lot of thc so I'm sure it's going to be a strong smoke
Likes
77
Share


@biggreens420
Follow
This girl is doing well bushing up nicely after fimming gone a bit pale so hit her with the Shogun nutes now she's settled put a video up of feed one of ec and one of pH when using Shogun i don't do it that often as it's always roughly the same just when n flower I'll switch the calmag and silicon for a pk and a boost max it goes is 2.2 ec her side branches are coming on well hoping the feed sort her colour out other than hat she seems happy not slow drinking well nice chunky stems will get some better pics when possible thanks for reading happy growing guys
Likes
3
Share


At this point of the process, you just sit there and observe how the plant gets fatter and fatter. The only thing you have to do is give her food, take care of her and that's it. Harvest is coming
Sólo queda mirar, alimentarla y cuidarla básicamente. Los cogollos sólo se dedican a crecer.

Likes
3
Share

@birdmountain
Follow
Die Candyland ist wahrliche eine wüchsige Sativa mit mittlerweile 52 cm Höhe, obwohl sie bereits einmalig getopped wurde. Ihre Internodienabstände sind allerdings auch sehr groß. Da wird mehrmaliges Topping und vielleicht auch HST angesagt sein. Freue mich darauf sie nächste Woche nach den Eisheiligen in den endgültigen Topf verpflanzen zu können.
