


Likes
Comments
Share


@CalGonJim
Follow
3/3 MONDAY 12 am. They are doing great, the supplemental lights are helping. they cost about 60 for the AC Infinity germination kit. I think the 2 lights are enough so it’s cheaper to get another Germination setup with the lights for my 2.8x2.8 tents. 3pm they all took quite a bit of water. feeding into the bottom of the container is very beneficial to the plants. Wish I would’ve known about that sooner I made a video of how I do it.
3/4 4am looking good. 130pm
3/7 4am looking great, new way of watering works better, dont need to water every day now.
1pm give them all water did the heavy watering. They shouldn’t need water tomorrow not until Sunday. They are looking good. I raised the secondary light up a couple of inches. She was causing too much growth lower down in the canopy. The AC Infiniti lights are incredibly powerful at 15 W two of those are more than enough. I’m gonna get two more sets of them for each tent.
4pm Witches Wedding needed work she had twice the nodes I originally thought, so I topped her down to 4 colas, they are very tight internal spacing. She is in with the Trailer Park grow now with a Mix Pack Auto that didn't flower or I made a mistake. If I accidentally got Fas Bud photos instead of Autos it is still like winning the lottery!!!!
3/8 230am I topped her twice and did WAY more cutting back but NO problems, she's looking great. 130pm no water today. 👍👍
3/9 Withces Wedding is in Tent 4 veging. They are doing great. Raised the Aux lighting up a few inches it was causing huge bud formation in the wrong place. Absolutely amazed at how well the little AC Infnity nursery light works, it comes on gentle not all at once. I will have to buy the whole Germination Kit for the light to do this setup in the other 2 grow tents now!!! EVERYTHING HAS TO MATCH!!!!! its not just for cool looks so my Tents look like Star Wars robots if I have to move the plants even a little bit of a difference in lighting can flip them to males and also to be consistent to prevent spills and stupid accidents .


Likes
Comments
Share

@BudBeat
Follow
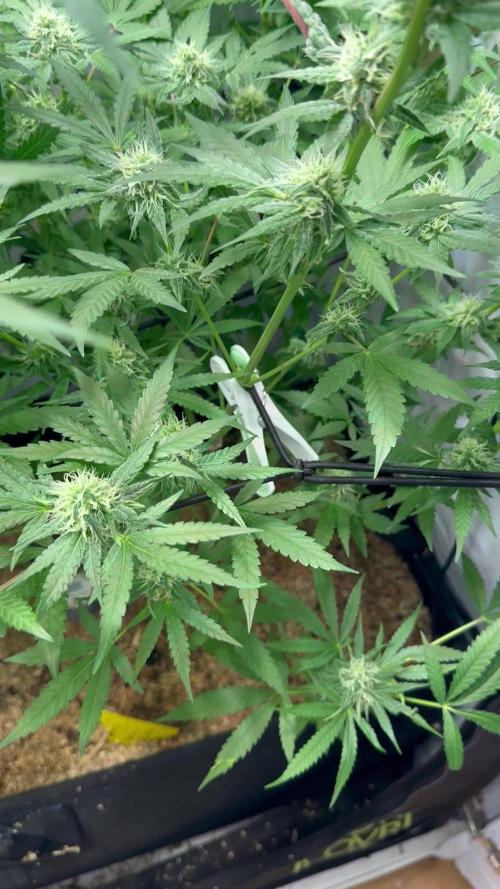
Die Buds werden immer größer und legen enorm an Gewicht zu. Die Mimosa hat keine Probleme diese auch zu halten und steht stramm im Zelt. Ich bin begeistert wie sie ihrem Reifepunkt immer näher kommt. Sie wird von Tag zu Tag immer intensiver vom Geruch und wenn man sie an den Zuckerblättern berührt, ist ein sehr saurer zitrischer Duft wahrnehmbar. Ich liebe diesen Duft und hoffe ihn mit in die Ernte zu nehmen.

Likes
26
Share


@pifflestikkz
Follow
Day 17
17/07/24 Wednesday
De-chlorinated tap water pH 6 with calmag 5ml -5L.
Very humid week, noticed a green turning colour on top of soils where the humidity has been far to high.
I have installed door netting and recently left open all day and night now so they can condition over night in colder temps.
All are doing well, one overdose slightly behind and looking ABIT swifted. But she'll come around 💪💚
Day 19
19/07/24 Friday
Lite Feed today, 250ml each pot small run off.
Seeing excellent start to these babies. Let's get it 👌💚
Day 21
21/07/24 Sunday
De-chlorinated tap water pH 6 with calmag 5ml to 5L.
Watering in 1L each day from now.
Updated video


Likes
23
Share


@canongun
Follow
Day 36 - 42
So fun to see her little flowers!! Everyday they are becoming bigger and noticeable. I am keeping the nutrients same as past week.
I hope she is happy!


Likes
17
Share


@Nicogreen
Follow
Så fedt at have bestilt og så lige op til en konkurrence det jo perfekt 👌 💪 😇 🇩🇰 💚 Hope the Best grower win. Best regarts Nicogreen 💚
Likes
151
Share


@BioBuds
Follow
Well, what we feared, became a reality, one of the regular XTrakush plants is a male. This is why I planted two and I'm happy it seems to be only the one. But with the canopy going nice and full it hurt to get it out. Of course, I hoped to have two females but nature went its course. Considered leaving it in, to pollinate the others, or keeping it somewhere, but I do not have the space or light for it.
Thus with pain in my gut, I went about getting her out. I notice a nice developed root system, very healthy, which was very hard to get loose. After shaking the soil off I have a rootball the same size as after my whole grow last time. I could lift the whole 57 ltr bag by lifting the plant. Sturdy stem, thick solid branches. This is what I was aiming for and it works. The soil again is proving itself to be a winner.
The light this low gives some higher temps as expected, but manageable within ranges. The SP-3000 is performing really well and I cant wait to see the bud development coming weeks. I'm sure it will deliver a great amount of bigger buds looking at all the flower sites and the thick branches that support them.
Remember to check in on www.mars-hydro.com, they have awesome deals now for Black Friday!
I'm giving more water now, once in two days instead of three. They seem to need it with the higher temps. The plants seem to take the light well on only 45 cm.
I've started adding the BAC Organic Bloom Nutrition. It is designed to work with the microorganisms I added with the micro life. With this I do a little bit of Calmag, but not so much, since I don't see any evidence of shortages, again proving my soil is dialed in for growing under LED perfectly.
All in all, even with a minor setback, all is ready to pull in a mega harvest.
Thanks for checking in again!! Hug Bud & Sunshine.



Likes
17
Share


@ChitownCannaChica
Follow
She’s taking her sweet time now! I found a nanner and pulled it off, but I have to keep an eye out. You can see from the trichome shots that she is not ready yet... thinking maybe 1-2 more weeks—-hoping for sooner. Going to start a flush because of the leaf yellowing. Otherwise, she’s moving along! ✌️🏻💚🌿💨

Likes
5
Share


@Nune2021
Follow
Hey bin mal gespannt obwohl ich nicht all zu viel erwarte der Wuchs bis jetz hält sich in Grenzen aber ich denke durch den Kleinen Topf ist das Wuchs Wachstum stark eingeschränkt
Aber mal sehen ich lass mich überraschen 😂


Likes
Comments
Share


@BIYEI
Follow
Vegetativo 22-11-2024 a 28-11-2024
Semana 1
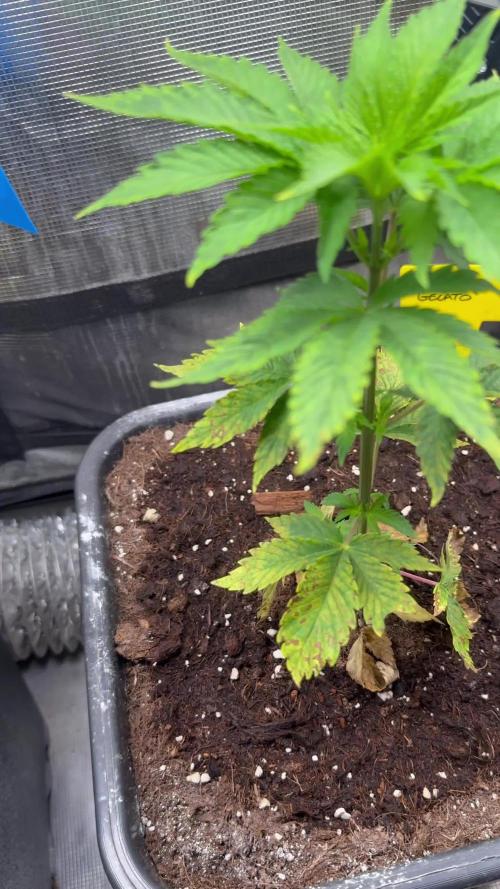
22-11-2024 La plantula esta lo suficientemente desarrollada para colocar un timer y empezar el periodo vegetativo.
23-11-2024 Se realiza cambio de Solucion nutritiva con valores ajustados.
25-11-2024 Se mantiene en observacion, el primer par de hojas se ve quemado, deduje que fue por la potencia de la lampara los primeros dias, el calor emitido ocaciono esa lesion.
28-11-2024 Se ve un buen desarrollo y crecimiento de la planta.
Parametros Utilizados
Temperatura del ambiente 24 C°
Extraccion de aire 4 pulgadas
Humedad 70%
Potencia de la lampara 75%
Ec Original 0.4
Ec Nutriente 1.1
Ph 6.0
Horas de Luz 18/6


Likes
44
Share


Likes
41
Share


@Reyden
Follow
Le FF di @Fast_Buds sono velocissime!!! In una settimana sono cresciute molto più delle normali Autofiorenti, ieri ho effettuato il travaso finale nei vasi in tessuto da 11L con tutta la miscela Dogma Super Soil e da ora in avanti only water 💦 vediamo come si sviluppano prossimamente! Le macchie bianche sulle foglie sono macchie di Zeolite Pure 10 micrometri sempre di Dogma Organics!
Likes
14
Share


@MadeInGermany
Follow
Info:
Unfortunately, I had to find out that my account is used for fake pages in social media.
I am only active here on growdiaries.
I am not on facebook instagram twitter etc All accounts except this one are fake.
Flowering day 61
since time change
to 12/12 h.
Hey everyone :-).
We arrive in the flowering week before the last :-).
She has developed perfectly up to now 👍.
It will be harvested in the next 10-14 days.
Until then, she still has enough time to use up all her nutrients.
The trichomes are already 60% milky, 30% clear and 10% amber.
This week it was poured 3 times with 1.2 l each.
As always, the tent was cleaned and everything checked.
Have fun with the update.
Stay healthy 🙏🏻
You can buy this Strain at
https://www.amsterdamgenetics.com/product/super-silver-haze/
Type:
Super Silver Haze
☝️🏼
Genetics:
Haze x Skunk #1 x Northern Lights
Type:
70% Sativa – 30% Indica
👍
Vega lamp:
2 x Todogrow Led
Quantum Board 100 W
💡
Bloom Lamp :
2 x Todogrow Led
Cxb 3590 COB 3500 K 205W
💡💡☝️🏼
Soil :
Canna Coco Professional +
☝️🏼
Fertilizer:
Green House Powder Feeding
☝️🏼🌱
Water:
Osmosis water mixed with normal water (24 hours stale that the chlorine evaporates) to 0.2 EC. Add Cal / Mag to 0.4 Ec Ph with Organic Ph - to 5.5 - 5.8

Likes
47
Share


@KA_LE
Follow
- Been flushing for 3 days now. Still showing more purple tones, not much yellowing yet.
- This will be my last post before harvest! Can't wait!
Processing
Likes
25
Share


@Heady_McDank
Follow
Hmmmm hmmmm did some defoliation on the ladies this week, now they got breathing space again.
Some peepz will call me crazy others a genius...... Well them both are correct 🤣
No feeding this week, it's a periodical flush time, next week we start with c4 that will be banging😜
#2 the droeftoeter is her name, well as u can see she will carry the heatstress in her leaves to the end, she produces Buds so she can stay 😁
#4 called witte cuz of her bleak sight before, is finally producing what she is meant to produce, Buds.
#1 and #5 well....... They just do it wonderfull nice developing of the Buds and the eye is getting something too 🤩
All in all its not going perfect but it goes good and that's something considering the shitty year I have been throwed through 😢
Enjoint and stay medicated 💚