


Likes
Comments
Share


@Nombudsman
Follow
Prep-
3/3/2025
Test 1q tap water for ppm and ph
1q tap water treated with 1 drop of Hydrogen Peroxide 3%
3/5/2025
Slurry test, 1q tap water mixed with 1q happy frog soil
ph 6.6
ppm 166
3.5 gal tap water treated with Hydrogen Peroxide 3% (10 drops)
3/6/2025
used ph- to bring 3.5 gal treated tap water to 5.7ph
3/7/2025 Day -7
added 1.5" perlite to three 5Gal cloth pots
Happy Frog Soil 2 cu mixed with 2Gal treated tap water
Mixed by hand until soil was at field capacity
divided soil to cloth pots, loosely to ensure soil is not packed
Pot weight 18 pounds, each
3/12/2025 Day -3
Soaked rapid rooter and seeds in distilled water.
Disinfected tent with alcohol, hydrogen peroxide, and an ozone generator.
Wrung extra water from rapid rooters to bring them to field capacity.
Added seeds to rapid rooter and added drops of hydrogen peroxide.
Distilled water added to tray
Graphite heater added under humidity dome
VPD in tent set to 0.8 target for humidifier and heater control.
Light set to level 1 @ 14 inches
Par measurement just over 200
3/13/2025 Prep
Checked logs and charts to ensure vpd, temp, and humidity are stable in tent.
3/14/2025 Prep
Checked logs for tent environment stability. vpd, temp, and humidity are stable in tent.
No sprouts yet
3/17/2025
One seedling has sprouted. Check for others tonight.
3/20/2025
Transplanted Seedling #1 to 5gal fabric pot.
Removed 2 other seeds from rapid rooters. One rapid rooter was getting a green discoloration on top. Pulled and sterilized equipment. 2 new seeds on a 24 hour soak in distilled water & h2o2.
2 unviable seeds transferred to new rapid rooters after a treatment of h2o2. Not expecting them to pop but will expand if needed.
3/21/2025
Seeds #2 & #3 both showing taproot
Moved both germinated seeds to rapid rooters
3/22/2025
Both seeds sprouting from rapid rooter.
3/23/2025
One seed has bad case of helmet head
Other seedling looking great
3/24/25
Helmet head seed pushed itself and root out of rapid rooter.
Carefully guided root into rapid rooter.
Gently removed outer seed husk.
Seed sac still intact and glued to leaf growth.
Added drop of water to head to assist with removal
Returned in 2 hours and sac leaves had opened, sac fell off when touched.
Stalk is correcting itself and leaves look undamaged.
3/25/2025
Transplanted 2 seedlings to fabric pots
Additional Notes
Light provides 5x4 coverage for veg at 18 inches
Light provides 3x4 coverage for canopy at 12 inches
Aiming for 3x4 canopy with 3 plants using SCROG & LST
Upgraded light to fc-4800 for better coverage, had concerns with par levels for the bt3000

Likes
32
Share


@SirSmokeALot333
Follow
Gelato this strain is really something special. Amazing smell, amazing taste, amazing terpenes really citrus cream bubblegum like. But beware of the smell, this is crazy it's to strong. Also this strain got so much frost on it. Both lady's had so much frost on it that I saved some good trim and made some nice bubble hash .

Likes
13
Share


@SillyTrippyHippy
Follow
Watered in coconut water, microbes & aloe.
Topdressed some bloom
Fan fell on front left plant when I was moving it broke a top lol. Whoops

Likes
3
Share


@BossDean81
Follow
Day 22- She stopped putting on height due to one night of a dramatic temperature drop. It's a cooler fall this year plus a freeze came through the night before. That night, I was up doing some studying when I noticed the reading on the remote display. N o telling how long it had been in the very low 60's. The problem was fixed simply by adding a heater to the room. Now, the temp is only in the 68 degree range for the final 2 1/2 hrs. before the lights are cut back on.
Day 26- Her bud branches hav grown at least 2 -5 innches in length and have at least 2-4 bud sites already. Instead of Defoliation, I decided to actual two different types of LST. The first is simply bending to fan leaf branches under to expose the bud branches to more light. The main benefit is that you still keep the ability to absorb more of the light energy with them. I look at the fan leaves as your plant's " Personal Sun Panels". Since they store energy in the day and use that reserve to grow at night, why would you take something away for her that is meant to help her? Also, the second method I used is something I like to call" wind thickening". The technique is using wind resistance to train your plant's stem and branches to become more rigid by growing thicker to stablize itself. So, instead of a gentle breeze, I use a three speed box fan at varies distance. I started doing this on Day 22 and the results are definitely showing. The main stem went from 1/16 in. to a nice 3/8 in.
Likes
3
Share

@kdifiori_
Follow
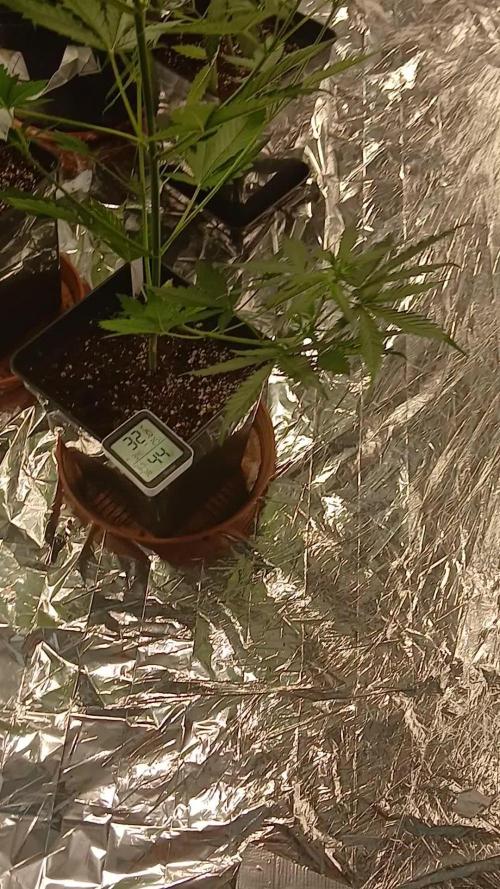
The girls are growing up and doing well, despite the crazy heat we've been having lately. Cheese and Pineapple have turned into two little monsters! I'm really happy with the result!
Likes
11
Share


@Bread_n_Buds
Follow
Here we are again ready to start again, always under the sign of Zamnesia, we make our fantastic plants and we show you what we are capable of. We have 5 autoflowering strains and 5 photoperiodic ones and now we present them to you.
The fifth and last autoflowering for now of this round that we present to you is another classic of the classics always in the Zamnesia version. We have already grown it once and we sincerely hope to find the purple phenotype, Mythical mythological herb really in music and in everything, WE ARE TALKING
To explain my germination method which is a combination of experiences acquired in the field and readings of right advisors, I have chosen to divide it into phases so whoever wants can follow them and understand better step by step.
- Preparatory Phase ---- Check the average temperature in the room, humidity status to understand well whether it is the case to start or wait, I decided for the end of August because the temperatures start to drop towards the 22-25 degrees recommended for germination.
Then another thing more or less credible depending on the sensitivity is the control of the lunar phases. I believe in it a lot, it is a method that ancient farmers used to understand when it was best to plant depending on the attraction of the moon. To make my life easier I use a simple app that advises you on the right time to plant, harvest and put in a jar (depending on the lunar phases).
- Phase 1 --- Soaking in water. There are many authoritative friends who advise against this method due to the risk of drowning, but I have always been fine and I follow the rule if it opens in water almost certainly the seed is healthy and will come out of the ground 90% normally.
- Phase 2 --- Opening of the seed in water. As soon as the seed opens and the root comes out a little you have to be very very careful not to leave the seed in water open for too long. This is why there is a risk of drowning. So as soon as the root has come out it must be planted. Do not wait for it to stretch out too much, in the absorbent paper you can wait a little longer in water no.
- Phase 3 --- While I soaked the seeds I prepared my pots: I use small biodegradable pots (choose the ones with holes underneath for drainage). A few hours before working with the opened seeds I moistened the soil with water adjusted to the right pH (5.8 - 6.2) and Plagron Power Roots. The small root is now open and we can make a little hole with a toothpick, widen it and insert the seed. Not too deep with the root facing downwards. From Serious Seeds we learned the dome technique: if you put a small dome of soil on the seed the water will settle on the sides avoiding overwatering problems.
- Phase 4 --- The plant emerges from the soil. Up to now I have not put the light on, now I turn it on at minimum after half a day of soil to give direction to the seedlings. The first week the light will be gradually brought from 40% to 60% to go to 70% - 75% in the remaining weeks of veg. During the first week maximum, I keep the cycle of 24 hours to avoid stretching. Be careful not to exceed the first week at least with photoperiodic.
- Germination % --- In water 20/20 seeds have opened for good luck I'm waiting to talk when they come out of the ground but it seems that we are going towards an excellent percentage of germination..."Not too bad"...
- Soil and Food --- The soil used is entirely organic in every part and is the Plagron Promix that will be used with the 100% organic pack supplied by Zamnesia complete with all the main fertilizers for your plant buy it at the link --
https://www.zamnesia.io/it/11457-plagron-easy-pack-natural.html
// Strain Description // Have you ever wondered what Jimi played in 1967? With Purple Haze Automatic, it has never been easier to experience the magic of Purple Haze firsthand. In just 65 days, this compact autoflowering will reward you with top-quality sativa buds that will take you on a long creative journey. -
- Get a seed of this fantastic strain --- https://www.zamnesia.io/
- Soil and Fertilizers entirely organic --- https://plagron.com/en
- Growbox --- https://www.secretjardin.com/
- Music and sound --- I made my girls listen to 432hz frequencies and music from www.radionula.com
- Z --- You can find these seeds, much more from the world of cannabis, mushrooms and an incredible series of accessories and gadgets on the reference site not only mine but of many growers ----
https://www.zamnesia.io
Likes
11
Share


@gsimd
Follow
I'm going away for 30 days about a week into this grow. I'm going to automate weeks 1 through 5 by using the Blumat watering system along with the automated fan from AC Infinity. Hopefully, these will keep things going while I'm gone. I've never used the Blumat products before and I'm excited to see their potential. If I succeed, I'll return to happy 5-week old plants. If not, I'll have to start a new grow...which is what I was going to do anyway. I have nothing to lose but a couple of seeds. Let's get this automated grow started.
Day 1 - I placed the seeds directly in a fist-sized clump of Coast of Maine Seed Starter soil that was then placed in a 3-gallon pot full of Coast of Maine Stonington Blend. This will ensure the seedling doesn't get exposed to the nutrient-rich soil too soon. I set the light 2 feet above the top of the pots so they have room to grow into the 18" to 12" range. I also set the light strength to 60% during germination. The temperature in the tent remained 75 degrees and humidity was 70%. I also covered the soil over the germinating seeds with mason jars to act as humidity domes.
Day 4 - Both pots sprouted this morning. I immediately removed the mason jar humidity domes. I also increased the light to 70% strength and installed the Blumat watering system to help me keep things growing while I'm gone.

Likes
40
Share


@Peeman
Follow
Wow last day of August, summer is flying by
All the girls have finally stepped into high gear and are flourishing although in years past at this time of season my girls have always been further along. I guess this means a later harvest this year? Wondering if other growers are experiencing the same pattern.
Sept.1 and average temps have started to drop during the day and the morning dew has reared its ugly head once again. This will probably be the case from here on in. Going to try my best to keep the girls from staying wet throughout the day.
Sept.3 noticed some powdery mildew on my Godfather OG #1 in front of the wall. Made up a concoction of 1 litre of milk to 3 litres of water and gave her a good spray after the sun went down.
Also sprayed the rest of my girls as a preventative. Hopefully this will help manage the problem.
Sept. 6 this week has been quite windy most days and my Godfather OG blew over landing on top of Trainwreck #1 and breaking 2 lower colas OUCH! 👺 My fault for having Godfather to close Trainwreck


Likes
82
Share


@ClubRiot
Follow
Week 9 ,
pH Perfect Connoisseur Bloom Part A ( 1 ml/L )
pH Perfect Connoisseur Bloom Part B ( 1 ml/L )
CarboLoad Liquid ( 2 ml/L )
Sensi Cal-Mag Xtra ( 2 ml/L )
Sensizym ( 2 ml/L )
Bio-Heaven ( 2 ml/L )
Big Bud ( 2 ml/L)
Nirvana (2 ml/L)

Likes
10
Share


@Gruschel_Muschel
Follow
Purple Punch am 26.12.2024
Tag14 / 11.01.2025
Die Pflanze ist kompakt mit saftigen Blätter. Habe sie mir unter der Lupe angeschaut, es gibt nichts was mir Sorge bereitet.

Likes
26
Share

@Joni2017
Follow
Hello again, GrowDiaries family! 😎
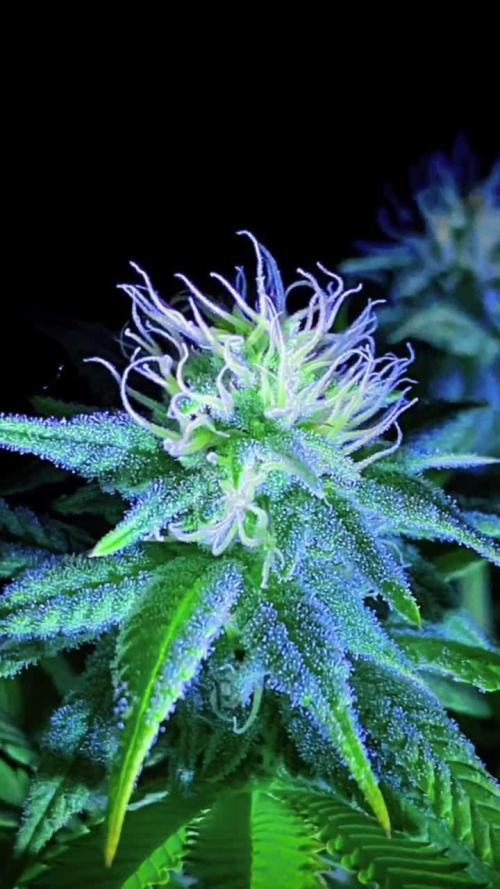
We’ve officially entered Week 11 (5th week of flowering) and this Critical is breaking the rules. Even in full bloom, she managed a last stretch, reaching 40 cm. The reaction to this week's defoliation has been simply perfect, and the energy is now 100% focused on the flowers.
📏 Precision Measurements & Training
-Height: 40 cm (a surprising +3 cm stretch since last week).
-Canopy Management: The LST and the deep defoliation from this past week have created the ideal environment. Airflow is optimal, and light is reaching the base of every cola.
-Visual Check: I’m continuing with the white light photography. Resin production is at its peak, and the first milky trichomes are already starting to appear.
🌡️ Environment & Climate Challenges
-Temperature: We are still managing those tricky nights at 12°C and 27°C during the day.
-The Strategy: The lukewarm water trick after the defoliation was key. The plant showed no stress and continued growing vigorously despite the cold floor temperature.
-Humidity (RH): Stable at 40-45%. This is crucial now that the buds are gaining density to prevent any mold issues.
💧 Watering & Organic Strategy
-Nutrient Strategy: Maintaining the Biobizz schedule: Bio-Grow 1ml, Bio-Bloom 2ml, and Top-Max 1ml per liter of water. She is drinking and eating everything with great appetite.
-Pest Control: The cinnamon barrier is still there and working perfectly. Zero gnats, zero problems. It’s the best way to keep the roots clean during the final stage of flowering.
🌿 Flower & Resin Evolution
-The sugar is turning into ice! ❄️ Resin is now heavily coating even the smallest leaves, and the buds are fattening up fast. The aroma is a Critical classic: sweet, fruity, and very pungent.
Thanks for the comments and for following this grow. We’re getting close! 😉👍
Likes
21
Share


@Esmoki_La_Cabrona
Follow
Week 8, Day 63. September 22, 5:38pm
Kaboom Mama is doing very well! She continues to grow and buds are beginning to form. I realized the plant needed more nutrients and have given full strength of all nutrients and she appears to be doing well. She now requires water every 24-36 hours.Two days ago I give her 1.5 liters of water with with pH down, armor Si, Cal mag, and half a teaspoon of Recharge. Today, I gave her a gallon of water today with all nutrients except Recharge. I plan to water again within 36 hours with armor Si, Calmag and Big Bud. The fabric bag is becoming calcified so I will flush before the next full feed.
As always, thank you for stopping by. Happy growing and prosperous harvesting 💯💚

Likes
Comments
Share


@Big-Daddy
Follow
Die ersten Stempel färben sich, die Blätter wollen langsam Lila werden. Der Geruch ist stark. Beim berühren, riecht sie noch undefiniert. 3 Wochen circa noch und am Montag das letzte Mal Nahrung.
Likes
8
Share


Likes
10
Share


@StickyFingah420
Follow
Extrema producción de tricomas de esta variedad! Gran parte de los frutos lo usaré para extraer rosin, su resina se ve ideal para este propósito.
Fragancia exquisita a ponche de fruta dulce, con notas ácidas y un fondo de especias.
Como mencioné anteriormente dejaré la parte de la reseña de efectos, sabores y sensaciones para cuando los cogollos estén secos y curados, por ahora solo puedo apreciar lo que mi vista y olfato me permiten captar.
Totalmente conforme por la calidad de estas flores y agradecido de los amigos de Sweet Seeds por la confianza.
Será hasta la cata entonces, buenos humos!


Likes
4
Share


@AustinRon
Follow
LJ 2Q24 Flower Week 7
Start of Week:
- [Sun Aug 11, 2024, LJ 2Q24 43:F:7:1]
- Plant Heights: [ 26, in]
End of Week:
- [Sat Aug 17, 2024 LJ 2Q24 49:F:7:7]
- Plant Heights: [ 26, in]

Full Line NER Week 7

HYDRO Charts Week 7

__
Sun Aug 11, 2024
LJ 2Q24 43:F:7:1
- [x] Fertigation @ 2000
- [x] To the above Feed Chart, Add 1 Tsp BioAg CytoPlus (Sea Based µNutrients/Molybdenum) SUNDAY ONLY
- [x] Fertigation @0130
__
Mon Aug 12, 2024
LJ 2Q24 44:F:7:2
Fertigate ONCE @ 2000, 1.5 Gal
- 250 ml/Plant, Wait 20 min, Water remaining 250

__
Tue Aug 13, 2024
LJ 2Q24 45:F:7:3
EC: 2.4
Moderating Calcium - Boosting 2ml, Not 7 (We’ve probably rebuffed our coco ;-} )
__
Wed Aug 14, 2024
LJ 2Q24 46:F:7:4
Reducing, EC: 2.3

__
Thu Aug 15, 2024
LJ 2Q24 47:F:7:5
Reducing, EC: 2.2
Evening: 400/ml/plant

__
Fri Aug 16, 2024
LJ 2Q24 48:F:7:6
- First view this morning ~0745, first impression ‘Shrunken.’
- Watered ~400ml/plant
- YESTERDAY’s RUNOFF - 1/2 Gal (from 2?) - 25% +
- Lets reduce to ~300/event . . .4200/
Reducing, EC: 2.1

__
Sat Aug 17, 2024
LJ 2Q24 49:F:7:7
Reducing, EC: 2.0


Likes
294
Share


@StarLorr
Follow
Welcome to my Ðivine ØĠ Ķush diary.
In this diary:
Seeds: sponsored by Ðivine Șeeds
Media: Promix HP
Nutrients: Advanced Nutrients, Diablo Nutrients, Gaia Green Power Bloom.
Light and Weather: Şun☀️and Mother Earth.🌎
___________________________
Feeding:
Wed 14Aug: 8L water not pH'd
Thu 15Aug: 10L water not pH'd
Fri 16Aug: 9L water not pH'd
Sat 17Aug: 10L water not pH'd
Sun 18Aug: 6L water not pH'd
Mon 19Aug: 2L water not pH'd
___________________________
*please note that most watering are from top now since topping with Gaia Green Power Bloom*
______________________________
Ķush Ķush got more defoliation treatment who required the stepladder last Friday Aug16th😅😂🤣mostly fan leaves and tiny branches.
_______________________________
Top dressing her with Gaia Green Power Bloom was a Sage move she seems to like it, haven't fed her with liquid nutrients this past week, was kinda concerned about over feeding her😬but will do later on this week.
______________________________
Thanks for stopping by, likes and comments are appreciated!👊🏻😎
Keep on growin!
Keep on tokin!!!
😙💨💨💨💨💨

Likes
1
Share

@Day_1
Follow
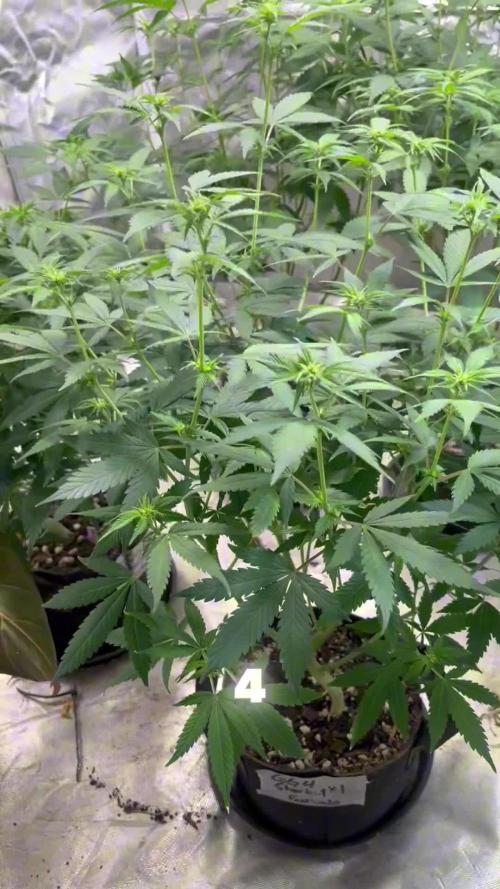
Ladies are doing amazing. First week of flower. I’ve went ahead and topped dressed with worm castings Gaia green 444 and 284 and Bone meal also water them with stash blend.