


Likes
Comments
Share


@Comfrey
Follow
Tangerine Dream Auto - Barney‘s Farm
Mein erster Indoor Keller-Grow neigt sich dem Ende zu. Es ist bunt geworden im Zelt. Die erste Blüte habe ich bereits vaporisiert und bin ziemlich begeistert vom Geschmack und der Wirkung.
Leider habe ich aufgrund persönlicher Umstände nicht im Ansatz geschafft hier ein paar Tagebücher zu führen. Es war für mich ein extrem stressiger Winter und ich bin froh, dass ich wenigstens regelmäßig ein paar Fotos machen konnte.
Der Anbauraum hatte zwischen den Pflanzen gemessen eine Minimaltemperatur von 17,4 Grad und während der Vegetationszeit konnte ich die Auto-Damen Tagsüber mit bis zu 28 Grad unter einer Sanlight Evo 4-120 1,5 verwöhnen. 18/6 - Licht/aus. Die Luftfeuchtigkeit war in der Veggiephase bei ca. 65-75 Prozent im Zelt und in der Blütephase konnte ich sie Stück für Stück absenken auf 55-43 zum Ende hin.
Gedüngt habe ich ein einziges Mal mit 1:20 sauberem Urin am Ende der dritten Woche. Ansonsten gieße ich auf das Terra Preta ähnliche Substrat ausschließlich mit hartem Leitungswasser mit Ph 7,6.
Das Substrat wurde kurz nach der Sämlingsphase mit einer dicken Schicht Laub, Braun- und Grünschnitt Mulch abgedeckt, welchen ich zuvor dreißig Minuten bei 150 Grad im Ofen gedämpft habe (Sterilisation). Es kamen Nematoden, Raubmilben und Gelbtafeln zum Einsatz, weil wir mit einer ziemlich unangenehmen Trauermückenplage zu kämpfen hatten.
Anfang der Blütephase kam es zu einer Nährstoffblokade aufgrund von Überwässerung. Das Substrat hält die Feuchtigkeit sehr lange und die Mulchschicht verhinderte ein Austrocknen des Substrats. Wir haben anfangs deutlich Zuviel gegossen und das Substrat nicht etwas austrocknen lassen. Nach Anpassung des Gießintervalls auf alle drei Tage mit ca. 2-2,5 Liter, löste sich das Problem nicht in Luft auf, aber wir konnten es aufhalten.
Meine Pflanzen sind bereits geerntet und hängen zum Trocknen. Viel Spaß mit den farbenfrohen Bildern. Happy Growing! 💚



Likes
7
Share


@Pistil_Whipped
Follow
Flipped it to 12 12 schedule. now I am seeing more pistil hair on the bud sites. Noticing stems are getting more rigid and wood like.

Likes
11
Share


@Professor_Daank
Follow
Holy moly. She's growing... like a weed.
She's loving the nutrient schedule and environment (finally). I was having an issue maintaining proper humidity levels and after exhausting EVERY possibility with venting, fans and otherwise, I have moved my dehumidifier inside the tent and it's working wonders. I drain the water with a shop-vac as I do the same for my run-off. Things are going great so far, I hope to continue this forward progress in the coming weeks. Going to LST sometime this week, just not sure when.
6/13: Started minor LST phase to open spots to light. Fan leaves are gonna be huge. I also overwatered her... I'm a noob.
6/14: No watering for 24 hours. I removed my LST. She wasn't yet strong enough for the arc I put into her. Another noob mistake and add the overwatering to this, I just wanted to destress her.
6/15: Back to regular 1 liter per 24 hours, also added Armor Si to the nute schedule.
6/16: She's showing signs of getting back to normal. Added Diamond Nectar on this day. I also LST'd her back to position.
6/18: Back to normal. I trimmed 1 fan leaf under the canopy that wasn't going to get any light.
6/19: She's better and growing well. I'm going to try and keep this vegetation stage a little longer. Added a little more water today, just a tiny bit. I have 2 other plants that are a week behind and I want them caught up for the flip as close as possible. Pray for me.
Likes
2
Share

@MrWeeedWorld
Follow
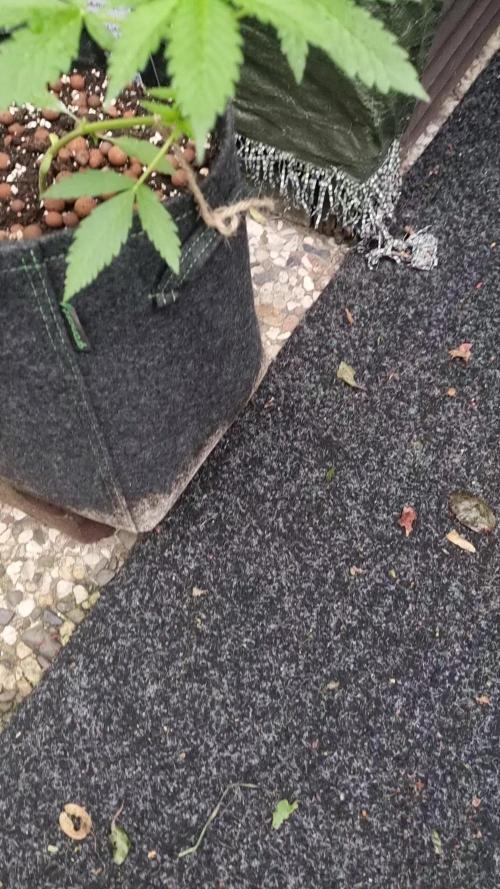
Nach einer spannenden Woche und einem großartigen Wochenende auf der Mary Jane in Berlin gibt es endlich wieder ein Update meiner drei Lemon Cherry Cookies.
Die Pflanzen entwickeln sich weiterhin hervorragend und haben in den letzten Tagen einen ordentlichen Wachstumsschub hingelegt. Das Low Stress Training zeigt mittlerweile seine Wirkung und die Seitentriebe beginnen kräftig aufzuholen. Aus den einst kleinen Sämlingen entwickeln sich langsam schöne, breite Outdoor-Büsche.
Besonders erfreulich ist die gute Vitalität aller drei Pflanzen. Die Blattfarbe bleibt gesund und satt, das neue Wachstum ist kräftig und die Pflanzen zeigen keinerlei Anzeichen von ernsthaftem Stress. Selbst die Dame, die zu Beginn etwas ungewöhnlich gewachsen ist, entwickelt mittlerweile ihren ganz eigenen Charakter und holt hervorragend auf.
Durch das LST wird das Licht optimal verteilt und immer mehr zukünftige Blütenstände erhalten direkten Zugang zur Sonne. Genau jetzt beginnt die Phase, in der die Struktur für die kommenden Wochen aufgebaut wird.
Die Lemon Cherry Cookies zeigen bisher genau die Eigenschaften, die ich mir von einer starken Outdoor Autoflower wünsche: robust, vital und voller Wachstumskraft.
Jetzt freue ich mich auf die nächsten Wochen, denn schon bald dürfte die Vorblüte beginnen und die eigentliche Show kann starten.
Vielen Dank fürs Vorbeischauen und bis zum nächsten Update! 💚🍋🍒
--------------------------------------------------------------------------------------------------------------------------------------------------------------------
After an exciting week and an amazing weekend at the Mary Jane Expo in Berlin, it's finally time for another update on my three Lemon Cherry Cookies.
The plants continue to perform beautifully and have put on some impressive growth over the last few days. The Low Stress Training is clearly paying off, with side branches starting to catch up and creating a much wider structure. What started as small seedlings is slowly turning into a beautiful outdoor canopy.
One thing that stands out is the overall vigor of all three plants. Leaf color remains healthy, new growth is strong, and there are no signs of significant stress. Even the plant that started off growing a little differently is now showing plenty of character and catching up nicely.
The LST is helping distribute light evenly across the entire plant, allowing more future bud sites to receive direct sunlight. This is exactly the stage where the foundation for a productive flowering period is built.
So far, the Lemon Cherry Cookies are showing everything I want from an outdoor autoflower: strength, resilience, and vigorous growth.
I'm really looking forward to the next few weeks because pre-flowering should be just around the corner and the real show is about to begin.
Thank you for following along and happy growing! 💚🍋🍒🌱


Likes
6
Share


@I_Identify_As_A_Dan
Follow
Week 14 for Space Panda by Atlas seed,
They have finally 2 weeks later almost started to get some better growth after the topping. She will need atleast 2 more weeks of veg if not 3 before being flipped to flower.

Likes
7
Share


@JsGrowShow
Follow
Stress training hair cut water change fresh nutrient mix hit the numbers right on the head 💯👊☀️

Likes
8
Share

@Firstautos
Follow
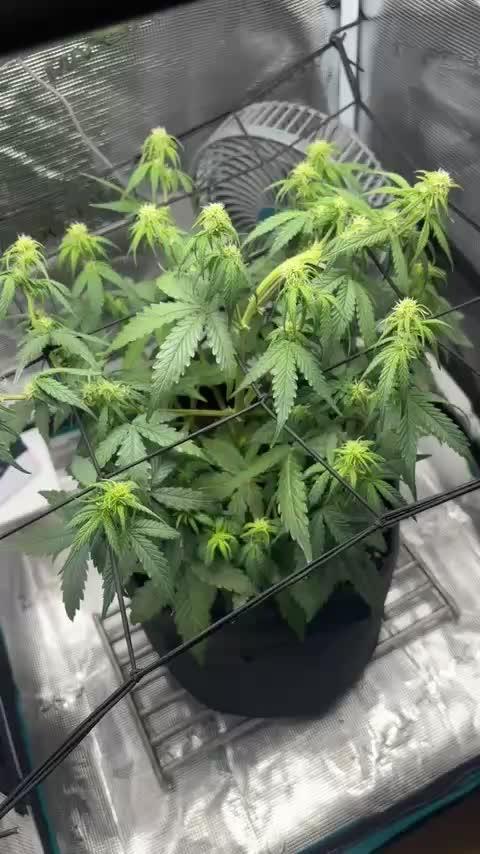
So have had to to use the trellis the top bud was making me move the light to far away from the others I hope I haven't done harm doing this but I felt it was starving the others of light :).. this is my first grow and first diary entry.. all and any help is appreciated this video is where I'm at today :) happy growing :) 31/8

Likes
8
Share

@burnout
Follow
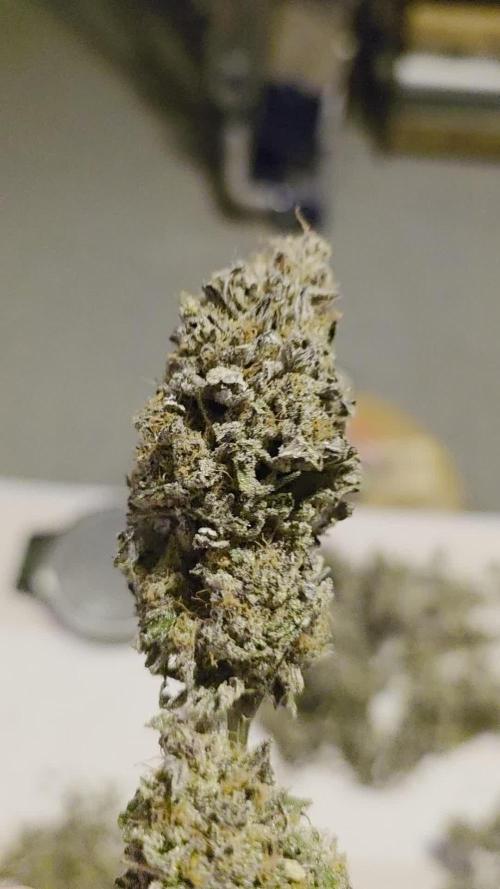
Dry weight
#1 99. Small plant, faint candy smell, tastes sweet and skunky
#2 130. Very strong candy smell and taste, very good


Processing
Likes
Comments
Share


@Stubby_Stoner
Follow
Gave them water on Wednesday at 6.4ph distilled water. Began having issues with ac in my house. Temps got up to 81° and humidity rose to 60%. Been sitting around 75° and 50% humidity. On sunday they were ready for water again. My wife changed out the fish tank water on saturday, so i used 20% ratio of old tank water to distilled water and adjusted ph to 6.1. They are starting to take off and develop nodes quickly, now.
Likes
23
Share


@420DeepGrow
Follow
Gracias al equipo de Sweet Seeds, XpertNutrients y Marshydro sin ellos esto no seria posible.
💐🍁 Red Hot Cookies:
Excelente genética resultado del cruce entre un clon seleccionado de una variedad “Super Strong” americana de la familia Cookies, la Tropicanna Cookies (Girl Scout Cookies x Tangie), y un clon seleccionado de una potente variedad también americana de excelente aroma a mandarinas, la Tangie.
Para el cruce se han elegido exóticos parentales con fenotipo de flor roja. El color rojo en las flores se presenta en un 60% de la descendencia y suele aparecer en las últimas semanas del periodo de floración, comenzando desde las ramas y flores inferiores hacia las superiores.
Variedad de marihuana “Super Strong”, muy productiva y resinosa, que alcanza niveles de THC de hasta el 25%. Excelente aroma y sabor, dulce, profundo y denso, con marcados tonos de mandarina y mango, y pinceladas de frutos del bosque.
🚀 Consigue aqui tus semillas:
https://sweetseeds.com/es/the-red-family/3066-red-hot-cookies.html
💡FC6500: Eficiencia líder en el mercado: la lámpara de cultivo LED FC-E6500, que ostenta un estatus líder en el mercado, es una solución rentable con un PPE de 2,8 µmol/J y un rendimiento máximo de 2,5 g/vatio. Ofrece un PPF alto de 2026 umol/S y es adecuada para una cobertura de vegetación de 1,50 m x 1,50 m y una cobertura de flores de 1,20 m x 1,20 m.
Iluminación versátil y uniforme.
https://marshydro.eu/products/mars-hydro-fc-e-6500-730w-commercial-led-grow-light/?gad_source=1&gclid=Cj0KCQjw1qO0BhDwARIsANfnkv9IIrYSbmJqz8PqpJOIyWwJfp5bc3SGJgUV68USLQ4tjmXDYwoBuAsaAue3EALw_wcB
🚥 MarsHydro ADLITE UV/IR/RED:
Para lograr un crecimiento óptimo de las plantas y maximizar los rendimientos es un arte simple que depende en gran medida de las condiciones ambientales adecuadas. Reconociendo las limitaciones de la iluminación natural y las soluciones de iluminación tradicionales para satisfacer estas necesidades únicas, lanzamos ADLITE. Estas luces especiales UV, IR y roja están diseñadas para llenar áreas del espectro, proporcionando las altas longitudes de onda que las plantas necesitan para un crecimiento y desarrollo óptimos.
🚀 Consigue aqui tu Adlite:
https://marshydro.eu/collections/adlite-supplemental-lights/
🏠 : Marshydro 1.50 x 1.50 x 1.80, carpa 100% estanca con ventanas laterales para llegar a todos los lugares durante el grow
https://marshydro.eu/products/diy-150x150x200cm-grow-tent-kit
🌬️💨 Marshydro 6inch + filtro carbon para evitar olores indeseables.
https://marshydro.eu/products/ifresh-smart-6inch-filter-kits/
🍣🍦🌴 Xpert Nutrients es una empresa especializada en la producción y comercialización de fertilizantes líquidos y tierras, que garantizan excelentes cosechas y un crecimiento activo para sus plantas durante todas las fases de cultivo.
Consigue aqui tus Nutrientes:
https://xpertnutrients.com/es/shop/
📆 Semana 11:
Última semana para uno de los ejemplares, la otra se va a quedar una semana mas todavía. Los tonos rojos en las flores son muy notables. Estoy muy contento con esta variedad.

Likes
Comments
Share

@AlbStoned
Follow
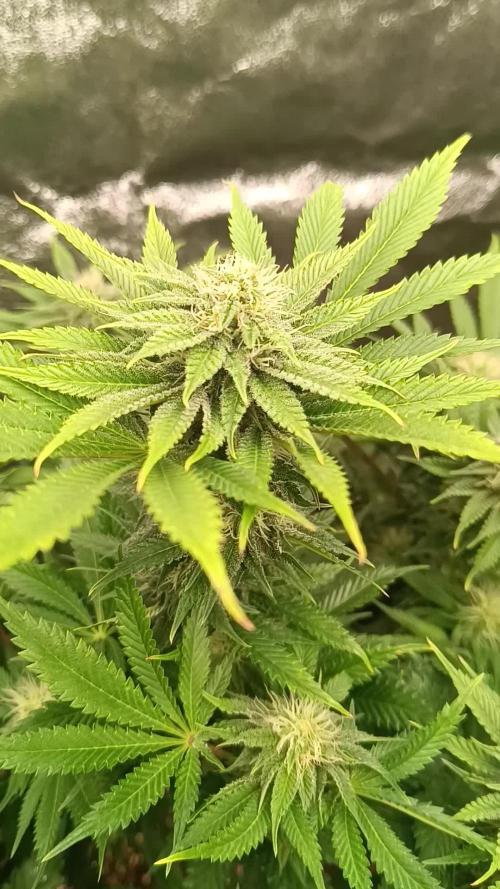
Die Blüten Bilden sich extrem aus. Ein wohlriechender Duft liegt in der Luft. Die Pflanzen wachsen eher in die dicke als in die Höhe. Die Bud Ausbildung bei der Mango Cream x Cinderella ist Genial. Hierbei müssen bei der Ernte so gut wie keine Blätter entfernt werden. Bei der Durban Poison bilden sich schöne harte kompakte Buds die einen süßlichen Duft verteilen.
Likes
92
Share


@DogDoctorOfficial
Follow
🌟 Welcome to the TrolMaster Chronicles: Seed to Harvest Adventure! 1st run🌟
Hey, Grow Fam! It’s DogDoctor here, and I’m thrilled to kick off this exciting new series with you. Today marks the beginning of our journey through the TrolMaster sponsorship, and we’re diving right into the heart of the action with germination and unboxing. 🌱✨
We’re starting strong with the Germination Station by @thecannakan, a game-changer for this process. I’ll be showing you all the details as we delve deep into every aspect of our grow adventure.
Here’s today’s lineup for the germination extravaganza:
1️⃣ Mandarin Squeeze - Terpyz Mutant Genetics. 🌈 One seed germinated.
2️⃣ Punch Pie RQS and Tyson 2.0 Genetics. 🍰 One seed germinated.
3️⃣ RS11 by Kannabia Seeds. 🚀 One seed germinated.
4️⃣ Green Papaya by Super Sativa Seed Club. 🍍 Tester unreleased seed, one germinated.
5️⃣ Gorilla Mellon by Fast Buds. 🍉 Two seeds, one germinated (the first one didn’t make it).
6️⃣ Tropical Smoothies - Tried all seeds from the pack, but unfortunately, none germinated. 🌴
We’re also using the complete organic mineral line from @aptusholland, which includes top-notch nutrients to ensure our plants get the best start possible. 🌿✨ Plus, we’ve got the new ProMix Mycorrhizae soil, which will help create a thriving root environment. 🌱
Throughout this journey, I’ll be breaking down every step, sharing tips, and keeping it real with both the successes and challenges. I’m excited to share this adventure with you, and there’s so much more to come!
For more in-depth coverage and exclusive content, make sure to check out my YouTube channel and subscribe—where you’ll find full video breakdowns, detailed insights, and more. 🌟🎥 Follow me on Instagram for additional exclusive updates and behind-the-scenes peeks that you won’t find anywhere else! 📸✨
Your support means the world to me, and I can’t wait to have you along for every step of this amazing journey. Let’s grow together and make some magic happen!
#TrolMasterChronicles #SeedToHarvest #GrowDiaries #GrowJourney #TrolMaster #TheCannakan #GrowLife #PlantAdventure #HighFrequency #PositiveVibes #GrowWithMe #SubscribeNow #ExclusiveContent #AptusHolland #ProMixMycorrhizae
P.S. 🌟💚 I want to take a moment to express just how honored and grateful I am to be the first TrolMaster Maverick. This opportunity is a dream come true, and I’m beyond excited to embark on this journey with all of you. Being a part of this incredible community and pushing the boundaries of indoor horticulture with TrolMaster and ThinkGrowLED is a privilege I don’t take lightly. 🙌
A massive shoutout and thank you to the entire TrolMaster and ThinkGrow team for believing in me and supporting this adventure. Your trust and support mean the world to me, and I promise to give it my all to make this journey as amazing as possible. 🌟🙏
Thank you, Grow Fam, for being here from the start. Your encouragement and enthusiasm fuel my passion and make every step of this journey worth it. Here’s to making magic happen together and to many more incredible milestones ahead. Let’s grow, learn, and shine! 🌱✨
With all my heart,Growers Love and thank you. 💚
#FirstMaverick #TrolMasterFamily #ThinkGrowLED #GratefulHeart #GrowTogether #MakingMagic
Lets Play a game , FB Gorilla Melon Jump in to the future, can you guess the week ? Let me know in the comments before we get there , this is just for fun Lets Grow 💚💚💚 Growers Love everyone 💚💚💚


Likes
12
Share


@thonhash
Follow
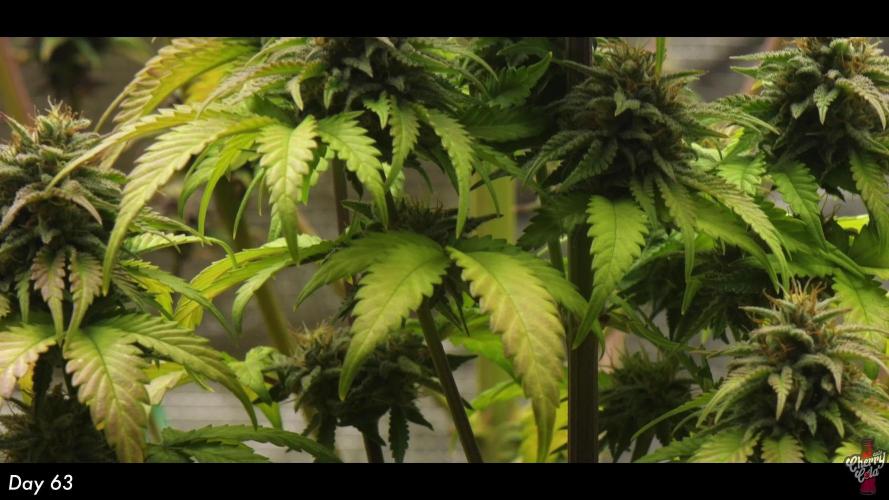
Sorprendido gratamente del resultado final tanto de producción como de sabor/efecto.

Likes
28
Share


@Borberad
Follow
Anesias Blueberry Banana ein von der Herstellerbeschreibung sehr netter Autoseed, welcher als kleiner Versuch, meine Photos in ihrem veg.-Zelt begleiten soll.
(Auszug der Original Sortenbeschreibung
Die Auto Blueberry Banana kombiniert den fruchtigen Bananengeschmack mit dem
süß-sauren Beerenaroma der Blueberry und bietet ein unvergessliches Geschmackserlebnis. Sie hat die stärkste Indica-Wirkung aller Automatika, die wir bisher
finden konnten.
Diese automatische Indica-dominante Sorte erzeugt ein volles körperliches High und ist die perfekte Wahl zum Entspannen am Abend oder zum Chillen in der Sonne.
Sie wächst kräftig mit einer starken Hauptblüte und vielen Seitenästen. Viele Pflanzen zeigen am Ende der Blütezeit farbenfrohe lila und rote oder fast schwarze Blätter und Knospen. Die ausgehärteten Knospen sind wunderbar
klebrig und kompakt.
Auto Blueberry Banana wird etwa 70-90 cm hoch und kann 10 Wochen nach der Keimung geerntet werden, wenn sie mit einem 20/4-Lichtzyklus kultiviert wird.
Quelle: anesiaseeds.com)
Die Dame wird bei mir jedoch 18/6 anstatt wie oft bei 20/4 wachsen müssen, da sie in dem Growzelt die Photos als Naschwerk 🍭begleitet.
Starte mit dem Quellen am 04.10.um 22uhr in 1%igem Wasserstoffperoxid. Nach max. 20h kommt der Samen dann in ein kleines Nest aus Kokoserde direkt in seinen 8l Endtopf. Ca. 106h nach dem Quellen also 86h nach dem Einplanzen zeigt sich dann das kleine Pflänzchen. 🌱💚
Habe mich im Laufe dieser Woche dazu entschieden auch mit diesem Blümchen keine halben Sachen zu machen. Sie bekommt eine eigene Sonne. Bisher stand sie zusammen mit den Photos unter einer Mars Haydro FC 1500 evo welche ich nur zur vegetativen Phase nutze. Für eine ordentlich Dosis Photonen für das Blümchen sorgt jetzt ab der ersten vegetativen Woche eine GCX 4 pwr. 🌞 😀
Falls sich jemand wundert. Habe die Tage zwischenzeitlich an das Datum des Tages angepasst an welchem sie aus der Erde kam.

Likes
1
Share

@Sundancers
Follow
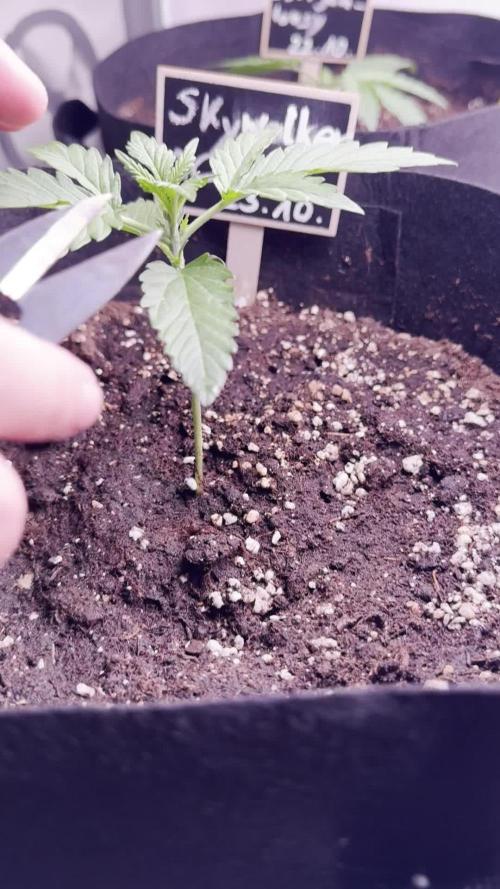
Der Skywalker ist ein kräfter Strain und wurde bereits an Tag 10 mit Topping belohnt. 😜
Likes
2
Share

@UnderTrappen
Follow
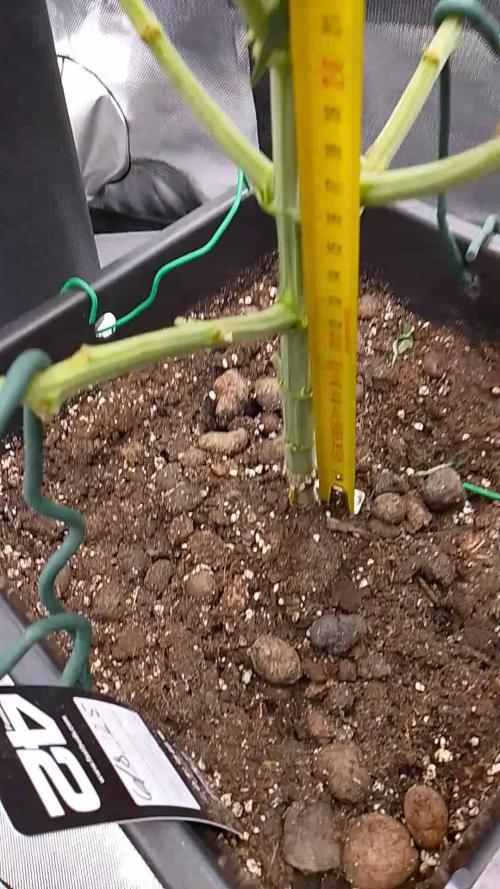
She is still growing and seems happy and healthy..Went into flower yesterday after a month to the date. Lets see. This plant has surprised me a lot. Have two similar, neither going anywhere. This one is the exception hopefully.
Currently also moving to a tent. New ventilation etc.
The yellow tint to the leaves is due to my camera
This is last day Week 4. Literally grew 5cm overnight. Preflowering
Likes
13
Share


@Weedig_Weedigson
Follow
Heute gingen die kleinen zum keimen. Ich bin gespannt wie die neue Anzuchtstation ist. Diesmal werde ich 6 Pflanzen mit Plagron Bio und 3 Pflanzen mit BioTabs, alles ganz nach schema düngen. Als Blütekammer kommt wieder die Homebox R120. Man darf gespannt sein. 😊
Leider ist eine Gorilla Zkittlez nicht gekeimt. Die hab ich durch eine Alienz von Greenhouse ersetzt


Likes
42
Share


@GODSGIFT_2005_JM
Follow
COMMENTED BY
GODSGIFT_2005_JM GODSGIFT_2005_JM 18 February 2022
⛺️ MARSHYDRO
💡VIPARSPECTRA
🍼GREENHOUSE FEEDING BIO GROW
🌱 WEEDSEEDEXPRESS
