
Likes
Comments
Share


@MisterZ
Follow
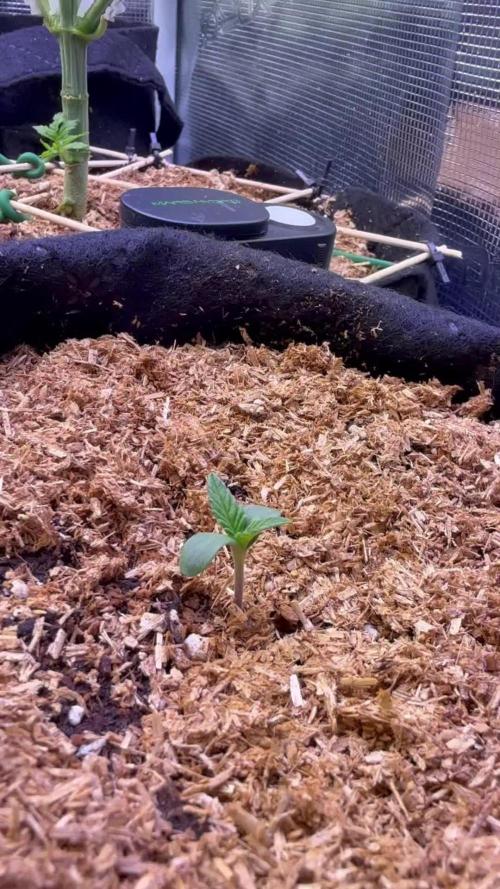
Bonjour les amis. Cette semaine le stretch a bien démarré et est bien sensible 😻. J'espère qu'il sera limité, mon placard est petit. Aucune odeur pour l'instant. La plus petite des 3 plantes fait 15 cm de haut. Les 2 autres font 29 cm et développent plusieurs têtes. Pour l'instant tout va bien. À bientôt 👋

Likes
17
Share


Likes
Comments
Share

@hassehujasse
Follow
8 plants in 70/70/160. It is all about level changes) UFC Freedom 250.
Cant wait until tommorow to update my lab with latest staff

Processing
Likes
12
Share


@jennamontana
Follow
DAY 15 // Week 3 has started we already did the plants last week in the bigger 18l Pots with BioBizz All Mix Soil. Feeding with BioBizz Bio-Grow, Bio-Bloom and Top Max. Plants looking strong. Topping will coming soon.
DAY 16 // Topped one of the Special Kush already will see how she's going through
DAY 19 // Topped all other Ladies - one of the 3 Special Kush has been topped 3 days before nd looking great


Likes
9
Share


@JonDin
Follow
it was outdoor growing in soil. used flora trio, koolblum, rippen and floraKleen. I had to harvest 1 weeks early, but it was awesome tree :D I've got about 100g dry. about 300-320 wet.
Likes
7
Share


@Nikkov
Follow
Since last week I've been doing the normal watering only when they ask and watering once a week with top crop top veg fertilizer and they've responded very well and both are already in 11L airpots that I transplanted during this week
Likes
5
Share


@Johnny_0G
Follow
Well she made it another week and tbh I think I'll go about two more days with her in dim light. She got another coating of terps a few days ago and she looks ready🧐😍😍😍

Likes
4
Share


@TheObserver
Follow
Repotted in definitive pot. Gonna top those in the next days.
Something I learned: water on the edge of the pot, as roots extends as much as possibile.


Likes
3
Share


@Smalltimegrows
Follow
So I started this grow for 4-5 weeks under a 60 watt fluorescent bulb with little growth. I stressed this plant out so much and have learned loads from this grow. Too much light for the space is a big learning curve for next run. Overall just over 6 ozs of dried bud, gotta say I’m pretty happy for my first time around. Have purchased a smaller wattage light And some proper nutrients for my next single plant indoor grow 👌

Likes
Comments
Share


@Squaregrouper
Follow
Looking very healthy leaves are green and there is no nutrient deficiency that I can see.. reeks of strawberry lemonade.. with honey

Processing
Likes
13
Share


@VALHALLA
Follow
Northern Light & Quick one - Week 3 vegetation
Box 60x60x180cm
Bio - bizz light mix
Mars hydro TS600 - 18/6
Plagron alga grow 3ml/L
Plagron Vita race 5ml/L , once a week
I'm happy with the RQS strains for my first time :)
Likes
6
Share


@Hydro_sweetness
Follow
Hey welcome back in the 6th week of flowering with the Dutch Passion’s Glueberry OG.
Last week my fan broke down and I had to order some new bottles of nutrients because the CannaZym and CannaBoost/accelerator had gone empty, but yesterday I received the nutrients and a new fan!
Not to long anymore before harvest! I stopped giving the PK booster, from this week on I will decrease the nutrient values for the coming 2 weeks for the last week I will perform a flush (on most of them).
The Brooklyn Sunrise and the other 2 Colorado Cookies just need a week or 2 extra.
The Glueberry OG is also getting very frosty, you can really see the layers and layers of trichomes on the close ups. Also, you can see the purple glow creeping on the buds, I wonder how much more purple she will get.
It’s funny how you can see the 3 different pheno types of the same strain with the same characteristics only a different structure.
I noticed that the buds start to get a bit to heavy for the plant which is good, volume of the buds is very dense.
That’s it for now see you all next week!
Likes
5
Share


@cookingwithninja
Follow
This is week 8 day 4 video. I have tried about 30g in testers rapid 1:05 dry. I’m waiting on seeds to finish. Plants are 7ft tall super cropped 3x on some branches and monsters just pop up. I highly don’t recommend super ripping or manipulating breaking stems. You will have jungles and delicious harvest. Some tops were touching doides so lights were raised to maximum tent ceiling. Every day is 2tbsp soluble pk into 5 gal water, 1/2-1tbsp folvic acid, sometimes humid acid, sometimes fishsh!t, sometimes microbial mass. 2 times only I added 1tbsp of magnesium phosphate into5gal. Every watering in 5gal has 2tbsp of carbs, I don’t use black molasses but it’s bluesky organic booster. Buds smell sweet, 2 and 3 are where the terps are but no1 is frosty af. 2 is og. As numbers left to right. Split between the middle bar. Running about 840w. 640is my reg along with 5x 20w blurples and my friends 100w “lm301h” but I beg to differ. My 640w is lm301h. I wish I had more light but I am not a facility. I just have a 4x8x7h. I’m very happy with this grow. Everything is to the max been flushing last week and it’s burning my plants lol. Just 1tbsp ph down. I have not been using ph down in my entire flower because the soluble pk 1-1.5 tbsp per 5gal water is enough to lower and make things happy. Every day is watering and every plant gets 1gal water daily. They could do a lot more but I don’t have the space as you can see ❤️

Likes
31
Share


@Growi
Follow
Tag 92 ,
Noch 2-3 wenige Wochen und die Tage der Ladys sollten gezählt sein . 😍🙌👏
Likes
7
Share


@LeakyTitsBukkake
Follow
Use just solids of milk for the best plant, no contest only win.
Made it fresh, can't do no evil.
Plant soil fingers are thick and love milks, Strong plants bones and teeth.
Thank you much champion

Likes
31
Share


@BigBadLion
Follow
Heeey! 👋
Another update! :D
This week I made another transplant, this time from the drink cups to a small 3.5 liter pot and I also applied some more mycorrhizas to my babies! 😃 From both of them Pistachio seems to be the one who's developing faster and Matcha is trying to catch her sister. The plants ended with about 19500 lumens! Couldn't rise them more because of heat issues 😟
The only tricky part this week was when I decided to add a bit of growing nutrients to my plants so I ended up watering them a lot after the transplant and the results were quite shocking! I barely added 2ml of total nutrients per liter but the runoff water I got was around the 1400 ppm which all honestly scared me a lot! That's way too much for two young plants (and I believe some of the excess nutrients can be seen on Matcha) nonetheless they are still developing so I'll just continue with water for now till they start to lose color (the Light Mix I used should have enough 'food' for at least 2 weeks, so that's good I believe!
Besides that everything went well. I'm using tap water for my humidifier and its sediments are being thrown into the air by it, but so far it seems my plants are doing well.
During the last 4 days the plants developed a lot in their new pots so I'm quite happy for that! If things go well next week I'll be moving them to their final container!
Thanks everyone for reading! I hope you'll all enjoy my new timelapses and photos! :D
Likes
1
Share


@Hydroponicfarm7
Follow
Subimos la temperatura de la sala y vaya si se noto, las plantas crecieron más en 2 semanas que en un mes, una pena no haber podido aclimatar antes la sala


Likes
3
Share


@Lovemabud
Follow
First grow since 2020, with around 250 grams for an outdoor which has kept me going as I'm not a big smoker. No option for outdoor this year so with summer coming to an end indoor it will be in my tin garden shed. Bit of a heat wave this week but likely to cool down by the time I plant. Then just hoping the weather gods are nice for the next 4 months. Not too hot. Not too cold...just right🙄 Soaked seeds last night and now in paper towels.
Planning on 5 plants anyhow, will veg for 4 weeks and flower for 9 to 10 or whenever ready. Hoping to harvest early winter before it gets really cold. Coco coir perlite mix this time and using the whole Mills range. Should be fun anyhow. Not expecting the same rewards of my last outdoor, but anything over 100 grams I'll be happy with. Anyhow, as far as germination goes I have 5 seeds to play with. In a glass of water for 8 hours, then paper towel in a zip lock bag in a warm location, including my pocket and next to me sleeping. Within 24 hours 3 of the 5 had germinated. I have doubts that 1 of the 2 remaining will germinate at all as it's a small mongrel seed but who knows.
Update...all seeds germinated even the last mongrel seed. I like keeping em warm, in bed with me, in my pocket when cold and not in bed. The last seed that I didn't think had a chance from the start popped 2 days after the rest, after I put the zip lock bag with the paper towel in my pocket for a couple of hours. 100% ain't bad that's for sure. Every time I grow I do the same thing, no u may not see this method recommended but it works for me. Last few grows I've germinated them in my underwear, while wearing of course. Nice and warm thats for sure, maybe its the fluctuation 🤣 Go on, do a google search on the underwear germination method, doubt any hits will be found 🤣
Processing
Likes
11
Share


@ganjaman24
Follow
It’s bern roughly two months these guys have been growing! Lst’d Both but untied the gg because I wasn’t sure she was benefiting from it so I’m going to do it over. These ladies (I hope) will start their flower journey next week when I revive my new flower tent 😎..stay tuned for some epic buds..I hope!!

Processing
Likes
5
Share


@UnkleSkunk
Follow
this week I was expecting an extension of the top that didn't happen
The plant has remained very uniform with the flowers all quite large even the lowest ones ..
the plant has remained small but I think it will have a nice yield ..
now let's talk about perfume .... last week a stronger and more pungent smell now much more delicate but always spectacular ...
The growth continues every now and then by rinsing with just water to eliminate the residual salts, otherwise the fertilization remains standard
