
Likes
Comments
Share


@therealgrowmie
Follow
Now this is where things get interesting.
According to the growth cycle of autoflowers, we’re now hitting the end of the vegetative phase, and the first flowers are starting to form. The plants have developed an even canopy and look relatively bushy. I reckon this favors an indoor setup, since the light comes straight from above with little to no diffusion—aside from reflections off the inner tent walls. I am aiming for a VPD between 0.7 and 0.8 kpa now to support plant growth!
I’ve adjusted the watering schedule to 1.5L per plant every third day from now on—bigger plants, bigger thirst!
Bonus: Tomatoes and an absolute Hulk of a parsley plant!

Likes
19
Share


@sellem
Follow
This week marked the start of flowering - they were showing sex and soon you could make out the little preflower budsites on both of them! This week also marked the start of their explosive grow-stretch phase. Looking back, i should have trained way more aggressive. but not TOO aggressive! on Day 21, i adjusted a prexisting stake too hard and plant Bs main trunk snapped in the middle. (I only fully noticed this in the next week, i just heard a snap but didnt visually see anything, the crack really formed over the next couple of days) A shock for me as an inexperienced grower - but again, as with everything so far, the BPP just. did. not. care. at all. i supported her with some stakes from below and rubbercoated garden wire, but honestly, the plant took good care of itself. Note to self - train early, train evenly, and test flexibility BEFORE adjusting :P
Ramped up PPFD to about 600 and Watering to 1,5L on Day 21 and 2L on Day 25. They were getting thirsty!
Day 21 was the last time i added root juice with 1 ml/L, and Day 25 i began adding Flowering Nutes and Stims with BioBloom and Topmax, 1ml/L each per plant. PH with both waterings was 6,5. Didnt measure Drain PH cause i was lazy.
Also defoliated leaves that were blocking out future budsites.
So far, they didnt care about topping, staking them down, defoliating, and Plant B also didnt care 1 bit about being literally ripped in half. i am impressed.

Likes
7
Share


@RizlaZA
Follow
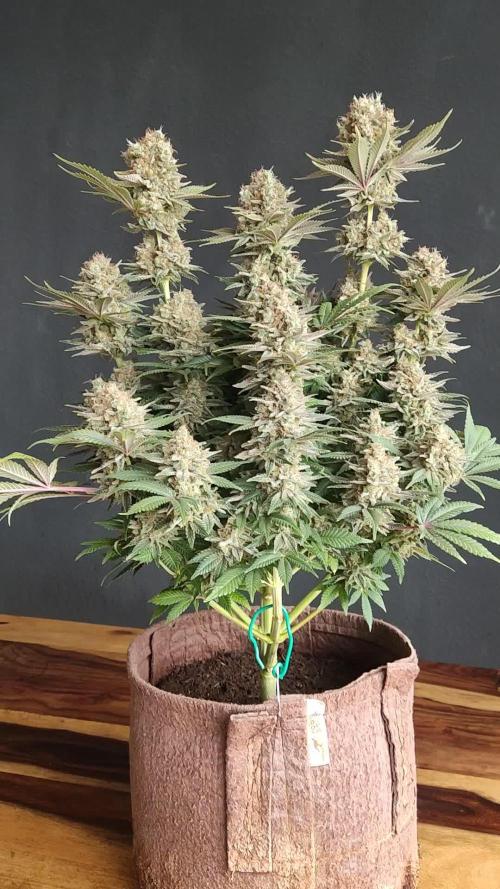
Incredible strain this, grew hassle free from the start. Keep her healthy and give her what she needs and it will produce some dense, trich covered goodness.
The smoke is Incredible but has a massive kick so be warned. Estimate these girls will be 25%
THC.


Processing
Likes
17
Share


@Hoodoo
Follow
Day 57 total (for plant 1)
Day 8 of flower (for both)
2020-06-28 New week, changed the nutrients from 1000 to 800 ppm because I kept having to dilute with CaliMagic water last week. I tried jumping up the nutrients too quickly. No burn but the nutrient intake wasn't nearly as fast as the water intake. Pre-flowers are coming out all over :)
2020-06-28 Plant is still drinking far more than its taking in with nutrients. You really have to drop them a bit when you go into flowering because they start guzzling... Trying to keep them around EC=1.6 but I might have to go down to 1.4.
Regardless, they are clearly happy and growing like crazy. Flowers are starting to emerge at the beginning of week 2 of flowering. I think that's a good sign. I continue to have to defoliate, especially plant 2! It's making these huge fan leaves every day.
2020-07-01 I typically have to top up Plant 01 every other day with water, so thirsty and growing so quickly, I wish it would stop.... I am posting an image of what I think is springtails. Gonna ask a grower question about it.
2020-07-04 Springtails don't seem to be hurting much. Tested and they seem to be fairly resistant to bleach AND hydrogen peroxide... They also seem to eat their dead very quickly and they congregate in clumps. They are bizarre to watch. Seem to have gotten a bit of nutrient burn on plant 2. I've kept the nutrients about 1650 but the ppm in the water keep going up because of the water usage.
I keep diluting it down over the course of the week and it seems to be working.

Likes
7
Share


Likes
91
Share


@MrCOCO
Follow
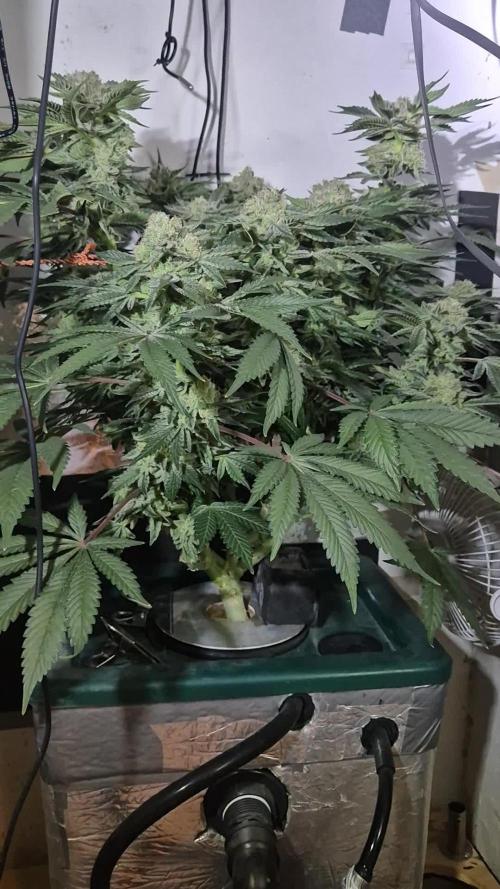
On day 15, I defoliated the girls. The girls are growing up like crazy, they have already doubled their height. Everything is going well, I'll probably have to do supercroping in the following days ...

Likes
4
Share


@matias_scrog
Follow
LAS BABYS VAN SE VAN ESTIRANDO Y SE EMPIEZAN A FORMAR LOS COGOLLITOS!

Likes
19
Share


@Skinnytalls420
Follow
Day 38- 18/01/22 and we are now in flowering everything is looking good I’m still cutting down the plants from my last grow Afghan kush and once I’m done with that I’ll be moving everything that isn’t chemdawg into the HPS tent!!! Day 41-21/01/22 there’s only fastbuds chemdawg in this tent now I managed to free up some more space in hps tent!!!
Likes
14
Share


@MUSRIME_supreme
Follow
Потихоньку растём👍
Все грядки были ухожены и политы) с заботой и лаской конечно же☺️
В эту субботу или воскресенье будет Корневая подкормка NPKMg 16/6/26/2+Меласса
Удобрения и стимуляторы используем от производителя Plantators.com. Так же были закуплены препараты для профилактики от вредителей и остальной никому не нужной дряни!)
До встречи 🤟
Processing
Likes
31
Share


@Dunk_Junk
Follow
She grew 10cm this week. Growing well. I turned her pot halfway through the week to ensure an even plant. Learned that on my last grow...

Likes
24
Share

@SkunkyDog420
Follow
Hallo zusammen 🤙.
Habe sie heute geerntet.
Wir sehen uns in 3 Wochen mit dem Erntebericht


Likes
6
Share


@BLAZED
Follow
Week 16 (Harvest)
30-1 First day of darkness.
Temperature: 27.9 degrees (lights on) 18.8 degrees (lights off)
Humidity: 65% (highest) 48% (lowest)
31-1 Second day of darkness.
Temperature: 24.5 degrees (lights on) 19.5 degrees (lights off)
Humidity: 65% (highest) 50% (lowest)
1-2 Drying day 1
The Saparot is ready to be harvested!
Before chopping her down, i took a lot of pictures.
I was able to remove most of the soil to see the rootball.
I hang plant as a whole to have a slow dry.
The exhaust fan is on setting 4.
2-2 Drying day 2
Temperature: 19.1 to 17.5 degrees
Humidity: 62% to 57%
I changed the exhaust fan to setting 2 because setting 4 was a bit high in my opinion.
3-2 Drying day 3
Temperature: 19.9 to 18 degrees
Humidity: 62% to 59%
I changed the exhaust fan to setting 1, as someone told me that it was enough air movement for drying.
4-2 Drying day 4
Temperature: 19.8 to 18.5 degrees
Humidity: 62% to 59%
5-2 Drying day 5
Temperature: 19.9 to 18.8 degrees
Humidity: 62% to 59%
Today i checked on the drying plants and the buds are shrinking a bit, they are getting a little bit crispy on the outside aswell,
I hope they wont dry as fast, and i aim for a 12/14 day dry.
Cant find the temps for 6-2 to 2-13.
I do have a video when she was at the half of the dry process.
14-2
Trim day, yay!
She was easy to trim, the buds are nice and dense, and there was not a too high bud/leaf ratio!
She dried for 14 days.
End results:
Dried buds: 81 Grams.
Dried Trim: 18.5 Grams.
I am really surprised how good these genetics are! If you like CBD, i really suggest trying JYM Seeds out!
The Saparot smells very fruity almost like a fruity coctail. The buds are super dense, and very bag appealing.
After some months of curing the sweet fruity smell changed to a more sour smell, but still smells amazing!
To be honest, i cured her a bit poorly, burped too less, and because the buds are so compact she holds moisture better then normal, so she tastes harsh, but thats on me.
I have a pack of JYM's Sour Fruit aswell, so i will for sure try it out again! And my hope is already very high :D
Thanks for following my diary, and feel free to check my others out aswell!
See you at the next one!
Processing
Likes
10
Share


@Geewiz
Follow
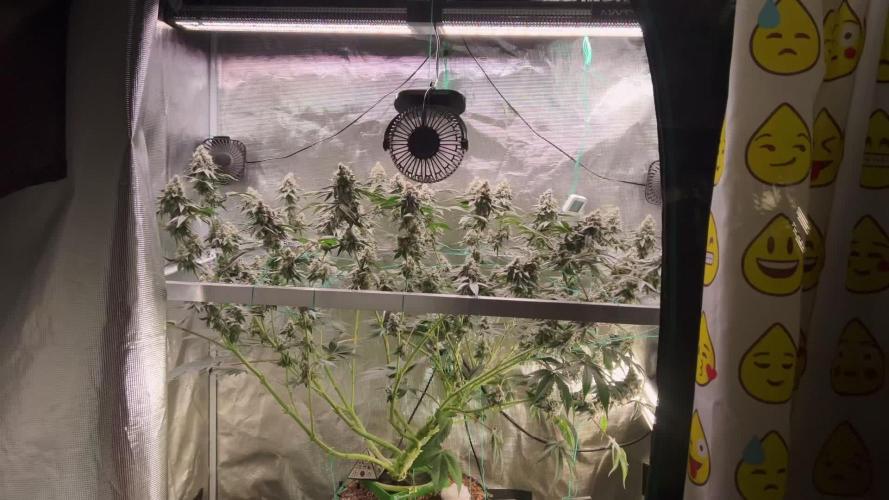
Hey guys! Thanks for stopping in to check out my babies! This is week 2 of flower (days 8-14).
This week things really seemed to take off! 🔥 Plants were happy all week long and seemed to grow almost an 1” per day if not more.
Buds are developing nicely, no smell yet but nice to see them stackin’. I cut out anything under the trellis that would end up being popcorn buds so the plants could focus on the main colas. Hoping I’ll just have to pull a few leaves here and there from now on.
The New Floraflex drip system has been nice! 💯 It has made watering easier and more automated. Water distribution isn’t perfect but I’m sure they aren’t 100% level either.
Plants should stop stretching after this next week and should start putting on some size! Stoked to see what these girls can do in week 3!
Day by day break down:
Day 8
Cut out some lower growth/ leaves blocking bud sites
Day 9
Fed all 6 plants. PH: 6.11, PPM: 1136
Day 10
Plants look great. Let them do their thing.
Day 12
Fed al 6 plants. PH: 6.05, PPM: 1264
Day 14
sitting at 29” tall right now. Not so stressed on height being be issue. Thinking they might be around 35-40” tall at the max.
Stay tuned for next weeks post to see how much these ladies have thickened up!

Likes
2
Share


@L8bloomr1008
Follow
Flipping this week. Top dressed with Gaia green, castings, and build a flower. Lookin more healthy and greening up.
Yupp

Likes
7
Share


@Sunstonedgrows
Follow
A tad late, but on Dec 20th we started flower! The pics and video are all from dec 20.
To kick it off we did a small feed (1tbsp) of veg nutrients and over the next few weeks will transition to flower blend.
So far she's taken well to the training and looks very strong overall.
Cheers til next time
-Dj Sunstone

Likes
37
Share


@Foggedaboudit
Follow
Flush is on! A gallon a day each of pH’ed tap water for the next week and a half to 2 weeks. Fall colors galore incoming! One is already going mad purple as I started it on the flush a bit earlier.
Likes
6
Share

@Janerussel
Follow
Flowering week 8.
Flower developing was quite slow because i had too low humidity too early. Now humidity should be ok. Ph 6.0 & ec lovered to 1.60. Plant started to drink heavily on fd 52.