Likes
Comments
Share


@GERGrowDesigns
Follow
Welcome To Week 11 or Flower Week 7 :D
( Green-o-Matic Twin Grow )
--2 Plants 1 Cup --
Everything is done with "Narcos Seeds" Products and is Showed in one Picture.
I’d like to thank Narcos Seeds for the great collaboration. Together, we’ve successfully brought visions to life and Iooking forward to continuing our strong partnership.
The Green-O-Matics doing Perfect .Theyre just reaching the Finish Line in the next hopefully in the next 3 days , btw some longer then GHS Predicted .
The Smell is everywhere, a Sweet blueberry with a little Gas in the end .
Watering : 2 Liter each 1 1/2day
Every Watering since the start got Narcos Nutriets in the water .
Temp day: 25-27
Temp Night :18-21
Light : tenty pro x4 200w dimmed to 160w 18/4 Light
Humidity: 40-45%
I would Apreciate some Thoughts and Thumps in The Air if you Enjoy what you see . Every Grow Week Needs a lot of Time Effort to keep this Quality At my Diaries .
So Keep up Growing Everyone and good Luck for your Projects !

Likes
16
Share


@TooQuiikk
Follow
Let me start by saying, I'M SO GLAD I DIDN'T CHOP! THESE BABIES ARE GAINING SOME SERIOUS BULK!
I can not wait to see them finish out, It's really testing my patience, but I notice more bulk every single day!
It's about time to get the chop, they are maturing really quick and I love it. The smells are absolutely insane!!!


Likes
31
Share


@XperencdGmanXG
Follow
amended so there is enough for the plant to finish flowering. After the 3rd week they are really perking up and getting that fat structure on the buds. Starting to smell very danky. Can't wait to taste this one under these new grow conditions.

Likes
11
Share


@Bread_n_Buds
Follow
Our Jet Fuels have the aroma that we like the most potentially at Casa BreadandBuds the Diesel aromas and derivatives are the favorites.
That said we have two plants, as with all photoperiods, one planted a little earlier to be worked with the topping that will start next week, the other planted 10-15 days later to avoid size problems will be grown straight with the main cola, because giving up the main cola is a tear to the heart.
We gave Power Roots 1 Ml/l , Pure Zym 1 ml/l , Sugar Royal 1 ml/l , Alga Grow 3 ml/l -
Plagron nutrients are available at Zamnesia in convenient pack formats for all growing styles. I used this one with a simple search you can find the other products.
Try a seed of this strain that drives us crazy...
---- https://www.zamnesia.io/it/11258-zamnesia-seeds-jet-fuel.html
Zamnesia Description //J Jet Fuel (also known as G6, Jet Fuel OG, and G6 Kush) is a modern hybrid rich in THC and terpenes with a diesel aroma. Originally created in Colorado by crossing Diesel with Aspen OG, this 60% sativa-dominant hybrid is a must-have for any smoker who enjoys an uplifting and energizing high. Now, thanks to the hard work of our breeders, the original Jet Fuel is even easier to grow at home. Order your seeds, plant them in soil, and enjoy their rapid growth. After just 9–10 weeks of flowering, you can expect a generous harvest of premium sativa buds!
All the best that mother nature can offer is on ----www.zamnesia.com

Likes
4
Share


@Fabroking
Follow
Genetica davvero valida come già detto merita un posto nella coltivazione di tutti almeno una volta, penso sopratutto che quando farò estrazione avrò bella soddisfazione data la quantità di resina e terpeni che hanno sprigionato
Likes
1
Share

@BAM_BAM
Follow
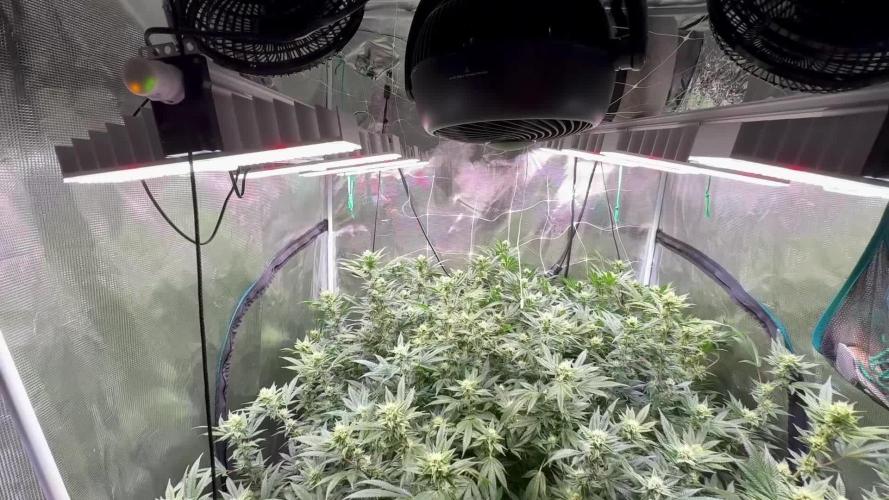
They are starting to get a bit frosty. the sensi prop is powder so the given values are in grams. Big bud as well. I planted cloves in the bottom of the pot, they are growing well and I think I am liking the companion planting of mixed clovers.
Likes
8
Share


@bauergrows
Follow
The usual maturing of buds. Unfortunately, they're still a bit small but smell really good.
Observation: The premature yellowing seems to have stopped after green sensation was introduced and the amount of water was reduced. So we could think that my previous hypothesis was not so wrong.

Likes
9
Share


@wheedtobeus420
Follow
Day 83 she’s looking beautiful and bulking so fast. The time is coming soon. I can’t wait. She is looking fabulous. Just keeps chugging along. She will begin the ice flushing process soon and she’s so damn heavy she’s being held up.


Likes
4
Share


@CalGonJim
Follow
4/7 245am MONDAY totally unnecessary lighting!!!!! Experimenting with supplemental lighting ideas!! it does not have a dimmer no blue lights. It uses 16 W so I lowered the main lighting from 99 to 97 and I will probably bring it down to 94 and that will keep it as cool as the room, but the same amount of heat is a person is all the tent should give off👍👍
FROM GROK... I WAS RIGHT!!!!! HERE YOU GO EVERYBODY: I NEVER use more than 6ml per gallon of each one!
""Do Tasty Terpenes and sensizym by Advanced Nutrients work well together???
""""Yes, Tasty Terpenes and Sensizym by Advanced Nutrients can work well together in a nutrient regimen, as they serve complementary purposes and are designed to be compatible with each other and other Advanced Nutrients products.
Tasty Terpenes is a bloom enhancer focused on improving flower quality, aroma, and size. It provides potassium, amino acids, and organic compounds from kelp and alfalfa to strengthen stalks, bulk up buds, and boost terpene production. It’s typically used during the flowering phase (weeks 3-6) at 2ml per liter to support robust plant development and enhance the sensory profile of the harvest.
Sensizym, on the other hand, is an enzyme formula that targets the root zone. It contains a blend of enzymes like xylanase, cellulase, and beta-glucanase, which break down dead root material, organic debris, and complex carbohydrates into usable nutrients. This promotes a healthier root system, improves nutrient uptake, and can be used throughout the grow cycle—often at 2ml per liter during weeks 1-6 of bloom—to maintain an optimized growing medium.
Together, they complement each other by addressing different aspects of plant health. Sensizym keeps the root zone clean and efficient, ensuring the plant can effectively absorb the nutrients and organic compounds delivered by Tasty Terpenes. This synergy can lead to better nutrient availability for flower development, potentially enhancing the size, potency, and flavor of the yield. Advanced Nutrients explicitly states that both products are compatible with all their base nutrients (pH Perfect or non-pH Perfect) and supplements, as well as competitors’ products, and can be used across various growing systems like hydroponics, soil, and coco.
For best results, you’d typically apply Sensizym consistently to maintain root health, while adding Tasty Terpenes during the bloom phase to maximize flower quality. Since both are recommended at 2ml per liter, they integrate easily into a feeding schedule without overloading the nutrient solution, provided you monitor your plants for any signs of overfeeding. Growers often pair these types of products to cover both root optimization and bloom enhancement, and there’s no indication of chemical or functional conflict between them. Just ensure proper pH and EC levels after mixing to keep everything balanced."""""👍👍👍
4/8 1230am BUGS.... I saw hundreds of little white bugs on the rim of the planters, so fungus gnats LOTS of them..... Killing the grow, BPP is most damaged, I watered then sprayed FLOWER SHIELD at 10ml per 30oz saturated we will see ..... THE CHEAP AMAZON LIGHT LASTED 24 HOURS......I WILL GET AC INFINTY LIGHTS FOR AUX NEXT TIME. The lights from the humidity dome are good enough for my 2 x 2 tents
4/13 1am now im inventing some new aux lighting


Likes
46
Share


@DogDoctorOfficial
Follow
Germination Report: Runtz vs. Runtz 🌿✨
Hey there, green thumbs and cannabis enthusiasts! 🌱🌟 I'm thrilled to share the exciting details of our Runtz vs. Runtz germination journey. Buckle up, because this ride is packed with fun, knowledge, and a touch of green magic! 🍃💫
The Germination Journey 🌱🚀
Our Runtz seeds were given the royal treatment from the get-go! We kicked things off with the Cannakan method, ensuring our precious seeds had the best start. Here's a step-by-step breakdown:
Hydration Stage 💧:
Seeds were soaked in water, embracing their first taste of life. This process lasted about 30 hours, allowing the seeds to absorb enough moisture to kickstart germination. Watching those little seeds swell up is always a magical moment! 🌟
Transition to Soil 🌿:
After their water bath, the seeds were gently transferred to soil. This crucial step ensures they have the nutrients and environment they need to grow strong and healthy. Each seed was placed in a cozy, nutrient-rich bed, ready to sprout and thrive.
Understanding Runtz Genetics 🌸🔥
Runtz is a legendary strain, celebrated for its powerful genetics and exceptional traits. Let's dive into what makes Runtz so special:
Parentage 🌿:
Runtz is the love child of two powerhouse strains: Gelato and Zkittlez. This dynamic duo contributes to Runtz's unique flavor profile and potent effects.
Flavor and Aroma 🍭:
Expect a delightful explosion of sweet, fruity flavors with a hint of candy-like goodness. The aroma is equally enchanting, filling your space with a tropical, sugary scent that's hard to resist.
Effects 🌈:
Runtz is known for its balanced high, offering both euphoria and relaxation. Perfect for those seeking a joyful, uplifting experience that melts into a soothing body calm.
What to Expect 🌿✨
As our Runtz plants grow, here are a few things to watch for:
Vigorous Growth 🚀:
Thanks to its robust genetics, Runtz is a strong grower. Expect rapid development, especially in the early stages. Keep an eye on those green shoots as they stretch toward the light!
Resin Production 💎:
Runtz is a resin powerhouse, producing dense, trichome-covered buds. This not only enhances its potency but also contributes to its striking appearance.
Balanced Structure 🌱:
Look for a balanced structure with a mix of sturdy branches and lush foliage. This makes Runtz ideal for various growing techniques, whether you're a novice or a seasoned grower.
The Joy of Growing Runtz 🌿❤️
The journey of growing Runtz is as enjoyable as the end product. Each day brings new growth, surprises, and the satisfaction of nurturing such a phenomenal strain. Whether you're growing for personal use or to share with friends, Runtz is sure to impress with its vibrant traits and rewarding yield.
Stay tuned as we continue this exciting adventure! We'll keep you updated on the progress, sharing all the green goodness and joyful moments along the way. Happy growing, everyone! 🌿🌟💚
Germination method 🌱 @thecannakan
Genetics Runtz F1 @zam.nesia Runtz auto @kannabiaglobal
Nutrition
@aptusholland 🌿
@aptus_world 🌎
@aptus_es 🌍
@aptusbrasil 🌱
@aptus_thailand 🌿
@aptus_portugal 🌳
@aptususa_official 🍀
@aptusplanttechnz 🌺
@aptusplanttechaus 🍃
Ambient controls🎮
@trolmaster.eu @trolmaster.eu.support @trolmaster.support @trolmaster.agro
Soil @promix_growers_eur @promix_cannabis
LED - @lumatekeu
Watering- @autopot_usa @autopot_global
Love and attention- @dogdoctorofficial
#aptus #aptusplanttech #aptusgang #aptusfamily #aptustrueplantscience #inbalancewithnature #trolmaster #trolmastereurope #trolmastersecrets #Autopots #RuntzBattle #KannabiaVsZamnesia #GreenJoy
As always thank you all for stopping by, for the love and for it all , this journey of mine wold just not be the same without you guys, the love and support is very much appreciated and i fell honored and so joyful with you all in my life 🙏
With true love comes happiness 💚🙏 Always believe in your self and always do things expecting nothing and with an open heart , be a giver and the universe will give back to you in ways you could not even imagine so 💚
More info and complete updates from all my adventures can be found ⬆️link in the profile description ⬆️
Friendly reminder all you see here is pure research and for educational purposes only
💚Growers Love To you All 💚


Likes
6
Share

@bkickstand
Follow
Week 12 Update: The Oasis Project Deck Cultivation
Garden Overview & Environmental Notes:
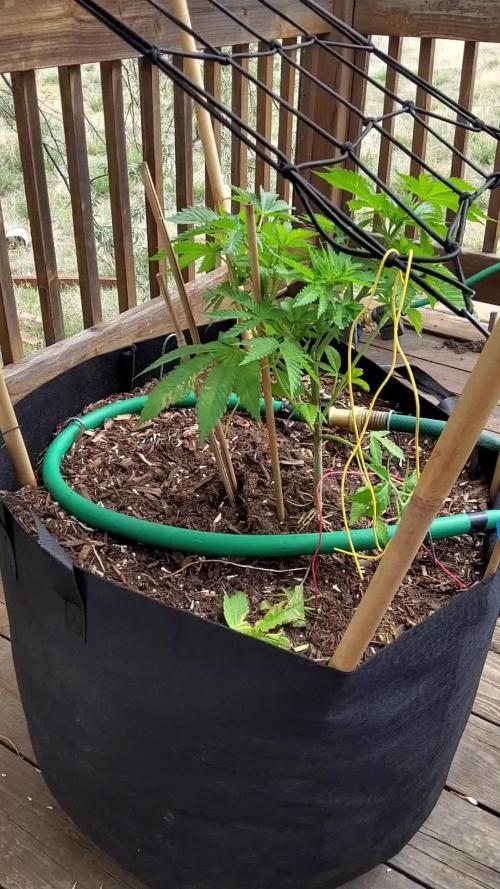
We are officially cruising through late May on the Eastern Plains, and the deck setup is performing beautifully. The intense high-altitude sun is fueling some fantastic vegetative development. The custom dual-timer irrigation manifold and hand-drilled halo rings are dialed in perfectly, keeping the media consistently moist without oversaturating. The atmospheric action has been classic Colorado—watching some spectacular afternoon storm build-ups, localized rain shafts, and distant lightning patterns out across the plains while the garden stays secure.
Plant Metrics & Development:
The Durban Poison Quartet is absolutely thriving in their massive 25-gallon homes after their Mother's Day transplant. They are focusing heavily on structural branching and filling out their footprints. Low Stress Training (LST) and SCROG preparation are underway to keep the canopy flat, wide, and optimized for maximum light penetration. For a quick snapshot on DP 5, she is displaying strong, tight internodal spacing. The main canopy top is steadily established right at 17 inches, with the outermost fan leaves reaching eagerly up toward the 18-inch mark.
Feeding & Maintenance:
We are remaining strictly organic, running the FOOP nutrient line—including the Veg, Bloom, and Sweetener components—to feed the active microbes and keep the root zones robust. For training, we are continuing to adjust the bamboo stakes and tie-downs to spread the canopy. The goal is to maximize the horizontal surface area before they really explode later this summer.
Looking Ahead:
For now, the focus is keeping this Durban Poison quartet broad, healthy, and perfectly trained.
-Keep growing and stay mindful! ✌️
Update 6.3.26: Worm castings top dressed into the DP quartet and saturated. DP5 and DP6 were pulled and trained. Looking solid!


Likes
2
Share

@DE_BW
Follow
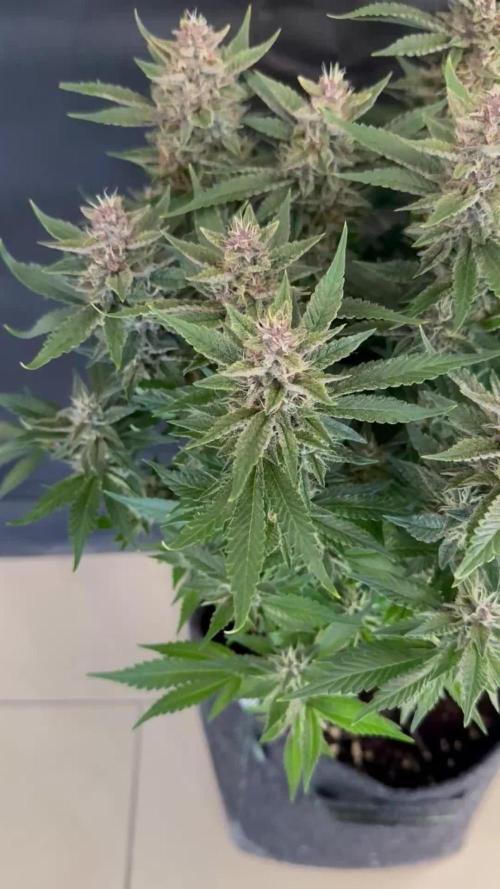
The aroma is already incredibly intense, with a strong fruity profile and a deep apricot-like sweetness filling the space. The colors are developing beautifully, showing subtle purples and frosty highlights that make the buds really stand out. Structurally, the plant is essentially one continuous cluster of flowers, with buds forming everywhere from top to bottom. Bud stacking is still progressing rather slowly at this stage, but the overall flower coverage and terpene expression are extremely promising.
Likes
2
Share


@Vet4weed
Follow
Week 3 (Jan 18 - Jan 24)
So far so good. The new plant (in the new water only organic soil) is doing a good job catching up to the others. Going to name this one River. Oddly enough though, her partner isn't doing well at all. Going to give it a few more days, but looks like we may down to just four plants for this grow.

Likes
2
Share


@CannaIGrow
Follow
Seems to be growing and looking good. I can’t wait to see how she grows out.
Likes
14
Share



Likes
151
Share


@CANNASIM
Follow
------GENERAL COMMENT------
As planed I lowered the base nutrient to 2ml, and took a break from Cal Mag, to release the N a bit, green is on point now.
Tomorrow will catch up with the Cal Mag schedule as usual.
Time for some overdrive, for the rest all good, girls are developing well and buds are getting bigger, no issues.
Smelling delicious! Hope I had some Terpinator to give a go...
------SM.BB COMMENT------
BB is maturing faster you already can see I have cloudy Trichomes, she will be a fast finisher as it looks like...
Likes
216
Share


@Ju_Bps
Follow
Hello growmies 👩🌾👨🌾🌲🌲,
👋 The buds start to forming and stems coming alone full of little buds 😍😋.
Nothing to say, was long to start but now look in fire 🔥 .
💧 Give water each 2/3 days.
1,5l Water + RQS Bio Flo Pack
PH @6
- Bio Flowering Booster Pack
Thicker Flowers 1 ml/l
Bigger Flowers 1 ml/l
Sweeter Flower 0.5 ml/l
💡Mars Hydro - SP 3000
100% 53 cm.
🔥 Thanks community for follow, likes, comments, always a pleasure 👩🌾👨🌾💚🌲.
Mars Hydro - SP 3000 💡💡
https://www.mars-hydro.com/sp-3000-samsung-lm301b-greenhouse-led-grow-light
Zamnesia - Gelato Auto🌲🌲
Discount code -20% with GROWITGD code 🔥🔥
https://www.zamnesia.com/7688-zamnesia-seeds-gelato-automatic.html
Likes
Comments
Share