
Likes
Comments
Share


@DivineBuds420
Follow
Woche 9 – die Trichome tanzen ✨, die Terpene explodieren 🍇🍋, und die Buds sind auf dem Höhepunkt ihrer Schönheit.
Doch dann, wie aus dem Nichts: Spinnmilben 🕷️.
Ein unerwarteter Besuch, der uns daran erinnert, dass selbst im scheinbaren Paradies Herausforderungen lauern.
Wir haben schnell reagiert ⚡, natürliche Methoden angewendet 🌱 und die Ladies mit Liebe und Sorgfalt behandelt ✋❤️.
Diese Erfahrung hat uns gelehrt, noch achtsamer zu sein und die Zeichen der Pflanzen frühzeitig zu erkennen.
Week 9 – trichomes shimmering ✨, terpenes bursting 🍇🍋, buds at their peak.
Then, out of nowhere: spider mites 🕷️.
An unexpected guest, reminding us that even in paradise, challenges can arise.
We acted swiftly ⚡, used natural remedies 🌱, and cared for the ladies with love and intention ✋❤️.
This moment taught us to be more present and read the signals more clearly.


Processing
Likes
12
Share


@Buurman
Follow
A really hot week last week, The lamp doesn’t make it any easier but steady at 28 degrees now.
OG auto in its final days I think, leaves are starting to turn yellow so I’ve started a flush, it’s a beautiful plant, 80% of the plant is covered in bud, I’ll post some good pics before harvest. Not gonna be a crazy yield but for the size of the plant really decent.
The feminized OG are all exploding with bud sites, amazing how fast it’s going the smell is getting better by the day
Gorillas are cute! Flowering a little slower but a lot bushier and the leaves are sooooo pretty!
Started to give more water and upping the dosage of nutes since I’ve not seen any signs of over feeding might as well try it out
Okloveyoubye ❤️


Processing
Likes
6
Share


@oP41No
Follow
I got a double scrog setup and I'm gonna let it grow into it. This is my first grow and I'm excited. General Hydroponics nutes (Flora series). Kingbrite QB 288 v3 from alibaba. I'm just gonna let her do her thing until about week 3.

Processing
Likes
75
Share


@Dedon
Follow
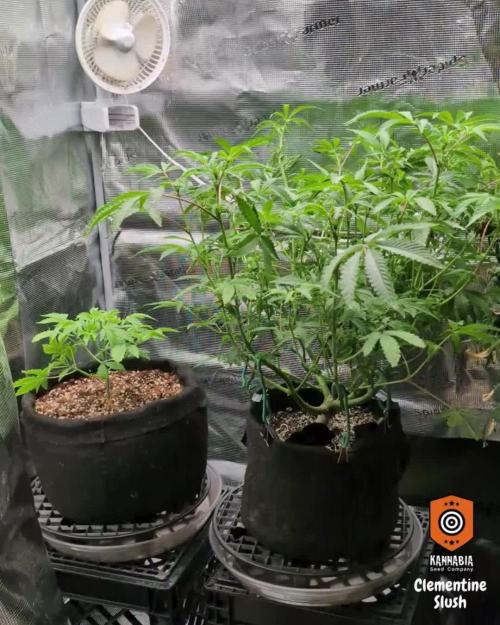
Hi everyone ! 😀
Everything is ok, no disease, no carrency. but 2 ladies don't want to stretch a lot :/ ( the 2 on the corner, bottom left and Top right ) i don't know why. maybe it's the variety. i have 4 Skunk XL and 2 Critical. Maybe these 2 are the critical ( yes i lost them when i plant the seed 😩 ... )
No more pH fluctuation ( i love that )
EC is around 1.9/2.0 and increase to 2.1/2.2 when they drink a lot so i add water with 1.7 ec to decrease it to 1.9/2.0 again
I added 30L of water since i changed the water ( 2 tanks * 20L / i change it the 11/05/18 ) so i'm gonna change the whole solution during the week.
See you next week !

Likes
7
Share


@BudXs
Follow
Super busy with a move and a big garden reno. Sorry, this is the only update for this week

Likes
6
Share


@GermanBoy69
Follow
The plant grows. I have now added an oxygen pump to the water tank. Let's see what effect that has. You can see the progress every day. I've also bought some phosphoric acid to keep the PH down (hopefully).
My water tank is very large, about 75 litres. I also have a few holes in the lid, so a lot of rainwater gets into the tank through this and also through the openings in the pots. Never had to top up the water yet lol.
At the end of the fourth week I'm happy with the growth, especially as it's my first plant.
--------------------------
Die Pflanze wächst. Ich habe mittlerweile einen Sauerstoffpumpe in den Wassertank gegeben. Mal sehen wie sich das auswirkt. Man sieht den Fortschritt jeden Tag. Ich habe außerdem Phosphorsäure gekauft, um den PH-Wert endllich stabil unten zu halten (hoffentlich).
Mein Wassertank ist sehr groß, ca. 75 Liter. Außerdem habe ich ein paar Löcher im Deckel, so dass dadurch und auch durch die Öffnungen in den Töpfen viel Regenwasser in den Tank gelangt. Musste noch nie Wasser nachfüllen lol.
Am Ende von der vierten Woche bin ich zufrieden mit dem Wachstum, vor allem da es meine erste Pflanze ist.


Likes
24
Share


@Grey_Wolf
Follow
Eva Seeds
High Level 14 weeks of vegetation completed 20th Jan 2020
This Diary feels like it's been going forever 😄 and Ive still got about 10-12 weeks still ahead of me 😶 Not to worry tho I've been busy tying up the branches on the big plant
as they are getting bigger everyday. I'm going to need to start training the branches closest the far end of the greenhouse to start growing horizontally otherwise they'll be pressing against the ceiling of the plastic greenhouse which isn't good for the buds or Discretion. I have to get most of the training done before I head off for a fortnites break.
I have a close friend who will be watering them all for me but that is all they'll be doing so all training and preparations must be done prior to me leaving.
Cheers for stopping by I'll be back next week.


Likes
55
Share


@pifflestikkz
Follow
Day 120
30/08/24 Friday
Feed again today 😁
She seems to be loving it!
Day 122
01/09/24 Sunday
De-chlorinated tap water pH 6 only today
Picture and video update ✌️💚
Day 124
03/09/24 Tuesday
Feed again today using de-chlorinated tap water pH 6 with calmag.
Noticing her starting to stack them tops out 🤩
Day 126
05/09/24 Thursday
(End of week)
De-chlorinated tap water pH 6 only today full 5L no run off now. Will up to 6L next week.

Likes
14
Share


@ZombieKushAddicted
Follow
FC-E 4800 lamp ,
to view this lamp or any other marshydro product go to: https://instagram.com/marshydro_aliexpress?igshid=YmMyMTA2M2Y=

Likes
65
Share

@Fatnastyz
Follow
Day 29 - 8/12
- I took the day off! Didn't water and didn't measure. LOL I did peek at her once or twice though...
Day 30 8/13
- 8.5" today!
- 5.8 ph water as usual.
- Cut off a couple of fan leaves that were annoying me. Thinking about finally flipping her tonight, getting a bit bored LOL need a change up.
Day 31 - 8/14
- LOL Never mind on flipping her I guess, I ended up topping her! I wasn't going to, the furthest thing on my mind when it came to training her! But, I just did! I topped her! What can I say...I am very impulsive. I get an idea in my head and it's done before the next thought. I will change things up on a dime!
- Well, she is doing good after that sudden head chop though. Wish I would have decided to do this a few days ago...but whatever! I think I will let her veg out for a few more weeks and get tall before I flip now LOL I may change my mind before then though.
- 7" tall today now that she is topless.
- No water today, but bringing her new feed up to full strength on her next...It's coming! She wants it bad lol
Day 32 - 8/15
- Finally a full feed! Upped her Cal mag to 4ml/gal now too. May end up needing to go higher on that soon.
- 7" tall still
- She's already growing new pretty leaves and looking more bushy lol. I'm glad I topped her.
- Hoping her full strength will help her paleness now lol, and her big dose of cal mag of course.
Day 33 - 8/16
- 7.5" tall
Day 34 - 8/17
- 7.5" tall
- Still on every other day water with full strength Terra Grow from Plagron and 4ml of Cal Mag. Sometimes I feel like adding a ml or 2 of silica.
Giving 2000ml per water.
Day 35 - 8/18
- 8" tall
**Still going on about how much I love my low effort nutrient feed! Simplicity is the way ! LOL at least for me. She didn't seem to mind the switch up to Plagron at all, but she was really young though. She did yell a bit at me for starting her so low...but this was my first time using Plagron, and my first time not going off of someone else's chart so I was fine taking my time. And, as you can see, she survived LOL
She also didn't mind me suddenly cutting her head off.
LOL When will I flip.....now that will be a mystery. I'm sure it will just hit my head one day that "today is the day"....and I'm sure there will be no actual reason for that specific day either, just an "I felt like it".
Lana has not managed to nibble any this week, but she has stood guard to make sure no one else could either. She thinks if anyone is getting a nibble it's gonna be her! My little guardian.
Also included some beautiful pics of other kitties! The joys of my life!

Likes
4
Share


@Jardin33ro
Follow
Ultimaaa semana!! O eso quiero esperar jaja No ha sido facil, y la mimosa no le gusta compartir el espacio con geneticas mas grandes! Una planta que come mucho y no pude dar con la tecla para su mayor bienestar. Sin dudas voy a volver a cultivarla, tiene un olor muy frutal con toque a gas(diesel) al menos yo le siento. Tratamos de bajar ec en esta semana y ya comenzamos a lavar con flawless que viene cargadita.

Likes
105
Share


@Natrona
Follow
Welcome to Harvest week of my Sunset Sherbet journey sponsored by Zamnesia. Sunset Sherbet has been in the garage this week just chilling. Temperatures outside were 25-37f at night and in the garage 40-50s and flushed for 4 days with 2-3 liters each day. The cold weather did not do much for color change. Weeks of colder weather would have had an impact. I harvested her 12/5, day 101 from germination in the soil. I got some good trichome pics earlier this week.
Sunset Sherbet grew in my small 3x3. She demonstrated a strong resistance to mold, bud rot and pests. I switched to an organic nutrient feeding solution and kept trying to get my ppms in the range of synthetic fertilizers. This resulted in overfeeding which burned up her leaves. She would have been pretty based on the colors I see in the buds-pinks, purples and oranges.
Plant structure – Sunset Sherbet remained short at just 20 inches. This would make her very good for small closet grows. She had many branches off the main stalk and her nodes were tight. There were many, many small leaves, not much bigger than a quarter.
Data sheet advised of regular maintenance. Trimming will be a bit tedious as a result of not defoliating more.
Sunset Sherbet grew without difficulty or issues. Produced a nice outcome. Wet weight 384g.
Your likes and comments are appreciated. Thanks for stopping by.
Growers love 💚🌿
💫Natrona💫
Likes
12
Share


@Bread_n_Buds
Follow
Now we've reached day 41
Our Runtz is truly very very beautiful, aesthetically the most beautiful of all, truly and without a doubt.
It has grown gracefully and regularly, the central top is swelling and the lateral ones have risen enough and are well aligned to give a great effect even in photography.
Now fertilizers are necessary, we had that moment between veg and bloom of flush but when you want to do this thing you have to be very very careful to give the fertilizer for flowering at the right time otherwise you go from excess of fertilizer for veg to deficiency of fertilizer for bloom.
For the rest your eyes can do everything very well, look to believe and remember the benefits of F1 Hybrids, you will forget about hermaphroditism if it doesn't seem like much to you ask the photoperiod growers what they are having fun in these periods.
Site Description
ZAMNESIA - RUNTZ F1 HYBRID AUTOMATIC: UNIFORMITY, RELIABILITY, AND GREAT FLAVOURS!
What can we say about Runtz that hasn't already been said? Well, trust us when we say you've never seen it quite like this before! From the team at Zamnesia comes Runtz F1 Automatic. Now, this isn't some Formula One car-related special edition, no. This strain takes everything you know and love about the original Runtz and offers a reliable and uniform growing experience that will impress everyone.
GROWING RUNTZ F1 HYBRID AUTOMATIC
Runtz F1 Hybrid Automatic is the lovechild of Gelato and Zkittlez; the result is a strain that's extremely vigorous and fast to flower (taking just 10 weeks from germination to harvest). While autoflowers generally make for a no-hassle growing option, F1 hybrid seeds take this ethos one step further. Runtz F1 Automatic showcases great uniformity, meaning all plants will have a remarkably similar appearance and output. These plants are also highly resistant to pests and disease, so if it's your first foray into the world of cannabis cultivation, you're in the right hands with Runtz F1 Automatic.
Reaching heights of 55–75cm, Runtz F1 Automatic can slot into the pokiest of grow spaces, both indoors and outdoors. But this small stature is not to the detriment of production. Once ready, growers will be treated to a return of around 500g/m² indoors and 100–150g/plant outdoors.
AROMAS, FLAVORS, AND EFFECTS OF RUNTZ F1 HYBRID AUTOMATIC
Another perk of F1 hybrid genetics is that these plants are teaming with terpenes and cannabinoids, making for a pungent and potent experience you're unlikely to see with other strains. When it comes to delivering massive flavors, Runtz F1 Hybrid Automatic certainly doesn't phone it in. Upon taking that first toke, users open themselves up to bold notes of creamy vanilla mixed with candied citrus fruit. The result is mouth-watering. With 25% THC to its name, Runtz F1 Automatic offers an uplifting, euphoric, and creative high that will suit all kinds of scenarios, whether social or solo.
So seeds of all brands, in addition to these great F1 Hybrids and the entire Zamnesia line, fertilizers and everything related to the world of cannabis, you should buy them from the best online store in the sector
www.zamnesia.io
Likes
9
Share


@PrairieFrostGrow
Follow
***** Week 5 December 20 to 26, 2020 - Days 29 to 35 from germination *****
Going into the first full week of flower/transition. She was definitely going through the start of transition last week but I left it as a veg week and will call this the first flower week. She is not 100% and will not be but she has all of the signs of being a nice girl. She grew hard to start and she can take the nutrients levels, leaf colour is very good and she has grown evenly, nothing odd with growth. You just can't make up veg time with autos as they don't stop😞 For the first four weeks I end up staying so focused on making sure the autos are happy everyday and for the full day if at all possible..........as opposed to the first four weeks of a photo and I am a lot more relaxed and feel there is time to correct anything......its all good😂😂
This girl has obviously not been happy about everything in life over the first four weeks. She was put on a riser this week to help get her closer to the light. I still don't know exactly what I have done but suspect it was a combination of things in veg to slow her down. I feel she likely wants a quite dry media so the roots can breath more........I was not "soaking" the coco with the volumes of moisture but it was wet. Possibly could have cut watering volumes in half to see. Been battling pH drift though so I have it in my thick skull to give a good runoff amount........which can lead to a "soaked" media and that my have been part of it??? I also took four large fan leaves up higher on her, early on right after the first LST and think that pissed her off as well........I knew when I did it and thought I would "roll the dice" and take them but maybe should have left them.......cant go back but at least aware of it😀
Pulled her out this week and looked closer at her to see the bottom better. Her branches are soft so silica is increasing now that we are in flower. Colour was good below and not spotting or deformities. When tying down the branches, she pulled her self right up around the ties again easily enough by the next day. At this point I just want to get all the extra leaves out of there and let the air flow so I removed a number of fan leaves on her lower half, not too crazy but enough that she felt it I am sure.......she is already stunted so screw it and help give her a chance to get more light and grow taller was my thought😁👊
Little more detail.....
Dec 20/20, Day 29
- Dry out day after heavier feed yesterday.
Dec 21/20, Day 30
- need to add some moisture
- 1.5L watering with Magnificat @ 2ml = 200ppm and 5.7pH
- more of a watering today with some CalMag added because RO water being used.
Dec 22/20, Day 31
- dry out day today.
- going to let her go and feed in the morning tomorrow.
Dec 23/20, Day 32
- Feeding day today. Continuing with first weeks flower feed of 2ml/L.
- 2L feed with Micro, Bloom, Magnifical, AstroFlower, VeloKelp, Natures Candy @ 2ml = 800ppm and 5.8pH.
Dec 24/20, Day 33
- dry out day again. Still fair bit of weight in the pot compared to the other autos.
- pull out tomorrow and clean up lower growth and check runoff numbers.
Dec 25/20, Day 34
- 2L full feed again with the same 2ml/L feed as earlier in the week for all the autos. Added AN Rhinoskin as well for silica.
- 1150ppm and 5.9pH going in.........pots were really dry and perfect pretty well.
- Runoff was 1075ppm and 6.0pH.........I can live with that at week 2 flower😁😁
Dec 26/20, Day 35
- 1L full feed again. Had mixed up 12L yesterday.
- Added 2ml/L of Microbial Mass and Piranha = 1200ppm and 5.9pH.
- She needed her microbe allotment as we are at the start of flower.
- Bacteria added to help keep some of the nutrients in the media as she finishes.
- next watering is more of plain water and add Terpinator.
Nice girl Sweet Seeds.......I have messed her up but learning from her.......we will get one to smile about😬😬
Processing
Likes
8
Share


@JaGrowzAuto
Follow
Still having an issue with watering. They don't seem to be drinking as much as I thought... Sometimes it's 36-48 hours between waters, and yes I am watering til a little runoff dribble out.

Likes
23
Share

@Fatnastyz
Follow
9-18
Day 14
Well, she is growin very well. I haven't burnt her yet! 😱😂. She is bigger every time I look.
1500ml ph 6.0 with yucca. Turned a fan on a bit, shes taking it well.
Little extra on pictures. 😂
9-21
Day 17
Watered 2k ml recharge ph 6.2
Adjusted lst and removed bottom nodes.
One of the 2nd nodes got injured in battle, I had to remove her too.
She grows!
9-23
Adjusted lst slightly and watered with yucca.
Enjoy!

Likes
9
Share


@Burton1988
Follow
I cleaned the lower leaves and branches a bit, hopefully I didn't overdo it😃 however it is growing well , so I hope it will start to focus on the flower, the space to grow is getting smaller. 😂
