
Likes
Comments
Share


@BenDidKnEe
Follow
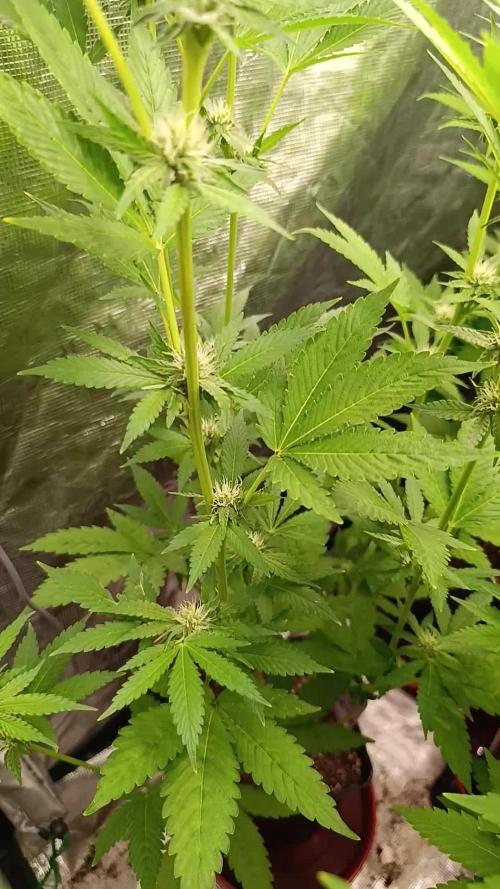
Light is at max. Need to top dress sometime this week and add some flower nutes let them start flowering soon, can’t afford to much more hight if they are gonna double. Things are as they should be! Happy growing!


Likes
29
Share


@nonick123
Follow
Día 6 (29/04) Spray solo agua el top del sustrato. DLI 13
Día 7 (30/04) Spray solo agua el top del sustrato. DLI 13
Día 8 (01/05) Spray solo agua el top del sustrato. Subo a DLI 17
Día 9 (02/05) Elimino la cúpula casera de humedad y empiezo a regar con 300 ml solo agua
Día 10 (03/05) Empiezo a luchar con una ola de calor inesperada para esta época, que me trae temperaturas exteriores de 30 ºC y humedad relativa del 30%...
Mantengo la cúpula casera de humedad
Día 11 (04/05) Hace muchísimo calor.. 30 °C. A ver como lo llevan
Hago un invento casero para aumentar la humedad
Día 12 (05/05) Primera alimentación con Aptus! 300 ml H2O + Regulator 0,15 ml/l + CaMg-Boost 0,25 ml/l + Startbooster 0,25 ml/l - pH 6.2
Creo que las plantas se ven un poco pequeñas para tener 12 días... esperando por explosión de crecimiento en los próximos días....
💦Nutrients by Aptus Holland - www.aptus-holland.com
🌱Substrate PRO-MIX HP BACILLUS + MYCORRHIZAE - www.pthorticulture.com/en/products/pro-mix-hp-biostimulant-plus-mycorrhizae

Likes
19
Share

@Natrona
Follow
Strawberry Cadillac
W5 12/7-13
Important dates
11/9 Germination
11/25 Transplant to 1.5 gal,
12/1 Topped, Pinned and removed 2 large center leaves
12/5 Repositioned pins and removed lowest fan leaves
Nutrients:
12/8 Aptus Regulator .75/gal
Aptus startbooster 2.5 /g
Molasses .5tbsp/g
Manuka Honey .5tbsp/g
Ph 6.44, ppm 275 62.7f
12/10Flora micro 5ml/g
Flora grow 5ml/g
Cal Mag 1.5ml/g
Recharge 2.5ml/g
5.97 ph, 539 ppm, 62.6f
12/13 Grow Time 8ml/g
Plant Juice 2 TBSP/g
Cal Mag 1.5ml/g
6.45ph, 537ppm, 62.4f
The Strawberry’s received 1 liter 2 times on 12/8, 11, 13. Cadillac 1 got an extra 500ml on 13th. All the gals bounced back after topping last week. The FIM I attempted on Cadillac1 did not work. I will let her grow out as is, maybe some LST. This gal already drinks more than the others and after I took pictures, 2 big fan leaves show nitrogen deficiency. So, she needs more food than the others. All the girls had 5-6 inches of growth this week.
Strawberry Cadillac #1 18” #2 14“
Strawberry Trop Cherry #1 12” #2 9”
Straw-Lectric Lemonade #1 11” #2 14
Stay green, growers love 💚🌿
💫Natrona💫
Likes
2
Share


@CannaIGrow
Follow
This plant is growing well, I transplanted them this week into 3 gallon pots from 1 gallon pots. Structure on this plant is pretty nice and visually pleasing to the eye lol.
Likes
3
Share

@Gewaltmann
Follow
Entlauben und Lollipoppen
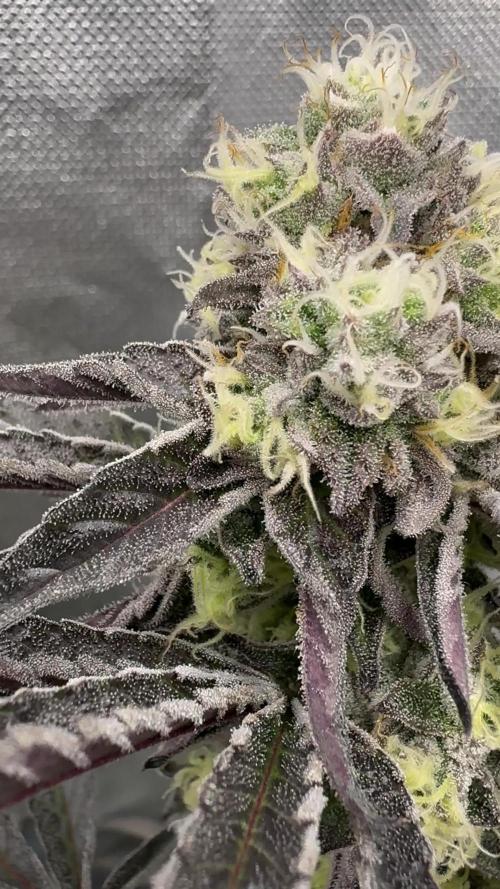
Es ist wieder eine Woche vergangen. Die LCC hat sich nun bei 110cm eingefunden und angefangen die Buds schwellen zu lassen. Der Top wirkt leicht mutiert. Der Zucker nimmt deutlich zu, sowie der Geruch. Das hieß nun für mich, da es Zeit technisch auch dran war, zu Entlauben und Lollipoppen. Da unten rum sehr wenig hängt, war es eine schnelle Geschichte. Oben rum sind einige Fächerblätter der Schere zum Opfer gefallen. Licht ist also genug vorhanden, für die unteren Etagen. Das restliche Gesamtbild der Blätter, lässt aber zu wünschen übrig… Farbtechnisch sind in an den Buds, ganz zarte Pinktöne wahrzunehmen – ob sie noch ein saftiges Lila bekommt? Das Kirsch-Zitronen Aroma, so spritzig und Mund wässrig machend, wird von einem erdigen, Keks artigen Ton eingeholt… Es haut einen aus den Socken. Der Gesamtgeruch ist noch „Schwach“, aber beim entfernen der unteren Popcorn Buds wurde deutlich, das es bald vorbei ist mit „Geruchsarm“
Die PH ist fleißig am Stretchen. Ich kann noch etwas derigieren und so gut die Fläche ausfüllen. Sie hat leichte Anzeichen, dass ich es etwas zu gut gemeint habe...aber sonst ist alles saftig. Einige Triebe haben sich doch abgehoben von der Gesamtfläche und bilden mehrere Hauptcolas. Die PH wird nächste Woche entlaubt und gelollipoppt. Dort ist dann einiges wegzunehmen. Momentan hat sie ca. 35cm an Höhe, wenn man die höchste Top nimmt. Ansonsten spielt sich viel auf 25 cm Höhe ab. Ich bin gespannt wie sie nächste Woche aussieht. Sie hat mittlerweile auch eine hauch feine Zuckerschicht bekommen. Und wenn ich sie sanft berühre, kann man das leise „öffnen einer Flasche Sprite“ hören. Farbtechnisch macht sie aber ihrem Namen noch keine Ehre – egal!
Die BPP ist auch durch mit ihrem Stretch. Sie baut richtig Masse auf an den Buds und daher wird auch hier die Tage gelollipoppt und entlaubt. Hier ist auch etwas Arbeit von Nöten. Das Gesamtbild ist Top. Die Buds bekommen ein kräftiges Lila. Der Zucker ist sehr deutlich erkennbar und nimmt zu. Der Geruch wenn man die Popcorn Buds berührt ist unbeschreiblich. Süß, fruchtig irgendwie, wie ein blumiges Gummibärchen. Die gute hat eine Größe von ca. 60cm.
Nur die LCC bekommt etwas mehr, außer der Reihe. Ansonsten bleibt alles Nähstoffmäßig so wie vorher. 3ml CalMg/L und 1ml/PK13/14/L – Es wird alle 2 Tage gegossen, 1 mal die Woche gefüttert. Die Luftfeuchtigkeit habe ich nun bei 45-55% je nach Ecke – passt.
Nun steht etwas Arbeit an zum Weihnachtsfest – dafür bekomme ich hoffentlich dicke Geschenke im neuen Jahr! Also bis zur nächsten Woche und ein Fröhliches Fest!
Likes
17
Share


@Growmancan2
Follow
Day 63 of the orange buds one was harvested early due to going hermie.. Possibly due to the fact they wer seriously underwatered a few weeks ago or that my 600w hps was flicking on and off for a few days or a combo of both... But anyways 2 oranges buds still going strong.. Until next week ✌️
Likes
179
Share


@Tropicannibis_Todd
Follow
💩Holy Crap We Are Back At It And Loving It💩
Growmies we are at DAY 28 and she's just killing💀it👌
👉We are in the Preflower stretch 👈
So Shit , I gave them just a tad to much nutes on the last feeding 👈 But I have since fixed it
So I'm starting to pull her over and do some low stress training 🙃 and some defolation 😳
Lights being readjusted and chart updated .........👍rain water to be used entire growth👈
👉I used NutriNPK for nutrients for my grows and welcome anyone to give them a try .👈
👉 www.nutrinpk.com 👈
NutriNPK Cal MAG 14-0-14
NutriNPK Grow 28-14-14
NutriNPK Bloom 8-20-30
NutriNPK Bloom Booster 0-52-34
I GOT MULTIPLE DIARIES ON THE GO 😱 please check them out 😎
👉THANKS FOR TAKING THE TIME TO GO OVER MY DIARIES 👈
Likes
61
Share


@Captensmokey
Follow
They are now growing faster than fast... They are getting ready for flowering. I will soon switch to hesi nutrition... 🙌👍

Likes
25
Share


@DeepRootsGrowTrees
Follow
FAT BANANA 🍌 AUTO / RQS
WEEK #10 OVERALL
WEEK #5 FLOWER
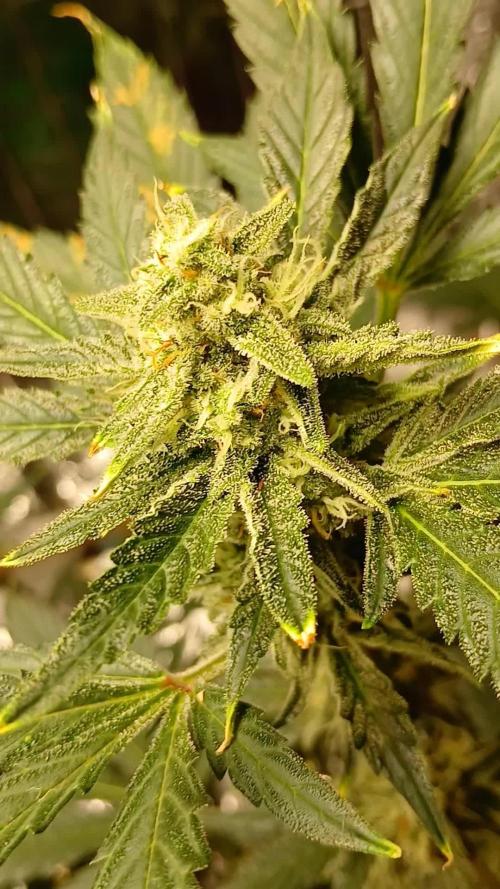
This week she's doing good no issues to report she's looking good buds are getting structure to them and they have nice trichome coverage! Stay Growing!!
Thank you for stopping by and taking a look much appreciated!!
Thank you ROYAL QUEEN SEEDS!!
RQS / FAT BANANA 🍌 AUTO

Likes
16
Share


@Dreamz_In_Green
Follow
First off, these plants are no fuss at all!
The 3 have shown their cards in my opinion.
Early in the week #3 had a pleasant odor and #1 had an odor from a rub.
Now all three have a great stem rub odor.
Noticeable differences are:
#1 looks to be the perfect blend of mom and dad.
It should be taller than dad but still bushy and has a great smell.
I would say it is aggressive but elegant.
#2 has the height difference I was looking for, it has an odor different than mom, bushy and the structure over all is not bad.
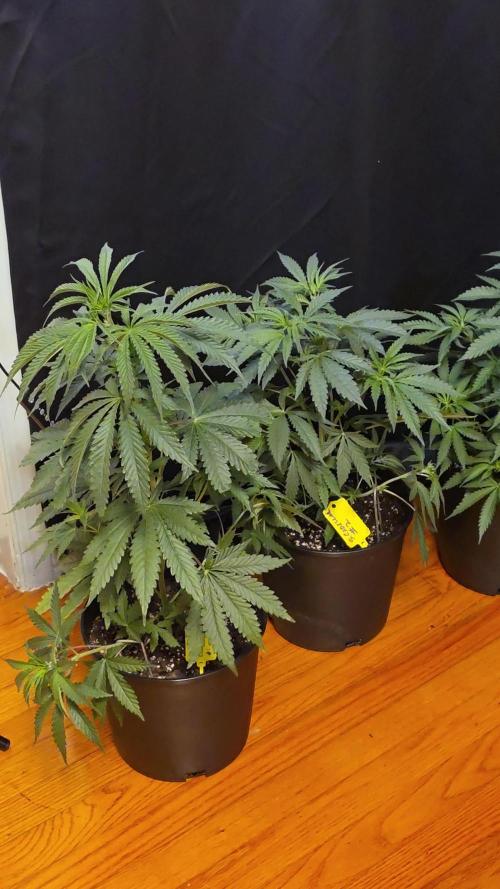
BUT, if you look at the end of the week top down photo, you can see the longer more spindly leaves on the lower part of the plant. And the 3 finger leaf sets... that is mamma and what I believe is the Auto/Ruderalis poking it's head out.
It is not what I am looking for.
#3, hell... that's daddies little girl all day long. (hopefully a girl, no sex on them yet) 😂
Regardless of sex, this plant is short, fat, bushy and stinky.
Now the next week hopes are that maybe we get to sex them.
Once the plants are sexed then the rest of the plan will take shape.
They are just cruising right along, I hope the pictures and descriptions do them justice.
I have included some other photos to see the full environment.
Happy garden over all.
You can see that the plants shift a lot.
Even if they are not shifted for one reason or another, all but the veggie plants get turned 1/4 turn everyday.
I get to see and handle them lovingly every day.
Or several times a day but.... 😏
Non stop excitement.
I hope you all feel the same with your grows.
Thank you for taking a look at mine.


Likes
17
Share


@DimiTryCool
Follow
9 week
Smells excellent, sweetly and fruity.
Begin change color from green to rose .
Looks really wonderful.
Starting prepare for harvest.
Last nutrition at the end of this week.
Then flash
Likes
3
Share

@kdifiori_
Follow
Nine weeks have passed, as you can see from the photos; despite various nutrient-related issues, the flowers are producing plenty of resin. This week, too, they absorbed a liter and a half of nutrient solution. Stay tuned.
Likes
16
Share


@ShowsWorld
Follow
Critical Kush is a strain that is potent, and with it come a few side effects, although none of them are very serious. This indica-dominant strain can sometimes make you feel parched as it can leave you with a dry mouth, which is usually coupled with a case of dry and itchy eyes.


Likes
10
Share

@420DeepGrow
Follow
📆 Semana 4
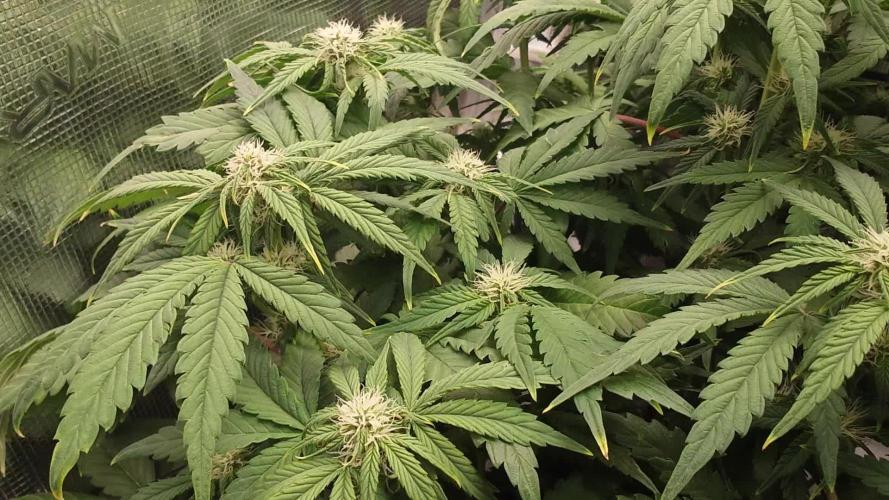
El estiramiento llega prácticamente a su fin y las plantas centran ya la mayor parte de su energía en la formación de flores. La estructura queda completamente definida, con una canopia uniforme que aprovecha al máximo la intensidad lumínica y favorece un desarrollo homogéneo de todos los sitios florales.
Los cogollos comienzan a ganar volumen de forma visible, aumentando la producción de pistilos y el desarrollo de tricomas. La demanda de fósforo y potasio se incrementa progresivamente, mientras que el calcio y el magnesio siguen siendo fundamentales para sostener el intenso metabolismo y evitar carencias en las plantas de mayor vigor.
⚡ EC: 1.7–1.8
💧 pH: 6.2–6.5
🌡️ Temp: 21°C
🌫️ Humedad: 45–50%
💡 Intensidad: 950–1050 PPFD
🔥 Nota de cultivo: La cuarta semana marca el inicio de la fase de engorde. Mantener un clima estable, una nutrición equilibrada y una iluminación uniforme permitirá que los cogollos comiencen a ganar densidad sin generar estrés, sentando las bases para una floración de máxima calidad.
¡Seguimos creciendo fuerte! 💪