The Grow Awards 2026 🏆 


Likes
2
Share
@Hidden
Follow
:
- Day 1 week 5: just checking how lst is doing, they will be ok
- Day 2 week 5: not completely dry to water so I’ll wait for day 3 of week. Did lst to make sure all branches receive as much ligth as possible
- Day 3 week 5: watered them with 4ml/L calmag and 2ml/L bio grow ph 6,5 tap water trough activated carbon filter. RHC#2 broke one of the branches, I had to tape it. Not to be worried, she’ll recover from that. RHC#3 is very slow compared to the others.
- Day 4 week 5: defoliation so sun enters better and wait.
- Day 5 week 5: added 1L of water with 2ml/L Bio grow, 6 ml/L calmag and 2ml/L bio heaven. 1600 us/cm and ph 6,2 - 6,5. RHC#3 suffered of broken branch due lst 😞 still learning about the flexibility of branches. I think she’ll recover hoping not too much stress for her.
- Day 6 week 5: RHC#3 looks good despite broken branch. Not much for today just watch temp and humidity, hoping they grow tall so I can cover a good part of the tent.


Likes
45
Share
@D33jW
Follow
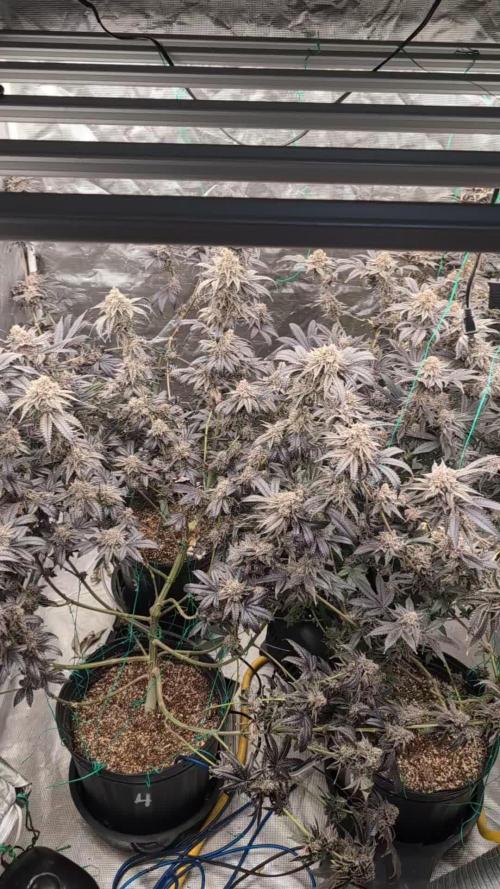
📅 Week 11 – Day 76 / FLO42
Conditions are still challenging – warm and humid, making it hard to maintain a high VPD.
This week I removed some fan leaves to improve airflow between the buds.
Despite the tough climate, the flowers are swelling nicely, and the trichome coverage is looking great – no complaints here.
The forecast says a cooler and rainy week is coming, so I'm hoping to push them further into ripening with the help of a dehumidifier.
We keep moving forward – the finish line is getting close! 💪

Likes
1
Share
@HomegrownGenetics
Follow
They be stretching! Did a major defoliation this week and standard water change - pushing nutrients again!

Likes
4
Share
@ObloTheGrower
Follow
Here we go, next week I will feed my girls hard next week, I did not feed them in grow phase, the custom media had whatever they need, but now I want to push them high, :) I have no grow led but my main girls are autos, according to their leafs, ruderalis highly dominant espacially 2 of them I should check their phenotypes. So the sun is enough for the light side and on the other side I will choose Advanced Nutrients Connoisseur Bloom from my poke ball :D


Likes
12
Share
@EARL_GRASS
Follow
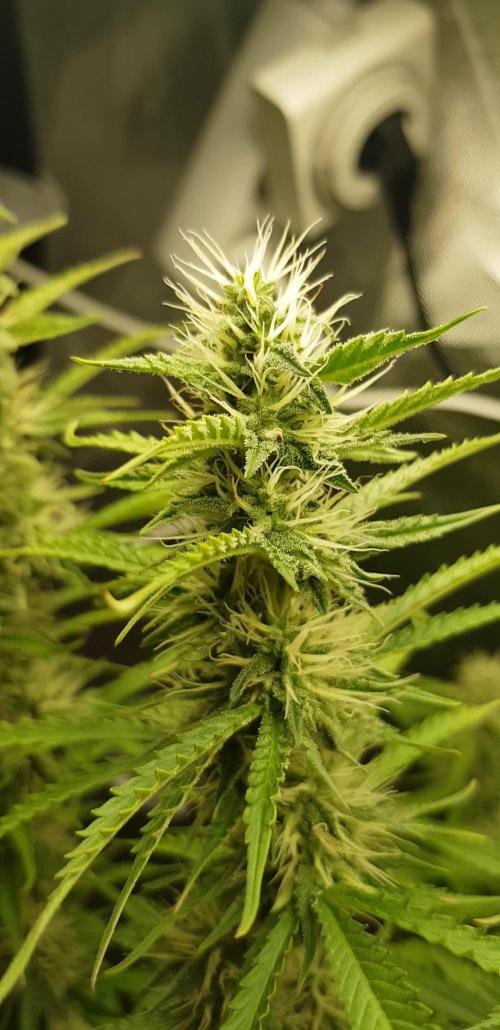
Super frosty lady
Orange terpeness is a boooommmm
This is a beautiful plant compact nugs and frosty
I can't wait to set this beauty on fire


Likes
24
Share
@Newbiegrower420
Follow
UPDATE: Day 2 of week 12 - Friday 6th Nov:
Nutes in today, haven’t really had to do much else, as the girls just seem to be concentrating on fattening up the buds at a nice steady pace.
Oh and this week I’ve finally got a hint of a fruity tropical sweet smell from the buds.. It’s truly lush..
My thoughts are now at when to flush the ladies and how many weeks are left? I’d like to time it all perfectly but as this is my first grow now sure exactly how long they have left! Trichomes are still looking clear and pistils are still mostly white but don’t wanna get caught out and miss the best time to harvest and flush.. Keeping a close 👁️..
UPDATE: Day 4 of week 12 - Sunday 8th Nov:
Nutes in again and all looking good, except for the girl that got really wilted last week, she’s doing ok but no way near as nicely developed as the other 3 girls. She has one main cola that’s taken off more than all the other colas which I think may be partly due to topping not working as well as is did on the other 3 girls, she still has one really thick stem compared to the other 3. However the wilting did really slow her down on top of that 😞..
Apart from that I’m pretty happy, Christmas 🎄 is coming and it looks like I will have my first ever home grown smoke just in time.. 🙏🏼❤️🌱
UPDATE: Day 7 of week 12 - Wednesday 11th Nov:
Nutes in and a small amount of defoliation. Girls weren’t quite ready for a feed yesterday but this morning they were super thirsty and leaves 🍃 were slightly droopy, nothing major but they were all really ready for a drink.
Put an extra 18w 2700k LED strip (from an impulse buy at the beginning of my grow journey) in last night to try and boost bud growth. I think my Viparspectra 300w LED alone wasn’t cutting it. I know it’s only a small increase in watts but the extra 2700k flower lighting for the last week weeks of flower can’t be a bad thing right? .. My DLI was 32 before adding the light so I hope this works positively.
Looking at the girls at around 10 hrs after adding the additional LED and they look great so let’s see what happens..
✌️🏼 & ❤️🍃🌱

Likes
4
Share
@NSABND
Follow
Day 29 massive leave cutting in the morning... but the queens seems to be ok 😃🙏👌👍the Z-Up strain has 5cm more then the others
Day 30 all queens are a little bit shocked from cutting 😩 ok chill today but tomorrow back to work bitches 😂😂😆😃🙏👍
Day 31 everything seems to be allright 😃🙏👌
Day 32 well the queens raise again 😃🙏👍
Day 33 i think this will be a really good grow 😃👌


Likes
13
Share
@SmokeableHobby
Follow
6/28 - 7/4
No major changes this week. Been consistently watering, usually about a half gallon to a gallon every couple days. No more feedings.
My girl is really fading hard at this point. I would have expected that she would have been putting off a lot more smell at this point. Given that there were a number of hot days where temps inside the tent were flirting with 90 degrees late in flower, I am resigned to the fact that it caused some terps to evaporate. Hoping I'll be able to salvage what's there during dry and cure.

Likes
4
Share
@MarianoDoBom
Follow
Sigo com confinaca na colheita, as plantas estão respondendo muito bem
.
Likes
Comments
Share
@GERGrowDesigns
Follow
Welcome to Flower Week 6 of Divine Seeds Auto White Widow
I'm excited to share my grow journey with you all as part of the Divine Seeds Autoflowering Competition 2025. It's going to be an incredible ride, full of learning, growing, and connecting with fellow growers from all around the world!
For this competition, I’ve chosen the Feminized Automatic strain: Auto White Widow
Here’s what I’m working with:
• 🌱 Tent: 120x60x80
• 🧑🌾 Breeder Company: Divine Seeds
• 💧 Humidity Range: 50
• ⏳ Flowering Time: 58 Days
• Strain Info: 20%THC
• 🌡️ Temperature: 26
• 🍵 Pot Size: 3
• Nutrient Brand: Narcos
• ⚡ Lights : 200W x 2
A huge thank you to Divine Seeds for allowing me to be a part of this amazing competition and Sponsoring the Strains. Big thanks for supporting the grower community worldwide! Your genetics and passion speak for themselves!
I would truly appreciate every bit of feedback, help, questions, or discussions – and of course, your likes and interactions mean the world to me as I try to stand out in this exciting competition!
Let’s grow together – and don’t forget to stop by again to see the latest updates!
Happy growing!
Stay lifted and stay curious!
Peace & Buds!

Likes
27
Share
@OldDabKing
Follow
Plant is showing signs of possible nitrogen and phosphorus deficiency with brown curling leaves and purple tipped leaves, but not too worried about it seeing as there's only about a few weeks left of growth. Removing smaller fan leaves to uncover bud sites. Heavy smells of pine and berries 😁
Likes
15
Share
@Venabr96
Follow
Começando a semana 4 com o lollipopping para dar força aos tops buds. Planta com otimo desenvolvimento. Adcionarei 6ml.l de mel para a cura dos cortes feitos.
4 dias depois de fazer o lollipopping a planta começou a desenvolver polem.

Likes
28
Share
@Salgeezi
Follow
As usual my grows take forever. Healthy... just slow growth.
Ph is good.
Runoff EC is good.
Lights 150w at 17".
Humidity 59
Temps 79

Likes
6
Share
@Noname121r
Follow
Coming to end of week 3 day 25 flowering. All looking pretty good. Couple that are more advanced than others but sure the others will get there.
Humidity a bit high. Do have a big ass freestanding a/c dehumidifier just need to concuct a way of making it usable.


Likes
10
Share
@Itslegalnow
Follow
Started in cup of water then moved to 3 gallon pots to growing once tap root was visible. Took approximately 2-3 days to break ground.

Likes
5
Share
@nerdz
Follow
57 to 63 Friday.
It is currently f58 as of creating this entry. I am going to be chopping them tomorrow at f59. This is the earliest harvest I've had. These guys were exploding at week 6 of flower.
The pics here don't do justice. With everything collapsing from the weight, and the leaves all being completely black messes with the image. When I pull them out of the tent the pics will show them in their true form.
Super sticky tight buds. I'm kind of in love with Clearwater. Especially after the nightmare I dealt with with those Beleaf jokes.
Been flushing about a week. Still ripping the lights as hard as I can while holding 24-25c.
I'm estimating around 750g dried for these. I'm usually fairly close ;)
Enjoy