


By continuing to use the website or clicking Accept you consent to our cookies and personal data policy and confirm that you are at least 18 year old. For details please see Privacy Policy and Terms
Accept

Likes
Comments
Share


@pareto
Follow
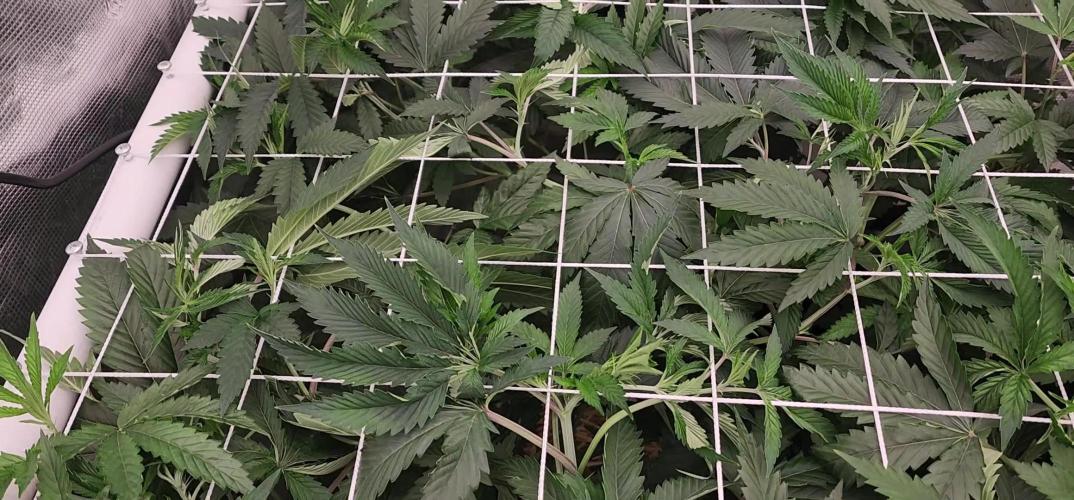
She had her issues and is not a big yielder. But she makes up for it in beauty and aroma!
The trichomes look absolutely awesome!
--------------------------------------------------------------------------------------------------------------------------------------------------------------------------------
Set up cost (fixed costs)
-Lamp: 40€
-Timer: 3,5€
-Pot: 4€
-Total fixed costs: 47,5€
Given 5 years (or 15 grows) usage time translates to around 3,17€ per grow in materials.
Variable costs:
-Seeds: 6,33€
-Soil: 6€
-Fertilizer: 3,50€
-Power: 20,22€
-Total variable costs: 36,05€
-Total costs per grow: 39,22€
-Cost per gram: 1,07€/g


Likes
14
Share


@GRow_M8s
Follow
⚠️ We keep pushing the plants with 24/24h light schedule + increase nuts gradually.
ℹ️ Crystal meths (3p) and fast berries (3p) are the tallests plants in the tent, we decide to experiment with the Crystals so we will make, #1 topping (tallest plant), #2 supercroping and #3 nothing.
ℹ️ Girls scout cookies (2p) are the only plants in the tent that haven't trichomes yet (bloom) 😪.
- 38 till 🔚 -

Likes
2
Share

@Ensign420
Follow
|»» LOG DISCLAIMER: Not intended as a grow guide. Grow log entries are usually posted 3 weeks later and are for my learning reference. ««|
Introduction - Week 11 Summary -
Ensign's log, stardate 17517.6,
Another healthy week in the garden!
Heady OG is filling in her pot beautifully and wow growth is healthy and all I see is green! Ca-Caw! TKO has also been raging and blowing up with growth!
Re-strung the scrog frame and dropped it in place. Also upgraded the tent a bit by installing Vivosun’s CFM Kit.
Pancaked TKO and started training her to fill in the back two quadrants of the tent. Heady also reached the netting! Started some low-stress training to fill in the front two quadrants.
Veg tent has been healthy and gnat free! Super-cropped the mothers and the canopy has been recovering nicely!
Also started germinating my first batch of popcorn tea! This will be my first time applying any Sprout Seed Tea (SST) and plan to feed next week.
Onwards to next week Ensign!
[START OF WEEK 11]
==========================================================
---------- [ 4x4 MAIN TENT ] ----------
Heady OG BX1 #1 [Round4 ~Wk4] - WEEK 11 - Full Veg
TKO [Round2 ~Wk9] - WEEK 11 - Full Veg
----------- [ 3x3 VEG TENT ] ------------
Garlic Budder OG#1 - WEEK 03 - Full Veg
Garlic Budder OG#2 - WEEK 03 - Full Veg
Gorilla Goat #1 - WEEK 03 - Full Veg
Gorilla Goat #2 - WEEK 03 - Full Veg
06/30/25 → 07/06/25
This Week's Estimated Goals
----------------------------------------------------------------------------------------------
DLI: ~19 mol/m²/d
PPFD: ~300 μmol/m²/s
VPD: ~1.0 kPa
This Week's Meter Readings & Averages
----------------------------------------------------------------------------------------------
Light On/Off: 16:00 - 10:00 | Wattage: ~325.5W [LV04]
Distance From Canopy: ~36”, 31.5”
DLI: ~22.29 mol/m²/d
PPFD: ~344 μmol/m²/s
VPD: ~0.91 kPa
Soil %: [48.4, 40.3, 49.0, 52.9, 41.9, 42.0, 42.7, 43.1]
==========================================================
Day 01 - Monday - 06/30/25 - Total Days: 078
-----------------------------------
Daily Averages ~[+01:00]
- Temps: 86.6°F [30.3°C]
- Humidity: 78.6%
- VPD: 0.92 kPa
- Soil %: [48, 41, 49, 54, 41, 43, 42, 45]
-----------------------------------
- [+01:00]: Night check on the 4x4 tent.
--- Ca-Caw! Another late night shift in the garden!
--- Heady OG (BX1 #1) is looking perky and spreading out nicely! She’s a good
--- TKO is just raging with growth! Bushy and beautiful!
- [+01:02]: Checked the Ecowitt soil moisture sensor data:
------------------ [ 4x4 MAIN TENT ] ---------------
------ 50% - [CH01 FT » G30 - Heady OG BX1 #1]
------ 40% - [CH02 FB » G30 - Heady OG BX1 #1]
------ 50% - [CH03 BT » G20 - TKO]
------ 54% - [CH04 BB » G20 - TKO]
------------------ [ 3x3 VEG TENT ] ----------------
------ 45% - [CH05 BL » GR7 - Garlic Budder OG#1]
------ 41% - [CH06 BR » GR7 - Garlic Budder OG#2]
------ 45% - [CH07 FL » GR7 - Gorilla Goat #1]
------ 41% - [CH08 FR » GR7 - Gorilla Goat #2]
--------- Veg: 38% - 45% | Flower: 45% - 55%
--------- General: 30% [Dry] | 45 - 60% [Moist] | 70% [Wet]
- [+01:04]: Checked the 3x3 veg tent.
--- Looking great my ladies! Canopy is healthy and green!
--- Pots also looking incredible and gnat free! Nematodes for the win!
- [+01:06]: Quickly checked on the auto-watering system.
--- System is still charged and no leaks or kinks found in the tubing.
- [+01:10]: Checked the humidifiers.
--- Tanks are still full and no leaks found.
--- Easy night in the garden!
Day 02 - Tuesday - 07/01/25 - Total Days: 079
-----------------------------------
Daily Averages ~[+01:00]
- Temps: 85.3°F [29.6°C]
- Humidity: 77.4%
- VPD: 0.94 kPa
- Soil %: [48, 41, 49, 53, 42, 43, 43, 42]
-----------------------------------
- [13:03]: Smoke update!
--- Wow! I think I found the one!
--- Both of the Garlic Budder phenos (OG#1 and OG#2) are getting pretty dank!
--- Both have been curing for a good 6-7 months (since 12/13/24) and now taste completely different! The #2 pheno now has a pungent earthy fuel profile which has made her a keeper! The #1 pheno is more on the purple sweeter terp profile side, which is not really enough to be a keeper, but the smoke is definitely smoother and terpier than before.
--- Still searching for more keepers, but now have a potential mother to breed with. Getting hyped!
--- Wow curing really does make a huge difference!
--- As for the Gorilla Goat phenos, they have been curing for about 3 months (since 04/08/25) and taste okay but nothing special. The #1 pheno still has a pretty loud lemon cleaner nose, but nothing to special on the smoke. Yet. I think.
--- Also, for this cycle, plan to probably reduce the 18/6 harvest flip from 7 days down to 4 days. I think 7 days might have been too long and may have caused some re-vegging.
--- Will continue to pheno hunt for more keepers!
- [16:21]: Evening check on the 4x4 tent.
--- Wow the garden is raging!
--- All growth looks green and the canopy is filling in!
--- Heady OG is starting to reach the side of the 30 gallon pot, but still has a ways to go before reaching the scrog frame. Growth looks healthy and green so I’m happy!
--- Wow TKO is bushy and getting enormous! She has already started to fill in the front left quadrant of the tent.
- [16:23]: Alright! Time to start scrogging and training out the canopy. Let’s go!
--- Temporarily took the PVC scrog frame out of the tent.
- [16:35]: Okay time to re-string the frame!
--- Like always, used mason string for the netting and double-looped each screw. Strung the vertical lines before weaving the horizontal lines over and under the vertical lines.
--- Also covered the top of each corner with foil and masking tape.
- [17:14]: Done! Scrog frame is re-strung and looking great!
--- Set the frame aside for a bit.
- [17:15]: Going to give Vivosun’s High CFM (cubic feet per minute) Support Kit a try.
--- Once the scrog frame is installed, the back area is difficult to access. So need to install the kit before placing the frame back in.
--- The kit came with 4 identical support bars which snap snugly onto the vertical tent bars.
--- Assembly was pretty straight forward and the bars snapped and screwed together with ease.
--- To make the process a lot easier, I installed all the corners first. The bars easily snapped into the corner pieces and once fully secured, the whole tent feels a lot more stable. The kit also widens the tent to keep the fans from hitting the sides.
--- Left the front bar off for now (only have the front corners installed).
--- To ensure that the support bars are level, decided to place the bottom (back and front) bars just above where the tent bars snap together (about 41 inches from the floor). The top (side) bars were installed just above (about 43 inches from the floor).
--- These bars should help to keep the walls of the tent expanded which should give more room for the oscillating fans.
- [18:05]: Installed and gently dropped the scrog frame into place.
--- Secured each corner to each corner (flag pole) clip.
--- The frame height was not adjusted and the netting is about 33 inches from the floor.
--- Also trained TKO and tucked her taller branches under the netting.
--- Super-cropped and pinched a few branches and redirected them away from the front area of the tent.
--- Lastly, installed the front CFM bar.
--- Keeping the front area clear for Heady OG and won’t flip to flower until the frame is completely full.
--- Heady OG still has yet to reach the netting, but that’s okay.
--- Plan to veg for another month or so before flipping to flower so Heady OG has plenty of time to fill in the front.
--- Grow strong my girls!
- [18:19]: Checked the Ecowitt soil moisture sensor data:
------------------ [ 4x4 MAIN TENT ] ---------------
------ 46% - [CH01 FT » G30 - Heady OG BX1 #1]
------ 41% - [CH02 FB » G30 - Heady OG BX1 #1]
------ 54% - [CH03 BT » G20 - TKO]
------ 53% - [CH04 BB » G20 - TKO]
------------------ [ 3x3 VEG TENT ] ----------------
------ 40% - [CH05 BL » GR7 - Garlic Budder OG#1]
------ 43% - [CH06 BR » GR7 - Garlic Budder OG#2]
------ 47% - [CH07 FL » GR7 - Gorilla Goat #1]
------ 40% - [CH08 FR » GR7 - Gorilla Goat #2]
--------- Veg: 38% - 45% | Flower: 45% - 55%
--------- General: 30% [Dry] | 45 - 60% [Moist] | 70% [Wet]
- [18:21]: Checked the 3x3 veg tent.
--- Mothers are vegging along beautifully and wow the canopy has exploded!
--- The canopy has almost reached the grow light!
--- Time to super-crop!
- [18:35]: To make the process a lot easier, used a pair of needle-nose pliers.
--- For added cushioning, the tips of the pliers were wrapped in masking tape.
- [18:37]: Perfect! The canopy is flat and a good 5-6 inches lower!
--- The pliers made super-cropping a whole lot easier! Especially stoked on how well they worked on the Garlic Budder phenos in the back. Both have brittle branches and when pinching and bending, a few usually break. But not when using the pliers. Nice!
--- Pots also look great and no signs of gnats! The double inoculation seemed to have eliminated the larval population and the under canopy is thriving!
- [18:41]: Checked the humidifiers.
--- Tanks are still full and no leaks found.
--- Another grow day done!
Day 03 - Wednesday - 07/02/25 - Total Days: 080
-----------------------------------
Daily Averages ~[+01:00]
- Temps: 85.4°F [29.7°C]
- Humidity: 78.1%
- VPD: 0.91 kPa
- Soil %: [49, 40, 49, 53, 43, 41, 43, 45]
-----------------------------------
- [23:06]: Quick night check on the 4x4 tent.
--- Looking green and growth is perking up nicely!
--- Heady OG is getting bigger and she has almost reached the edge of the pot. Also no gnats and no flooding. Perfect!
--- TKO is recovering from the scrogging an growth is straightening up towards the grow light! Great!
--- Trained a few of TKO’s front branches. Trying to keep her front growth from over taking the front area.
- [23:17]: Checked the 3x3 veg tent.
--- Wow! Growth has almost fully recovered and most already perky!
--- Canopy is nice and low with tops everywhere!
--- Pots also look great and gnat free!
- [23:19]: Checked the humidifiers.
--- Tanks are still full and no leaks found.
Day 04 - Thursday - 07/03/25 - Total Days: 081
-----------------------------------
Daily Averages ~[+01:00]
- Temps: 85.1°F [29.5°C]
- Humidity: 77.5%
- VPD: 0.93 kPa
- Soil %: [48, 40, 49, 53, 41, 41, 42, 41]
-----------------------------------
- [09:08]: Quick morning check on the 4x4 tent.
--- Looking healthy in the garden!
--- Heady OG is continuing to widen out and has stretched just beyond the sides of her pot!
--- TKO is recovering nicely with even and beautiful top canopy growth!
- [09:10]: Quickly checked on the 3x3 veg tent.
--- Mothers are vegging along and looking healthy!
--- Sleep well my girls!
- [16:26]: Evening check on the 4x4 tent.
--- Caw-Caw! Good morning ladies! Garden is looking healthy and green!
--- Heady OG is looking bit droopy but she is just waking up.
--- TKO is looking healthy and perky!
- [16:59]: Took the weekly general PPFD readings.
------ Heady OG (BX1 #1) was around 307 μmol/m²/s which gives a DLI of 19.89 mol/m²/d under an 18/6 light cycle.
------ TKO was around 344 μmol/m²/s which gives a DLI of 22.29 mol/m²/d under a 18/6 light cycle.
- [17:14]: Took height and light distance measurements.
------ Heady OG (BX1 #1) was about 17" tall.
------ TKO was about 20.5" tall.
------ Heady OG (BX1 #1) was about 4" away from the scrog netting.
------ Heady OG (BX1 #1) was about 36" away from the grow light.
------ TKO was about 31.5" away from the grow light.
- [17:24]: Checked the Ecowitt soil moisture sensor data:
------------------ [ 4x4 MAIN TENT ] ---------------
------ 52% - [CH01 FT » G30 - Heady OG BX1 #1]
------ 40% - [CH02 FB » G30 - Heady OG BX1 #1]
------ 54% - [CH03 BT » G20 - TKO]
------ 53% - [CH04 BB » G20 - TKO]
------------------ [ 3x3 VEG TENT ] ----------------
------ 40% - [CH05 BL » GR7 - Garlic Budder OG#1]
------ 40% - [CH06 BR » GR7 - Garlic Budder OG#2]
------ 45% - [CH07 FL » GR7 - Gorilla Goat #1]
------ 42% - [CH08 FR » GR7 - Gorilla Goat #2]
--------- Veg: 38% - 45% | Flower: 45% - 55%
--------- General: 30% [Dry] | 45 - 60% [Moist] | 70% [Wet]
--- All WittFlow units are also connected and charged. One unit is getting low, but still okay. Need to swap out soon.
- [18:32]: Checked the 3x3 veg tent.
--- Looking great in the mother tent! All growth is raging and starting to stretch upwards again!
--- Pots look good and no signs of gnats. Perfect!
- [19:22]: Ca-Caw! Time to start making some popcorn tea!
--- This will be my first attempt at any form of Sprouted Seed Tea (SST). What can possibly go wrong right?
--- Anyways,
--- Shoutout to Easy-E and Bleezy along with Minnesota Nice for the basic recipe and technique! Feed the worms and keep the soil hydrated. The worms will do the rest.
--- Of course shoutout to the legend who inspired all three, Subcool420. His videos are still on YouTube and are an inspiration to keep striving to grow better and to eventually breed the best genetics. Peace and live forever through good memories. 🖖
--- Over a decade of dope and living soil is still the way to grow! Stay up weed nerds!
--- Adjusted the original 10 gallon SST recipe to a 1 gallon batch.
--- Also adding in a bit of aloe for the initial seed soak.
--- To germinate and sprout the popcorn, using a one pint (2 cups) wide-mouth mason jar.
--- Alright Ensign, don’t frack this up! Let’s go!
------ Added 2tbsp of Popcorn Seeds
------ Added 1 cup of RO water
------ Added 1/64tsp of Horticultural Aloe
--- Mixed the solution and seeds around a bit.
- [17:46]: Decided to also place the jar on the heating mat.
--- The thermostat is set to a warm 83°F (currently at 85.2°F)
--- Shouldn’t be an issue since the local weather is warming up, but just want to keep the jar nice and warm.
--- To keep the jar insulated, covered it with a towel.
--- Done!
--- Going to soak the seeds for at least 24hrs before draining out the water. Then plan to rinse the seeds daily with RO water for about a week before blending up and feeding!
--- The sprouted popcorn will contain both growth enzymes and cytokinins which will help the soil biology.
--- Also the worms will enjoy the extra nutrients!
- [+00:55]: Quickly checked on the auto-watering system.
--- System is still charged and no leaks or kinks found in the tubing.
- [+00:57]: Checked the humidifiers.
--- Tanks are still full and no leaks found.
Day 05 - Friday - 07/04/25 - Total Days: 082
-----------------------------------
Daily Averages ~[+01:00]
- Temps: 85.7°F [29.8°C]
- Humidity: 77.7%
- VPD: 0.94 kPa
- Soil %: [48, 40, 49, 53, 42, 42, 43, 44]
-----------------------------------
- [16:17]: Evening check on the 4x4 tent.
--- Looking great in the garden!
--- Heady OG is still waking up but she usually perks up about an hour or two into the light cycle. Growth looks green and healthy which is the most important.
--- TKO is just raging! Tops are already pointing straight up and stretching towards the grow light.
- [16:31]: Using both my hands and a chop stick,
--- Tucked and trained TKO a bit more.
- [16:34]: Alright! The canopy is nice and even!
--- Will continue to re-direct growth to the back right quadrant of the tent.
--- Wow! TKO’s main stalk is thickening nicely!
--- Anyways, grow strong my girls!
- [16:39]: Checked the Ecowitt soil moisture sensor data:
------------------ [ 4x4 MAIN TENT ] ---------------
------ 52% - [CH01 FT » G30 - Heady OG BX1 #1]
------ 40% - [CH02 FB » G30 - Heady OG BX1 #1]
------ 51% - [CH03 BT » G20 - TKO]
------ 52% - [CH04 BB » G20 - TKO]
------------------ [ 3x3 VEG TENT ] ----------------
------ 41% - [CH05 BL » GR7 - Garlic Budder OG#1]
------ 44% - [CH06 BR » GR7 - Garlic Budder OG#2]
------ 40% - [CH07 FL » GR7 - Gorilla Goat #1]
------ 46% - [CH08 FR » GR7 - Gorilla Goat #2]
--------- Veg: 38% - 45% | Flower: 45% - 55%
--------- General: 30% [Dry] | 45 - 60% [Moist] | 70% [Wet]
- [16:41]: Checked the 3x3 veg tent.
--- Mothers are all looking healthy and perky!
--- Pots are still gnat free!
--- Easy evening in the garden!
--- Okay! Back to the sprouted seed tea!
- [16:55]: Checked on the jar.
--- The heating pad was at 82.4°F
--- The water is milky with enzymes and seeds are looking good!
--- Rinsed the seeds with RO water.
--- Mixed them around in the water for a bit before draining.
--- Placed the jar back onto the heating pad.
--- To give a bit more ventilation, put the lid on upside-down and loosely tightened the ring down.
--- Still no sprouts, but will check back tomorrow!
- []: Checked the humidifiers.
--- Tanks are still full and no leaks found.
Day 06 - Saturday - 07/05/25 - Total Days: 083
-----------------------------------
Daily Averages ~[+01:00]
- Temps: 85.9°F [29.9°C]
- Humidity: 78.7%
- VPD: 0.90 kPa
- Soil %: [49, 40, 49, 52, 42, 42, 43, 42]
-----------------------------------
- [08:09]: Quick morning check on the 4x4 tent.
--- Looking green and healthy in the garden!
--- Heady OG has almost reached the netting!
--- TKO is looking incredible with more tops popping up everywhere! Beautiful!
- [08:14]: Quickly checked on the 3x3 veg tent.
--- Mothers are vegging along and the canopy is getting closer to the light.
--- Gonna need to super-crop again soon.
- [19:56]: Night check on the 4x4 tent.
--- Ca-Caw! The garden is looking incredible!
--- Ah yea! Heady OG has finally reached the netting!
--- TKO has also stretched upwards and growth is raging!
- [20:43]: Trained and tucked TKO’s top growth under the scrog netting.
--- Looking flat and have another row of squares filled in. About 3 more rows before the entire back right quadrant is full. Nice!
--- Heady OG also got some training and started to super-crop the main stalk towards the front left quadrant.
--- Tent is looking great and
- [20:55]: Checked the Ecowitt soil moisture sensor data:
------------------ [ 4x4 MAIN TENT ] ---------------
------ 47% - [CH01 FT » G30 - Heady OG BX1 #1]
------ 40% - [CH02 FB » G30 - Heady OG BX1 #1]
------ 46% - [CH03 BT » G20 - TKO]
------ 52% - [CH04 BB » G20 - TKO]
------------------ [ 3x3 VEG TENT ] ----------------
------ 41% - [CH05 BL » GR7 - Garlic Budder OG#1]
------ 41% - [CH06 BR » GR7 - Garlic Budder OG#2]
------ 45% - [CH07 FL » GR7 - Gorilla Goat #1]
------ 43% - [CH08 FR » GR7 - Gorilla Goat #2]
--------- Veg: 38% - 45% | Flower: 45% - 55%
--------- General: 30% [Dry] | 45 - 60% [Moist] | 70% [Wet]
- [21:01]: Checked the 3x3 veg tent.
--- Veg growth is looking healthy and the canopy is bushy!
--- Pots look good too, but signs of gnats might be returning? Will continue to check back.
--- Back to the sprouted seed tea!
- [22:03]: Checked on the jar.
--- The heating pad was at 82.7°F
--- Wow! Got sprouts! Tap roots are just barely starting to grow. Nice!
--- Rinsed the seeds with RO water. Mixed them around in the water for a bit before draining.
--- This time, using a piece of paper towel as the lid. Using the lid ring to secure the paper towel.
--- Placed the jar back onto the heating pad and wrapped it in a towel.
- [21:04]: Checked the humidifiers.
--- Tanks are still full and no leaks found.
Day 07 - Sunday - 07/06/25 - Total Days: 084
-----------------------------------
Daily Averages ~[+01:00]
- Temps: 85.4°F [29.7°C]
- Humidity: 79.4%
- VPD: 0.86 kPa
- Soil %: [49, 40, 49, 52, 42, 42, 43, 43]
-----------------------------------
- [07:59]: Quick morning check on the 4x4 tent.
--- Ooo yea! The garden is looking great!
--- Heady OG has already straightened up and is at the netting again. Nice!
--- TKO’s under canopy is looking healthy with top growth spreading out nicely.
- [19:26]: Night check on the 4x4 tent.
--- Ca-Caw! The garden is raging with growth!
--- Wow Heady OG is bushing out! She has already growth beyond the 30-gallon pot’s sides and grow is starting to ramp upwards!
--- TKO is looking beautiful and the canopy is healthy with more tops stretching through the netting. Time for more training!
- [20:08]: Tucked TKO’s top growth under the scrog netting.
--- Still trying to re-direct growth towards the back two quadrants of the tent.
- [20:10]: Using a plant support wire and binder clip,
--- Bent Heady OG’s main stalk over and secured it with the support wire. This basic low-stress training technique should help re-direct her main tops towards the front left quadrant without slowing down growth.
- [20:17]: Done!
--- Looking good girls! With about 4-5 weeks before the flip to flower, this grow is shaping up to be another epic grow cycle!
- [20:21]: Checked the Ecowitt soil moisture sensor data:
------------------ [ 4x4 MAIN TENT ] ---------------
------ 47% - [CH01 FT » G30 - Heady OG BX1 #1]
------ 39% - [CH02 FB » G30 - Heady OG BX1 #1]
------ 48% - [CH03 BT » G20 - TKO]
------ 52% - [CH04 BB » G20 - TKO]
------------------ [ 3x3 VEG TENT ] ----------------
------ 43% - [CH05 BL » GR7 - Garlic Budder OG#1]
------ 40% - [CH06 BR » GR7 - Garlic Budder OG#2]
------ 43% - [CH07 FL » GR7 - Gorilla Goat #1]
------ 44% - [CH08 FR » GR7 - Gorilla Goat #2]
--------- Veg: 38% - 45% | Flower: 45% - 55%
--------- General: 30% [Dry] | 45 - 60% [Moist] | 70% [Wet]
- [20:23]: Checked the 3x3 veg tent.
--- Woah! Canopy growth has just about the reached the grow light.
- [20:25]: Using a pair of modified needle-nose pliers,
--- Super-cropped and bend over all top growth.
- [20:53]: Canopy is looking even again!
--- Pots are also looking great and gnat free!
--- Topped one of Gorilla Goat #1’s branches (front left mother). She was starting to take over the back left quadrant.
--- Mulched the trimmings.
--- Back to the sprouted seed tea!
- [21:06]: Checked on the jar.
--- The heating pad was at 82°F
--- Nice! Seeds looking great! Lots of healthy tap roots! Some have yet to sprout.
--- Probably could blend and feed, but going to wait even longer.
--- Rinsed the seeds with RO water. Mixed them around in the water for a bit before draining.
--- Placed the jar back onto the heating pad and wrapped it with a towel.
- [21:17]: Checked the humidifiers.
--- Tanks are still full and no leaks found.
--- Ca-Caw! Another week in the garden done!
--- Onwards to next week Ensign!
[END OF WEEK 11]
Processing
Likes
95
Share

@Darkmanx
Follow
So far so good. A little discoloration in a few leaves. Bud sites forming. Weird weather we've been having and temps in the box jumped up into the 90's. That being said I went ahead and made the switch to LED. Wish I would have switched sooner. Temps fell almost 20F. Sure some has to so with the outside temps dropping back down but this thing runs so cool.
Great light penetration but not sure if the intensity is enough. Time will tell.
She pretty much stopped eating and drinking. I read that prior to flowering they will slow down overall uptake and slow down growth as well. I don't quite remember that from my last grow but I do remember there being a huge flowering stretch.
I'm switching over to bloom nutes next week after a flush so hopefully she'll get the nutes she needs/wants.

Likes
16
Share


@valiotoro
Follow
Hello everyone 😎
Week 5 of flower for the Tropi🌴🍪
The top buds are ready✂️
Harvest in 2-3 times…
Amazing buds solid as a diamond 💎
It’s not easy to get this result with an autoflower.
Exactly what I’m looking for and this is why I love so much Fast Buds🤩
And when you get this result the trim is easier😁
Likes
55
Share


@Natrona
Follow
Blue Cheese F1 automatic
Week 8 2/23-3/1 Flower week 4
Week 8 flower week 4
The Blue Cheese gals are in full bloom, the buds are getting thicker and stacking. They are sticky and hard. Trichomes are increasing. From my phone they are a mix of clear and milky. They are 10 week strain so I and will have to get out my microscope. Since I have overfed my gals, this week I am trying to remove excess fertilizer from the planting medium by giving ph6.5 water only.
Ph 6.5
Temp 65
Your likes and comments are appreciated. Thanks for stopping by.
Growers love 💚🌿
💫Natrona💫

Likes
66
Share


@DogDoctorOfficial
Follow
i decided its time to start flushing this girls, so for this week only i will give them some enzymes and conditioner and after that just water for the next couple of weeks , lets see how long it will take them to finish 😅😆 so far I’m pretty happy with all of them, nothing to point out all is going as supposed 🙏💚 keeping my Par and VPD the same for now but soon i will start lowering them so that by the ending of this cycle I’l finish around 450/600 Ppfd
Week 8 day 50 since flipped to 12/12, I’m flushing and all is going as nomal, starting to fade out and I’m loving the frosty levels so far 😅🤩💚💚💚🙏🙏🙏
No idea why this doesn't allow me to crate a new week but I’ll keep updating here
Day 59 F And they are getting closer and closer but stil not ready, checking tricomes every day but all still very clear to my taste 😆 i think one more week at least, let’s see how they roll 🙏💪💚
Day 63 F And they are close but not there yet 😅 provably next couple days , I’ll keep on checking 😆 patience is a virtue, specially in this faze 💚😅
Week 11 day 72 FLower and j just gave them last watering 😅😁 they will have the day to enjoy lights as from today there will b no more of it for this girls 😅 i will do a 48h dark before harvest to increase more the tricomes production and the thc/cbd levels . From there hehehe we know whats coming from there , but lets wait for that time to comment on it 😆😅😁
Growers love you all see you on harvest mode asap hihihi
Ppfd- 1400 wUmol/m2s
VPD-A 1.51 kPa
Girls :
Tropicana Poison @sweetseeds - 7X
Chocolate Skunk @00seeds - 2X
Badazz Cookies OG @seedsman- 3X
Lights 2X Lumatek Zeus 465W Compact Pro @ 100%
All i Grow is medicine for myself, i do it with love for the love 💚💚💚
Growers love to you all💚💚💚


Processing
Likes
19
Share


@MadeInGermany
Follow
Hi everyone :-)
This week it has developed really well 😍.
it was also topped for the first time. Like the Cup,
I will not do an LST here either, just top it a few times 😃.
I wish you all a nice week, stay healthy 🙏🏻 and let it grow 🌱
Likes
25
Share


@Kirsten
Follow
Hulkberry has some definite issues. The leaves are damaged, so I'm concerned that the plant will be unable to carry out its normal functions.
If the plant can't properly photosynthesise, I really don't know how she'll make it to harvest.
I had phosphorus excess in this grow before, and I think that's what's happened again.
I think the excess of phosphorus has prevented the plant from being able to uptake Calcium, Magnesium and others.
8.5.25:
The plant was watered with 2ltrs of dechlorinated water PH'd to 6.2. I added per litre;
♡ 1/2 TSP Mega Crop Part A
♡ 1/4 TSP Sea K(elp)
PPM: 890
PH: 6.2
I decided to feed each plant separately and mix it up in the 2l jug.
I gave an additional 2l of dechlorinated water PH'd to 6.4 with the following nutrients;
♡ 4ml Ecothrive Trace
♡ 1/4 TSP Ecothrive Biosys
PPM: 636
PH: 6.4.
Let's hope I can manage to see her through to harvest somehow!
Thanks for following along 😊🍃✌️💚🤞

Processing
Likes
Comments
Share


@Smokwiri
Follow
Welcome to my diary of the Misty Gorlla by Zambeza seeds
looking nice, popped of the soil, i noticed it today and took some pictures
This strain won the first prize in the Higtimes cup in 2015 for section: Hybrid
so that sounds very promising
i'm using re-used soil for this one, so i can add some guano at proper level on clean soil.

Likes
32
Share


@AsNoriu
Follow
Day 43. All is good, heavy training session, trimmed sometimes almost half of the plant.
It will be 16 girls with different needs and heights, watering, cycle time ... Huge pain, but as it is my LAST of ALL LAST grow, so I just want to get few ounces max from each and do it fast !
Girls last week spent on BioHeaven, Silica and CalMag spray, so leaf colour went a lot better, maybe at the end of week I will feed them heavily. Today and next watering - just 6.3 water.
I took last NL away and now humidity and lightning are a lot better. Will drop lights down in few days, but not a lot ... 16 girls again in one room ;))))
I changed names of diaries, because I will try to finish them indoors ...
@MarsHydro @Susie420 @eleen , the first light that you gave me is moving to other city and I won't document results under her from now on. She served well for my friend, did magic at mines and I honestly would recommend her to any single plant grower ! Great stuff, it was privilege to test her for almost two years. Now she will serve for one more new grower !
Not the best retirement photo , but still ;))))
Happy Growing !!!


Processing
Likes
2
Share


@dubmusicrocks
Follow
The plant with calmag looking issues is growing height still the others seem to be not, one I didnt trim much is growing much denser nugs, with Crystal's sprinkling out much more than the trimmed /more trained plants. The middle plant is yellowing hard after I fed it tapwater for the first time in a long time. Lots of pistols starting to darken, I'll check trichomes next week.. might feed once more at least.
Likes
11
Share


@TheMadHasher
Follow
Whats up everybody cheers to another week of growth for everyone!
This week the ladies buds started showing signs of progress. You can see them produce more and more resin every day thanks to the cold weather its really easy to keep a pretty dry environment. Can’t wait to do my final defo next week! Until then stay green!


Likes
12
Share


Likes
9
Share


@Siriuz
Follow
Ok guys so she was bushy again and so we did defoliation again.
You can see the difference and then after that started flowering even more
Plus the fact we are increasing the amount of molasses added to the soil plus the floranova bloom nutes.
They are very thirsty girls, taking around 1.5-2lts per 48 hrs
So almost like a 1 liter per 24 hrs
Very good SoG to make them feel even more comfortable
Going to change schedule from 24/0 to 19/5 and see if they evolve!
Thinking about adding some humus to the soil as well, other than that they have been under good conditions
Temp is steady at day time around 24C top and night time is 18-19C minimum
RH around 45-60%
Mostly 45% control environment with AC
Cant wait to see big colas coming soon!
Have fun enjoy the videos!
Likes
4
Share


@YSLBeezn
Follow
Sehen alle gut aus 👍🏻
Fristed guava bekommt gelbe blätter aber davon lasse ich mich erstmal nicht verunsichern.
Die Blüten wachsen ja gut👍🏻👍🏻
Likes
4
Share


@QixxGrows
Follow
Day15 - Day17: I had some difficulties to get the humidity right. It was either too high or fluctuating too much. I ended up getting a timer for the plug and running the humidifier 15mins every hour. To help with air flow, I have the main duct fan running 4 times a day for an hour. To ensure that there's airflow around the plant, I have a fan in the light as well as a smaller clip-on fan that runs during light hours. I'm not sure how the camera moved on day17... I only watered it mid-day.
Day18: The timer on the humidifier and Duct Fan is now keeping the humidity in a good space. VPD now under control
Day19: The Vivosun controller perfectly adapted the lighting schedule to an hour earlier, to ensure 6hrs of darkness. UInfortunately the RPi kept it's 04:00 schedule (makes sense). So I captured an hour of darkness. Adapted everything. Will have 18hrs again from Day20 onwards.
Day20: In the next days I'll lift the camera higher for a better view of what's happening up top. My mesh-netting-dingsbums will arrive and I'll use this as a platform for the pi+camera.
Day21: I'm not sure if I like this angle. I'll only keep it like this until she goes into veg-mode. It at least shows the new nodes growing from different perspective

Likes
57
Share


@BudBoutique
Follow
Welcome to Bud Boutique Grow Diary - really appreciate all your love and support :)
Dont forget to check out my other current grows!
🗓️ This Week:
- Day 38: looking super beautiful - stacking up slowly - both Phenos #1 and #2 got amazing purple leaves
- Day 41: look at this color play
Thank you for still staying with me 💚
___________________________________________
--- 🌱 Strain (Sponsor) 🌱 ---
🏷️ PEACH GIRL by Art Genetix
https://www.artgenetix.world/product-page/peach-girl
--- 🥗 Nutrients and Feeding (Sponsor) - (APTUS Ambassador) ---
🍸 APTUS: full nutrient schedule extreme
-- Regulator, N-Boost, P-Boost, CaMg-Boost, K-Boost, Allin1 Liquid, Startbooster, Topbooster, Enzym+ every feeding
-- Fulvic-Blast, NutriSpray as Foliar each once a week
🔗 https://aptus-holland.com/
--- ♻️ Grow Control (Sponsor) ---
TROLMASTER: TENT-X + LM14 Light Adapter to dim/sunrise/sunset lights + Temp & rH Sensor all remote on App
🔗 https://www.trolmaster.eu/
--- 🚿 PetraGrow (Sponsor) ---
CannaFogger Foliar Spray
🔗 https://www.petratools.com/product/petragrow-cannafogger-atomizer-new-mini-fogger
--- 🏭 Grow Setup ---
💡LUMATEK Zeus Pro 600
* 🏠🌿 Indoor: Homebox 120x120x200cm (4x4)
* 📐🌀 PrimaKlima exhausting Fan 1180m3/h (running on 60-80%)
* 🌀 Can Light Filter 800m3/h & 1x Fanbox 1x Dyson fan for Air circulation
🔗 https://lumatek-lighting.com/zeus-600w-pro-29/
🔗 https://primaklima.com/de/shop/ventilatoren-de/ec-ventilatoren/pk160ec-tc/
🔗 https://canfilters.com/products/filters/
All Likes and comments are highly appreciated!!!
👨🌾 don't forget to check out my Instagram for daily educational content: budboutiquee
- Bud Boutique
