
Likes
Comments
Share


@AustinRon
Follow
TH 1Q2025 - Week 11 - Flower 8
(ON Haze X Original Haze) X Northern Lights #2
“Todd’s Haze”
Objective
- 8 Female Plants, Topped ONCE @ Flip, 12” when topped
- Modified Sea of Green
Seeds Wet: 1139PM, 28.2.2025
Germinated: 2.3.2025
Flip: 21.3.2025
Harvest: 77 Days, DATE: 6.6.2025
_________________________________________
__
Fri May 16, 2025
TH 1Q25 57:F:8:1
Harvest Dehu
- [x] Amount: [ 1.5, gal]
- [x] EC: [ 2.9, mS/cm]
Refresh Reservoir
- [x] Primer A&B: [ 36, ml]
- [x] SLF-100: [ 15, ml]
- [x] Amount: [ 3, gal]
- [x] EC: [ 1.8, mS/cm]
Runoff
Amount: [ 2, gal]
EC: [ 1.9, mS/cm]
__
Sat May 17, 2025
TH 1Q25 58:F:8:2
- [ ] Install Line Supports for TALLS!!!
We REALLY need to clean up the foliage, especially lowers.
Defoliation
- [ ] GO SLOW
- [x] Remove Fans w/ Petioles up to Center Bar of tent.
- [x] Selectively Defol above
Note: Last time we defoliated, we thereafter had a flush of new green. (Week 5) May be correlated with CalPHOS (Applied same time) or Not. Point is, GO SLOW.
Runoff:
- [ 0.25, gal] # Leaving Irrigation Parameters overnight. Will gauge amount being taken up SUNDAY
__
Sun May 18, 2025
TH 1Q25 59:F:8:3
The Veg is almost overwhelming. I’m continuing this grow with some encouragement from GrowCast, but:
1. Pistils have integrity, the bracts are completely loosened, but larfing on uppers apparent.
2. IF This plant finishes, they’ll largely be TRIM MONSTERS.
3. I could grow my clones today - without having clones to take -
*** Frustration***
Harvest Dehu
- [x] AMOUNT: [ 2.5, gal]
Refresh Reservoir
- [x] Amount: [ 2, gal]
- [x] Primer A&B: [ 12, ml, gal]
- [x] SLF-100: [ 5, ml, gal]
- [x] EC: [ 1.8, mS/cm]
Runoff
- [x] Amount: [ , gal]
- [x] Installed Lateral Supports for Leaning TALLS
__
Mon May 19, 2025
TH 1Q25 60:F:8:4
We’re using more water than Dehu is providing . . .
Refill with pH’d FILTERED TAP
__
Tue May 20, 2025
TH 1Q25 61:F:8:5
__
Wed May 21, 2025
TH 1Q25 62:F:8:6
__
Thu May 22, 2025
TH 1Q25 63:F:8:7

Likes
6
Share


@emeraldlabs
Follow
Opposite of last week! Flipped on day 45... put up a blackout curtain and had to move the tent. Light would not fire up after... thankfully had a replacement ready to go!
Started feeding LIGHTLY. Will increase every other watering.
Photos/video are day 50 since breaking the soil. Hard worker in last pic!
*EC is 0.5... website being dumb*

Processing
Likes
3
Share


@BonkEyesCZ
Follow
Going crazy about this strain ...
She flowering Very rapidly
And her flowers looks like they are bubbles ..bigger and bigger every day.
Dont have much time to have film diary do here's the final version ... Maybe in 1 week ill start flushing her

Likes
5
Share


@littlefoot
Follow
She gets bushy quick, led me to tying down some branches, caused me to snap a branch. I tied it back with a good fit and 2 days in its still alive, going to monitor and prune it off if necessary...just starting to get open amd see some decent growth but might have to up the nitrogen
Likes
2
Share

@AestheticGenetix
Follow
Looking so so frosty now. The stinks really starting to eminate and dominate the room
Likes
7
Share


@Athos_GD
Follow
The buds are really sticky and smell super strong. This stuff gives you a head high followed by relaxation. I dried for 14 days at 60 degrees Fahrenheit and 60 % RH.

Likes
28
Share


@GERGrowDesigns
Follow
A Special Project from Germany and Welcome to Veg Week 4 of GoodTimesGenetix Blue Cream Haze
I'm excited to share my grow journey with you from my
GoodTimeGenetix Seeds .Im the First Person outside my Friends Company who got hands on this Strain .
He Managed over a long time to Cross these Strains:
-Blue Dream (Blueberry x Super Silver Haze - Female)
-Ice Cream Haze (Gelato x Wedding Cake x Crockets Haze - Male)
They Done a lot of Tests for a Nearly Perfect Stabilisation of this Genetic and Feminized them aswell .
This one is Professionell Created In Germany , Growed in Germany and presented To the World on Grow Diaries.
Here’s what I’m working with:
• 🌱 Tent: 120x60x80
• 🧑🌾 Breeder Company: GoodTimesGenetix
• 💧 Humidity Range: 60
• ⏳ Flowering Time: 8-9 Weeks
• Strain Info: 23%THC
• 🌡️ Temperature: 26
• 🍵 Pot Size: 0.1
• Nutrient Brand: Hy-Pro
• ⚡ Lights : 600W x 2
I would truly appreciate every bit of feedback, help, questions, or discussions – and of course, your likes and interactions mean the world to me as I try to stand out in this exciting competition!
Let’s grow together – and don’t forget to stop by again to see the latest updates!
Happy growing!
Stay lifted and stay curious!
Peace & Buds!
Likes
2
Share


@TEKNOGROW
Follow
CONTEST SWEET SEEDS
SWEET SEEDS
SWEET GELATO
GROWER ADRY
www.teknogrow.it
Instagram @teknogrow


Likes
23
Share


@555ABKY555
Follow
hello guys this week I applied lollipopping to the two girls who are getting really huge the skunk responded to the pruning in a masterful way while the honey cream tends to keep its tip firm the ak420s are growing a lot while the sc girls. they reported very strong sun stress freak shows grow slow and so far the only plants I get along with are frisian ducks.


Likes
5
Share

@jdean88
Follow
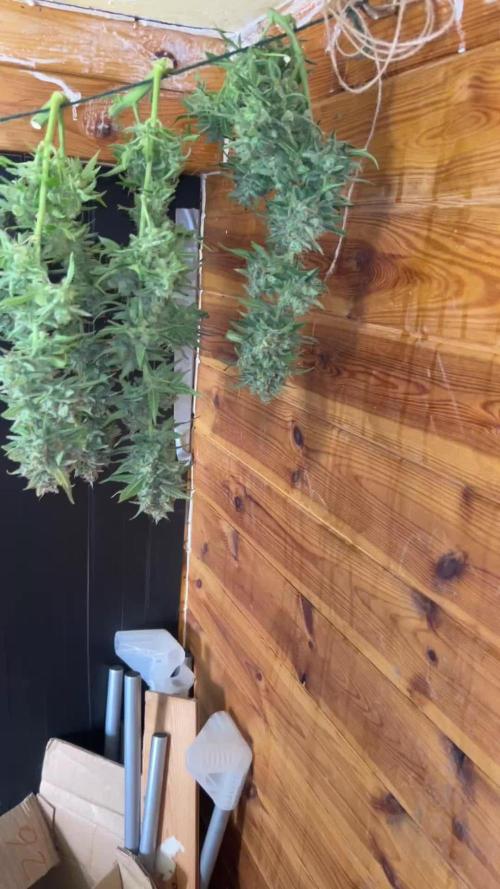
all chopped now and currently drying they all smell amazing and frown age I see over 100g on all
Plants but will update once dry with official harvest post
Likes
41
Share


@negrowsoil
Follow
Second week of flower has started
They really grew after a heavy feeding
Had to move my lights way up . LEDs tooo bright ..leaves were slightly curling

Likes
422
Share


@Crashoverite
Follow
Hi everyone 😁
Welcome back in another week update!
Thank you all for this amazing support on this bananas journey💚💚💚
Uploading and updating each week content on daily bassis so please revisit this diary if week not over yet.
So far all going great. Girls looking very healthy and happy. Due to my short trip had to leave my 🍌💜👊 girls unsupervised for 3 days. Was stunned when opened my cabinet on the Dec 5th. Athena stretched like crazy. Good 3 inches. She better slow down as not much roof space left for her. May tie some taller branches to netting if necessary. Introducing blooming nutes for the first time this week on December 6th at smaller dosage and on the second watering as listed.
Week 8
Dec 4 - Dec 10
Dec 5
Leaves tucking
Dec 6
Heavier selective defoliation on both girls. Athena fully lolipopped and Xena at 75%. Watered with 8 ltr beetwen both with perfect runoofs PH 6.4. Girls were very thirsty 🤤
Dec 7-8
Just enjoying how my girls developing. Frost has landed and they are start showing colours. All is looking great.
Dec 9
Second watering for this week 7 ltr beetwen both. Runoffs PH 6.4
Even with so much difrence in size of my 🍌💜👊 girls it seems that they are drinking my juice almost equally.
Dec 10
Applied selective defoliation and tied 3 tallest branches of Athena to netting to avoid any potential burns on these beautiful baby colas.
It's the end of the week!
Thank you all again for such a great support, all the likes, dm's, comments and follows 💚💜💚💜
Stay tuned for coming week update 😁✌️💚


Likes
12
Share


Likes
25
Share


@Luv2Grow
Follow
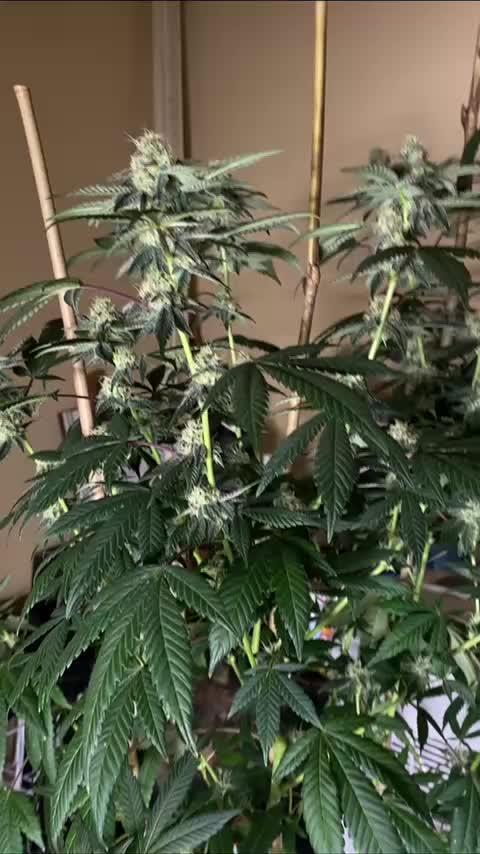
Day 71 - Starting week 11 and this should be her final week, I’m just looking for a little bit more amber to show up in her. Hopefully as she dries out from her last watering, she’ll get to that 30-40%. Her buds are really chunking up and dense as hell too!
Day 72 - And she’s done, she’s gonna get the axe after 48 hours or so of darkness. Haven’t really used the darkness before harvest method before but needed some room in the tent so gonna give it a go. She should be getting chopped on Thursday sometime.
Likes
25
Share


@Dingle
Follow
WEEK 8 🌻
Seeing really good bud development again over the last week.
Both strains are showing a majority of cloudy trichomes with some amber ones starting to appear so I decided to give them there final feed at start of the week and then their first flush 6 days later using only ph’d water and some cannazym.
Defoliating and using sticks again to get as much light to the lower buds as possible.
Lights out for 48 hours hopefully some stage next week.
🤞🏻☺️✌️


Likes
46
Share


@Toastdtoast
Follow
This is actual week 11, day 78 from seed.. Grew like a champ, took the topping well, looking and smelling great! I'll let yall know how it smokes soon as I find out!

Likes
2
Share


@Shefman93
Follow
Week 3 has been a breeze. Retied the plant to spread it out alot. I am going to veg for 6-8 more weeks and transplant into a 25 gallon pot to give the roots some room for flower.
