
Likes
Comments
Share

@BalconyBoy
Follow
02.06. the previous week I took to cutting back everything except 8-10 branches per plant. Each arm remains with sprouts at the top only (like lollipoping but with the leaves still on). I contemplated for a while before doing this an compared with last year's growth. Definitely want less little stuff in the lower region and a cleaner structure overall. TMV on the Quick Sherbet leaves looks contained. White clover growing along well, gave 1g / L of greenhouse feeding bio enhancer. This week is mostly cloudy and rainy so expect slower growth but good progress.


Processing
Likes
15
Share


@MG2009
Follow
08/20/2020
Soil temp a little warm,it is hot and humid going to water her good,and mulch the topsoil.
Flowering has started!
Likes
6
Share


@Mr_nugs_lover_David
Follow
Absolutely High quality strain! This strain is pure gold, strong smell very freaking stinky, you can't believe how much this little monster stinks, the colas are huge man, very hard dense like authentic Rocks, Brutal resin production very stinky, I can see her parentales of Zkitzy Gorilla because of the crazy amounts of glue she has produced, fat colas for real, I'm in love with this strain, I could grow her forever! I know she's gonna make me sleep amazing at night, brutal indica híbrid. Enjoy guys! ✌️💚 🦍👽

Likes
9
Share


@Tobecobe
Follow
29/10 - Full Res Change after a 6 hour flush with plain ph water. Tapering off the nutes as shes drastically slowed her water uptake. Took a test bud yesterday and vaped it wet. Tasted as expected, but has a smiley, relaxing effect to it. Think she should be good to come down shortly.
31/10 - Water uptake seems to have picked up a bit again. EC rising slowly, PH still plummeting daily. Looking pretty cloudy with a few starting to amber. Hoping to have her down in a week or so.
01/11 - PH still plumetting, PH stablized. Better microscope coming tomorrow. I'm pretty sure I'm seeing amber tips when eyeballing through a lens, but theyre not coming across on the phone. Hoping the new scope gives me a better view.
04/11 - Test nug taken and vaped. Shes got a very giggly but relaxing high which tails off into sedation. Very nice. Chopping tomorrow after a 12h dark period, and 16h plain ph'd water flush.
Likes
42
Share


@Prototype0181
Follow
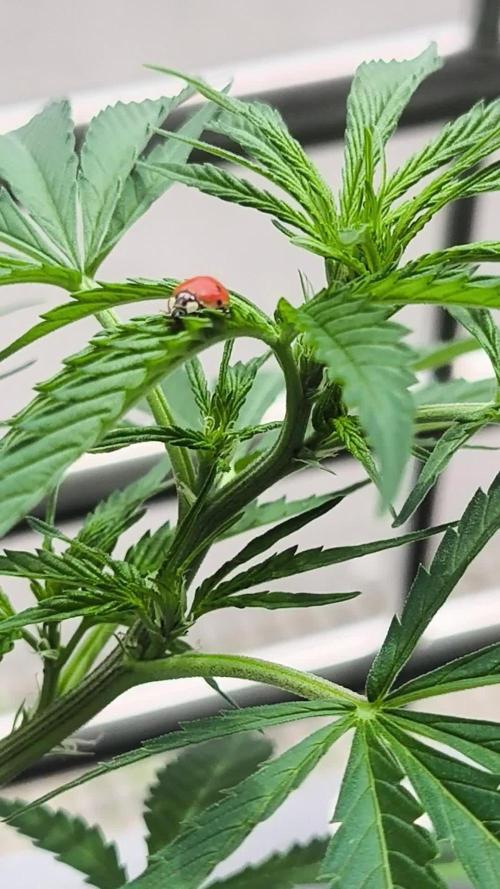
Found a fungusgnat inside my babyroom today😤 so i got myself a flyninja trap and a fresh batch of nematodes to eredicate those little bastards before it gets a infestation. Maybe gonna put some diotomaceous on top of the soil to be sure nothing survives before first transplant in 2 weeks

Likes
1
Share


@Elguacho420
Follow
Primera semana de crecimiento de estás red cookies gelato, fue una semana sin complicaciones, humedad relativa en 40% y temperatura rondando 20-23 grados, tienen un color espectacular boludo, estoy deseando que llegue la época de florar. Volvemos por aquí las proximas semanas guachines . 🇦🇷🇪🇸 Muchos humos para todos 💨💨💨
Likes
5
Share


@NicoCordoba97
Follow
Obvesvacion por Maceta.
Maceta 1: Mucha altura y poca expancion laterales, los cobollos se ven con ojitas muy chicas y definidas, no son tan gordos y comprimidos. Satisfecho. 😃
Maceta 2: Creo que tuvo un desarrollo como espere, con cobollos lindos por el medio y una punta imponente, ¿puede que podia ser mejor? no lo se. MUY satisfecho. 😄
Maceta 3: Fue Historia.
Maceta 4: Petiza, con su unica punta que es igual al cobollo a mediana altura de la maceta 2, puede que haya sido el sustrato ya que tanto la maceta 3 como esta 4 crecieron de igual manera, poco desarroyo, mismos cuidados que las demas. Por ovias razones la regaba menos ya que no consumia tanto y deje de darle productos ya que no lo veia necesario. Decepcionado. 😑
Ahora voy a Cosechar. 😎

Likes
10
Share


@oxieg3ngrows
Follow
After her 10/21 defol she has really started putting on some weight. her little golf ball sized flowers have almost doubled in size and the terps coming off her continue to increase in strength. If I even brush against her it sticks to me. The flower is insanely resinous.

Likes
42
Share


@CBD_Sweden
Follow
Week 15 / 6th week in bloom :)
One more week done, and even closer to harvest! Both my girls are looking great and starting to smell quite strong, I just love it!


Likes
19
Share


Likes
8
Share


@R1pp3r
Follow
Se siguió doblando ciertas ramas por que si no se iba a descontrola en altura, no me imagino lo alta que puede llegar a ser si a lo hancho ah demostrado ser bastante buena

Likes
4
Share


@Rangaku
Follow
Pulled the orange cookie today and couldn’t be happier, the yield is massive, the buds are dense, fruity sweet , sticky and pungent. This plant is prolly my best so far thanks to Dutchfem for another awesome strain . If you’re looking for something special give this strain a try . I’ve smoked a bit of this already and it’s Girl Scout cookies all over then just like a pallet cleanser of citrus freshness that keeps you coming back fir more .


Likes
32
Share


@Cariboo_OG
Follow
Week 1
New diary alert and I know This is your first time so.. welcome to my garden.
Super excited to say I'm sticking with BARNEY'S FARM for this summer grow season.
First couple entry's of these diary feel a little stale but this will be speeding up soon.
If you have a question drop me a comment please ! Im new let me know what you think, help a brother out.
Happy Growing everyone
Cariboo_OG

Likes
15
Share


@420DeepGrow
Follow
Gracias al equipo de AnesiaSeeds, Marshydro, XpertNutrients y Trolmaster sin ellos esto no sería posible.
💐🍁 Elementz:
Presentamos Elementz: Unleash The Elemental Fusion, una oferta trascendente de Anesia Seeds que te atrae al corazón mismo del reino elemental. Esta maravilla feminizada surge de un linaje de genética formidable, que combina la potencia incomparable de GM-UhOh con la energía vibrante de Epic Buzz.
Prepárate para ser catapultado a la estratosfera, ya que Elementz cuenta con un extraordinario contenido de THC que oscila entre el 33 y el 38%. Cada inhalación es una odisea, con un perfil de sabor que entrelaza intrincadamente notas de uva madura, frutas exóticas y un toque especiado, creando una experiencia sensorial tan compleja como deliciosa.
🌻🚀 Consigue aqui tus semillas:
💡TS-3000 + TS-1000: se usaran dos de las lámparas de la serie TS de Marshydro, para cubrir todas las necesidades de las plantas durante el ciclo de cultivo, uso las dos lámparas en floracion para llegar a toda la carpa de 1.50 x 1.50 x 1.80.
https://marshydro.eu/products/mars-hydro-ts-3000-led-grow-light/
🏠 : Marshydro 1.50 x 1.50 x 1.80, carpa 100% estanca con ventanas laterales para llegar a todos los lugares durante el grow
https://marshydro.eu/products/diy-150x150x200cm-grow-tent-kit
🌬️💨 Marshydro 6inch + filtro carbon para evitar olores indeseables.
https://marshydro.eu/products/ifresh-smart-6inch-filter-kits/
🍣🍦🌴 Xpert Nutrients es una empresa especializada en la producción y comercialización de fertilizantes líquidos y tierras, que garantizan excelentes cosechas y un crecimiento activo para sus plantas durante todas las fases de cultivo.
Consigue aqui tus Nutrientes:
https://xpertnutrients.com/es/shop/
💻 Trolmaster Tent-X TCS-1 como controlador de luz, optimiza tu cultivo con la última tecnología del mercado, desde donde puedes controlar todos los parametros.
https://www.trolmaster.com/Products/Details/TCS-1
📆 Semana 3:
Muy buena semana, he aplicado un riego solamente con agua de manantial para reducir la cantidad de sales acumuladas en el sustrato y se ha notado una mejoria .
Creo que le quedan unas dos semanas por estirar, parece que va a ser una buena cosecha.
Se mantiene un buen control del cuarto de cultivo gracias a @marshydro y @trolmaster.
Mantengo las dosis de 1/3 de nutrientes recomendados por el fabricante.
Potencia del foco 80%


Processing
Likes
13
Share

@MG2009
Follow
Week 3 males developing right on time! Pollen will be dispersing soon.
So now trying to nail down who daddy was? Week 3 day 1 males looking very nice, no sign of either one showing female flowers( no hermaphrodite/ true male) but I will stress them more after reveg for severe stress test. For final results.
Looks like I forgot to feed mom! Shit! But I did not.I used bio tone starter
5-1-1 by Espoma gonna feed in am. With tomato tone with myco 3-4-6 it's all I got and organic to boot 👍
Last grow with Captains cake went to 11 weeks 2 - 3 applications should get me to finish line. No flush should be needed, it's feeding the seeds growth.
Looking at 07/01/2018 harvest. Fingers crossed!
05/05/2018
First burst of male pollen is flying in the air, gonna try to get video of it as I shake the males. I am brewing tea with worm castings unsulphured molasses,topped off with protilizer immediately after brewing it.
Give them a little love (Tea) while they are making seeds👊


Likes
7
Share


@GhostByte
Follow
Did some defoliation and lst this week. Spread out the branches a little better because they were too close together.
I lollipopped them a couple days ago.
Theyre growing very wide, bushy and fast.
Budlets will form any day now.
Giving her one last shot of sugar royal. Only one of them isnt getting it because she looked quite packed with nitrogen. Dont want the same like my last grow to happen this time. :)

Processing
Likes
13
Share


@ladyjane
Follow
8/10 - In prep for flower I've got some Compost Tea brewing with a little Terp Tea Bloom by Roots Organics. .Also did a little selective defoliation
8/11 - Flipped the ladies to flower today! And all is good in the 8x4.
8/12 - Watered all the ladies with the Compost/Terp Tea. Also did some more defoliation and added some mosquito bits for added pest prevention.
