
Likes
Comments
Share


@Alejangrow
Follow
Harvested 1 plant after 49 days flower & harvesting the last one at 56 days of flower.✂️ Flushing with ph adjusted tap water. 🌊
Really happy with this strain. 😊🌿

Likes
7
Share


@SomeLikeItGrow
Follow
hey! we are one bloom as well, massive bug buds coming, but hairy lol, let’s see where it goes ;)

Likes
1
Share

@Oneman
Follow
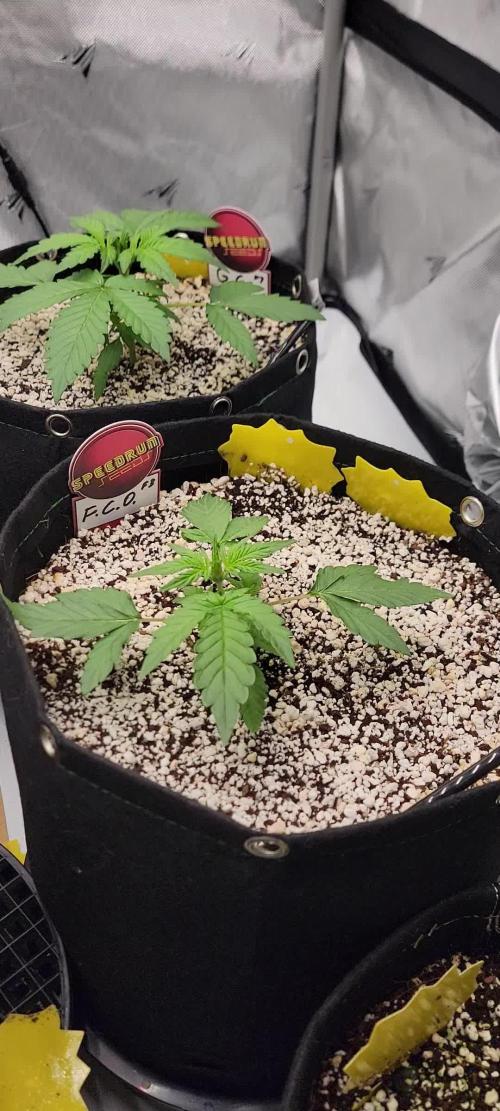
The two Water Egg strains have not developed and are stunted and deformed. I dropped the seeds before germination in the carpet. I found them but they must have picked up some bacteria or something. they are the only two that are weird and slow. I pulled them. I'm thier place went Speedrun Seeds Final Boss F2 and Terprantula Autoflowers Midnight Comet. Sowed directly in pots. Midnight Comet is in Gia Green amended coco cori and perlite 5 gallon fabric. Final Boss will be in Autopot 5 gallon fabric fed with the others.


Likes
10
Share


@Andres
Follow
I already imagine it with a lot of summer sun ... 100% recommended ... I will grow one of them again ....

Likes
5
Share


Likes
9
Share


@Headies
Follow
So this week after I gave it under nutrients I apparently gave it too much nitrogen while having a potassium deficiency. Shiney dark leaves, So i fixed that, but some didn't bounce back, and I tried nitrogen. I think they are doing pretty good considering everything I've put them through SO FAR. lol. Nutrients are NPK Raw's total lineup, follow their instructions at first, Fastbuds adjustments as of this week.


Likes
28
Share


@JiggleBudz
Follow
Day 71 - Let the new week begin! Removed some fan leaves from the center of the plant today to create more air flow.
Day 72 - Good run off today of 13%. Starting to notice the buds fattening up. CalMag decreased to 0.6ml/L.
Day 73 - She looks really beautiful today. All the colas are starting to take shape.
Day 74 - All the colas are taking shape now. Humidity in my area is high again putting the tent around 58%.
Day 75 - Defoliated some of the inner fan leaves today, whilst doing so I touched some of the buds and they are smelling amazing! Fruity/Mimosa smell is already there and super sticky!
Day 76 - She's taking up less water these days. My area humidity has gone up really high but still managing around 55% in the tent. I'll be monitoring her to see how she responds to the defoliation over the last couple of days.
Day 77 - Getting really smelly now!🍊 That's the end of week 10! Pretty crazy to think! We'll be entering Week 6 of flowering tomorrow. The flowers look great and they are swelling out by the day.


Likes
44
Share


@Cogollo_eu
Follow
**Encontrarás la traducción a español al final de la descripción**
From/Desde: 29/03/19 || To/Hasta: 04/04/19
From day/Desde día: 36 || To day/Hasta día: 42
You can find the Money Maker Diary here:
** Podéis encontrar el diario de las Money Maker aquí:**
https://growdiaries.com/diaries/25667-gorillamakingmoney-gorilla-vs-money-m
-----IMAGES & VIDEOS-----
Video 1:
Exactly the same video as 2 but accelerated +206% to fix it to 1 minute for instagram.
Video 2:
7 days (36~42) TimeLapse, 1 image each 60 secs @ 30 fps (I think there's a missing day in the middle, GoPro things...)
Photo 5:
Nutrients Used this Week
-----WEEK SUMMARY-----
I must apologize myself for the lack of pictures this week.
I raised a bit the amount of water this week, anyway as you can see at the end of the timelapse video the babies are drinking much more now, and I'm not using enough water. Starting from the next week i will water in shorter periods alternating nutrients and additives.
I finally decided to switch to flowering the first day of the next week, i want to see what size of colas they can generate from this size of plant. I don't wan't to try to create monsters at time, and i think my pots are small for too big plants i think. With this growing i'm just introducing myself to growing techniques and to indoor photoperiod strains.
The day 1 i switched the lights to flowering mode, and as i said the day 5 (1rst 7th week day) i will switch to 12/12.
-----WATERING CALENDAR-----
29/03/19 - 1.000 ml with all week nutrients @ 0.9 E.C. PH5.8
02/04/19 - 500 ml. Just water @ PH6
*****ESPAÑOL*****
-----IMAGES & VIDEOS-----
Video 1:
TimeLapse, exactamente el mismo vídeo que el 2 pero acelerado al 206% para ajustarlo a 1 minuto para Instagram.
Video 2:
7 días (36~42) TimeLapse, 1 image each 60 secs @ 30 fps (Creo que falta un día entre medias, cosas de GoPro)
Photo 5:
Nutrientes usados esta semana
-----WEEK SUMMARY-----
Tengo que disculparme por la falta de imágenes esta semana, y es que no siempre uno dispone de todo el tiempo que desearía.
A pesar de haber incrementado un pelín la cantidad de agua con respecto a la semana anterior, en el final del video timelapse se hace evidente como ya empiezan a beber bastante más agua y lo que les vengo echando ya no es suficiente, a partir de la semana que viene regaré cada menos días alternando nutrientes y aditivos.
He decidido que esta va a ser la última semana de crecimiento, quiero ver que tal se forman la colas con este tamaño de planta, hay que tener en cuenta que las tengo en tiestos pequeños/medios y tampoco es mi intención crear monstruos por el momento. Con este cultivo simplemente me estoy introduciendo a las técnicas de cultivo y al cultivo de fotodependienes en interior.
Con respecto a la luz, el día 1 he cambiado el modo de la luminaria a floración, y el día 5 (primer día de la semana 7) voy a hacer el cambio a 12/12.
-----CALENDARIO DE RIEGO-----
29/03/19 - 1.000 ml con todos los nutrientes semanales @ 0.9 E.C. PH5.8
02/04/19 - 500 ml. Sólo agua @ PH6

Likes
10
Share


@HideAndFly420
Follow
This week was really great except for some weather problem, cold is came a little bit earlier and i m still fixing something in the grow box. Roots are really large and strenght.
Flowering started exactly in the 28 day.
Let's go!
Likes
11
Share

@Enki_Weed
Follow
🌿 Early Skunk – Woche 7
Alles wurde heute gründlich gereinigt und aufgefrischt.
Nährlösung diesmal nur mit Hesi Bloom, PowerZym und 6 Tropfen SuperVit.
Plagron Silic Rock wurde abgesetzt – es war nur zur Stressvorbeugung beim Lollipopping gedacht (hilfreich, aber eher für Coco, in DWC setzt es sich gern ab).
Das große Lollipopping fand zwischen Woche 6 und 7 statt.
Beide Pflanzen stehen top da – kräftige Wurzeln, sauberes Weiß, keinerlei Stressanzeichen.
• Pflanze 1: 38 cm
• Pflanze 2 (getoppt): 32 cm
Lichtleistung konstant bei ~900 µmol PPFD.
📊 Werte:
• Wassertemp: 20,9 °C
• pH: 6,0
• EC: 1.67
(CF 16.7 | TDS 1170 | Salt 840)
• ORP: 262 mV
• Lufttemp: 25 °C
• Luftfeuchte: 52 %
Alles läuft stabil, Pflanzen zeigen super Vitalität nach dem Lollipopping, Setup sauber und Nährlösung optimal angepasst.
Nächste Beobachtung dann ca. 30 Stunden nach dem letzten Refresh, um zu sehen, wie sie auf die leichte Umstellung ohne Silic Rock reagieren.
🌿🌿🌿🌿🌿🌿🌿🌿🌿🌿🌿🌿🌿🌿🌿🌿🌿


Likes
38
Share


@gottagrowsometime
Follow
Welcome to my Gorilla Cookies Diary sponsored by Pure Instinto
!!!!!!!!!HARVESTED!!!!!!!!!!HARVESTED!!!!!!!!!!
Rating will be done once dried + 1 wk cure. Then vaped, smoked and put back in the jar for 4-8 more weeks.
(SADLY, I DELETED THE PICS LAST NIGHT. AFTER UPLOADING TO A NEW 3 WK, WK, AND PAUSED IT. CAME BACK LATR AND STARTED UPDATE ON ANOTHER, WIPING AWAY 3 WKS OF PICS...GRRRRRR
Roughly 105-110 days. 55-60 Days in flower.
WEEKS 13-14-15 Days was harvested. Noticed a lot of dead leafs in-between the buds. Pult it back to start pulling it out. And was covered in fuzz. The Pure Zym had started degrading the dead leafs that she threw off last wk when she turned yellow. And, the smell she look of rot. So, had to go thru everything. In total 3 of the biggest buds had to be stripped, opened and cut out the rot. (Thankfully I know what to look for) so, 98-99% of it was fine. Just 3 big ass buds,,(semi colas) so so dense. And yeah. I was running her in co2 with 70+ RH with temps pushing 30c but, even in her last week of fattening she took to co2 so a bat outta hell.
HARVESTED METHODS
Pult and was checking her trichomes. 90-95% cloudy. And was pulling dead leafs and noticed fuzz. Harvested ASAP. She was already on water for a wk. So I stripped, checked, cleaned out the dead leaves, and de-stemed and hung on my 8 tier net Drier. Was amazed when going through her bud, removing dead leaf after dead leaf from within the buds,( BTW, was very satisfying. Was like I was 15 again in wood class pulling wood glue from my hand while the teacher driveled on. 'Memories) anyways, I digress. So, she's hung, far from ideal temperature. 21.5-19c. So, she'll dry fast. Thankfully she was heavily fed on water all week. I did flush the soil to check the ppm was 290 bit higher than I'd like. Its why I soft flush for 10-14 days. But, I panicked. And stripped her. Delighted I lost very little. Video above to what I cut out, and some of the buds. So dense
Lights
SP/FC 3000
SP 3000 was used from start to 2/3rds thru fattening phase. Then the FC 3000 was used with co2. Buds exploded.
THANKS TO PURE INSTINTO FOR THEIR SEEDS TO TEST. And also big thanks to mars-hydro for allowing me to test their lights.
Much appreciated to all who viewed, liked &/R commented, look forward to seen your diaries. Either way thanks for dropping by.


Likes
8
Share


@imSICKkid
Follow
Watching her get frosty as hell. Besides her great structure, the trichome production this girl has is insane. She would be a great plant to press.
Likes
4
Share


Likes
48
Share


@pifflestikkz
Follow
Day 57
26/08/24 Monday
Feed today using de-chlorinated tap water pH 6.
Day 59
28/08/24 Wednesday
De-chlorinated tap water pH 6 only today, 1.5L with little to no run off.
Day. 61
30/08/24 Friday
Another feed today using de-chlorinated tap water pH 6 with Plagron products.
Picture and videos now 📸💚
Day 63
01/09/24 Sunday ( end of week)
De-chlorinated tap water pH 6 only today. 2L no run off but moist container all around.
She's now full flower mode 💪💚
