The Grow Awards 2026 🏆 


Likes
7
Share


@Chubbs
Follow
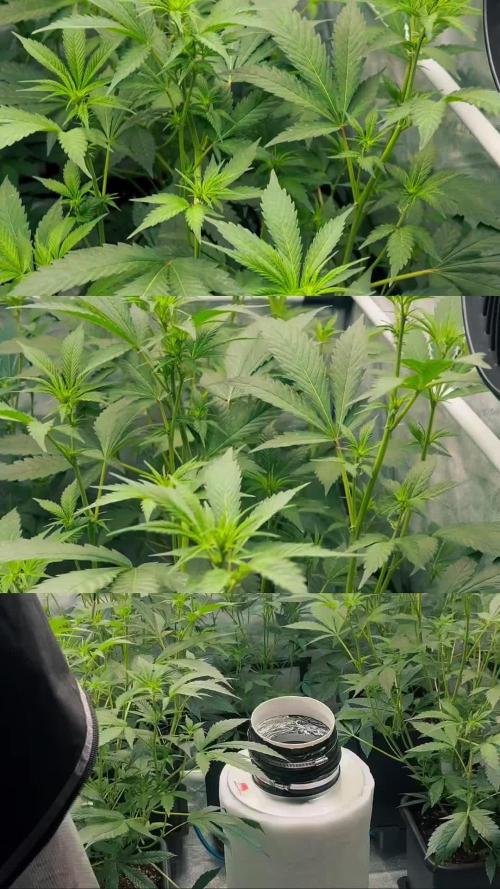
Weekly update. Sorry it was a late update this week I was out of town (Bizcon2024). Wow have they grown, I'd say doubling in size. I've upped the watering to 1000ml daily, this week I'll do a major defoliation and lollipoping. All in all Happy Growing
Likes
39
Share


@HydroHerb420
Follow
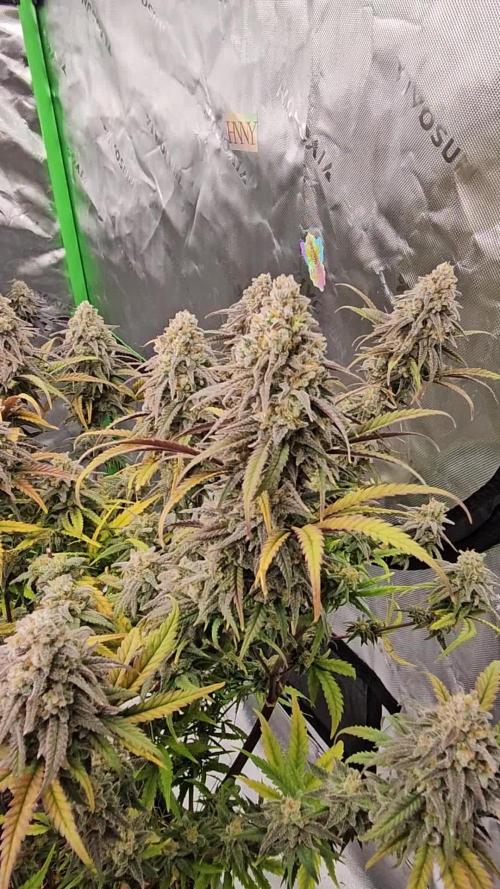
Massive dense colas. Is definately going to be the biggest yield of the three.
Likes
1
Share


@Greenpalace_420
Follow
La 4 semana de crecimiento las niñas están estupendas con un montón de baras y ramas para tofos lados y súper
Robustas ya dentro de 1 semana y media entramos en floración señores
Likes
23
Share


@Kakui
Follow
Primera ves cultivando una cepa de esta calidad, algo ansioso por obtener los mejores resultados posibles con estás genéticas.
Básicamente elegí la Grandpa's Stach R2 y la Grandpa's Cookies #6 S1 solo por sus tiempos de floración, espero que sean buenas tanto de sabor y resina, cómo también de producción.
G1, brotaron las semillas, solo 1 semilla brotó chueca, por lo que tuve que ayudarla con un alambre y va un poco atrasada en comparación del resto.
G3, primer riego con pH 6.1 y EC 0.6, y micorrizas Great White.
G5, creciendo bien.
G11, riegos cada 2 o 3 días, a punto de pasar a etapa vegetativa.
Likes
57
Share


@Nebula420
Follow
Gorilla Zkittle grow well, everything is good, no have any problem.
Gorilla Zkittle amazing beautiful plant, have a very frosty buds.
Gorilla Zkittle smell is strong, amazing smell of fruits, strawberries, cherry blossoms and sweet chocolate
Thanks to everyone who follows my grow reports, and Barney's Farm for nice genetics.
Likes
2
Share


@MistaOC
Follow
27.01. F8
Day 8 of flower and the plants are absolutely taking off. The stretch has clearly started, and they’re growing fast and vigorously — almost like salad shooting upwards overnight. Overall plant health is excellent, with no signs of stress despite the recent issues.
One very positive sign: the plants are slightly praying, which usually means they’re feeling comfortable with the environment and light intensity. The nematodes applied earlier this week should begin showing their effect over the next few days, and I expect the thrips population to be pushed back significantly.
Apart from that, everything is running smoothly and fully according to plan. If this momentum continues, the coming weeks should be very promising.
Likes
120
Share


@DogDoctorOfficial
Follow
Week 10, the second week of flowering, has been a wild ride in our Tropical Tangie Ninja Run. Our girl is on fire!
Talk about growth – she's become a bona fide giant, standing tall and proud. The canopy's like a green sea, and I'm thinking she might outgrow the room soon! I might have to sneak in for that defoliation before day 21 – let's see how ninja-fearless I can be!
And guess what? Her fruits are stepping into the limelight, and they're like little works of art in the making. They're shaping up beautifully and in promising numbers. It's like she's a fruity ninja master!
Now, let's talk numbers: Starting the week at a TDS of 300 and a pH of 6.1, things were looking balanced. But she surprised me with her super hydration skills – guzzling down 6 liters a day! So, as her thirst grew, I decided to amp up her food to 420 ppm. Yeah, the numbers asked for a little humor, didn't they?
And let's give it up for my ninja buddies! They're on ninja-duty, keeping a vigilant watch over everything. The pH's sitting pretty at 6.2, ensuring the perfect conditions for our Tangie to thrive.
And here's something enchanting: Our Tangie's always in prayer mode. Those upward-reaching leaves are like a constant reminder of her strength and the wonder of nature.
Stay tuned for more thrilling ninja updates! Remember, every leaf, every prayer, and every growth spurt is a testament to the incredible journey we're on. Keep cultivating with love and passion, you leafy warriors!
As always thank you all for stopping by, for the love and for it all , this journey of mine wold just not be the same without you guys, the love and support is very much appreciated and i fell honored and blessed with you all in my life<3 <3 <3
#aptus #aptusplanttech #aptusgang #aptusfamily #aptustrueplantscience #inbalancewithnature #trueplantscience #dutchpassion #dogdoctorofficial #legoninjago #growerslove
With true love comes happiness <3 <3 <3 Always believe in your self and always do things expecting nothing and with an open heart , be a giver and the universe will give back to you in ways you could not even imagine so <3 <3 <3
Friendly reminder all you see here is pure research and for educational purposes only
<3 <3 <3 Growers Love To you All <3 <3 <3
P.S.- Caught me in action, huh? Charging up my medicine with my trusty ninja buddies by my side. Gotta apologize for the smoke – looks like they're testing their ninja smoke bomb skills!
But hey, we're all about good vibes and green adventures here. So let's embrace the ninja spirit, roll with the giggles, and keep spreading that herbal happiness!
Oh and i had some photos from her babies this way you guys can follow that along also <3 <3 <3
Remember, even in the cloud of smoke, there's always room for a ninja's grin. Stay lit, my leafy warriors! 🍃💨
Likes
16
Share


@GreeneScene
Follow
I had trouble with my humidifier set up so she only took 5 days to hand dry . Fortunately I purchased a programmable humidifier so moving forward it’s all gravy. After everything was cut from branches & weighed she ended up yielding 20gs of some airy foxtaily bud.
I knew this would be a disappointment so we’ll just wait to see what the smoke is like , what the smell is like , & what the taste is like .
Likes
50
Share


@UKauto
Follow
grow space is listed as what I had her in up until the last 4 weeks when moved and switching lights.
Likes
54
Share


@Roberts
Follow
I am dropping a seed from Pure Instinto Seeds called Gorilla Cookies. I am grow it under the Spider Farmer G3000. The light use to be named the G300w. I scuffed the seed and have placed it in water. It is on a Spider Farmer germination mat for a little warmth. It will remain in the cup for 24 to 48 hours. Basically once I get a tap root started. I will put her in a 4 gallons of coco/perlite substrate. My schedule is about a 9 week vegging then flipping to flowering. 🤞🏻 for a great grow. Thank you Spider Farmer, and Pure Instinto Seeds. 🤜🏻🤛🏻🌱🌱🌱
Thank you grow diaries community for the 👇likes👇, follows, comments, and subscriptions on my YouTube channel👇. ❄️🌱🍻
Happy Growing 🌱🌱🌱
https://youtube.com/channel/UCAhN7yRzWLpcaRHhMIQ7X4g
Spider Farmer G300w: https://amzn.to/3S2zvsd
Spider Farmer 10X20 Heat Mat Kit - https://amz.fun/lsa0J
Spider Farmer Amazon Store: https://www.amazon.com/spiderfarmer
Spider Farmer Official Site: https://spider-farmer.com
Discount code: saveurcash
Likes
20
Share


@NorthernMonkeyzInc
Follow
Im really pleased with how these girls are turning out, i was worried at 1st as the propagation tent they were in wasnt big enough to get good air flow so they were very small but as soon as i got them into the Homebox triangle tent that all changed and they are looking great. Fantastic strains and genetics by Anesia Seeds.
Likes
9
Share


@Wicked_Stix
Follow
Flipped these girls to flower on day 26. Most of them have been looking good and growing pretty fast. I topped off the reservoir and added a little maxibloom. All 8 plants are drinking a total of about 2 gallons of water per day now. I kinda slacked on training them this week, but I will try to get them spread out some over the next week. I have been pulling a few fan leaves from the bottom so they can get good air circulation.
Likes
20
Share


@MrWolfe
Follow
So this round I just lollipopped and didn’t strip the top at all, with better veg next round it’ll work better but I’m having issues with some plants not quite trellised how I’d like. Everything smells great, BCS,BD and WM are getting fat and PKB is frosty and tight. Watering is more of a chore than I’d like I think I’m just going to use some 5s for the next round . Thanks for following along I hope your buds are fat and frosty.
Likes
8
Share


@NoProbation4Weed
Follow
the last 2 weeks she did not get any fertilizer.
Good smell and heavy yielder. Seems to be the best yielder this run.
Terps are there and as expected leaning to the mimosa side of life.
Likes
8
Share


@Fa5Venom
Follow
Good growth on them little bit of nutrients burn on the northern lights. Won’t get much out that small one but I just couldn’t let it go


