
Likes
Comments
Share


@Purrple_Haze
Follow
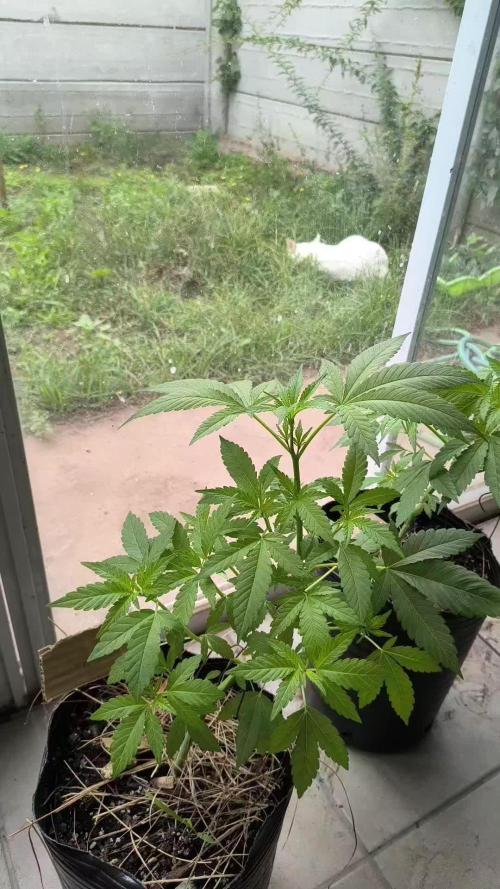
Topped & Sun-Kissed ☀️✂️
This week, I finally made the call—she’s been topped! 🌿
After a bit of back and forth, I decided it was time to give her structure a little boost and open things up to more sunlight. The side shoots are now reaching out confidently, soaking up every bit of that warm summer glow. ☀️
She’s had a golden week of sunshine and handled it like a champ—strong, vibrant growth and no signs of stress post-topping. 💪
Here’s what went into her care routine this week:
🔸 Fed with BioBizz Grow, CalMag and Alg-a-Mic
🔸 Followed by some homebrewed compost tea two days later for that microbial boost
🔸 Two days after that, a fresh round of Effective Microorganisms to enrich the soil life
🔸 And every 3 days, a light misting of silica spray to keep her leaves strong and resilient
I’m super happy with how she’s shaping up so far—great energy, lush color, and the new growth is coming in fast. Curious to see how she responds to the topping in the next week!

Likes
2
Share

@mjumbo
Follow
Well planta are growing and growing , this Will be last week of veg for some of them, the other ones maybe I Will keep adding hours of lighting but I need to separete thems SO the ones flowering don't get the lights. Surely Will be getting the flowering ones out the Quincho while the lights is on.
I have added tricomas, and also some plagues preventive.

Likes
3
Share


@LAShugars
Follow
Had to move her to a smaller space with a weaker light. But she has the entire light to herself. I ended up giving her one more dose of cannacoco A and B and the pk 12/14 also by cannacoco.
Will be flushing her with ph’s water at 6ish going forward. I may harvest her top buds first and give the lower buds some time to catch up.


Processing
Likes
142
Share


@MadeInGermany
Follow
Hey everyone :-)
This week it smells more and more sweet and fruity in the whole room 😍.
There is actually not much to report, everyone is now under 12/12 :-).
This is the last grow that comes in the entire diary.
From now on, each plant will be added to the diary 👍.
I wish you all a lot of fun watching, stay healthy 🙏🏻 and let it grow 😎👌


Likes
23
Share


@Chi_K24
Follow
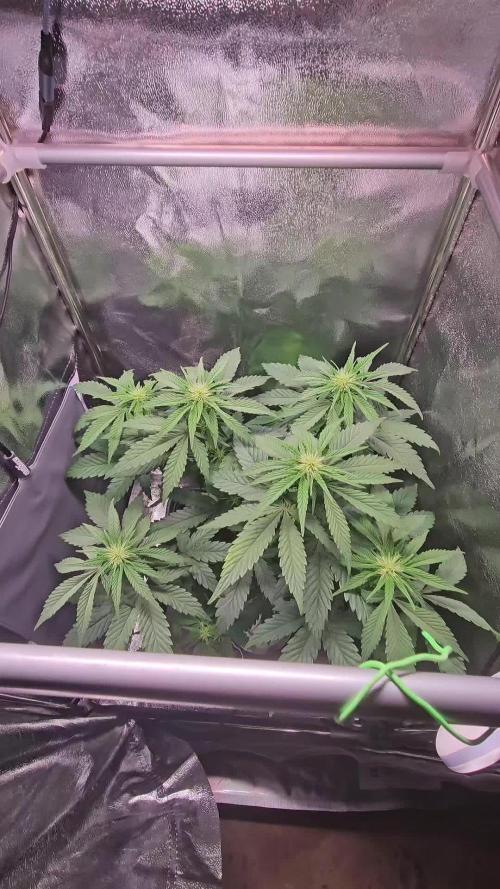
Hey guys, allot happened this week. Mid week on Wednesday I did a major heavy defoliation, she was very bush and allot of internode growth. I clean up everything and allowed more light pen. Also nipped any undesired off growths. Shaping how I want the plant to grow. Basically lollipoping.
As you can see I also started to install 4x 1/2 bamboo sticks to help support the plant once she gets bigger. I had problems last year late into flower and don't want to repeat same mistake.
I also amended the pots with 70/30 ratio of 444 to 284 @ 2tbs/gal.
Iv only water once in the past 7 days with the Aquabak. Not enough data to review the product. We will see.
Other than that we have had plentiful thunderstorms and have not required to water. Thanks to the felt pots, they did not get flooded with the amount of rain we got. Prolly 50-100mm worth of rain.
Thanks for updates. Enjoy the photos and vids


Likes
2
Share


@Viccrazyweed
Follow
Shit got out of control, i had to perform an LST to keep the big sister under control and she is the biggest plant I’ve ever grown although
She is developing buds everywhere and im not really sure but for me this is bad as i think sometimes less is more, its clear that the plant just can’t distribute the same nutrients on 10 buds/20buds, so i expect them to be soft and not potent, maybe THAT xxl pheno, im sure someone else could have get even more, shame that I can’t clone her
Little sister is looking so nice tho, Perfect structure, just amazing looking and beautiful to its maximum

Likes
3
Share

@tony_kiffton
Follow
Habe nochmals kleine Triebe und Popcorn entfernt ... wächst trotz kalter Temperaturen munter weiter - umgetopft in den 6 Liter Endtopf aus Stoff mit Floragard Rosenerde aus Deutschland !
Likes
19
Share


@growbville
Follow
Last week I fought some yellowing of the leaves. Did some small adjustments on PH to keep it in the 5.6 range. Seemed to stop it from progressing.
For Week 3 Veg I topped the plants. I plan to flip the lights at the end of week 3 and move into flower.
Day 15
I continued to have yellowing leaves even though I had everything looking right. (Added Pic). I decided to look into the PH to see if I was having issues with it. I have a meter in the water 100% of the time taking a reading every 1 sec. It all looked right. But I decided to Calibrate it in 4,7,10 solutions. Found out that my meter was off. So new to the check list is to calibrate the meter before each grow.
I was thinking my PH was High, when in reality it was low. put in some PH up to get it back to 5.5 and over the last 16 hours things look pretty good. Leaves look darker.
Day 17
Things are looking good. Leaves are getting darker and new growth coming in.
Day 18
Turned room temp down to 73F from 76F. Fearing it is warming up my res tank too much.
Day 19
Starting to get yellowing again. checked everything and can't find a good reason for it. Did notice some cloudiness in my res tank. Added 2 ML/Gal of peroxide. have Hydroguard on the way to help. I'll be adding more fans this weekend. I have light air movement currently.
Also found a few spider mites and sprayed Greencleaner to all plants.
Current environment settings:
Room Temp 72.74 F
Room Humidity 63.63% (After spraying, Trending down).
Room CO2 589PPM
Tank PH 5.70
Tank PPM (500 Scale) 953
Tank Temp 74.05 F
Day 20
Recalibrated my EC probe just to be sure it was also accurate. wasn't off by much.
Dialed back my flooding to every 5 hours to encourage Rooting. <-- Strong roots = strong Plants
Sprayed for mites
Likes
13
Share


@DeepRootsGrowTrees
Follow
JOANNE'S CBD / ROYAL QUEEN SEEDS
WEEK #9 OVERALL
WEEK #8 VEG
This week she starting to look much healthier and she growing at a nice rate overall a good week! Stay Growing!!
Thank you for stopping by and taking a look it's much appreciated!!
Thank you ROYAL QUEEN SEEDS!!
JOANNE'S CBD / ROYAL QUEEN SEEDS
Likes
10
Share


@HIAZ_urbanbudfarmer
Follow
Finished really fast! Not expecting a very big harvest, they needed a longer veg time, pretty small at start of flowering, didn't use massive bloom this run either
Going of the last run expecting good quality. Small buds.


Likes
44
Share


@Ukfarmer420
Follow
Easy grow, nice pretty plant, kept it small and performed lst early on, nice dense hard buds, wish I had space to run them all. I will be running the rest of my seeds very soon.


Likes
12
Share


@Tazard
Follow
She’s looking much much happier in flowering! I’m not sure how but I’ve grown her bigger than she is rated for maximum height. The end of this week she was 60” or 152cm tall, her rated maximum height was 39” or 100cm so I’m a good 50% taller than rated!!

Processing
Likes
2
Share


@TheFitz
Follow
So I flipped them 2 weeks ago, they grew nearly 10 centimetres in a week and I was running out of space so I read a bit about super cropping and gave that a go. Waters up to 2 litres every 2 days, feeding 2 out of 3
Likes
26
Share


@pifflestikkz
Follow
Day 17
17/07/24 Wednesday
De-chlorinated tap water pH 6 with calmag 5ml -5L.
Very humid week, noticed a green turning colour on top of soils where the humidity has been far to high.
I have installed door netting and recently left open all day and night now so they can condition over night in colder temps.
All are doing well, one overdose slightly behind and looking ABIT swifted. But she'll come around 💪💚
Day 19
19/07/24 Friday
Lite Feed today, 250ml each pot small run off.
Seeing excellent start to these babies. Let's get it 👌💚
Day 21
21/07/24 Sunday
De-chlorinated tap water pH 6 with calmag 5ml to 5L.
Watering in 1L each day from now.
Updated video

Likes
7
Share


@Mrg7667
Follow
Going to be a big weekend for the babies! Getting transplanted into 5 gals and getting the scrog put in!
Getting ready for flower hopefully by next week!
Also need to grab cuttings from each baby!

Likes
2
Share


@Mr_nugs_lover_David
Follow
She looks very beautiful,she's a little bit too short but it's okey because the aroma it's so pure and sweet that you definitely fall in love with her,another great automatic strain from the family of gea seeds 🔝💎🌱💯


