
Likes
Comments
Share


@shwable
Follow
It's an amazing journey and flowering time has started! Welcome to week 7💚
They are stretching really good I am excited to see how tall they get

Likes
68
Share


@MrHightimes
Follow
i'm in love with this grow.
I'm also drunk!
good pics and druken videos.
I love fastbuds/ Fastubds is life!

Likes
69
Share


@nonick123
Follow
Día 59 (29/07) Este cultivo no es muy entretenido con solo agua, asi que...
Le hago supercropping a todas! 😁 A ver como reaccionan!
Día 60 (30/07) Las plantas se están recuperando muy bien del supercropping! 😁
Todos las puntas hacia arriba! 💥
Come onnnnnnn! A por esa floración en 2-3 semanas!
Riego 500 ml H2O pH 6,75
Día 61 (31/07) Las plantas se han recuperado genial del supercropping y están lanzando TODAS las ramas hacia arriba 😍
Un espectaculo la fuerza de estas plantas! 💥
Redistribuyo las plantas, para ver si OnionOG está más protegida del sol, ya que consume muchisima agua y voy a estar en unos días fuera...
También reubico ligeramente la malla de sombreado, debido a que en mi latitud el sol empieza a incidir lateralmente por las tardes...
Riego 500 ml H2O pH 6,55
Día 62 (01/08) Vuelvo a redistribuir las plantas en el invernadero dejando a OnionOG todavía más protegida del sol directo, para tratar de disminuir su consumo de agua estos días que no voy a estar...
Pongo una protección "visual" en el invernadero en el lado que da a los vecinos (cara norte), porque he "cazado" miradas indiscretas...
Riego 500 ml H2O pH 6,55
Día 63 (02/08) Debido a que me voy de vacaciones unos días, adelanto el riego semanal con Té y la aplicación foliar de Kelp
Riego con 1 Litro de Té Vegetativo de Lurpe Solutions. Preparación: 24 horas con bomba de aire (oxigenación) con ingredientes:
Green Sunrise 8 ml/L + Insect Frass 16 ml/L + Hummus Lombriz 8 ml/L + Melaza 1 ml/L + Kelp Hidrolizado 0,25 g/L
Aplicación foliar Kelp hidrolizado de Lurpe Solutions a 0,25 ml/l
Día 64 (03/08) Cerrado por vacaciones
Día 65 (04/08) Mi amigo viene a casa a hacer un riego con 1 Litro de H2O pH 6,5
💦Nutrients by Lurpe Solutions - www.lurpenaturalsolutions.com
🌱Substrate PRO-MIX HP BACILLUS + MYCORRHIZAE - www.pthorticulture.com/en/products/pro-mix-hp-biostimulant-plus-mycorrhizae


Likes
6
Share


@LX1977
Follow
J-29 arrosages eau (pH 6.6)
J-31 arrosages avec engrais (pH 6.6)
J-33 arrosages eau + diamond sugar (pH 6.5)
J-35 arrosages eau + nématodes bénéfiques (2eme phase du traitement contre les larves de mouches de terreau)
Likes
6
Share


@Floryx
Follow
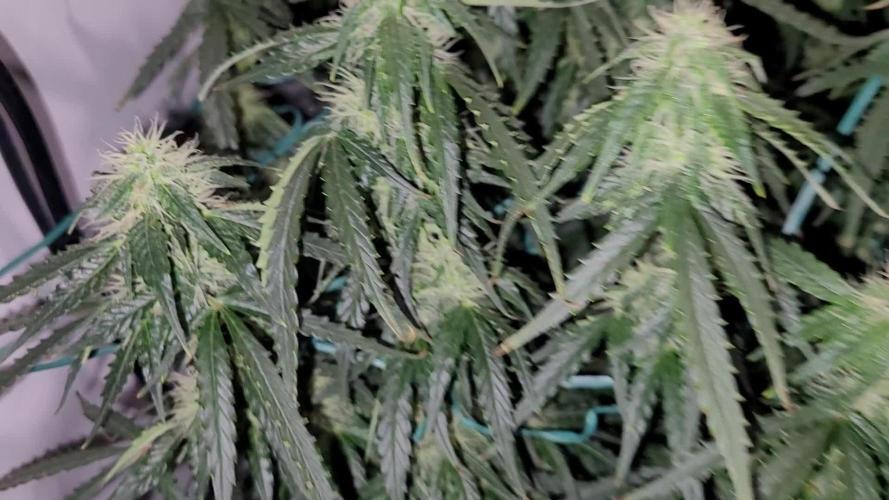
-getting really tight now
-will install scrog-web to use the space fully
-some leafs still have yellow and brown spots
-think i will fetilize twice a week from now on
-getting a lil cold in the night but therefore humidity is now almost perfect
Thankful for any comment :)

Likes
114
Share


@Tropicannibis_Todd
Follow
💩Alrighty Then Growmies We Are Back At it 💩
Well folks we just finished up the last run and so we are back to do it all over again 😁
So what do you say we have some fun 👈 We got some Gorilla Punch 👊 👊 👊 DAY 63 👉 The Frost 🍦 Is Real 👌 with this one 👍
👉 😳 So I am just gonna give this a day or two and then chop it down 👈 Shes ready and smells awsome 👌
FC4800 from MarsHydro Lights being readjusted and chart updated .........👍👉Added an RU45 too the mix 👍
www.marshydro.ca
👉I used NutriNPK for nutrients for my grows and welcome anyone to give them a try .👈
👉 www.nutrinpk.com 👈
NutriNPK Cal MAG 14-0-14
NutriNPK Grow 28-14-14
NutriNPK Bloom 8-20-30
NutriNPK Bloom Booster 0-52-34
I GOT MULTIPLE DIARIES ON THE GO 😱 please check them out 😎
👉THANKS FOR TAKING THE TIME TO GO OVER MY DIARIES 👈
Would you like to hang with the growdiary community 👉 https://discord.gg/gr4cHGDpdb 👈
Likes
25
Share

@NewName
Follow
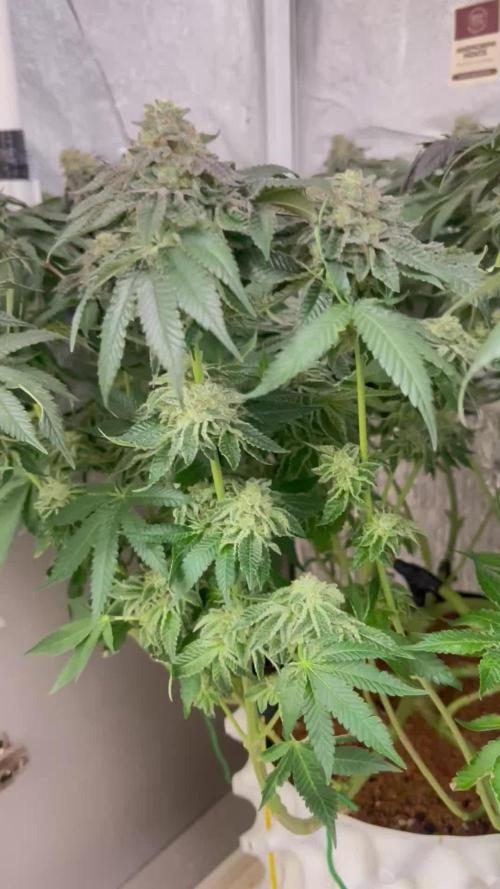
Thick flowers 8p gettin a big top 😛
These plants are not bigger than 30cm, crazy!! 🤩🤩

Likes
13
Share


@YOUNGSTERBR
Follow
meu scrog estava muito próximo ao meu vaso, meu regador com água de PH certo nao dava mais pra regar sem que molhasse as flores, tive que adaptar uma ponteira na mangueira e regar com uma água que nao sabia do PH, pior hora que fui fazer isso, problema de PH logo ultimo mês de flora, isso vai diminuir bastante meu rendimento, to tentando consertar!


Likes
24
Share


@CURATI_DA_SOLO
Follow
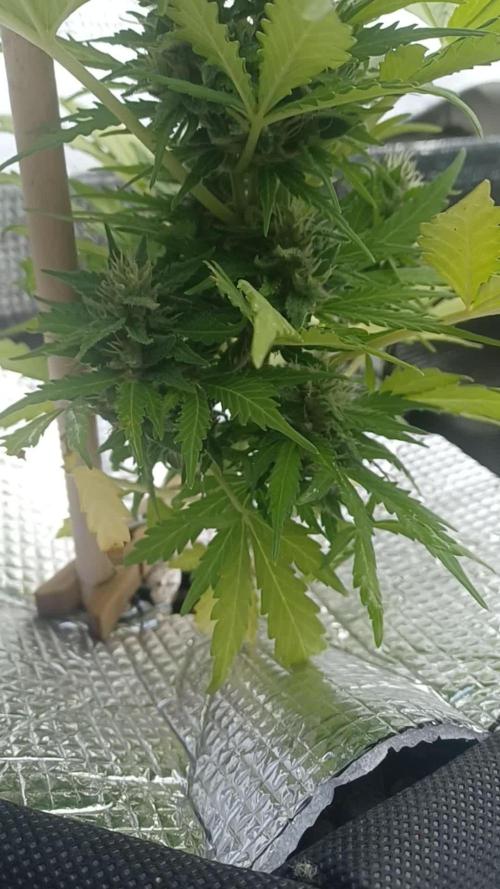
Ho toppato 2 volte , una volta al 4 nodo,poi ho tolto via anche le prime foglie ad una punta e ho lasciato crescere solo il secondo e il terzo nodo, non appena sono cresciuti ho toppato ancora tutti e 4 i rami in modo da avere 8 cime apicali ...a reagito stupendamente bene per avere 3 settimane beve già parecchio...ora cerco di tenerla giù facendo LST ogni giorno se c'è bisogno, così successivamente ci sarà spazio per fare penetrare abbastanza luce per tutte e 8 le cime!....io sono positivo, lei e promettente vediamo la prossima settimana cosa ci aspetta!!!! Nel frattempo vi ringrazio per essere passati da qui a vedere i miei lavori! Grazie mille a tutti voi!!! 🌈🌈🌈 Alla prossima settimana 💪🏼
Likes
27
Share


@420
Follow
An Tag 41 wurde nochmal getrimmt und kleinere untere Blütenansätze entfernt.
Heute ist Tag 45, würdet ihr mehr entlauben ? Tagsüber habe ich leider eine Luftfeuchtigkeit von 52 % mehr holt mein luftentfeuchter durch die vielen kleinen Blätter nicht raus. Nachts denke ich etwas mehr.
Tag 46: Luftfeuchtigkeit wieder dauerhaft unter 50%

Likes
16
Share

@Susquihanna
Follow
This week is another wet week with 72% humidity!! I am watching really closely for bud rot. And, I tend to get nervous and take a plant down too early when it rains so much. I can't really feed them any nutrients either because of all the rain.
The good thing, however, is my skunk of doing really well considering the hail storm and broken stem it has had to endure. Miss Skunk has been brave and withstood the test of time. She has long, thin stems but she is packed with small buds and lots of resin!
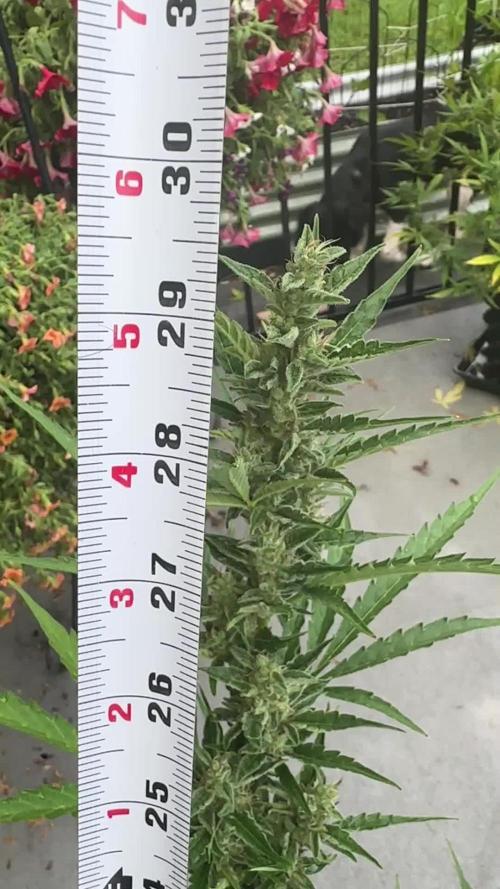
Royal Queen Seeds says, "Sweet Skunk Auto seeds produce plants that grow to a very manageable height of around 60–100cm, which translate to 40 inches. My Skunk is currently 36 inches!! Sweet Skunk Auto seeds are ready to harvest just 11–12 weeks after sprouting." So, I should be ready to take this down pretty soon.
Likes
24
Share


@Basementganja
Follow
Week6 of bloom, feeding Cal-mag+Floranova Bloom, both at 1tsp/gal. Each plant receives a glug or two from a 1gallon mixture. Runoff is removed.
New Clones of different phenos have entered the arena!
Happy growing!

Likes
19
Share


@Organic_G
Follow
Wieder vieles gelernt, gute Qualität, was soll ich sonst sagen, die kommende Zeot wird erst einmal mit Autos gearbeitet.
Likes
34
Share


@ElLocoDeLaHabitacion420
Follow
I have not been at home too much this week so theres not too many photos but im flushing right now just counting down the days to chop this plant down! I have a problem with foxtails due to my tent not being high enough to raise the lights but thats fine.... ill get a new tent pretty soon ( This is my first Indoor grow! thats why im still learning about lights and all that.. I used to grow outdoors so my indoor and autoflower techniques still in baby steps


Likes
13
Share


@Mastr
Follow
They grow amazing without any problems
Day 38 I switch to bloom cycle 12/12 I defoilate her next week
Day 39 she is preflowering such good strain I bet
Buy new light guys philzon 2020 Pro led its lovely 😍
Likes
14
Share

@StonedSteve
Follow
Start week 6 of bloomingToday 11.3. I had to pour 6 liters of clean water over it. 1500ml (leaked out)
76. day of grow
36. day of bloom but not sure I think I started counting the blooming before they actually started blooming.
All of pohotos is acutal from today


Likes
5
Share


@Naujas
Follow
I came back after vacation, the girl is ready for cutting, the rainy weather has started, so there is a threat of rot, you can say I managed to find just a few small pits in time and removed them and threw them away, the big and stiff flowers look fantastic:) but after a long trip I was tired, so I didn't take quality photos :( no everything else, I am very satisfied with the result I got:) its smell already lets me know that it will be good:) a lot of sugar leaves from which I will make bubble hash:) I will update the weight when it dries.