
Likes
Comments
Share


@GroloCup
Follow
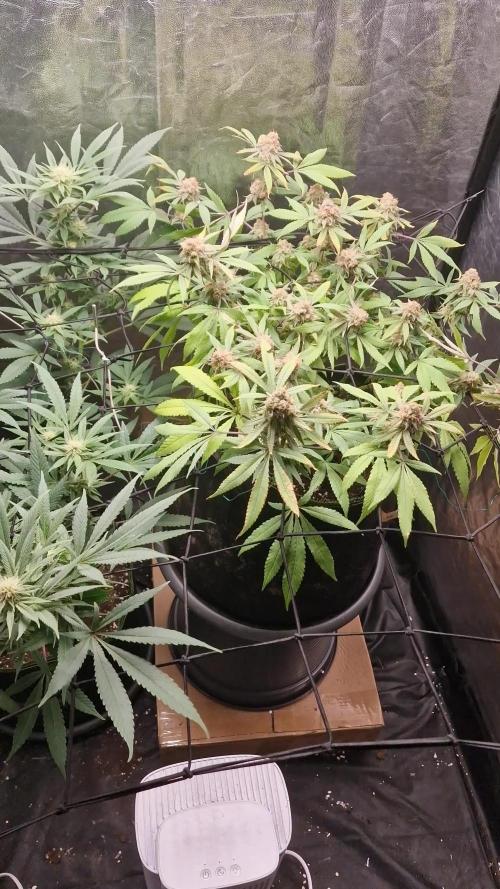
Great week, plant hit it's stride and the time lapse shows it. Upping the EC to 1750 and letting her rip now. Should be seeing pistils soon.

Likes
38
Share


@Aedaone
Follow
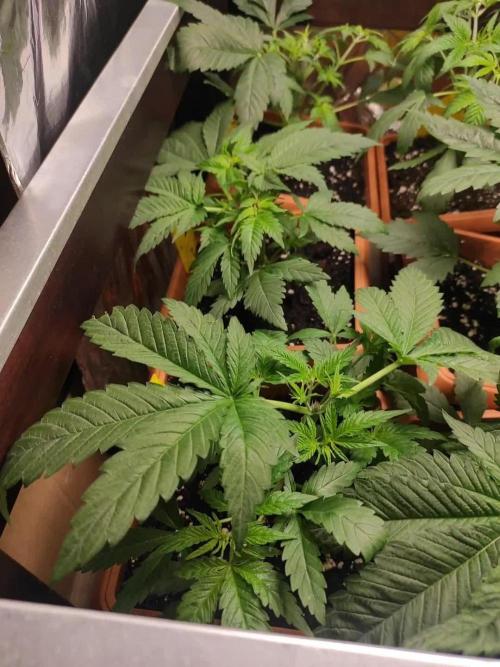
These girls are starting off the week getting blasted by the Sun and heat. I had to increase the water dramatically. Pots are short and because the heat and lack of humidity they are having to be drenched. Day 2 of this week, I'm noticing some ph imbalance. I don't have ro water and my tap is 7.6 ph. I'm going to water today with 5.8 ph water and see if they green up. I also took down a tree that was shading that little one. That should speed up it's development. The 10 mph winds blew one of these over on day 1 this week. I'm propping it back up on day 2 and it should straighten out. End of day 3, everyone got some organic soil acidifier. They greened up nicely. The smallest plant this week had its new growth eaten. Ants, grasshopper, I've got a big question mark there, but she's still alive. The week finished nicely. Plants are finally getting into the super soil and taking off. The extreme heat has been tuff on them but fastbuds can handle it.

Likes
Comments
Share

@LegacyGrow
Follow
Englischversion below
Deutsch:
Tag 36 Veg:
Das Umtopfen bereitet den Damen noch sichtbar Schwierigkeiten. Auch der Temperaturunterschied stresst die Damen sichtbar. Der VPD muss angepasst werden, da sich die Temperatur von im Schnitt 28,5 Grad auf im Schnitt 22,5 Grad gesenkt hat. Die Blattoberflächentemperatur liegt im Schnitt bei 20,5 wodurch die RLF% bei ca 60-65% gehalten wird.
Heute wurden die Damen auch vollständig mit ca 8,5L mit einem PH von 6,3 und 0,5 ml/L CalMag gegossen.
Ein leichtes LST hat die Fürsorge heute abgerundet. Ziel ist es mit einer wider gesunden Pflanze an den Rand des Topes zu kommen.
--------------------------------------------------------------------------------------------------------------------------------------------
Day 36 – Vegetative Phase:
The transplant is still visibly causing stress to the plants. The temperature difference is also clearly stressing them. The VPD needs to be adjusted, as the average air temperature has dropped from around 28.5 °C to approximately 22.5 °C. Leaf surface temperature averages about 20.5 °C, which requires relative humidity to be maintained at roughly 60–65%.
Today, the plants were fully watered with approximately 8.5 liters per pot, adjusted to a pH of 6.3 and supplemented with 0.5 ml/L Cal-Mag.
Light LST was also applied today to round off plant care. The goal is to reach the edge of the pot again with healthy, stable plants.


Likes
3
Share


@sunnykuyall
Follow
08 - 14 May 2023 - Germination Week
15 - 21 May 2023 - Veg week 1
22 - 28 May 2023 - Veg week 2
29 - 04 June 2023 - Veg week 3
05 - 11 June 2023 - Veg week 4
12 - 18 June 2023 - Veg week 5 - Final Veg
19 - 25 june 2023 - Flowering week 1
26 - 2 july 2023 - Flowering week 2

Likes
14
Share


@KannaKullektiv
Follow
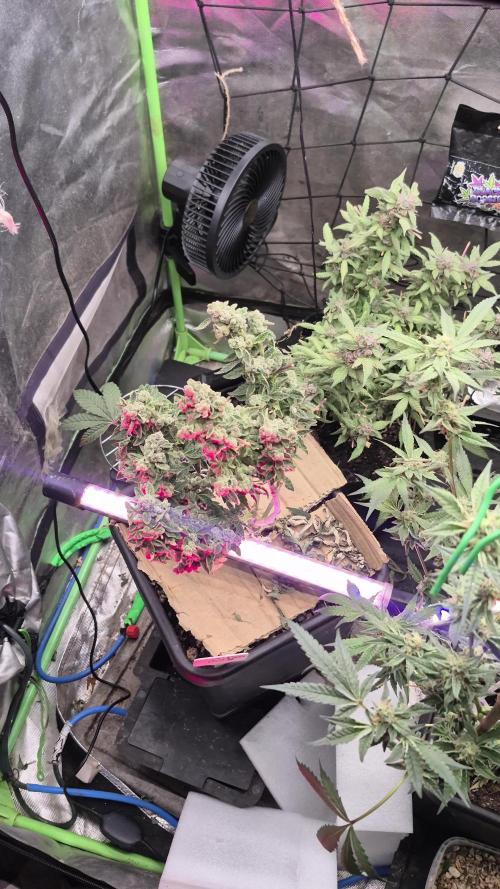
Sie ist soweit. Die Farbe ist intensiv und sie richt verdammt gut.
Zum schnellen trocknen im Zelt, habe Ich jeden Zweig einzeln aufgehängt und versucht die Relative Luftfeuchtigkeit zwischen 58 - 62% zu halten und die Temperatur unter 18 Grad Celsius zu bekommen.
Sobald die Stängel knacken schneide ich die Buds runter und lege sie im Zelt in Pizzakartons damit sich die Feuchtigkeit gleichmäßig verteilt.

Processing
Likes
41
Share


@Enki_Weed
Follow
Our beautiful girls have plant louses 😱
So yesterday we made a brew of garlic and sprinkeld all of the plants, also the
ground of the growbox - after cleaning up everything.
So we hope this works.
Have anyone experience with the small green monsters?
We would be grateful for some suggestions.

Likes
1
Share


@18six12twelve
Follow
As soon as I can get back into my google account I'll upload the pictures from Germination, again sorry for any inconveniences and I know some of you probably like yeah alright mate, lol I ain't got nothing to prove to anyone I grow my medicine for me and that's it I just thought I'd start uploading on here and got asked to participate in a competition for Divine Seeds, and me not having the Germination and weeks before pictures I probably will be disqualified. But I'll still continue to upload on here and try to get back into the Gmail account to retrieve the pictures during Germination and weeks 1 to 3.


Likes
22
Share
@SpunkyTerps4200
Follow
Check this shit out guysss!!
🌿 ONLY_DANKZZ4200 🌿
Welcome to the channel! Here you'll find cannabis grow diaries, strain reviews, cultivation tips, harvest updates, genetics spotlights, harvests, and everything related to the cannabis growing lifestyle. Follow along as we document the journey from seed to harvest and share our passion for quality cannabis cultivation.
🔥 Indoor Growing
🌱 Grow Diaries
✂️ Plant Training & Techniques
Nutrient Guides & Grow Tips
🏆 Harvest Updates & Smoke Reports
💨 Strain Reviews & Genetics
📸 Instagram: @only_dankzz4200
🌱 Grow Diary: @spunkyterps4200
https://youtube.com/@th3_dankzz420dk?si=HSioyHRv-cGwh5LX
🎟️ Support the Channel with These Promo Codes:
DEBO
SPUNKY
SPUNKY4200
DKREW
⚠️ DISCLAIMER – 18+ ONLY ⚠️
This channel is intended for viewers 18 years of age or older. All content is provided for educational, informational, documentary, and entertainment purposes only.
Viewers are responsible for understanding and complying with all local laws and regulations regarding cannabis in their jurisdiction. This channel does not encourage or promote illegal activity, substance abuse, or unsafe practices.
By viewing this content, you confirm that you are 18 years of age or older.
🌿 Stay Lifted • Stay Learning • Stay Growing 🌿
#OnlyDankzz4200 #SpunkyTerps4200 #CannabisCommunity #GrowDiary #HomeGrow #IndoorGrowing #CannabisCultivation #420Life #GrowersNetwork 💚🔥🌱💨https://youtube.com/@th3_dankzz420dk?si=HSioyHRv-cGwh5LX


Processing
Likes
41
Share


@Wicked_Stix
Follow
This auto ghost of is at day 21 and she has been growing like crazy since she broke the surface. She has the potential to be a real work of art if I can keep her happy. I upped the maxigro to .5 tsp per gallon and started them on a little armor si so they can build some strong branches. Still running them on 24 hour light and 24 hour irrigation. They are going to stay under the blurple lights for a few more weeks until I can get them in the big room under the quantum boards. I'm hoping they will flower around 4 weeks but my autos seem to enjoy staying in veg so we will see what happens.

Likes
8
Share

@eldruida_lamota
Follow
Que pasa familia, vamos con la séptima semana de floración de estas Fishy Zoap feminizadas de Seedstockers.
Vamos al lío ,se trasplantaron en macetas de 7 litros definitivamente.
El ph se controla en 6.0 , la temperatura la tenemos entre 24/20 grados y la humedad ronda el 50%.
El ciclo de floración puse 12h de luz, el foco está al 100% de potencia.
De momento está yendo todo bien están madurando ya, tienen un aroma fuerte , y han tricomado por el momento de lujo.
Comentar de nuevo que el estrés hídrico fue superado sin problemas, esperemos que no surja nada más.
Gracias Agrobeta por el envío de la Gold series para esta temporada, se vienen cositas .
- os dejo por aquí un CÓDIGO: Eldruida
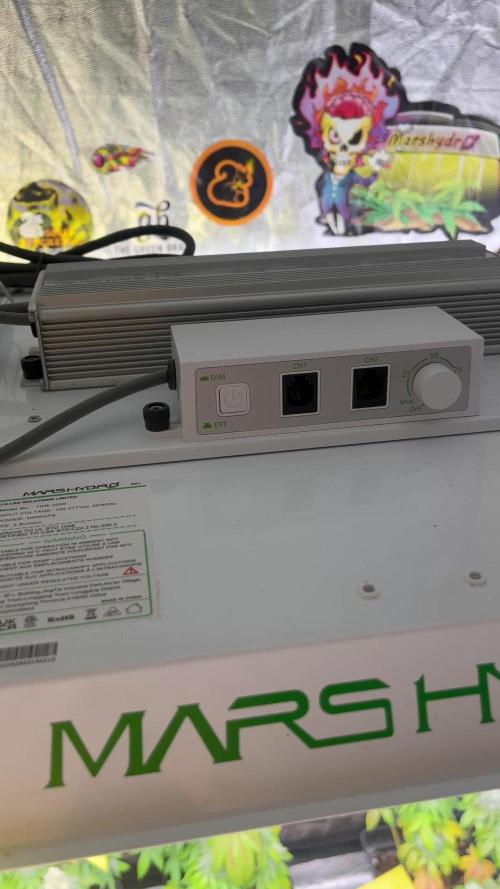
Descuento para la tienda de MARS HYDRO.
https://www.mars-hydro.com
Hasta aquí todo, Buenos humos 💨💨💨
Likes
48
Share


@Theia
Follow
I am not sure what the deal is with the Chibans. They look mutant to me maybe due to pollination. There is so much crystal forming up on them and they still look beautiful.
Plant 1 is huge with big colas that are fragrant and very very sticky to the touch.
Plant 2 looks the most normal as far as bud structure to me. She has not got the same flattened of tops but instead are more cone like . Also very very crystal heavy
Clones 1 and 2 look like monsters to me. Their buds are bulbous and fat with a very flat round top and quite a bit larger then golf balls! I have never seen bud look like this but then I have never had pollination issues and watched the plants quite as much as I am at the moment.
We will keep going with them and see what we get. I hope for some smokable bud and also some Sherbert banana seeds maybe🤪👍👍.
Thanks for looking.
Stay safe.
Grow well.🌱🌱

Likes
37
Share


@MrJones
Follow
OSS Ghost Train Power
🔹⊱╮🔹╰⊰🔹 GROW Started 03.10.24 INFORMATION 🔹╰⊰´🔹⊱╮🔹
🌞Environment - Maintaining 80F and 65%Humidity
🌾Training - Nothing this week just letting the seedlings veg out.
⚱️2-Gallon 📊6.2 PH
💧 Feeding - Using Horti Grow 8-11-21, Bloom 5-15-26, Late Bloom 0-24-26, Cal 12-0-0
🌞Medic Grow Smart 8 760 Watts
🕷️ IPM - CannControl from Mammoth and Mosquito Bits as needed
🔹⊱╮🔹╰⊰🔹 PLANT UPDATES 🔹╰⊰´🔹⊱╮🔹
📝 Notes - Starting Dailiy Reduced Volume Fertigations with Hort-Grow @ 3.3 GRMS Per Gal, and Horti-Cal @ 2.5 GRMS Per Gal.
🗓️04.05.24 Today fed with Hort-Grow @ 3.3 GRMS Per Gal, and Horti-Cal @ 2.5 GRMS Per Gal.
🗓️04.06.24 At the beginning of week 2 I defoliated and now today the beginning of Week 3 I pruned and defoliated again, may look harsh but they will recover quickly!
🗓️04.07.24 Maintaining Temps and Humidity
🗓️04.08.24 Starting Dailiy Reduced Volume Fertigations with Hort-Grow @ 3.3 GRMS Per Gal, and Horti-Cal @ 2.5 GRMS Per Gal.
🗓️04.09.24 Fed with Hort-Grow @ 3.3 GRMS Per Gal, and Horti-Cal @ 2.5 GRMS Per Gal.
🗓️04.10.24 Maintaining Temps and Humidity
🗓️04.11.24 Fed with Hort-Grow @ 3.3 GRMS Per Gal, and Horti-Cal @ 2.5 GRMS Per Gal
╰⊰🔹╰⊰´🔹⊱╮🔹╰⊰🔹╰⊰🔹STRAIN INFORMATION🔹⊱╮🔹╰⊰🔹╰⊰🔹╰⊰🔹⊱╮
Powerful West Coast genetics Ghost Train Haze x Pellezino combine to create this exceptional Cali weed strain Ghost Train Power. This exceptional strain exhibits dominant terpenes like Limonene, Linalool, and Terpinolene that produce a tempting citrus, herbal, floral scent with a fruity taste that is a flavor sensation.
Ghost Train Power comes from powerhouse parentage and produces extreme levels of THC up to and in excess of 30% and when you consider her substantial production this strain is unprecedented. The potent effects are surreal and intoxicating and the harvests are a treat. Indoors this beauty will reward you with a generous 650 gr m2 of tantalizing frosted bud and outdoors she can produce more than 1 kilo per plant. Ghost Train Power is USA genetics that will live up to its acclaimed reputation and have you coming back for more over and over again.
Likes
6
Share


@Budking420
Follow
These ladies are super healthy I want to feed them but a little worried about nute burn so I'll hold off a few days or dilute the feed I have. I just lowered the light a bit and dimmed it because I want them to stretch. That is known as crop steering I want them to all get tall and eventually I may set them in a greenhouse once flowering or big enough. Hope you enjoy & check back next week 2 see just how fast she grows. & remember its 4:20 somewhere!!!!!!!!!
Likes
5
Share

@CannDy420
Follow
In der Woche zuvor habe ich überdüngt und dann die Erde der Pflanzen einmal durchgespüllt als sie sich dann wieder erholt haben habe ich sie einmal getoppt . Aus den Spitzen habe ich Stecklinge gemacht die ich in Honig und Zimt gedipt habe und dann in chiffies habe .

Likes
32
Share


@AsNoriu
Follow
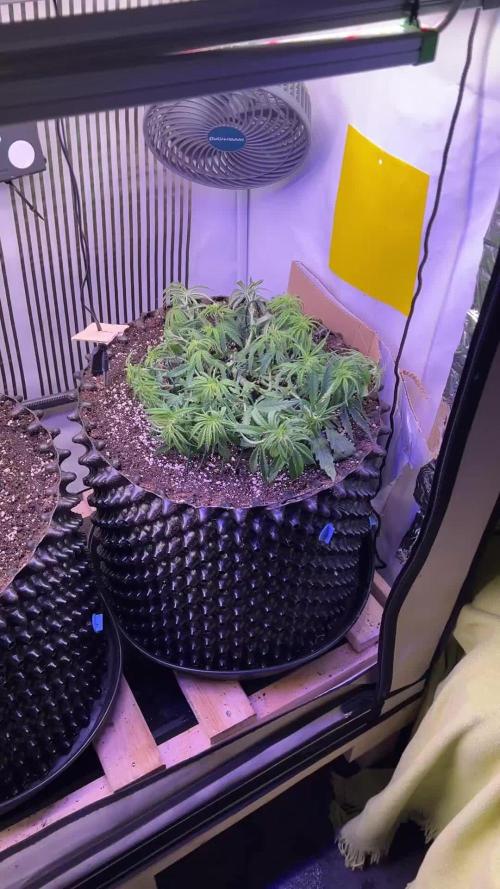
Day 64. All is good, one Mimoza ( off course biggest ) didn't liked new house ... Maybe after this one she will bounce back. The rest of the girls are going, think it's 10 days max left for two smallest plant in a week few more will be ready, the rest - around the floor .... Too croudy, no love, hope extra lightning will hurry them up, . I'll have Mars SP3000 soon to add.
Gave full feed today, other two waterings will be plain water.
Some selective defoliation here and there ...
Day 69. Second day after few girls went outdoors. I need more light, but I will get it in a week only.
Happy Growing !!!


Likes
32
Share


@BudBoutique
Follow
Welcome to Bud Boutique Grow Diary - really appreciate all your love and support :)
Dont forget to check out my other current grows!
🗓️ This Week:
- Day 52: the end is near - fading out colors super beautiful
- Day 53: Trichomes check - looking super good almost all cloudy, a few amber and clear. perfect point to chop
- Day 54: this one is finished, let's chop them !! ✂️✂️✂️
- now its time to dry inside the tent at about 60%rh and less than 20°C/68°F trying to get it even lower for the next 10-14 days
Thank you for still staying with me 💚
___________________________________________
--- 🌱 Strain (Sponsor) ---
🏷️ Stardawg by MSNL
https://www.marijuana-seeds.nl/stardawg-feminized-seeds
--- 🥗 Nutrients and Feeding (sponsored by APTUS: APTUS Ambassador) ---
🍸 APTUS: full nutrient schedule extreme
-- Regulator, N-Boost, P-Boost, CaMg-Boost, K-Boost, Allin1 Liquid, Startbooster, Topbooster, Enzym+ every feeding
-- Fulvic-Blast, NutriSpray as Foliar each once a week
🔗 https://aptus-holland.com/
--- ♻️ Grow Control (Sponsor) ---
TROLMASTER: TENT-X + LM14 Light Adapter to dim/sunrise/sunset lights + Temp & rH Sensor all remote on App
🔗 https://www.trolmaster.eu/
--- 🚿 PetraGrow (Sponsor) ---
CannaFogger Foliar Spray
🔗 https://www.petratools.com/product/petragrow-cannafogger-atomizer-new-mini-fogger
--- 🏭 Grow Setup ---
💡LUMATEK Zeus Pro 600
* 🏠🌿 Indoor: Homebox 120x120x200cm (4x4)
* 📐🌀 PrimaKlima exhausting Fan 1180m3/h (running on 60-80%)
* 🌀 Can Light Filter 800m3/h & 1x Fanbox 1x Dyson fan for Air circulation
🔗 https://lumatek-lighting.com/zeus-600w-pro-29/
🔗 https://primaklima.com/de/shop/ventilatoren-de/ec-ventilatoren/pk160ec-tc/
🔗 https://canfilters.com/products/filters/
All Likes and comments are highly appreciated!!!
👨🌾 don't forget to check out my Instagram for daily educational content: budboutiquee
- Bud Boutique

Likes
3
Share

@Depresley999
Follow
I harvested the upper canopy of one mandarin cookies clone! :)) can't wait for curing! The buds are rock solid

Likes
101
Share


@WhiteEdge
Follow
23.04.2024
Continue into week 8
Replaced all filters in the system and cleaned them.
Mixed a new batch with the following components:
20+25ml AN Connoisseur Bloom A+B
Total volume: 34 liters
Electrical Conductivity (EC): 1.0
Target EC for this week: 0.8-1.0. Adjustments will be based on plant observations.
Performed one long misting session (3 minutes).
Environmental Conditions:
Outside temperatures going up, today is raining but this week start higher temps and humidity
Wedding Cheesecake: One girl is gonna finish in this week, Two others probably in next. Frutti terps in this, Two pheno in total from 3 girls'
Tropicana Cookies: Phenomenal strain; One girl is going to finish this week and second couple days after . Two pheno in Tropicana's girls
Purple Lemonade: Tall plants, massive producer, all three girls will be in 9 week provably. Here so far all three girl share same characteristics and bud structure
Beautiful and high odor in the room!
Lighting Parameters: PAR Map: Maximum PPFD is 950, minimum PPFD is 650.
VPD: Ranges from -1.1 to -1.2.
Daytime Temperature (DT): 23-24°C.
Nighttime Temperature (NT): 19-20°C.
Leaf Temperature: 21-22°C.
Light Distance: 45-55 cm from the plants.
CO2 Levels: 700+ ppm.
HLG Scorpion Diablo: Set at 70%, positioned at a 45-55 cm distance.
Girls drink less water, so for this week and till the end of flowering new misting timing's
Daytime: ON for 70 seconds, followed by 30 minutes OFF.
Nighttime: OFF for 70 seconds, followed by 35 minutes OFF.
Nutrient Tank (NT):
pH: Maintained between 5.80 and 6.00. Stable PH, small drifting up and downs
EC: 1.05.
Temperature: 19-21°C
25.04.2024
TrolMaster toys arrived! Purchase new DST2E, DSP2E, DSH2E, AMP3+probes. Another DSH2E and DSP2E ordered to complete this grow box!
Replaced all filters in the system and cleaned them.
Mixed a new batch with the following components:
25+30ml AN Connoisseur Bloom A+B. Total volume: 17 liters
Electrical Conductivity (EC): 1.05
Tomorrow Tropicana Cookies harvest! Put bucket with this girl on separate line for flushing
Wedding Cheesecake also finish soon, probably in next week, Wednesday think...
Purple Lemonade still need full week or more...Exceptional odors
Temps and humidity outside start to raises, hope i will finish this run before Tropical heat
Lighting Parameters: PAR Map: Maximum PPFD is 950, minimum PPFD is 650.
VPD: Ranges from -1.0 to -1.1.
Daytime Temperature (DT): 23-24°C.
Nighttime Temperature (NT): 19-20°C.
Leaf Temperature: 21-22°C.
Light Distance: 45-55 cm from the plants.
CO2 Levels: 700+ ppm.
HLG Scorpion Diablo: Set at 70%, positioned at a 45-55 cm distance.
Daytime: ON for 70 seconds, followed by 30 minutes OFF.
Nighttime: OFF for 70 seconds, followed by 35 minutes OFF.
Nutrient Tank (NT):
pH: Maintained between 5.80 and 5.95. Stable PH...
EC: 1.05.
Temperature: 19-21°C
26.04.2024
Connect TrolMaster components into the Tent-X system. Program DSP2E, Temperature DST2E, Humidity DSH2E, as well as the AMP3 sensor with PH and EC probes, are all in place.
After calibrating the probes, AMP3 module works perfectly! It has a quick response in measurements, is accurate, and I am very happy about the possibility of online monitoring of liquid values.
After day off use i can tell that all readings are very consistent, compared with Milwaukee, totally without all over the place measurements. Perfectly steady and on spot receding!
The Program device runs flawlessly all day, and I hope it has solved all the problems I had with DH48-S timers.
The humidity control operates without errors throughout the day, and it’s nice to see in the app when the module is active.
Raise light as much as i can..50-55cm from canopy. Set off misting time from 30min to 35min @ day time , and from 35min to 45min @ night time
Flush Tropicana Cookies' for one more day, tomorrow harvest, prepared tent for drying with humidifier , ventilation and temperature and humidity controllers
PAR Map: Maximum PPFD is 850, minimum PPFD is 500.
VPD: Ranges from 1.0 to 1.1.
Daytime Temperature (DT): 23-24°C.
Nighttime Temperature (NT): 19-20°C.
Leaf Temperature: 21-22°C.
Light Distance: 45-55 cm from the plants.
CO2 Levels: 700+ ppm.
HLG Scorpion Diablo: Set at 65%, positioned at a 50-55 cm distance.
Daytime: ON for 70 seconds, followed by 35 minutes OFF.
Nighttime: OFF for 70 seconds, followed by 45 minutes OFF.
Nutrient Tank (NT):
pH: Maintained between 5.80 and 5.95. Stable PH...
EC: 1.05.
Temperature: 19-21°C
28.04.2024
First harvest in this run! Tropicana Cookies No1 is a winner.) First Tropicana Cookies is harvested on 89 day from seed. Total 55 days off flowering.
Fast flowering indeed as fast in vegetative stage. Cut this girl in branches and hang upside-down in smaller tent for drying
Set RH @ 55% , temperatures not able to control so they will be something around 20-21 in drying tent
Second Tropicana will be chopped within a couple off days. Checking trichomes with microscopes can tell that one Purple Lemonade is also going to finish in next days
Somme lady's will take full 9 weeks or so..
Lowering light intensity, EC in tank start to raise slowly so i will start to adjust according to condition. Currently 0.85EC is perfect strength i think
PAR Map: Maximum PPFD is 850, minimum PPFD is 550.
VPD: Ranges from - 0.9-1.0
Daytime Temperature (DT): 23-24°C.
Nighttime Temperature (NT): 19-20°C.
Leaf Temperature: 21-22°C.
Light Distance: 45-55 cm from the plants.
CO2 Levels: 700+ ppm.
HLG Scorpion Diablo: Set at 65%, positioned at a 45-55 cm distance.
Daytime: ON for 60 seconds, followed by 30 minutes OFF.
Nighttime: OFF for 60 seconds, followed by 35 minutes OFF.
Nutrient Tank (NT):
pH: Maintained between 5.80 and 5.95. Stable PH...
EC: 0.85.
Temperature: 19-21°C
Week 8 off Flowering in Summary
80 litter off RO water,
120ml+150ml AN connoisseur A+B
45kW electricity in total for light, Pumps and AC Infinity Fans. 42kW for Light + 2kW Dehumidification + AC Infinity ventilation
Week start @ 1.1EC, nutrient strength., week finish with 0,87EC
Tropicana Cookies is first harvested on day 89 from sprouting , week 8 off flowering
Purple Lemonade is on second place with harvest on day 91, last day off 8 week off flowering
PH was stabile and move from 5.70 min to 5,9 max.
Light distance for this week - 50-55cm from tallest top , PPFD levels around 900 in center, trough whole week. Lowest reading 500 @ corner
Temperature are from 20c at start off day to 24.5c max at some points.
Night temps around 19.5-20c. Outside humidity is generally low
This week i have install TrolMaster AMP3 sensor and humidity, temp and program devices
Day RH is moved from 45% to 55% max, at night times drop to 45-48%
Lighting Parameters: PAR Map: Maximum PPFD is 900, minimum PPFD is 650.
VPD: Ranges from -1.0-1.1.
Daytime Temperature (DT): 24.5°C.
Nighttime Temperature (NT): 20°C.
Leaf Temperature: 22°C.
Light Distance: 45-55 cm from the plants.
CO2 Levels: 700+ ppm.
HLG Scorpion Diablo: Set at 65%, positioned at a 45-55 cm distance.
Daytime: ON for 70 seconds, followed by 25 minutes OFF.
Nighttime: OFF for 70 seconds, followed by 35 minutes OFF.
Nutrient Tank (NT):
pH: Maintained between 5.8 and 6.1
EC: 0.87-1,1.
Temperature: 20-21°C