The Grow Awards 2026 🏆 


Likes
Comments
Share
@Kinghaze
Follow
Unfortunately, I don't have pictures of the buds when they were dried and cut. But I can tell you they looked very nice
The taste and high were very good.
Verry potent !
Really liked this strain.
Unfortunately, 1 of the 2 blue zushi had
become a mutant.
I made some very nice fresh frozen bubble hash out of it.
The dry weight was :
Blue zushi 1# 96 gram
And from the mutant i made 15 gram of fresh frozen bubble hash, wich was very nice.

Likes
9
Share
@Beachycheech
Follow
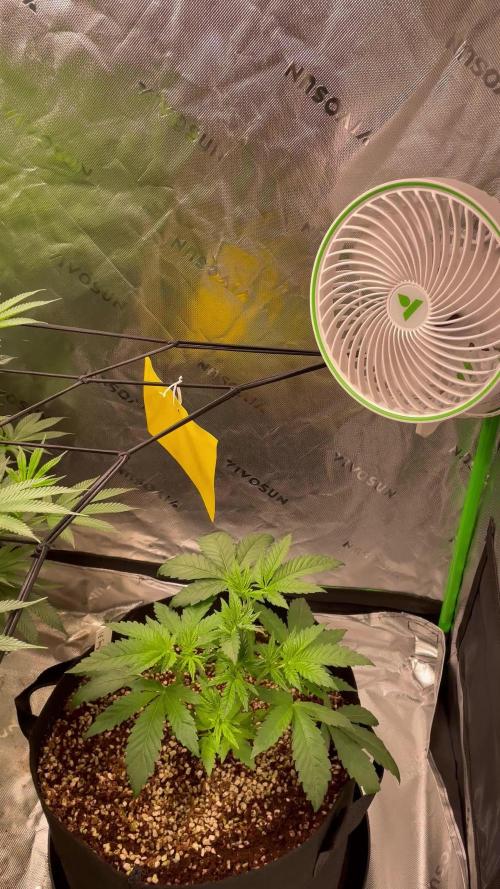
Raised the lights today. Yesterday I replaced water and cleaned the tank after noticing chlorophyll build up around pump. Overnight it seems the two of them drank a half liter. I topped off the aerovoir reservoir this morning.


Likes
10
Share
@TheUk420Show
Follow
Hi Guys Sorry I havent got around to updating this Ive been moving stuff around and having a clear out in my flat we have decided to kit out the room and try to get a little bit more yield from some more plants which new diary will be created for both rooms :) starting with jack herer clones around 28 I have :) around 4 LED lights so far 2 10 inch extractors and a shit ton of fans lol these plants had to be moved to a friends house in order to set them up but they are still alive and kicking that is my friend on the video the first two plants are mine :) the first one is the melon and the larger one is the gorilla :)
Likes
26
Share
@KidAlienGrows
Follow
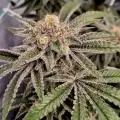
Really happy with how she’s turning out with massive bulking in this last stretch! GC is an amazing strain that I’d highly recommend to anyone looking for something very unique! Flushes are all done and we have about a week or two left, trichomes are all still very clear under the microscope want to wait for some borderline ambering before I chop her.
Likes
11
Share

Likes
2
Share
@DrBud420
Follow
03.07.
OG KUSH
Day 69#
Nothing special is happening, it's been 4 days since the last update, I was a little late last time, so here I am so I won't be late again.
Tomorrow is the end of the tenth week for the plants, this morning I fed them, before that I gave them only water for 2 waterings, that is, they were in water for a whole week.
It's hot right now and I'm watering them every 3 days, this morning they each got 30+ liters, anyway, except for the ones in smaller pots, they got a lot less.

Likes
10
Share
@toscky
Follow
Esta semana seguí con 18 hrs unos días hasta que hoy le cambie el fotoperiodo a 12/12 y le puse otro foco más.
Seguiré así una semana y luego pasaré a nutrientes de flora.
Likes
33
Share
@iLoveGoodWeed
Follow
She is looking very nice. Now second week in flowering stage and the buds are getting out on all bratches


Likes
20
Share
@victor_lion
Follow
This is a strain that is very easy to grow and resistant, after the fourth week it sticks a lug, and does not need a lot of vitamins, it grew with only 13 and 12 hours of light and went through cloudy days and a lot of humidity


Likes
4
Share
@Fyno_TH
Follow
Week 7 ✅ — the final week of veg! Main plant is drinking heavy now, taking around 15L with 10–20% runoff. Roots are exploding and the canopy is filling the net perfectly 🌱🔥.
Main plant is wide and strong with a bushy structure from all the topping + LST. The second plant is still smaller but pushing steady new growth and looking healthy 💪.
Feed mix (per L):
• Corex 1.5 g/L
• Eldex 2 g/L
• Terra 0.4 g/L
• CalMag 1.3 ml/L
• Mira 0.5 ml/L (pH adjust)
• Bud Candy 2 ml/L
• Terpinator 5 ml/gal (~1.3 ml/L)
Ppm around 1400 @ pH 6.0. With 15L per plant and proper runoff, coco is staying clean and roots are thriving.
Environment has been consistent: 26–27 °C / RH 60–65%. Leaves are praying strong under the Spider Farmer G3000, no burn, no deficiency 🌬️🌿.


Likes
8
Share
@Bud_Koenig
Follow
The Trop Cherry was harvested on day 56 and dried in the tent at around 16-20°C with a humidity level of 60%. After a week, she was ready to be trimmed and then spent another two days drying in a cardboard box. Now the buds are in their container for curing. Updates to follow
Dry Weight - 40 Grams

Likes
72
Share
@Sider79
Follow
Scrog Is up & almost finished veg last week I presume . Friday I will flip to 12 12 even with the autoflower I've read there isn't a difference.


Likes
12
Share
@cookingwithninja
Follow
day 9 for a few days I have seen Dr. Thunder have N issues. I put about 4-5 cups of old discarded coffee grounds that has been saved for 5-6 months, into my 5 gal water bucket,along with air stones etc. My water ph has been significantly low (6ph)from around day 7 to 11(writing this day 12).
day 12 video, water is back to 7. Been giving Dr. Thunder Bloodmeal now into watering. I personally would like a darker green. All females showing 4/4.


Likes
4
Share
@gottagrowsometime
Follow
Welcome to my Wedding Cake, Freebie from Zamneisa.
0-35 Days. Week 0-5
She has a lovely shape. Grew very quickly.
Has that distinct from all the other Wedding Cakes I've seen here. Looking at other diaries. And after looking at this in my seed storage. I said let's go with it.
Possible 25% THC
all in the end of pics.
Lovely leafs, strong roots. No dying leafs. Has a lovely root ball. As she's in an 11L pot now as she was such a fast Grower out of the fems. Just behind Green House Seeds Lemon Orange. But, she's catching up. Soon I'll put her to LST, last Defoliation and will put her to the flip.
I was using power buds. And my god. So many stems with shoots. Tbh, I ended up removing a lot of those extra stems that were on my autos. It really does work. If you've the time. Which to bring all those nodes to full flower, would of added weeks to my grows. With this. She's a fem. I've removed at lot below and has long stems with a good few shoots, making for what should be some big tops (huge tops) by feeding right and with proper lighting. Also I've a trick by adding nearly 2 extra hrs during fattening with FAR RED 730NM which puts fems to sleep in 5m after 5-10m after a dose. Also have UVA for ripening.
