
Likes
Comments
Share

@Phaleg
Follow
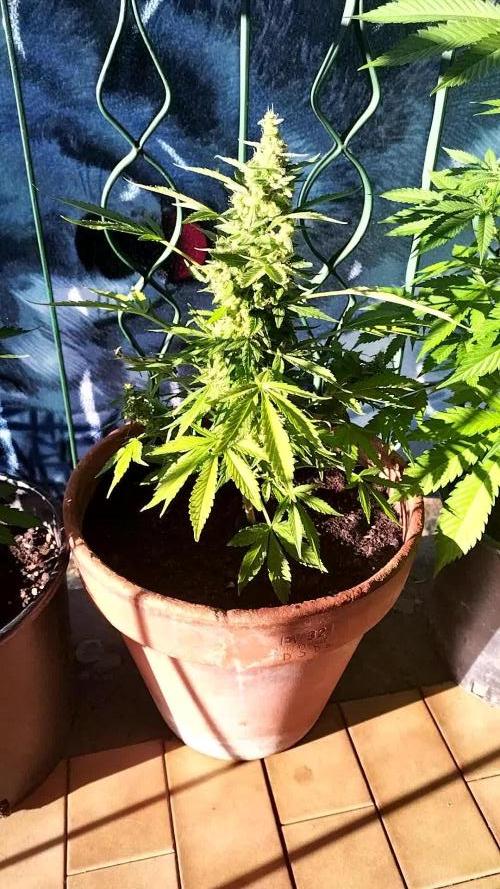
After a previous fresher week, heat is back and daytime temperature reach 25-27° C again, plants are now flowering and the only automatic is close to be ready (about 2 weeks left I think). I will inspect triconomes with my lenses and microscope.
2x ICE 78cm (+6cm) & 69cm (+2cm) === No idea why this difference!
White Widow 85cm (+5cm)
Cookies Gelato 90cm (+5cm)
Do-Si-Dos Automatic 39cm (same as last week)

Likes
13
Share

@vyndalin
Follow
14.5 - Week 13 is behind us. Unfortunately I found one bud with mold on the Blue Gelato 41 as well, so I had to act fast. Watching the plants get more mold day by day didn’t seem like the best plan, so I harvested the tops from those two plants right away.
The last Super Boof — a.k.a. the ‘wide‑legged lady’ — took full advantage of the new situation. I flipped the circulation fan upside down and hung the light at an angle, so she basically has no lower canopy at all. This plant looks like: ‘I’m ripe, but I can easily stay here another month.’ I don’t think mold is a threat for her, so she can chill there for another 2–3 weeks if she wants.
Since Tuesday she’s back on bloom nutrients. I mixed her another 10 liters as a farewell gift… Honestly, I don’t even know what a perfectly ripe Super Boof is supposed to look like. Back in my younger days, weed looked completely different.


Likes
10
Share


@420Bucket98
Follow
Into week 6 for these now. Day 44
Both still doing very well. PL is frosting up nicely, the dos si dos though is just a monster, did not anticipate her stretching so much! She’s going to have the tent to herself to finish in about a months time and I’m expecting a good yield from her. Definitely the biggest auto I’ve grown to date. Would of liked the PL to be bigger but the 2 fit in the tent pretty snug.
The PL smell is phenomenal🔥 can’t wait to see what the coming weeks bring. Going to start feeding nutrients and then water in a 2:1 ratio. So for every 2 feeds plain pH water after and so forth at half strength, see how they get on.
Temp is sitting at about 20c and humidity about 70%. Going to look out my extension lead and get my dehumidifier in today to bring that down.
P.S. I messed up the weeks section, just to clarify these are in week 6 from sprout, 3 weeks into flower for the PL, feel like the Dos si dos has just been stretching for 3 weeks! Haha.


Likes
2
Share


@KannaGrowing
Follow
Ya estamos en plena floración y con las luminarias a max potencia... Evidentemente el aire acondicionado también está trabajando durante la fase de encendido.
Flowa-Bloom es la estrella de los nutrientes a incorporar, pero todos son importantes... Así que sigo la tabla de fertilización de JUJU Royal al pie de la letra.
Eso si, primero humedezco bien el sustrato con agua, para aprovechar bien la solución con los nutrientes y que no filtre por las macetas textiles.
Riego cada cuatro días.

Likes
6
Share


@wheedtobeus420
Follow
Day 47 or so I haven’t measured her so the height can’t be right she’s huge! And getting so heavy. Took some photos of her in the dark while I pretreated the tent for mites or any other fuckers who like to ruin the day. Just in case. Since I recycled soil it couldn’t hurt. She’s beautiful I’m so excited for her to be finished.

Likes
13
Share


@GangbudsGenesgdl
Follow
19/01/21. segundo dia de su nueva semana de 12 x 12 se le cortaron las hojas mas grandes para
intentar que le pegue mejor la luz a los brotes bajos
22/01/21. hoy se aplico riego con nutrientes organico de Rootz.mx se aplico magnaflor y forzasilicia
MagnaFlor. Estimula la floración.
100% orgánico.
Contiene biocatalizadores que serán rápidamente absorbidos por las raíces de tus plantas. El comienzo de la floración será explosivo.
24/01/21. cierre de semana la separe del resto por que note inicios de hermafroditismo 😞
solo era en las ramas bajeras no se que tipo de estres causo esto

Likes
28
Share


@SooSan
Follow
Dans l'ordre :
Blueberry
Dutch Passion
Blueberry
00 Seed
Blueberry
PEV Seed
Blueberry
Bulk Seed
Animal Cookies x Blue Monkey
Exotic Seed
Red Hot Cookies
Sweet Seed
DoSiDos x Purple Punch
PEV Seed
Purple Shot
Exotic Seed


Likes
13
Share


@Rene1968
Follow
20-2 a New week. Day 55 Starting week 4 flowering. I feed them now with Plagron 'Green sensation'.
The distance light at 62 cm from the plants. PPFD at the middle is 981 umol/s
21-2 Flowering looking well for so far
22-2 I changed power of lamp. PPFD is 1002 umol/s. Past night all the Girls grows 3 cm.
Likes
9
Share


@crystal_garden_0
Follow
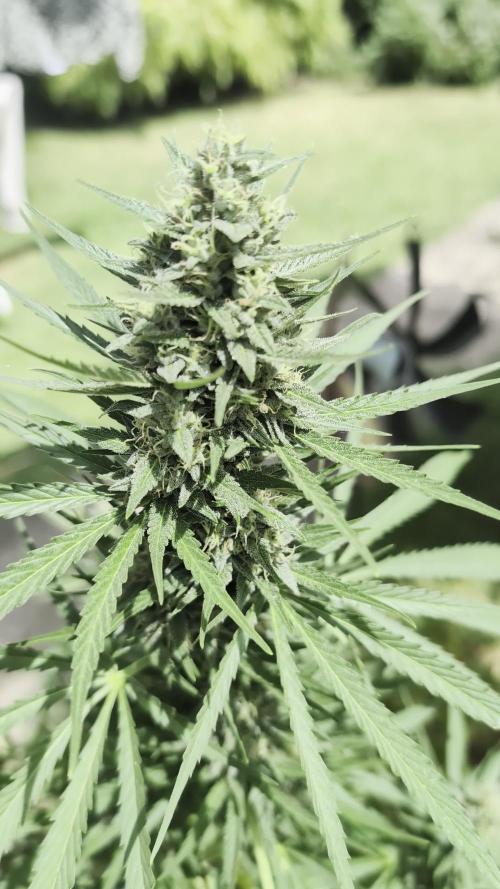
End of week 7. Everything is going great. Strong Candy smell, very sticky dense buds. Looking forward to smoking them. Fast plants, flushing has begun. Thanks everyone
Likes
11
Share


@goeser
Follow
More details and photos are coming when all buds are dried in about 6-7 days00


Likes
39
Share


@Grileon
Follow
10% discount code for Zamnesia shop - GROWITGD
--
Another series of topping done, so that there will be 8 main branches.
Roots look amazing, healthy, white, and bushy.
UPDATE:
Did some heavy defoliation for fan leaves and LST on all 8 main branches.

Likes
46
Share


@KingSalomonsWeed
Follow
22.07.
Hallo,
Tag 26. Blüte 1
Zwei 2 girls im Growschrank von Zelsius.
Einer, im Westflügel des Anwesens.
Läuft, so habe ich es gehofft.
23.07. Greenception GC4.
4 COB LED. Zwei in Weiß. Eine in Blau (eine kostet soviel wie 3 weiße). Und eine in Rot(noch teurer).
Uva leds uvb leds. Und 2 Lüfter.
128w/h.
Und ist sehr gut abgestimmt.
Das ist mein high tec high budget grow.
Meisterweed bekomme ich hin.
Grins.
Dies soll mein Eintritt zum Großmeister grower werden.
(ich fänds passend)
Dazu sollten sie terpen reich(da könnt ich mogeln, denn ihr könnt es nicht riechen), kristallhart, und glitzernd sein. (Ich liebe glitzerndes weed).
Yield : I still don't care.
BIO WEED.
Thats all what I want!
24.07. Alles durchgewurzelt bis unten. Beide. Pflanzen sehen top aus.
25.07. Bobo dreht durch. 29 Tage alt. Blühte 4. Stamm mindestens 40 mm
Ca 1,57 zoll. Jetzt schon! Das habe ich noch nie gehabt.
27.07. Das Männchen steht kurz davor seine Samenkapsel zu öffnen. Ich werde den Pollen Sammeln zur späteren Verwendung. Und nachdem er ordentlich gemolken wurde darf er nach Spinnenart gehen.
Kill after sex.
29.07. Bobo! Tina! Geschwister.
Eine riesig. Eine normal. Sind tolle Pflanzen.
Bobo hat die größten Fächerblätter ever.
Die unteren Äste, Verzweigungen sehen komplett gleich aus.

Likes
Comments
Share


@eldruida_lamota
Follow
Vamos familia, actualizamos la cuarta semana de floración de esta Amaretto Tarmac de Seedstockers.
Empezamos abonando ya con varios productos de la gama Agrobeta para la floración.
Temperatura y humedad dentro de los rangos correctos, 12 horas luz, 12 oscuridad.
Una lástima que de todas solo aguanto una, y en concreto tiene un color espectacular aún así seguiremos con el diario hasta el final.
Agrobeta:
https://www.agrobeta.com/agrobetatiendaonline/36-abonos-canamo
Hasta aquí todo, Buenos humos 💨💨💨

Likes
22
Share

@Pheno_Minds
Follow
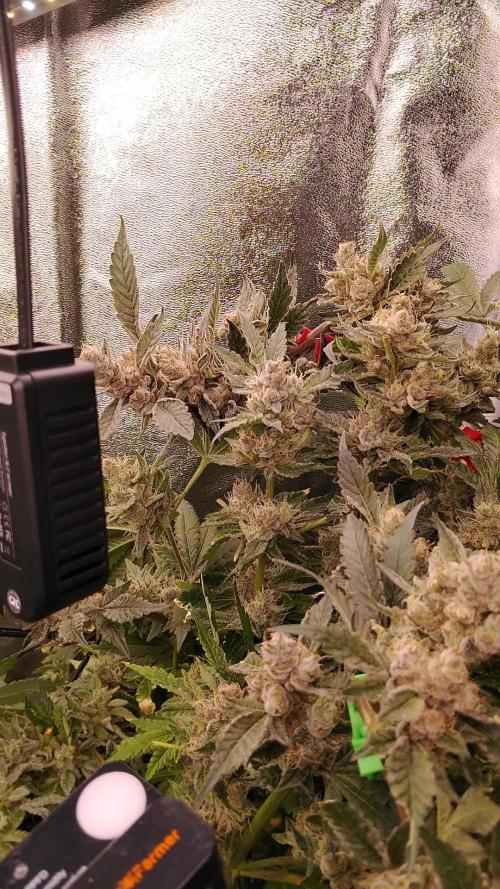
💧 Die Strawberry Banana von Fastbuds befindet sich in Blüte Woche 6. Die Pflanze zeigt eine kompakte Struktur bei einer aktuellen Höhe von 58 cm. Die Blätter sind vital und dunkelgrün, was auf eine gute Nährstoffversorgung hindeutet. Die Blütenentwicklung schreitet ordentlich voran; die Buds sind bereits gut mit Trichomen besetzt und die ersten Stigmen beginnen sich zu verfärben.
📏 Als Sondergabe habe ich 5 ml S&R Organics 5in1 hinzugefügt, um die späte Blütephase gezielt zu unterstützen.
📸 Die aktuelle Optik zeigt eine gesunde Pflanze ohne Mangelerscheinungen. Die Blütenbildung ist für die geringe Wuchshöhe beeindruckend dicht. Auffällig ist die gleichmäßige Harzbesetzung auf den Blüten und den direkt angrenzenden Zuckerblättern.
📋 Für die kommende Zeit werde ich das Augenmerk auf die Reifung der Trichome legen. Die Pflanze steht gut im Futter, daher werde ich jetzt genau beobachten, wie sie auf die zusätzliche Gabe reagiert und das Gießverhalten an den Bedarf anpassen. Der Endspurt ist eingeläutet.