The Grow Awards 2026 🏆 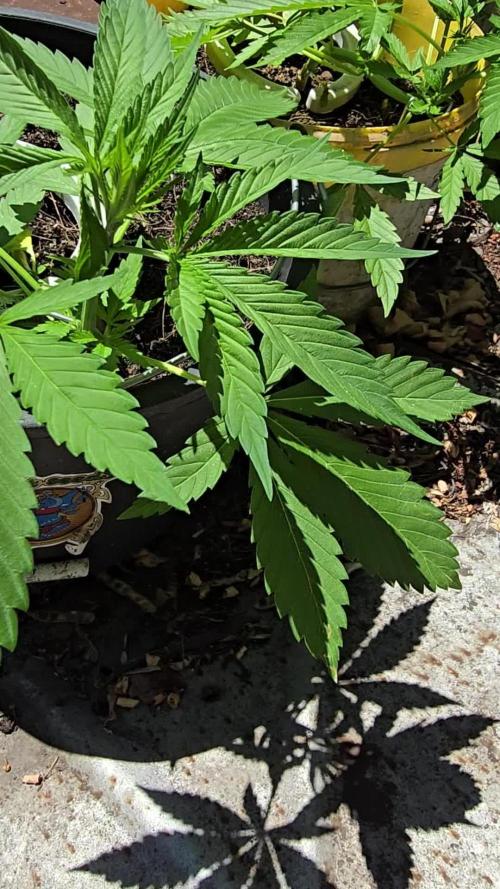


Likes
Comments
Share
@Aleks555
Follow
SWEET SEEDS - Red Hot Cookies – Week 4 (Vegetative Stage)
We’re now in week 4 of veg, and our girl has reached 25 cm in height! 🌿☀️
Growth is going strong, and a light aroma has started to appear — sweet and promising 🍪🌸
We applied more LST this week, gently bending her to open up the canopy and boost lateral growth 🌱💪
Watering schedule: 1–2 liters every other day, keeping her happy and hydrated 💧

Likes
43
Share
@Le_Duc_Du_Bud
Follow
Hello amis cultivateurs 🌿🍁
Bon les semaines précédentes on était compliqué pour ces conlombian jack 😔😔
Mais aujourd'hui elle m'a l'air d'aller mieux et de repartir enfin tout doucement 👍🌿
Merci Kannabia encore une magnifique variété 🍁❤️


Likes
3
Share
@undermink
Follow
She got really purple because of the temperature drop (from about 30 degrees outside to nearly 15 now) I guess. Which looks kinda awesome. The bids are growing and I increased her nutrition again to 2ml one a week.

Likes
9
Share
@Gardengobblin
Follow
Les fleure son bien.compact et bien givré . Les arome d'agrumes son très forte av3c une légère différence entre les trois . Plus tropical sur 2 des 3 pheno.
J'ai eu la chance d'avoir 3 pheno different . Une bien bourgogne , une avec des touche mauve et roser et la derniere plus verte avec un peut de violet.
Bien hâte à la fin du séchage pour goûter. Cela fait 6 jour quelle son couper

Likes
1
Share
@BruWeed
Follow
08/05 - Comenzo su primera semana en etapa de floración.
Se encuentra perfecta, sin ningún problema
Ya esta con 12/12 y su aroma se siente.
Las chalas estan perfectas.
La luz la aumente un poco mas ya que entro en flora pero se encuentra al 100%.
Crecio bastante la ultima semana, mas que nada en altura.
En estos dias estare publicando mas imagenes de como viene.


Likes
8
Share
@skaterblasted
Follow
Days 99 - 105 (from sprout)
8/30/24 - 9/5/24
Raised light above canopy of The Good Shit - PAR on main tops is 800-700+ while remaining lowers are seeing closer to 450-500
Loompa's Headband x TK fading to a close this week - trichome check starting to show amber on the bracts
Sweet 16 S1 now starting senescence and a little fading on some fan leaves
The Good Shit showed signs of some overwatering, so a newly made FPE was added to feed schedule to assist the microbiology
Light schedule lowered to 10 hrs this week
IPM: Applied enzymes (tweetmint) at a rate of 0.5 fl oz to 1/2 gallon and sprayed on cover crops + mulch throughout the week. Significant decrease in pest population, now needs a high quality compost top dressing for long term correction

Likes
23
Share
@elementhc
Follow
A few of the autos have mostly milky trichomes but no amber yet. Maybe another two weeks.


Likes
62
Share
@Natrona
Follow
Week 7 7/25-31
AUTO Pablo Escobar
7/25 2gal
TPS1 30ml
Cal mag 5ml
Recharge 5ml
Kelp 2 tbsp
PH 6.3
PPM 1010
Temp 73
7/28 2gal
TPS1 45ml
Cal mag 5ml
Recharge 5ml
Kelp 80ml
PH 5.7
PPM 1210
Temp 72
Auto Escobar bounced back nicely from last week's defoliation. Escobar's opening her structure to open the lower inner branches made her really wide. Bumping
Thank you @DivineSeeds for the opportunity to participate in not only the photo contest but also the auto grow contest.
Thanks for the visits, likes and comments; I appreciate all the plant love💚.
Have fun & love what you grow 💚
Sending you good vibes of love, light, and healing 💫
💫Natrona 💫


Likes
6
Share
@Genussmittel420
Follow
day 1 - shes getting her sugar on the leafs now clearly and you can start to really notice her smell after just a few minutes of the tent being open. not too strong of a smell yet but there is still much time to improve, really happy with the bud developement so far!!!
day 4 - trichome producktion is just kickin off since 1-2 days, love to smell her sweetness. stretch has come to a stop a few days also.
day 6 - when i opened the tent today she was showing me her flowers big. there was a big diffrence visible for my eye from last open yesterday to today and i like it! the pistils on the main bud start to get orange color and the others also seem to get a few pistols with color totay!

Likes
4
Share
@2x2UkGrow420
Follow
Had to tie up branches to take the weight of these heavy ass nugs, can’t want to taste this smell orangey as f**k! 🔥🔥🔥 started flush midway through the week.
Likes
39
Share
@BlackDragon22
Follow
😱😱😱 mostruosa questa runtz,ecco che mostra i segni di pre fioritura è sono sbalordito. Continua a crescere a vista d'occhio. Piena di siti di gemme che presto saranno ben visibili e come voi, li attendo follemente. Non so come sarà appena ci sarà il boom durante la fase di fioritura.. Ma sono sicuro che sarà mostruosa 🤤💣💚
Likes
5
Share
@Organic473
Follow
The growth is really satisfying especially for the one that germinated first…my first guess is that it’s a male. I should know in the next two weeks as they’re both regular seeds.
Can anyone else guess the male?
Likes
2
Share
@Ryno1990
Follow
The Strawberry Banana from canuk seeds is still the smallest girl but she is moving along she will not be getting any more toppings but once she gets a little bigger under the medic grow fold 6 then she will be going into flower
Likes
8
Share
@Marihumama
Follow
64 days after i planted her seed directly in a pot outside 😱the reaper came, i hung her upside down for 6days then cut her &put her on a net to dry some more
While cutting I found some little catterpillars about 5 guess that were the eggs that I found on some of the plants last week.☺️
After a few days drying on the net i weighed it:53,6gr
The taste is great
I'm very happy with the result catterpillars included☺️
Likes
27
Share
@RDWCGrowing
Follow
5/30/2023
Week 8- Day 1 of Flower (Day 117 overall)
So two of the buds in the back fell over, it was definitely because they are getting heavy, I had to pick them up and tuck them in to the net to help support them they were so covered in Resin that I had to use Rubbing alcohol to clean my hand was so super sticky from touching the bud will have to use gloves from now on if I need to touch the buds. Other than that I sat back and got to watch the ladies grow.
5/31/2023
Week 8- Day 2 of Flower (Day 118 overall)
Just watched them grow today.. :-)
6/1/2023
Week 8- Day 3 of Flower (Day 119 overall)
I noticed on two of the bigger Fan leaves small signs of Calcium Deficiency so I fixed my Chart to up the Cal mag from .5 to .75 for the water change on Saturday.
Other than that I let them keep growing on Auto Pilot, frost is everywhere including all the way ont the Big fan leaves this strain is super Frosty...
6/2/2023
Week 8- Day 4 of Flower (Day 120 overall)
Auto Pilot engaged today.. Growers Hands stayed away just looked and apricated the beautiful buds that are forming. Tomorrow Water Change day!
6/3/2023
Week 8- Day 5 of Flower (Day 121 overall)
There were a couple of sucker buds right up front today so of course I had to get rid of them. Other than that Water Change Day.. Drained and reset the system. Since I am taking this to 10 weeks Week 7 and Week 8 Nutes repeat.
I took a couple of shots looking up for those that like stem action.
I added 36 gallons
Mammoth Silica = .5Mil/Gal= 18Mil
Root DRIP = 1Mil/Gal= 36Mil
CalMag= .5Mil/Gal= 18Mil
FloraMicro = 3.8Mil/Gal= 137Mil
FloraGro= 2.8Mil/Gal= 100Mil
FLoraBloom= 4.6Mil/Gal= 166Mil
LiquidKoolBloom= 2.5Mil/Gal= 90Mil
TPS SIGNAL= 4.0Mil/Gal= 144Mil
ORCA = .5Mil/Gal= 18Mil
Water Temp= 71.2
Tent Temp= 76
6/3/2023
Week 8- Day 6 of Flower (Day 122 overall)
Auto Pilot.. I did nothing but look in and enjoy the beautiful ladies.
6/4/2023
Week 8- Day 7 of Flower (Day 123 overall)
Auto Pilot Day 2.. Just watched them be beautiful.. I did want to get a picture of where they stems meet to make an arch I thought it looked really cool and would be a fun pic. I also wanted to focus on the color differences between the two. I am amazed between this lightside/darkside, yen/yang, thing going on in the tent.. Plant #2 is decidedly bright green, like more light with hints of yellow throughout, and plant #3 leaves are getting darker and it has hints of purple coming in throughout the buds. It really is an amazing and fun contrast especially with the name Yoda Soda to have a type of light side/ dark side theme going on with the Two plants.

Likes
4
Share
@Creme_De_La_Creme
Follow
day 70 was harvest day !!
really fast strain, 24h light ON really played a big role as well
frosty buds and amazing strawberry smell, now lets dry it !!
Likes
5
Share
@Herbz_Unkraut
Follow
Harvest time! 😁
everything looking good so far, plants are quite healthy
check www.sr-organics.com and get a 10% discount on this great 5in1 fertilizer with "UNKRAUT10"


