
Likes
Comments
Share

@Nickeluring
Follow
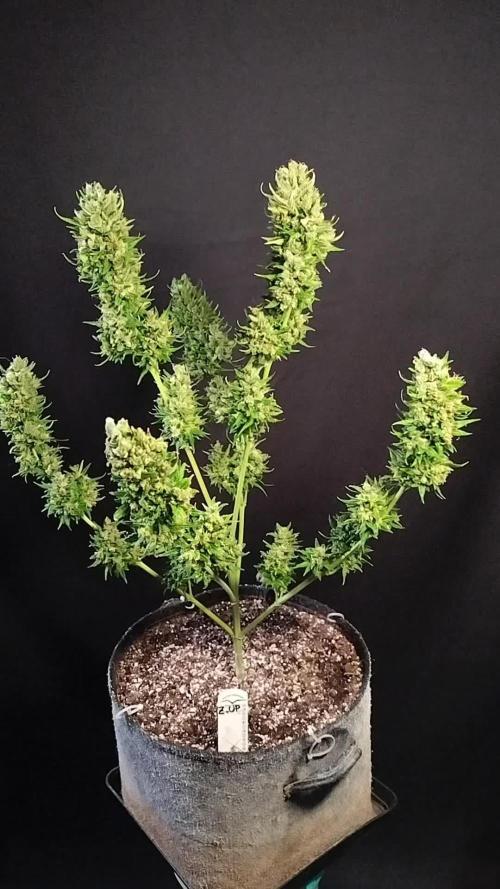
So, I chopped her on day 70. She was very ready.
The last week I kept the girls in the shade a bit during the day. We´ve had temperatures close to 40 degrees C. I didn´t want to expose them to too much heat.

Likes
6
Share


Likes
3
Share


@NyBushDr
Follow
Sorry on vacation so a couple of pics from the cam and a time lapse is all I can give you! See you for a detailed update next week as we get close to flip :)
Likes
37
Share


@Levi_Grows
Follow
All in all i am more than happy with the outcome and the life of these girls. Plus did you see i got 11gram of crystals by using the trim tray! Deffo worth it


Likes
29
Share


@JeyGanesha
Follow
Un altra settimana è passata senza problemi...grazie alla mia perseveranza nel curarla e debellare i ragnetti Rossi che bastardelli mi sono arrivati anche dentro al box... sicuramente c'è li ho portati io involontariamente quando sono andato a vedere delle piante di un amico che erano impregnate di ragnetti e ragnatele sui fiori....vabbè ora devo sbattermi un po' più ma non lascerò che mi rovinino la mia terapia 💪👍🙏🕉️🙏... Boom Shiva Shankar 🕉️ belle le mie coccinelle 🐞 che mi tengono pulita la mia terapia

Likes
6
Share


@MrPipi
Follow
99 Days but the Bitch aint done.
Mr. Pipi likes his new Camera. Pictures gettin better. Plant also is gettin gooder.
Strawberry Flavours definetly inda building.
Mr. Pipi does not flip the plant off, its just for size comparison side-by-side.
No Plants were harmed (not yet) and no Pipi was used during this documentation.
Wild-Strawberry Update: Mr. Pipi achieved to convince 2 friends to agree that they smell wild strawberries . yippeeee

Likes
34
Share


@Salokin
Follow
Hello Growmies,
As we step into the eighth week of our Watermelon Candy F1 Hybrids' flowering stage, the dance of growth and aroma continues to enchant our senses. These delightful plants, sharing their space with Epic Buzz and Red Banana Pudding varieties, inch ever closer to the pinnacle of their bloom.
The Watermelon Candy cultivars are flourishing with an undeniable zest, their foliar tapestry thick with the potential of what's to come. The air is thick with their intoxicatingly sweet scent, a testament to their namesake, and their buds are expanding with satisfying robustness.
Plant #1 is maintaining its lead with a striking bud formation, clearly thriving in the consistent environment of the Tent-X system. Plant #2 and Plant #3 are not far behind, with each showing a wealth of budding sites and a sprawling canopy that speaks to a bountiful harvest ahead.
Despite being under a 12/12 light cycle along with the photoperiod plants, which may limit their yield compared to a 20/4 cycle, these plants are putting on a splendid show. They continue to swell, their trichome-frosted buds promising a powerful and flavorful finale.
Nutrition continues on a carefully scheduled five-day rotation, our blend of Alga Bloom, Sugar Royal, Power Roots, and Orca nurturing these beauties into their late flowering phase. The TrolMaster system diligently logs every parameter, ensuring our VPD and PPFD values are consistently optimized for peak performance.
As the eighth week unfolds, we see the evidence of our meticulous care in the uniform health and structure of the plants. The internodal spaces remain tight, the stems sturdy, and the flowering sites increasingly impressive.
With anticipation building for the harvest that lies ahead, we reflect on the journey so far. It's a path marked by shared knowledge and collective experience, all leading us toward what promises to be a remarkable culmination of our efforts.
Stay lifted,
Salokin

Likes
18
Share


@JohnnyBlaz3
Follow
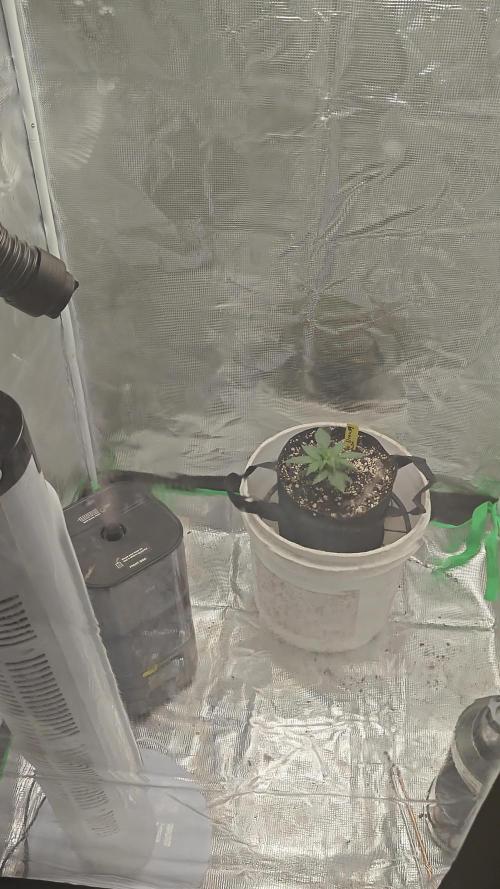
I wish I could have put them in then tent a few days sooner to speed up growth but all good, ladies needed a few extra days in there. They were transplanted on the last day of this week. Doing a tent full of autos this grow, 20-4 light schedule with 7 plants 7 strains. this diary of course will just be covering my lady purple haze. I put them in 1gal pots for now and will be trans planting to 3gal in about 7-10 days.

Likes
21
Share


@BigBudWolf
Follow
BLUEBERRY AUTOFLOWERS (QUEBEC CANNABIS SEEDS)
42 DAYS FROM SPROUT
ADVANCED NUTRIENTS (ORGANICS)
IM LIKING THE FLOWERS! EXCITEMENT BUILDS!

Likes
6
Share

@MaltedMadness02
Follow
Plant is responding really well to the change in conditions! I've noticed a rapid turn around in her vigor and overall growth day by day. Really glad I decided to ride this out. Next update should be a great one! Happy growing!
Likes
3
Share

@AestheticGenetix
Follow
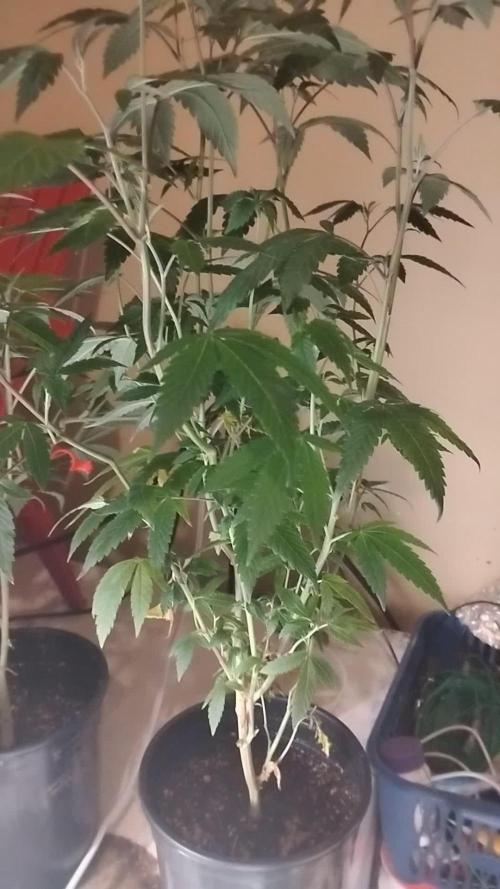
Oh man I'm excited about this one now. I think I may try and fill this tent out with this just this one plant.
Earth box and manual scrog on this Gelato. After getting her in there and realizing how easy she is to bend over and how easy it will be to get a monster plant with this set up, I'm super stoked. This will probably end up being a super long veg time but that's okay.
This is exciting for me. Something different.
Likes
6
Share


@CryptAnon
Follow
Start of week 6. Smell is getting strong, lots of trichomes forming now and buds starting to swell.

Likes
13
Share


@cookingwithninja
Follow
best cannabis I ever grew and smoked. Others agree. This is a cup winner I would win with no competition. 3 months harvested, 90% consumed. Will run more genetics and future cross, backcross. Feels like energy drinks, positive, 100% youre high and lit, extreme ripped. Smell is slight citrus, this is very sweet tasting and smelling because of my methods of growing. Oozing sticky like an industrial adhesive. Daytime smoke, ripped no couchlock. For heavy daily smoker this is above your level of comprehension, good luck finishing 0.5g session. 10/10 all categories.
4 months after harvest video macro, this is what 40% looks like


Likes
2
Share


@Ninjabuds
Follow
I have got a whole crew of four Bubble OG plants, and they're all doing really well. These plants are like quadruplets – they all look super similar, with the same strong smell that's kinda like a putrid skunk. They're all uniform in height and have the same spacing between their branches. It's like they're all following the same blueprint.
Happy late turkey day grow diaries world!!!! It's now day 24 from seed for all the seedlings I have going. The past few days the plants have really started to take off. There roots have really started to dig in. Every other water I am still giving 2ml per gal of fox farm grow big. I keep having to tell myself not to add any more nutes other than that. I don't want to fry my plants but I also want they to start jumping. I'm quite excited for the coming week, I think the next 7 days or so is when the plant really starts to transform and look more like a pot plant than just some random little green thing.
A few days ago I decided to move the plants from under my 55w cheep amazon light to under my spider farmer 100w newer version light with the good leds in it. The plants will hopefully be ready to up pot them here soon and get them in the large tent.
Sometimes when growing multiple different strains it can be really hard to balance giving to much or to little light. You don't want the faster growing plants to get to stretched out waiting on the slower plants to catch up
I spend Thanksgiving day morning transplanting the plants into 2gal pots. I am useing spme promix potting soil it's my 1st time tring this soil. It is actually doing really well the roots were all white and nice looking. I think next time I'm going to add some worm casting, kelp, granular mycos, and a little bit extra perlite. I just didn't have the money with christmas coming to splurge for all the extra stuff. I got rid of 2 plants 1 of the bubble og and 1 skunk apple runtz. There is only room for 10 pots in the 2x4 tent. I will peob only bring 8 of them to flower, always good to have back ups. Yesterday I also stuck the plants back under the 500w medicgrow mini sun 2 in my 2x4 tent. They did great under it the 2nd half the day I was happy they didn't get stressed. I had put them under that light a little early about 10 days ago or so. I am expecting in a week these plants will ge going crazy with growth
Likes
2
Share

@HavelGrower
Follow
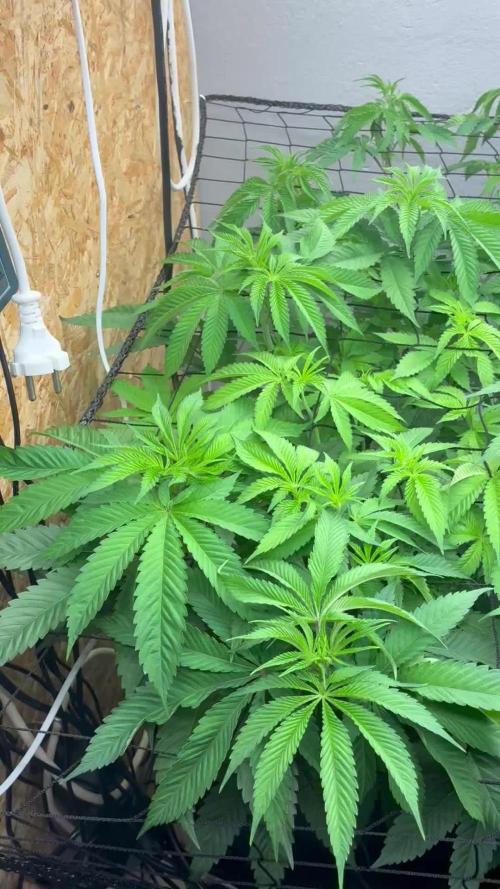
Week 7.
Did nothing besides putting nutrients und water in the system. Spreaded the plants every 2 days to fill the space. Week 8 will start with 42h of darkness and flip to 12/12 afterwards.
From now on I will turn off the far red during lights on period. The canopy is filled so it’s now just beneficial for putting them to sleep or waking them up. Using far red in the early flower time could cause a unwanted stretch. In mid-late flower I am going to use it for the Emerson effect.
Conditions of the Grow:
💡 PPFD: 550 umol/m2/s
☀️ DLI: 35.6 mol/day
🌓 Lightcycle: 18/6 h
💨 Humidity: 50-55 %
🌡️ 🌞Daytime Temp.: 21-22 *C
🌡️ 🌙Nighttime Temp.: 18-19 *C
🌡️🌱Leaf Temperature: 20 *C
🌡️💧Water Temperature: 18-19 *C
Water TDS: 1000ppm | EC: 2000us/cm
🚰Watersource: Rainwater (TDS: 15ppm | EC: 0.03 us/cm
Vegetation Equipment:
🔦 Lamp: Mars Hydro FC-E6500
📤Container: 3x DIY 63L Euro-Box with lid
Pot: Netpot 2 inch
💦Pump: M.R.S. Ultimate Whisper Powerpump 22 bar
🚿Nozzles: 12x 0.3mm
🫧Waterfilter: 150 microns
🌬️Fan: 3x Clipfan
🌪️Duct-Fan: AC Infinity 200 mm with Controller and Carbon Filter
🍶Nutrient Brand: Terra Aquatica
🔬Sensors: Waterstation (EC, TDS, Temp, PH, Salt), CO2, Air Temp. & Humidity (VPD), Temperature-Sensor Root Container
Likes
54
Share


@Benzels
Follow
Whats up again from down under growmies... Well its been a quiet week for me, plants are on auto pilot atm, nothing much to do aside from watering them with a light feeding mixed in. Starting to have to water more often now and the plants are making it obvious they are happier with more frequent watering's so thats what they are now getting. Caramelo has recovered even more from my mistake of over strength lime sulfur spray- lost a few bud sites that were totally burnt away and now there is a space on the stem where a popcorn bud should be but its not. But aside from that shes looking good. Hash plant is really getting going into bud now, for a near pure indica she has taken the longest to start flowering- hope thats not a sign she will be a light yielder...still if its old school hashy bud thats makes your eyes so red you look in the mirror and think "woah zombie!!" then I'll be pleased.
And Zkittlez- what can I say. Just LOOK at her!! How the hell is this plant only 4 and a bit weeks into flower?? If you told me that plant was in week 6 id believe you. And smell is amazing. Sweet and sour just like candy. And can be smelt from 20 feet away easy...lols.
Processing
Likes
54
Share


@Mimi420
Follow
Hello grower family!
FD 41,and looking awsome to me!Nice fat and dense buds on both.And the colours are amazing again!I'am sure that the reason for that is bat guano from Plagron.Eating like crazy,abaut 9l of solution for both,every 3 days.One more feeding with nutrient,and then start to flush them.
Stay green!🌱


Likes
49
Share


@Roberts
Follow
Mandarin Squeeze smells amazing if you love oranges. The girls grew great. One took dominance as I expected in the grow. I hope it tastes as good as it smells. It would be my new favorite indica strain. I will be back with a smoke report in a few months. Thanks again Terpyz Mutant Genetics, and Spider Farmer. 🤜🏻🤛🏻🌱🌱🌱
Thank you grow diaries community for the 👇likes👇, follows, comments, and subscriptions on my YouTube channel👇.
Thank you Happy Growing 🌱🌱🌱
https://youtube.com/channel/UCAhN7yRzWLpcaRHhMIQ7X4g

Likes
7
Share


@Messypies
Follow
This week started strong. Some small concerns due to small orange spots appearing on fan leaves which on researching indicates a calcium/magnesium deficiency. Will add a small amount of cal mag to their next feed

Likes
12
Share


@CheeRz
Follow
Damn we r gettin' close to the end 💚. Week 6 of flower and the buds lookin' pretty frosty ❄️ and feel dense, too. The smell is very strong and kinda sweet 🤤.