
Likes
Comments
Share

@HandsomeTerpz
Follow
ChatGPT:
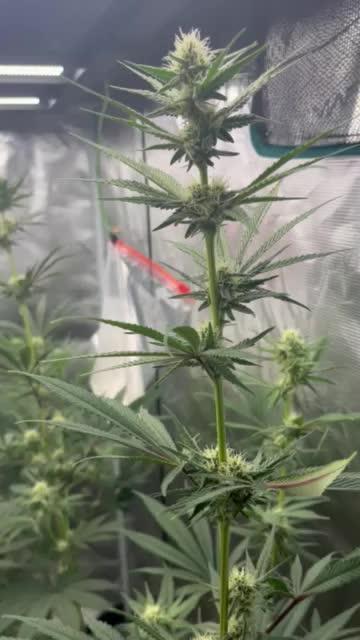
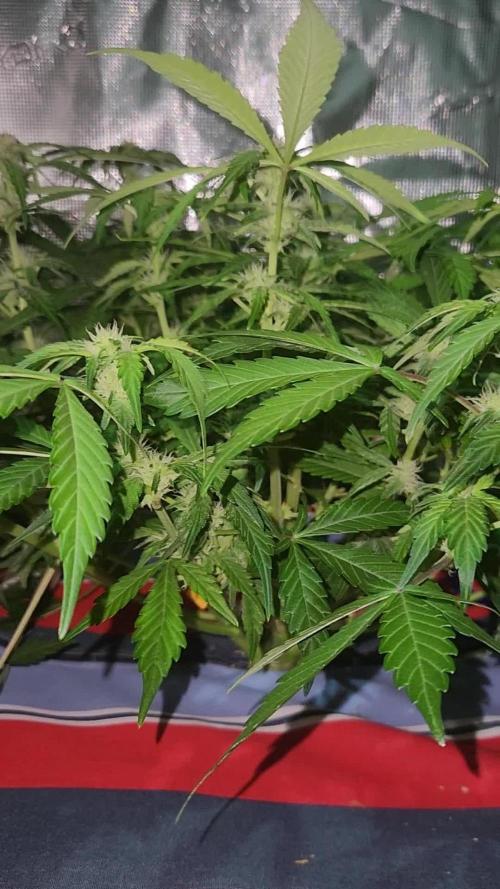
🇺🇸 Week 11
--------------------
Humboldt California Haze: This week, she has adapted well to the new light, and you can tell the conditions and temperature suit her perfectly. It’s still a bit of a shame that the nodes have stretched so much, but the flowering is coming along nicely. The scent is truly pleasantly delicious.
🇩🇪 Woche 11
-------------------
Humboldt California Haze: Diese Woche hat sie sich gut an die neue Lampe angepasst, und man merkt, dass ihr die Bedingungen und die Temperatur sehr zusagen. Schade ist nach wie vor, dass die Nodien so extrem in die Höhe gegangen sind, aber die Blüte entwickelt sich wirklich gut. Der Duft ist angenehm lecker.

Likes
62
Share


@OwlGang_Uk
Follow
Week 1 - The Plants Are Looking Nice & Healthy, I’m Very Satisfied With How The Grow Is Going So Far, It’s Quite Fascinating Watching Them Grow Right Before My Eyes. #OwlGang


Likes
20
Share


@EvilGrower
Follow
This entry covers days 31-38. There is a timelapse for this week.
First off, I'm not sure whether this week should be the first flowering week. Evidence of preflowering is clearly visible.
Again, another week of dramatic growth. This week the first nine pointed leaves have grown. What a crowded leaf!
Unfortunately my LST efforts haven't achieved much in shaping the plant. This is because my net cup wasn't held in place enough, so the cup would tilt rather than the plant conforming to my bending.
I plan on switching the nutrients for the transition from veg to flower.

Likes
19
Share

@Caertner
Follow
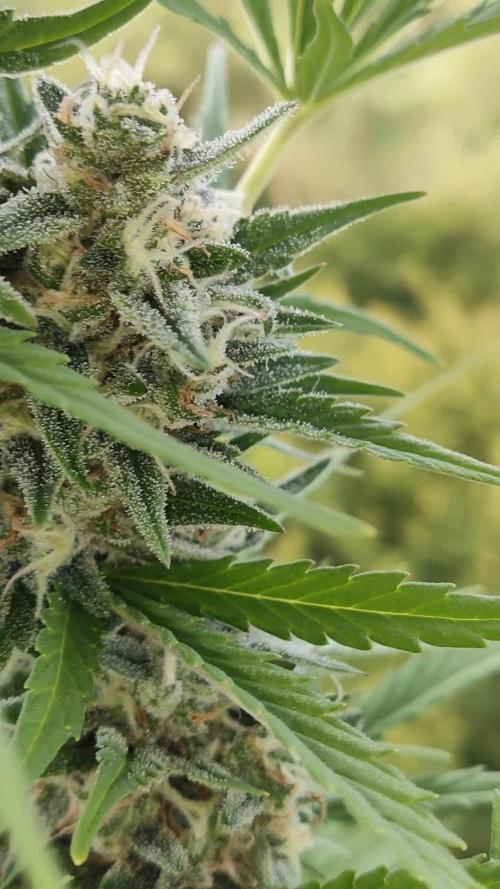
Lange genug gewartet. Trichomköpfe sind gut milchig mit vielen Beige-Bernstein-Braun Reiflingen. Bester Zeitpunkt

Likes
8
Share


@PEAKYPLANTERS
Follow
Hello everyone, fellow growers!
welcome to peaky's gardens
I had so much fun growing this little girl in a small pot and with a frame around which I twisted my plant
I wanted to test her resistance and my experience

Likes
22
Share


@NanoLeaf
Follow
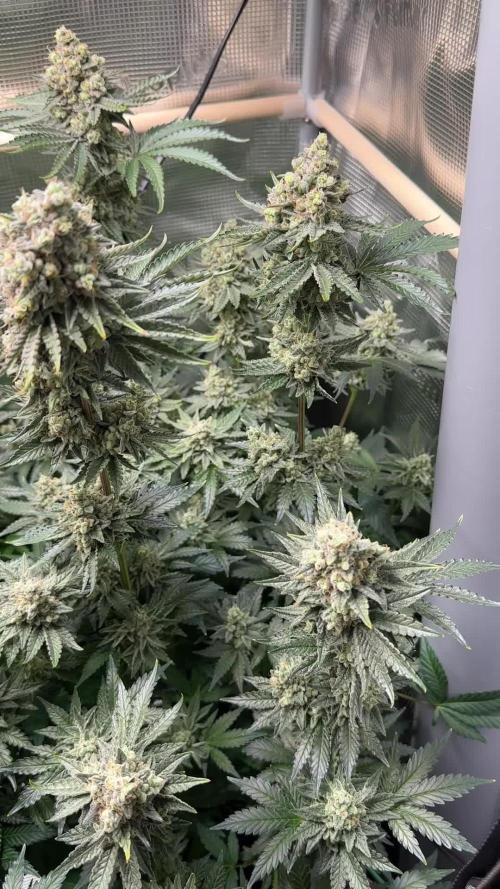
End of Week 12 (Fifth week of flower)
The ladies are smelling reDANKulous and are so frosty and sticky I can't remove fan leaves without getting my hands sticky. Next level terpene profiles.
I did a final increase in CO2 to 1500ppm.
The main top-sites are taking shape.
I have been keeping a cooler average temperature - and also keeping the relative humidity lower.
Pest Report: None

Likes
11
Share


@adam_pawloski87
Follow
Let’s Go Day 26 of flower 🌺 for these lovely Pre98 bubbas and Dirtyblondes from Twenty20 genetics! Only couple weeks into flower an These girls are stacking up oh so nicely an smelling super delicious and getting frosty ! Can’t wait to see what these ladies do next week , y’all keep them eyes peeled!

Likes
20
Share


@pifflestikkz
Follow
Day 98
Day 63 Flower
30/05/24 Thursday
Finally the time has come!!
The fox tails aren't a issue for me as it's Percy smoke, and to be fair, there decent fox tails 😍😂.
The plant is huge for a auto.
I have wet trimmed,
Removed all excess stem.
Wet bud weight is 587g
Wet trim is 35g
I will update dry weight and smoke report 👌
Thank you to everyone who liked, commented and followed 🙌
Love for the grow 💚
Till next time ✌️

Likes
67
Share


@Natrona
Follow
Week 6 2/9-15
Runtz Auto in full flower, the cute puffy white buds are starting the stack. On 2/13 I did major defoliation on Runtz. I removed all large fan leaves and any leaves shading bud sites. Initially, I thought this would be my last defoliation, however I have heard that 1) they continue to grow new leaves until day 20 of flower and 2) there must be enough foliage on the plant to photosynthesize energy. Well, I hope I left enough leaves for energy to keep bulking up the buds. She is still stretching and now 21inches. This is the end of week 2 flower. This should have been an indication Not to defoliate severely.
Oh darn. My AC Infinity controller is set to flower. I add 2 gallons of water to the T700 humidifier daily to keep the VPD in line.
2/9 & 11 4 gal fed 2 liter each nutrients added at ½ of recommended amount. Making 4 gallons since I have 2 pots of carrots and a Dill in the back.
Bloom Juice 45ml
Plant Juice 75 ml
Royal Rush 15 ml
Power bud 15ml
Green sensation 7.5ml
Recharge 2.5ml/gal
4 ml
Cal Mag
5
Ppm 333
Ph 7.02
Temp 66
2/13 5 gal
Bloom Juice 60ml
Plant Juice 60 ml
Royal Rush 20 ml
Power bud 20ml
Green sensation 10ml
Recharge 2.5ml/gal
4 ml
Cal Mag
25
Ppm 538
Ph 6.6
Temp 66
Your likes and comments are appreciated. Thanks for stopping by.
Growers love 💚🌿
💫Natrona💫

Likes
9
Share


@BelgianBudtender
Follow
How's it growing farmers?
Oh my god, she kjust kept stretching, idk what's going on. She's so massive.
I deffo need to defoliate, ill have mold issues.
she drinks half the bucket every day, Early on in the week I had some Light burn, moved my lights up all the way
My Flower lights:
https://marshydro.eu/products/mars-hydro-ts-1000-led-grow-light/?ref=BelgianBudtender
My Veg lights:
https://marshydro.eu/products/mars-hydro-ts-600-led-grow-light/?ref=BelgianBudtender
Coupon code BelgianBudtender for 3% off


Likes
38
Share


@Babylongrower42
Follow
Na última semana os pistilos começaram a ficar alaranjados, os buds engordaram pouco, espero que nos próximos dias eles finalizem bem gordos!
Darei a ela fertilizante por mais uma semana e depois flush por outra semana, creio que daqui uns 20-25 dias estarei colhendo!


Likes
26
Share


@GuerillaGorilla
Follow
Sept 10th
She was ankered to the fence with rope.
Notthing to report really. Looking great no sign of mould. Heads are yellow looking. Pretty bizarre. From a distance its is really striking...does'nt show in pictures sadly
She is next up for defoliation, together with Killer Kush. Few more days rain till sunny period..fingers crossed.
Happy growing everyone


Likes
Comments
Share

@Dr_Zauberer
Follow
This is the day i chopped its around at Day 105. the middle one and the right one was perfect. The left one was so slow i dont even know what happened with her in flower. I was thinking about giving her more time but at that point i wanted them off. Pistiles were still a lot white and not brown but whatever i took them off this day :) i think we can be happy with the results. I try to actually not give nutrients within the last week. I know flushing is not necessary for organics which i dont, but i dont think they need nutrients for the last week. My opinion!


Likes
16
Share


@bigbootybotanist
Follow
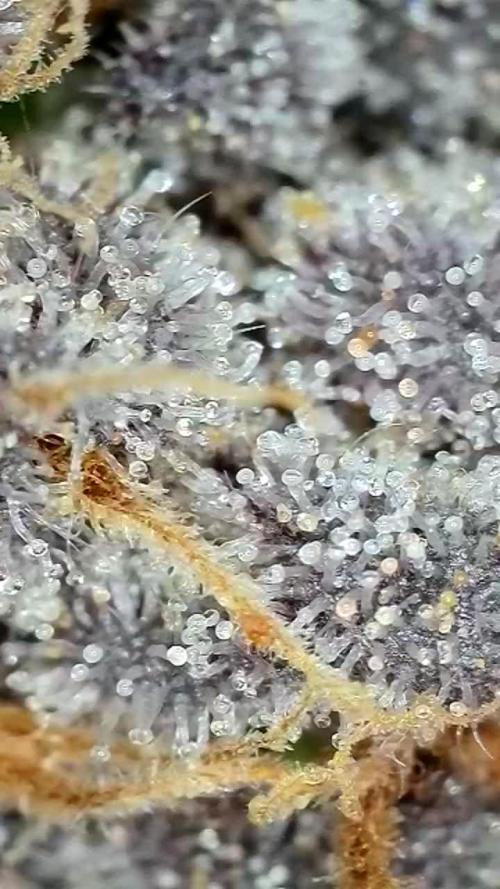
watched trichomes fall off when the humidity spiked but got to see some amazing colors


Likes
2
Share

@Weedman268
Follow
Week 3 flower she's been drinking alot, so keeping her water reservoir full. I should top dress but am gonna finish her without top dressing, I believe the soil is healthy enough to do the job,🤞