


Likes
Comments
Share


Likes
2
Share


@Borberad
Follow
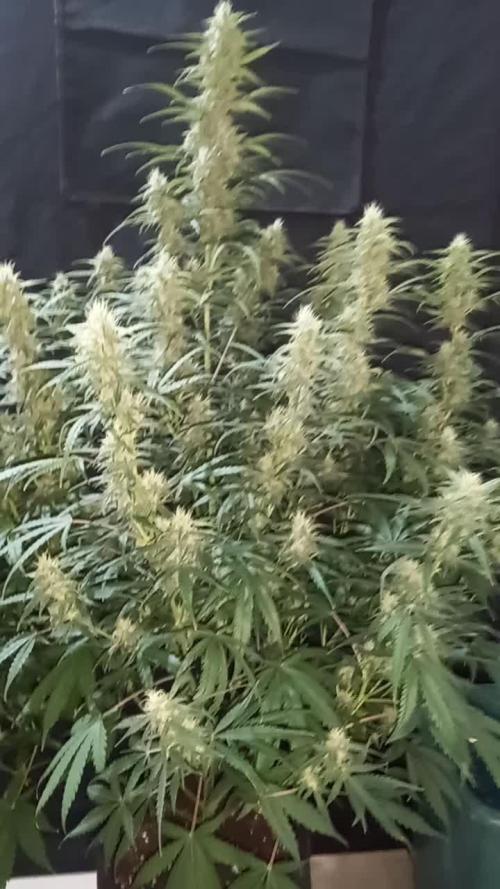
Letzte Woche verlief ohne Probleme hätte auch noch 2 bis 3Tage länger stehen können. Mögen aber lieber weniger amberfarbene Trichome daher jetzt kommt sie schon ab.

Likes
44
Share


@PotCasso
Follow
This was the last time running this strain/retired and boy oh boy did she finish Strong. I never got her to be this colorful any other time and she tastes of a distinct orange🍊flavour.


Likes
68
Share


@MrHightimes
Follow
i'm in love with this grow.
I'm also drunk!
good pics and druken videos.
I love fastbuds/ Fastubds is life!

Likes
3
Share


@Eaegifts
Follow
Day22
Minor lst but that’s about it. She’s doing well and I just chopped her sister today, this girl and a few more left of this cultivar. Thinking we found the keeper already but only the cure will tell for sure.
Likes
15
Share


@Waveform
Follow
Day 53 has broken for the ladies, and I am very pleased with their progress. The buds are visibly getting stronger every day. A few brown leaf tips appeared, but at this stage I don’t care much for them. Overall, they still look very much alive.
Day 57: Uppermost leaves are curling up. Could be they are saturated with light and I should reduce the lighting period a bit, could be that the water drop installment provided them with a bit too much water, although they don’t show any more fresh signs of over-watering or fertilisation. But I had to remove water that flooded the bottom of the tank … I’ll reduce their lighting period to 14 hours. Rest of the ladies looks very healthy so I don’t want to stress them too much. It would be better to raise the left light a bit but I cannot. So, although the label says they would grow taller, I can be glad they did not gain more height.
Day 58: Buds are really getting massive, and they started to smell a bit more. They even gained 1 cm and tallest bud is now at 89.
It’s a very sweet but deep odour, really enjoyable. Lady #2, while being a bit smaller, looks like being in winter. Sugar leaves are enormous on her.
I added a detail photo from timelapse video showing some of the curled and slightly burnt leaves. They are not many, and damage does not seem to progress. Anyway, ladies are already late in the game and I am rather surprised they still look very healthy.

Likes
63
Share


@Chubbs
Follow
420Fastbuds
StrawberryGorillaAuto Week8
What up grow fam weekly update on these 3 gorgeous girls. Getting super hot in my tent as summer time is here. Over all besides some crispy leaf tips and having to water more frequently all is good.
Likes
9
Share

@GnarlySeedGenetics
Follow
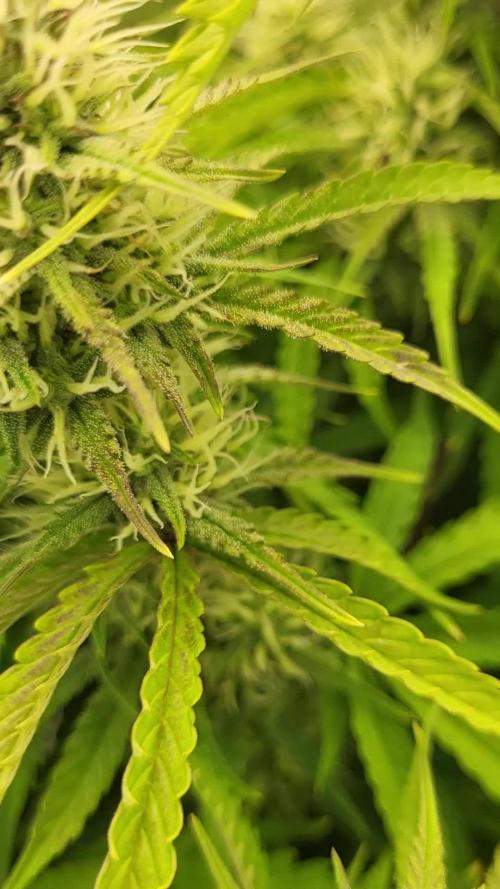
Finishing up day 56 with 4 waterings/feedings this 8th week.. buds are fattening slowly and the trichomes are covering more and more..
Cut out all the N and she's on 2.5ml/l of both bloom and TM now with a plain water still every 3rd watering
The smell is very prominent now, left a little bit of the zip open by accident and it had taken over the house in no time 😂😂
Going into the 9th week ive learned a lot about what I could have done earlier but thats for next time to act on..
The main cola has damage on the leaves due to being super close to the light now however with my tiny space theres not much more I can do about that, the temp is hard to control but its not too bad yet and the humidity is getting easier to control.. keeping her steady between 45 and 50%
Big changes day by day now 👌
Likes
26
Share


@Highgrade_Harvests
Follow
Week 9 of flower and these girls are almost ready to be harvested. They all smell amazing and are extremely sticky and resinous. Should get a decent size harvest of this strain I'm excited to trim these plants up and put them in their curing jars.

Likes
34
Share


@SavTheGrower
Follow
The first week of flower!!!
Bad news: DS turned out to be a male, so I trashed it last night.
Good week overall, temps and RH have been excellent. All and all things look well, and I'm excited for the weeks to come. Just fed them plain water this week.


Likes
19
Share


@cpt420
Follow
Second week of flowering and still going strong. I experienced a bit of stretching within the first week of flowering but it seems so have slowed down and the buds are finally starting to put out. 4-6 weeks left before harvesting I reckon.

Likes
7
Share


@FrostyB
Follow
Now this baby was a delight to grow and grew real big. I decided to leave this lady to do her own thing and she ended up finishing just short of 6ft! The main cola was huge and juicy and all round the end result was really nice and super strong just the way it should be.

Likes
51
Share


@Corwinism
Follow
WEEK 5 (03/28/2021 - 04/03/2021)
Day 38: 03/28/2021
Plants had their first feeding today. It’s been about 3 or 4 weeks giving them tap water only. With my ppm dropping in the soil, I thought now would be a good time. Leaving out the Cal-Mag this feeding.
Nutrient mix: 651ppm, 6.0 pH, 71℉
FF Big Bloom: 5ml/gallon (⅓ strength) = 15ml/3 gallons
FF Grow Big: 5ml/gallon (⅓ strength) = 15ml/3 gallons
ppm/ppm = runoff/soil
JB#1 - 960ppm/309ppm, pH 6.9 JB#2 - 1290ppm/639ppm, pH 6.8
AP#1 - 1400ppm/749ppm, pH 6.8 AP#2 - 1190ppm/539ppm, pH 6.8
GC#1 - 1190ppm/539ppm, pH 7.0 GC#2 - 1350ppm/699ppm, pH 6.8
-------------------------------------------------------------------------------------------------------------------------------------------
Day 41: 03/31/2021
Plants watered around 5:30-6:00 p.m.
ppm/ppm = runoff/soil
JB#1 - 955ppm/653ppm, pH 6.8 JB#2 - 1070ppm/768ppm, pH 7.0
AP#1 - 1470ppm/1168ppm, pH 6.8 AP#2 - 1390ppm/1088ppm, pH 6.8
GC#1 - 1110ppm/808ppm, pH 7.0 GC#2 - 1160ppm/858ppm, pH 6.9
-------------------------------------------------------------------------------------------------------------------------------------------
Day 44: 04/03/2021
Plants watered between 5:30-6:30 p.m. Botanicare Hydroguard was used at half-strength to supplement the roots and as a preventative against rot.
Tap water: 247ppm, pH 9.4, 70℉
Botanicare Hydroguard: 1ml/gallon = 3ml/3 gallons
pH Down: 11.5ml
Mixture: pH 5.6, 285ppm (+43ppm from pH solution)
ppm/ppm = runoff/soil
JB#1 - 858ppm/573ppm, pH 6.8 JB#2 - 857ppm/572ppm, pH 6.8
AP#1 - 984ppm/699ppm, pH 6.8 AP#2 - 1030ppm/745ppm, pH 6.9
GC#1 - 880ppm/595ppm, pH 7.0 GC#2 - 932ppm/647ppm, pH 6.9
-------------------------------------------------------------------------------------------------------------------------------------------
This week has been much more pleasant than the weeks prior. I believe my plants are finally getting acclimated to the medium and recovering from transplant shock. New growth is looking much healthier. Just as a preventative measure, I picked up some Botanicare Hydroguard to use in an attempt to supplement the roots and bring the pH of the soil down to where I want it. Personally, the pH remains just a tad too high for my liking this week. I would like it more in the range of 5.7-6.5 but I'll give it a week or so to see the reaction to the Hydroguard.
I've continued with more LST on all but the Glookies #2. On this plant I simply did a topping. It was a risk, considering the plants isn't vibrantly healthy, but I need to maintain it's height. I also did a second topping to the American Pie #1.
As can be observed from the photos, not all of the plants were shaped the same way. I got creative with the fabric pots and I decided to LST a few plants a little bit differently just to see which technique/style I liked the most. So far, I am digging the way the Jelly Bananen #1/#2 and American Pie #2 are shaping up. They are going to have a beautiful, wide canopy when they head into flower.
I'm considering transplanting into 5 gallon fabric pots within the next week or two so I can flip them to flower two weeks later. My intuition is telling me this has been a pretty lengthy vegetative stage, thus far.
I'm expecting all of my plants to double in size during the flowering stage, which should be anywhere between 65-70 days long. I made sure to select strains with similar flowering times (60-70 days).
Thanks for stopping by this week. Please feel free to leave a comment or any tips/advice! Until next week! 🙏


Likes
11
Share


@bastiBLond
Follow
I sorry for not uploading photos, I've been very busy and without having time to appreciate my girls, I'll upload pictures soon before finishing this week.
change the topbloom for bloombastic starting with 1ml

Likes
151
Share

@yan402
Follow
🌸🍊✨🍭🌸🍊✨🍭🌸🍊✨🍭🌸
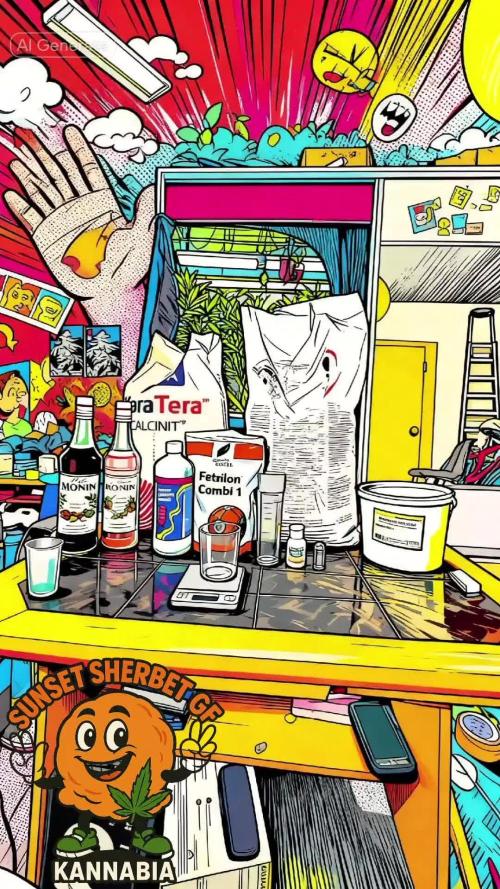
Back at it with Kannabia — huge thanks for the NEW EXCLUSIVE Upcoming Kannabia's seed Launch 🙏🍨🍊
Grateful for the trust and for everyone following along, I’ll run her clean and showcase what she can do.
Dessert-party goals: berry–citrus sherbet terps, creamy finish, tight stacks, easy trim, zero drama.
Veg 24/0, clean manifold + LST, flip on a happy, even canopy.
Coco’s fresh, seed goes in now. 🚀
Added on 12.10.2025
🌞 Light conditions: Limited direct light for the first 4 weeks — ~4 h/day on weekdays and ~10–11 h on weekends due to tent sharing and work schedule.
🌸🍊✨🍭🌸🍊✨🍭🌸🍊✨🍭🌸
💭❗💭❗💭❗💭❗💭❗💭❗💭
❗Events & thoughts worth noting❗
💭❗💭❗💭❗💭❗💭❗💭❗💭
10.08.25 GW1 Sowed seed, soaked starter pot with #1
12.08.25 GW1 Seed popped hip hip hurray
28.08.25 VW2 Stopped using GreenBuzzBloom, took it out of the schedule.
01.09.25 VW3 TriPartMicro 10→30ml, TriPart bloom 10→30ml
12.09.25 VW4 Applied nemadodes against thrips and fungus gnats.
20.09.25 VW6 topped and trained for first time, decided against a full manifold as I lost a few weeks already.
26.09.25 VW7 Topped her one more time for 8 mains
27.09.25 VW7 Topped up the pot with perlite instead of clay pebbles this time, just trying things out, TriPartMicro 30→40ml , TriPartBloom 30→20ml
10.10.25 VW9 have her a haircut, umm be trimming the side shoots tomorrow, rest in the video 📹
12.10.25 VW9 done some extra trimming to clean up a bit and chose two extra side shoots to nurture info mains, so kept the 8 original mains plus 2 rest in the video 📹
17.10.25 VW9 FfJ/fpj fish mix 30 → 60 ml
20.10.25 VW10 Feed tweak: added 3 g Calcium Nitrate/ 30 L (≈ 15 ppm N + 10 ppm Ca)
24.10.25 VW11 did a defoliation and trimming session 📹
27.10.25 VW11 Epsom Salt 0 → 2.5, Calcium Nitrate 3 → 9 g
01.11.25 VW12 CalMag 60 → 30ml, TriPartBloom 20 → 30ml, Magnesium 2.5 → 3.5g
02.11.25 VW12 Did a cleanup in preparation for flowering, rest in the video 📸
12.11.25 VW13 Did another cleanup in the tent 🎥, also switched to the FERMAKOR PK Micro schedule, (10.11.25) added Phosphoric acid as a pH down in preparation for flowering
14.11.25 FW1 FERMAKOR PK Micros 40 → 50 ml
🌱💦🌱💦🌱💦🌱💦🌱💦🌱
🌿 Day to day tasks & actions 🌿
🌱💦🌱💦🌱💦🌱💦🌱💦🌱
21.11.25 FW1 – Fed 5l of #1 → 2l runoff
(*RUNOFF reused for tomato plants)
🍶💧🍶💧🍶💧🍶💧🍶
💧 Nutrients in 30 L #1 Veg — FERMAKOR
🍶💧🍶💧🍶💧🍶💧🍶
💧 Calcium Nitrate (Calcinit / Nitcal): 45 → 40 g
= 1.33 g/L → 207 ppm N + 253 ppm Ca
🍶 PK Concentrate (FERMAKOR Base): 30 → 40 ml
= 1.00 → 1.33 ml/L → balanced 1:1 P:K + light micros (from extract)
💧 Home-made FFJ/FPJ (Fish + Veg): 30 ml
= 1.00 ml/L
🍶 Epsom Salt (MgSO₄·7H₂O): 8 g
= 0.27 g/L → 26 ppm Mg + 35 ppm S
💧 Fetrilon Combi 1 (Micros): 0.5 g
= 0.017 g/L → Fe 0.7 ppm • Mn 0.7 ppm • Zn 0.3 ppm • Cu 0.3 ppm • B 0.1 ppm • Mo 0.02 ppm
🍶Phosphoric Acid (pH down) + Citric Acid (chelation): as needed
→ First set pH with phosphoric acid, then add a little citric only if you want extra chelation
💧 Target pH: 5.8 – 6.0 (drop test yellow-green)
📦 TOTAL: 60 → 70 ml / 48.5 g inputs per 30 L
= 2.00 → 2.33 ml/L + 1.62 g/L
⚙️✂️⚙️✂️⚙️✂️⚙️✂️⚙️
✂️ Tools & equipment ✂️
⚙️✂️⚙️✂️⚙️✂️⚙️✂️⚙️
✂️ 2× MarsHydro SP3000
⚙️ MarsHydro 150mm ACF Ventilator
✂️ Trotec dehumidifier (big unit)
⚙️ Mini no-name dehumidifier
✂️ Kebab skewers (LST – stainless)
⚙️ Wire + roast skewers (LST assist)
✂️ Scissors (HST)
⚙️ Vacuum (for spills & cleanup)
✂️⚙️✂️⚙️✂️⚙️⚙️✂️⚙️✂️⚙️✂️⚙️
---
🍊🍧🌬️🍬🍊🍧🌬️🍬🍊🍧🌬️🍬 Mystery seed (Kannabia Seeds) — NEW EXCLUSIVE
🍊🍧🌬️🍬🍊🍧🌬️🍬🍊🍧🌬️🍬
Species: Hybrid (GF / swift-flowering line)
Genetics: TBA (breeder sheet pending)
THC: TBA
Effect: Euphoric, relaxed, creative (target profile)
Flavor: Berry–citrus sherbet, sweet candy, creamy finish
Flowering (indoors): ~6–7 weeks target (GF)
Resistance: High (aim: no drama)
Indoor yield: TBA
Outdoor yield: TBA
Structure: TBA
Notes: Brand-new exclusive from Kannabia’s GF line — I’ll update specs when the breeder card drops. Goal is rich sherbet terps (berry–citrus + cream), low leaf-to-calyx, easy trim. Stage harvest stays on the table if tops finish early.
YouTube Link: https://youtube.com/-m8h?si=A7x4Zlr2kj-_ga31

Likes
6
Share


@Munchiesfrommars
Follow
Finally we are done, I spent one 10 months on Durban Poison, this is my best sativa strain and im absolutely in love.
So next report will be with some Clones of Durban Poison.

Likes
3
Share
@Organic710
Follow
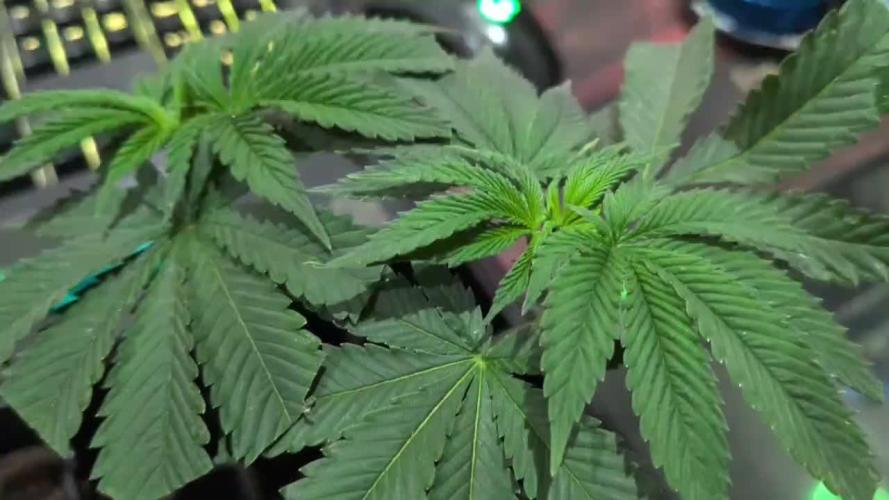
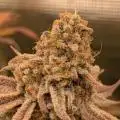
Week 3 is going as planned and it looks like the left side stacked better but its only 2plants on the right what are smaller I might take a few tops off try avoid larf I dont use and never end up blasting it or making bubblehash 😂 Top dressed with Dr Organics 2-8-10 40g per 20L pot and weekly doses of microbes and a combination of Organic growth reg and Trace + Flourish during every watering

Likes
10
Share


@FrulaFrulaki
Follow
Amazing growth this week, they've just exploded. The training was worth it as they're growing evenly, except for a few branches that I need to get under control. I probably won't install a net just because I'm a little late and don't see the benefits in this stage. Next thing I'm going to do is some cleaning up, defoliation to get them perfect for flowering.
