
Likes
Comments
Share


Likes
76
Share


@Canna96
Follow
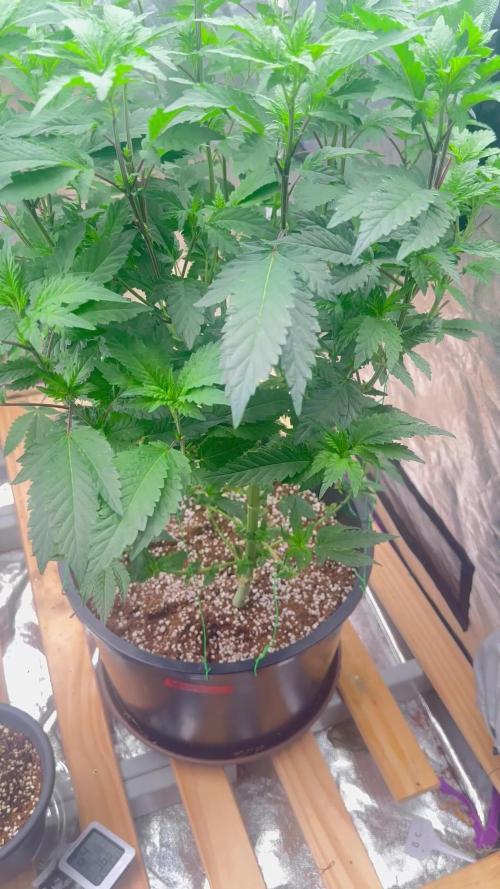
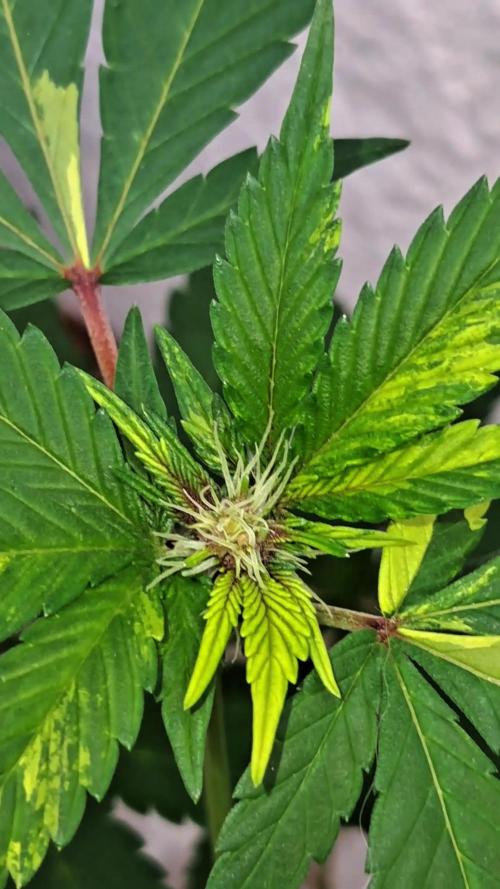
This week went very well, I was finally able to get the second toppings done today on day 35. I am hoping to get the final 4 toppings done in about a week or a week and a half, and then Give her a couple more weeks in Veg before I flip the lights. She is definitely not growing super-fast, but she seems to be growing nice and thick and sturdy with tight internodal spacing, which is exactly what I am looking for. Thanks for stopping by and checking out my grow, if you have any tips or advice feel free to hit me up. Stay safe and Blaze On!

Likes
28
Share


@Gerard_1
Follow
Ultima semana de estas variedades:
Papaya
Dr Green
Cafe Racer
Bruce Banner #3
15 Abril se da corte a: Monster x Cheese, y Orange Monkey
16 Abril - Ultimo riego
6 Litros agua base
Calmag 1 ml x lt
bacterias 2 ml x lt
PH: 6.3
EC: 0.5
17 Abril: Se dará a estas 60 horas de oscuridad total y stress hidrico, se ve en videos diferencias, antes y después
Se dará corte luego de periodo de oscuridad completa donde teóricamente se prepara para recibir la luz generando mas tricomas, si tiene un periodo mas extenso a cual estuvo acostumbrada en flora se generan mucho mayor concentración.
Fotos del 19 de abril 70 días Flora


Likes
76
Share


@PEAKYPLANTERS
Follow
Respect for all of you, brother farmers! masters and beginners! thank you again for gathering on the pages of my diaries! we carry out our work with dedication and live on ambition! Come on guys!🙌👽🙌
Let's go farming

Likes
23
Share


@Firepharmer
Follow
She’s getting frosty and dank
👃🍪🍊🍓🍰🍌🍒🍇🍭👃
Day 29 almost half way , happy with all the phenos so far all frosty so many terps
.. started feed the canna nutrients plants canna pk1314 ..
2 flush’s Got the remo plants all most on the proper Ec again


Likes
15
Share

@IberianRootcraft
Follow
Continuing the journey with the HiHolyHigh selection in this 8th cycle Living Soil bed. The canopy is looking mostly uniform, though a few cultivars (RS11, Colorado Nightshifter, and Runtz HHH) are taking a bit longer to fully acclimatize to the environment.
Key Technical Details:
• IPM: Fully up to date and strictly maintained.
• Soil Moisture: Keeping levels constant within the optimal range to ensure the soil microbiology remains active.
• Biological Activity: Applied avocado tech today to congregate and stimulate the worm population on the top layer, prepping them for the upcoming pre-flower re-amendment.
Nutritional Notes:
The space is almost completely filled, but I’m noticing a slight Magnesium deficiency in the Animal Tsunami and the RS11 is currently recovering from a minor Nitrogen lockout. I’ll be spending this week dialing in these corrections to ensure they are 100% healthy before flipping to the flowering cycle.


Likes
Comments
Share

@THEFROZEN710
Follow
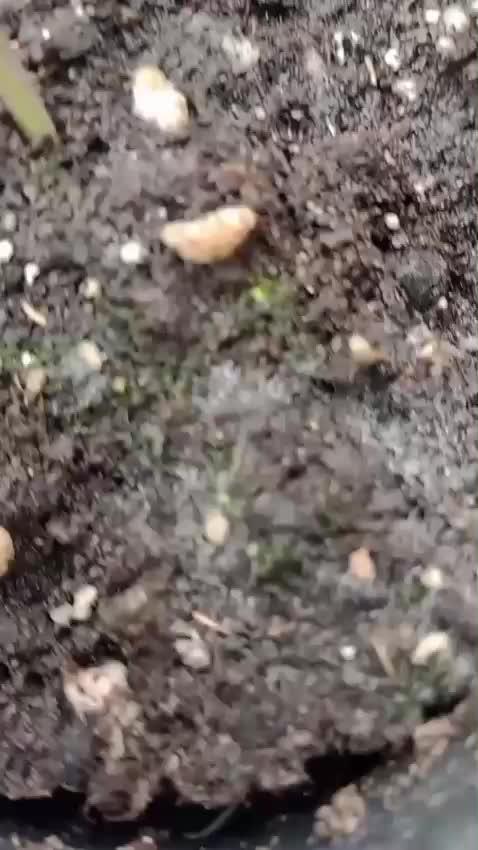
These photos represent the first week of my first indoor cycle. I'd like to emphasize that if the GMOs don't appear at the end of the cycle, it's because they're seeds from a flower I purchased without provenance. The other seeds are all from trusted seed banks. The soil is 100% organic. For further information, Terro Super Soil offers a similar recipe, with the addition of various flours and other ingredients to encourage microbial and fungal activity. In the first week, mycelia began to form on the soil surface, indicating good fungal activity. Along with the mineral addition of lime and nit, Tricoderma Hazarium, a beneficial fungus for rooting and root health, was also added. Just 1 ml per week is sufficient for now.


Likes
4
Share


@Ledros
Follow
Day 57 (2020-07-05): Feeding @ 5.8 PH. Removed a few leaves.
Day 58 (2020-07-06): Noticing a few amber trichromes on the CBD Crack. Wondering if it might be time to start thinking about pre-harvest flushing.
Day 59 (2020-07-07): Fed today @ 5.75 PH.
Day 60 (2020-07-08): No news today. Plants are kind of on autopilot at this point.
Day 61 (2020-07-09): Waiting to feed until tomorrow.
Day 62 (2020-07-10): Fed today @ 5.6 PH
Day 63 (2020-07-11): Leaves on both plants look pretty rough at this stage, but buds are looking nice all around! Guessing 1-2 weeks left on the CBD. Will probably start flushing sometime next week. G14 seems to be running behind at least a week.

Likes
21
Share


@Staffedition
Follow
Привет друзья. Моей растихе сегодня 88 дней.
Растение почти пришло в себя.
20.10 буду переводить на цвет.
Начал применять LST технику на 19 дне и продалжаю применять её через день, а 18 августа добавил ДЕФОЛИЗАЦИЮ
С 20.08 ДЕФОЛИЗАЦИЮ делаю каждые 3,4 дня
С 20.08 LST технику делаю каждые 4.6 дней
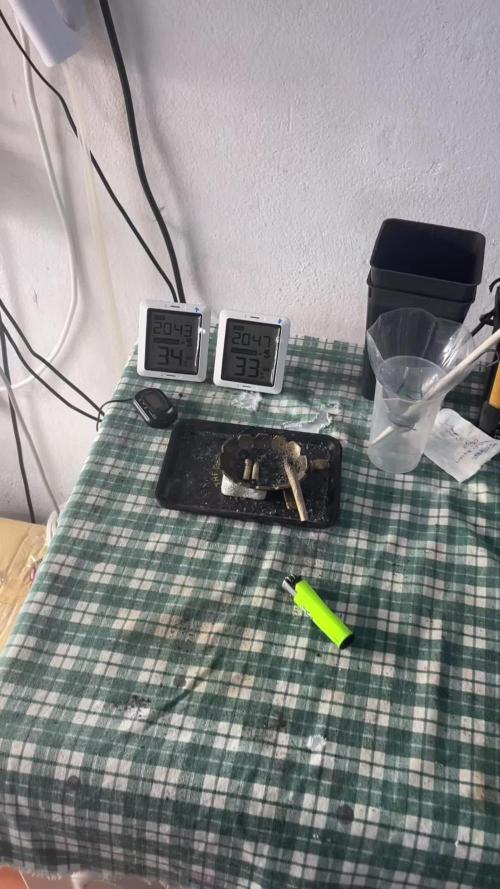
На сегодняшний день влажность 54%
5.09.2023 заметил высокий Ph 7.9
С 48 дня Ph не ниже 5.8
На сегодняшний день Ph 6.0
Начал кормить с 60 дня Canna Terra Vega
PPM 450
Всем мира и добра!
Не забудь поставить лайк❤️, если понравилась как прошла неделя
И читайте наш TELEGRAM: https://t.me/smail_seeds
#Smail_Seeds 😀

Likes
Comments
Share

@Kannisho
Follow
Esta es la primera fast version que crio desde cruce y ya veo que valio la pena tanta espera y esfuerzo en el proceso de producción de la semilla 💜💚💛


Processing
Likes
19
Share


@HisHope
Follow
5/31 Week 6
Finally she is no longer growing vertically. The bulking up is starting as she now has much more space and thus light at all levels of her growth.
She will continue receiving the occasional shot of PK when it looks needed.
Afraid to hope for what it looks like will happen here
6/2
Pics
She is taking over the 4x4
The more room she gets the more she seems to want, she will be alone in there soon enough.
Time of a shot of PK tonight at lights on - 2ml/gal
Nuets prob stay as is for the duration cannot see any way to improve this situation.
6/4
Now Showing : The Beast of CBD Mountain
Will she fill a 4x4 tent?
Villagers are nervous... see it now!
6/5
Light swap HID out Mars TS-2000 in
Reduced cocotek slightly to reduce nitrogen, some tips showing burn.
Water needs reduced a good bit due to new light
Likes
11
Share


@Bread_n_Buds
Follow
The situation is getting interesting, flowering is coming in the final part for our Green Crack F1 Hybrid Auto.
First of all, we have another plant that is growing straight, you can see it in the photos in the Zamnesia pot that is doing very very well. It is behind in flowering compared to this one because it was planted later but it drinks two liters a day, it has huge sunbathing leaves, and it is starting to flower.
The plant worked with the main lining shows a typical characteristic according to my experience of the F1 Hybrid: these plants have a very fast flowering so they start to mature a little earlier in the sense that they put out flowers the red pistils while the flower is still swelling, it happened to me with all of them, I think even with the RQS ones in the past. From the observation of all the F1s I can notice that you can see some red and the flowers do not seem very big but after a while they reach a nice size. This one is in the swelling phase and in these days it is starting to change color from the top. Very beautiful, I hope they swell the buds properly and it will be perfect.
The shape is very very beautiful as is the structure of this plant indeed.
We are still using soil, fertilizers and all the additives recommended by Plagron 100% organic.
With her We have switched to the late flowering program that wants the additives Sugar Royal, Pure Zym for another week and adds the flowering stimulant Power Buds and the myth Green Sensation. Obviously the basic fertilizer is now Alga Bloom.
---- Decide on the right soil and calculate your fertilization program based on the soil on the official website. -- www.plagron.com
Try a seed of this strain that drives us crazy..
---- https://www.zamnesia.io/en/10677-zamnesia-seeds-green-crack-f1-automatic.html
Zamnesia Description // Forget what you think you know about cannabis. Green Crack F1 Automatic by Zamnesia Seeds is here to shake up the entire industry. Using F1 genetics, growing cannabis has never been easier. These plants offer uniform and abundant yields. Get ready to harvest high-quality buds, full of flavor and amazing effects.
All the best that mother nature has to offer is at ---- www.zamnesia.com

Likes
22
Share


@PrairieFrostGrow
Follow
*
********* Week 7 - May 23 to 29, 2020 - Day 43 to 49 **********
*
Good veg week but was expecting more of a flower week😒 Pulled them out and did some stripping. Buds not setting and these two girls are not flipping like the other autos on the go. Patience not being one of my strong suits, in the past I moved plants around into lower light intensity and it helped them to set their buds.
These girls bud sites were not setting in early this week so the girls were put into the veg tent and put into a 12/12 light cycle, Wednesday Day 47. They stayed this way the rest of the week. The other girls are well on their way and these two girls are not coming along. Forcing them to set their buds into 12/12 becuase they all flower at that point😃 I could work on being patient and give them another week or two as some strains just take that long...........45 days though for these girls and most flip by this time.
Other than my lack of patience the growth is doing well and GSC is doing well and growing out of her funk from the transplant more. Looking rather odd with the roots wrapping over her.......poor girl......we will love her and look after her and in the end smoke the shit out of her frosty buds😂😂😂
Little more detail........
May 23/20 - Day 43
- GSC feed only - 5L with Velokelp, Massive @ 2ml, Dual Fuel @ 1.5ml, Rezin, Liquid Wt, Sensyzime @ 1ml = 750ppm and 5.9pH
- GSC has some hairs popping out over night. She is looking healthy today.
- GSC2 is fighting it all. She has been though a lot. She is taller now and wider but her bud sites “floppy” looking and pistols not plentiful yet.
May 24/20 - Day 44
- dry out day
- Moved GSC girls into Veg tent today
- problem is the humidity is only 50% and temp is only 73 degrees.
May 25/20 - Day 45
- water in the morning.....did a leaf strip int he afternoon......an evening watering with Vitamin B to calm them down a bit.
- 7:30am - 2L each with Sensyzime, Piranha, rhino skin, Rezin @ 1.5ml = 335ppm and 5.9pH
- the microbes and enzymes😃👍
- 8:30pm - 2L each with Vitathrive & VeloKelp @ 1.5ml = 350ppm and 5.8pH
- got some seaweed in there as well to calm them down........4L total in one day is not over doing it and with such low ppm.
- GSC is much thinner in appearance now.
- GSC2 is tough to do much. Stripped some inner growth but just need her to get bigger overall in order to clean her up properly.
May 26/20 - Day 46
- dry out day.
- GSC was moved back into the flower tent last night. Just give her the time she needs to transition,
- Left GSC2 in veg tent alone for now.
- GSC is 17” tall and GSC2 is still at 11” range.
May 27/20 - Day 47
- feed day for only GSC
- she was given 3L with Bud Ignitor @ 2ml, Dual Fuel @ 1.5ml, Piranha @ 1ml = 875ppm and 6.0pH
- GSC2 was still heavy to lift.
- Moved GSC back into the veg tent and set the light cycle at 12/12 to ensure she flips.
- GSC2 is looking stagnant.
May 28/20 - Day 48
- GSC2 needs watering as its been two days.
- 2L given with Massive @ 4ml. Vitathrive, Sensyzime @ 2ml, Dual Fuel @ 1.5ml = 1350ppm and 6.0pH.
- added another 0.5L of water to bring down the ppm to 1100........was too high.
- GSC is looking a little more relaxed today. No bud sites yet.....only one night though,
- GSC2 is looking more like she is transitioning though😀
- Will give them a couple of days at the reduced light cycle.
May 29/20 - Day 49
- dry out day
- girls still in veg tent under same light cycle.
- feel like GSC has grown bigger but no bud sites yet,


Likes
7
Share


@Zuppler
Follow
Vegetation Phase - Week 4
The Donutz ladies are cruising through Week 4 in style, with no major changes to their routine. Simplicity is the key: just consistent care, reverse osmosis water, and keeping the vibes steady in the tent. Growth is strong and steady, with no signs of stress or issues.
Updates & Maintenance:
Watering: Still exclusively using RO water. No overwatering, just light and consistent hydration as needed.
Lollipopping: The plants got a little cleanup this week. Lower growth was trimmed back again, keeping the stems neat and focusing energy on the upper canopy. This helps maintain that signature Sea of Green look and primes the plants for fat main colas later.
Observations:
The plants are uniform, healthy, and stacking nicely. Each one is starting to show its individual character, but they’re all working toward that tight SOG canopy.
Marienkäfer buddy is still around, keeping the ecosystem in balance. No pest issues, no drama.
Next Steps:
It’s all about staying steady and letting the Donutz do their thing. The lollipopping ensures the plants are focused on upward growth, and the stable environment in the tent is creating the perfect conditions for success. Week 5 is around the corner, and everything’s looking set for these plants to keep stacking up!

Likes
28
Share


@Trickybis82
Follow
Hi,
Final few days before harvest with wedding cheesecake. Cannot wait.
Will update soon.
Grape gushers still has a few weeks left before she is ready.
Will be back to update.


Likes
132
Share


@SwissKush
Follow
Tag 36 (29 tage aus der erde)
- alles gut
Tag 37 (30 tage aus der erde) - 1500ml wasser
- alles gut
Tag 38 (31 tage aus der erde)
- alles gut
Tag 39 (32 tage aus der erde) - 1500ml wasser
- alles gut
- silikat auf den boden um den stamm gelegt (4g)
- untere Blätter entfernen
- video
Tag 40 (33 tage aus der erde) - 1500ml wasser
- Ich begann mit der "Pre-Flower" phase der nahrstoffe.
- 1ML/L Bloom, 1ML/L Grow
Tag 41 (34 tage aus der erde)
- alles gut
Tag 42 (35 tage aus der erde) - 1500ml Wasser
- alles gut
Processing
Likes
13
Share


@Andres
Follow
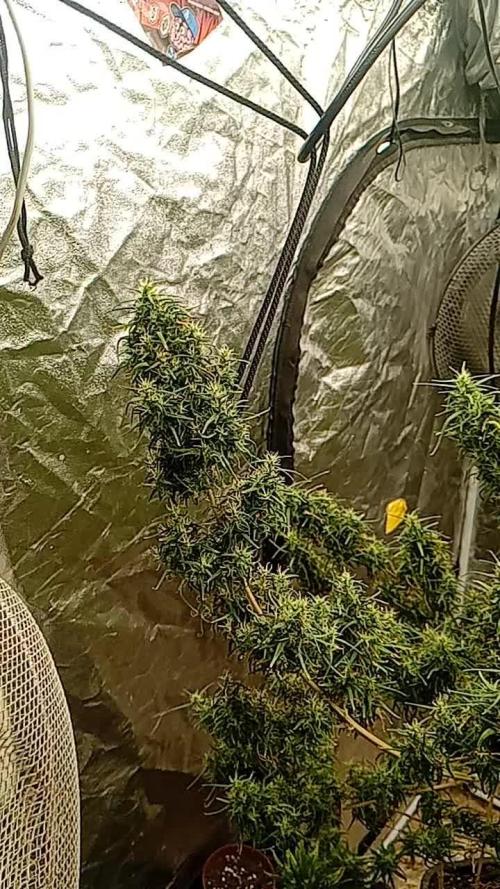
She is a monster measuring 1.94 cm 6'4 ft the same as me. She grew slow due to cloudy days. she is 2 different processes the bottom is the list and with big buds ready to be cut. The upper part has just begun flowering. her buds were cut at the bottom with 5% 15% amber in different buds. There are some big buds. I hope almost all ready as soon as possible this spring
