Likes
Comments
Share
Likes
4
Share
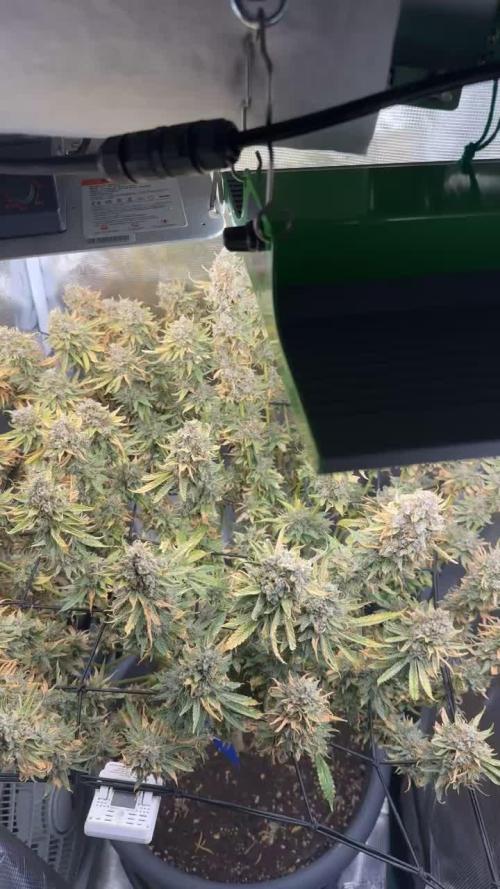
It's a snow storm going on in this tent! Just luv how frosty the buds are getting 😀
Likes
11
Share
The plants are now in full stretch and I have done some defoliation and LST in the last week. 2 plants came out to give the others enough space. I saw that I had significantly too much nitrogen in my plants. You couldn't really see it under the LED light. The next few times i give them pure water.
Likes
9
Share
@Ronin716
Follow
Week 3... She was still gooning but growth started to EXPLODE!! So I decided to LST her a bit and see what that’s all about. I may or may not have week 2-3 photos mixed a bit. I’m putting this together in week 4 so I don’t have the best documentation from back then 😅
Likes
6
Share
@Gromie
Follow
Started the new nutes a few days ago w/ epsom salt. Before that, for a day & a half, I used plain pH'ed water & trimmed off affected leaves. Such a slow grow 😕
Likes
12
Share
Performed some HST this week. Pics and video were taken 2 days after the bending. I bent the main stalk a little lower than 1/2 way down. She was getting a little closer to the HPS light than I liked (but no signs of light burn). I expect her to stand straight up again in a few days but with a new knuckle at the bend point. Then I'll probably bend her over again 👍
Likes
43
Share
START OF WEEK 4 FLOWERING. NUTRIENTS SAME 4 ML PER LITER RO WATER OF BOTH A & B. 2 ML PER LITER BIG BUD. MIXED UP 8 LITERS OF NUTRIENT SOLUTION --------------------------------------------------------------------------------------------------------- Day 64 April 18th - 2019 Both ladies had a little trim to get rid of thick interior. Day 64 April 18th - 2019 Both Jessica Rabbit & Elly May were fed 1.5 liters of nutrient mix. Day 64 April 18th - 2019 Temp in tent is @ 78.4° F. Day 64 April 18th - 2019 Humidity in tent is @ 51%. Day 64 April 18th - 2019 Jessica Rabbits Coco temp is @ 70.2° F. Day 64 April 18th - 2019 Elly Mays Coco temp is @ 70° F. --------------------------------------------------------------------------------------------------------- NOTE - Day 65 April 19th - 2019 The Lady in the coffee can is a clone from the Blue Cookies. The clone was 2 weeks old put in soil in the coffee can It was put in the tent straight to flower No Veg time at all the clump of leaves at the bottom was how tall it was. I have been feeding Her the same Nutrients I am using for Coco flowering with the Big Bud for Coco. --------------------------------------------------------------------------------------------------------- Day 65 April 19th - 2019 Both Ladies are looking good after their little trim. Day 65 April 19th - 2019 Temp in tent is @ 81.1° F. Day 65 April 19th - 2019 Humidity in tent is @ 55 %. Day 65 April 19th - 2019 Jessica Rabbits Coco temp is @ 71.8° F. Day 65 April 19th - 2019 Elly Mays Coco temp is @ 71.6° F. Day 66 April 20th - 2019 Ladies are looking good coming alone. Day 66 April 20th - 2019 Temp in tent is @ 79° F. Day 66 April 20th - 2019 Humidity in tent is @ 40 %. Day 66 April 20th - 2019 Jessica Rabbits Coco temp is @ 69.3° F. Day 66 April 20th - 2019 Elly Mays Coco temp is @ 69.4° F. --------------------------------------------------------------------------------------------------------- Day 67 April 21st - 2019 Both Ladies received 1 liter pre-mixed solution --------------------------------------------------------------------------------------------------------- Day 67 April 21st - 2019 The girls are looking fine. Day 67 April 21st - 2019 Temp in tent is @ 79° F. Day 67 April 21st - 2019 Humidity in tent is @ 47 %. Day 67 April 21st - 2019 Jessica Rabbits Coco temp is @ 70° F. Day 67 April 21st - 2019 Elly Mays Coco temp is @ 70° F. Day 68 April 22nd - 2019 Ladies are looking good no issues. Day 68 April 22nd - 2019 Temp in tent is @ 71.2° F. Day 68 April 22nd - 2019 Humidity in tent is @ 57 %. Day 68 April 22nd - 2019 Jessica Rabbits Coco temp is @ 67.6° F. Day 68 April 22nd - 2019 Elly Mays Coco temp is @ 66.6° F. Day 69 April 23rd - 2019 Both Ladies looking good. Day 69 April 23rd - 2019 Temp in tent is @ 69.4° F. Day 69 April 23rd - 2019 Humidity in tent is @ 61 %. Day 69 April 23rd - 2019 Jessica Rabbits Coco temp is @ 65.7° F. Day 69 April 23rd - 2019 Elly Mays Coco temp is @ 64.8° F. Day 70 April 24th - 2019 Both ladies are coming alone. Day 70 April 24th - 2019 Temp in tent is @ 67.1° F. Day 70 April 24th - 2019 Humidity in tent is @ 61 %. Day 70 April 24th - 2019 Jessica Rabbits Coco temp is @ 65.2° F Day 70 April 24th - 2019 Elly Mays Coco temp is @ 64.0° F.
Likes
26
Share
@Elpicor
Follow
The Canna Crumbly cocoa biscuits are always a delicious opportunity to fill up on energy. They are easy to prepare!   Ingredients: 30g Bitter Cocoa 300g flour 200g butter 100g sugar 5 eggs 1 bar of milk chocolate with whole hazelnuts HOW TO PREPARE THE CHOCOLATE BISCUITS 1. Boil the eggs for 8 minutes, cool them and shell them.  2. Blend the egg yolks and set aside.  3. Mix the butter in a bowl with the sugar, add the flour and egg yolks, mix, then add to the mixture a bar of milk chocolate with whole hazelnuts previously blended into small pieces (I used the knife for a coarse mince) 4. Add the cocoa to half of the mixture and let them rest in the refrigerator for about half an hour.  5. At this point, roll out the pastry to about half a centimetre, then create the variegation between the two doughs (here you can have fun), once the biscuits have been formed, arrange them on a baking tray with baking paper and bake everything for 12-15 minutes at 170 degrees. IMPORTANT: I put double the recommended dosage for the butter, thinking I was an expert smoker, but, next time I will follow the doses because I slept 12 hours, the edibles have a prodigious effect but you need to calibrate well otherwise you risk going to sleep at 8 pm!😇💤
Likes
43
Share
Pronti per iniziare un nuovo ciclo aspettando che queste siano pronte per fumarle... questa sera mi sentirò un po più solo, dato che non andrò a visitare le mie cucciole e non controllero ec e ph... Inizio al più presto.. la pianta é vita!
Likes
5
Share
@InsideAz
Follow
Added a second scrog net for the taller plants last Friday. Constantly defoliating to increase light penetration but not trying to stress the plants. (Selective leaf picking) Plants loved the tea I have them last week. Visual improvements in every plant 2 days later. Top dressing later this week on 9/29: 5 tablespoons Gaia green 444 5 tablespoons Gaia Green 284 15 tablespoon Wiggle Worm Earth Worm Castings Light increased to 75%
Likes
27
Share
1/20/2023- So much to do pre grow and over the next 16 days, absolute first order of business is that I have to take down my current Grow---TIMBER-- Then I have a list of things I have to get done in order to be ready to start this grow 1 Feb. With that said T - 2 days until start 48 hour Flush T - 2 days until Start 48 hours of Light T - 4 days until TIMBER!!! Items that need to be done before 1 Feb 2023 1. I need to clean the tent out 2. I need to clean the equipment- Proper Sanitization between grows in Hydro is a must!!! 3. I need to get the hole in the ceiling above my tent repaired- For my last grow I had a deep sink installed in my grow room, to make Hydroponics a little bit easier and have a water source in the same room. The seals on the pipes they were installing broke and leaked through the ceiling causing some damage all the way across my grow room, I was already weeks into my grow and couldn't risk them working above my tent and it would have been very awkward positon for them to be working in as well, so have to get this done quickly between chop and germination. 4. I have to install my new light- I was using a Vivosun 4000 and for this grow I am switching up to a Spider-farmer SF 7000. 1/20/23- For this upcoming grow I am working with M/F photo seeds so I ordered 4 Sex determination kits. I recieved my my 4 Sex determination testing kits from Rimrock Analytics today. I will be using these to test my plants at week 2 of Veg so that when/if I take clones I know I am taking them off females. As well as I don't want to accidently pollinate my tent during this grow I am looking for big beautiful buds not seeded buds. :-) 1/24/2023- Harvest of current grow- Started at 2:00pm and finshed wet trim and firt batch into the freeze dryer. 1/25/2023- Next batch into the freeze dryer and cleaning all my equipment for this Grow. T-1 Day until the workers are supposed to be here to fix the hole in the Grow Room. T-3 days until I instll my new Gorilla Grow Tent and my New Light Spider Farmer SE-7000 for this grow. T-7 Days until Start of Germination 1/26/2023- Harvest is done ran through the Freeze dryer and dry tim completed. 1/27/2023- Grow Room repairs completed. Hole is gone Letting the paint dry before I install the new tent. T-2 days until Install the New Gorilla Grow tent and the new Light T-3 days until I put the hydro equipment in the new tent T-5 days until Germination 1/29/2023- Day 0- Final Pre Germination activities Germination Start T-3 days The paint on the ceiling was dry and it was time to finish prepping for Germination. I got the following items knocked off my list. New 4X4 Gorilla Grow Tent is up and ready New Spider Farmer SE-7000 Light is installed- Thanks Moony Grows for the suggestion and for the Code that got me some money off and free shipping (Moonygrows)!! I turned the lights all the way up to max and set the timer to 18/6 0600-0000. I will keep an eye on the temperature and humidity without my plants and see how hot it gets with the new light. I put my Hydro system back together and put in 40 gallons of water into it, time to monitor for leaks the next few days. I Setup my cloning machine for Germination Days 3-11 1/30/2023 let me break down the situation, ROOM in the TENT.. Enough said.. No really I tried putting my exhaust system up in the new tent with my new light, The light is so big corner to corner that it really didn't give me enough room for the lights be be raised, with the exahust hanging the buckets my plants are Starting in are 2 and 1/2 feet off the ground, great for plenty of room for roots but not so great for upwards space for the plant to grow. In a 6' 11 tent with the exauhst in side and hanging that only gave me a little over 4 feet of grow room to play with. My last grow if you saw my diary, anyone could tell I was struggling to keep the buds off the lights. No good, Since space was such an issue I was running my carbon filter inside on the ground but It really needed to be up sucking the heat out not shooting the cool out. With that setup I was sucking air through the filter and pushing it out the tent at a bottom exhaust hole cold out. Wasn't doing me any good for my heat. I was hitting temps of up to 85 degrees. I bought a portable AC unit and have been running it in the grow room to try and keep temps below 85 and I have had to lower the power on my lights during grow also not ideal.. With that said a friend of mine MoonyGrows (Check out his diary) took the time to look at my issue send me a picture of my grow tent setup with detailed instructions on how to suck the air out from the top but putting my filter and fan on top of my tent so no room issue and I am sucking the air out from the top where the heat is instead of pushing the air out from the bottom where the cool is... THANK YOU MoonyGrows For taking the time to help me get this straightened out.. Now I have room and I have the exhausts working right and now my temps with everything at 100% are topping out at 80 this dropped the temp by 5 + degrees at 100% max. T-2 days until Start of Germination Prepped my seed tray with humidity dome Prepped my Rapid Rooter plugs. I Used RO water, and I added a few drops of Hydrogen peroxide to Oxygenate the water. I then PH balanced between 5.7-6.0 the same that they will be getting in the Cloning Machine and when they get to thier final grow pod. I perfere the 5.8x range and I hit 5.84 for these rapid rooters. If you want to see a complete video on the process HowWeedGrow has an amzing video that shows step by step how to do it and explains it better than I ever could including how to plant the seeds. Which I will cover when I get to that step on Wed. https://www.howweedgrow.com/how-germinate-weed-seeds-cannabis-rapid-rooters/ 1/31/2023 T-1 day until Germination Start All set and ready have my Rapid Rooter plugs ready to go have my seeds out.. Have my seed tray warming up tonight. Tomorrow morning right into the Rapid Rooter then strait into the tray. I will spray the dome to start the humidity in there. 2/1/2023 Germination Day!! Let the games begin! 0600am Put the seeds into the Root Riots. And then put the seeded Root Riots into their first home the Seed tray. I have them under the light 24/7. Sprayed the dome 7:30pm Sprayed the Dome to keep humidity going on the dome. 2/2/2023 Day 1 of Germination Sprayed the Dome in the morning Sprayed the Dome in the evening 2/3/2023 Day 2 of Germination Roots are starting to come out the bottom of the root riot plugs and the heads are slowly popping out of Number 4 just below the surface. Afternoon- Number 4 has popped up Evening- Number 3 has popped up as well. Happy Dance!! 2/4/2023 Day 3 - Germination Surprise Surprise Surprise- all 4 have now poked their heads up.. Happy day!! 100% Germination succeeded. Now major milestone to track is how many are female and how many are male. I will take look at the roots this afternoon/evening and see if they have enough root to go into the cloning machine for the next 7 days before they go into their Hydro Pods. Day 3 - Germination - Evening.. Roots looked good and they were tall enough to make it into the cloning machine. Now that they are all in the cloning machine I have switched the lighting to veg state 18 on 6 off. 2/5/2023 Day 4 - Germination - Morning All the Ladies (fingers crossed) looking great stretching nicely and look nice and green, Photo synthesis underway.... UPDATE!! After a very interesting POD cast on FSTS by Dr. Bruce Bugsbee from Utah University, I have shifted my lighting to 24 hours on through seedling and then I am going to shift to 20 hours on the rest of Veg. 2/6/2023 Day 5 - Germination While Checking on my conditions inside the new tent last night, I found that the Humidity was down to 39 Percent. I added an AquaOasis Cool Mist Humidifier, the reason I selected this humidifier is that I needed one that could be turned on and off utilizing my Inkbird Humidity Controller IHC200 that I have my Pro Breeze Dehumidifier currently running with. Root structures are starting to get there about 1/4 of an inch. 2/7/2023 Day 6 - Germination Everything seems on track more roots poking out of each today. They are each getting a little taller as well. Checked in the evening and number 3 was drooping the Root riot plug on the bottome was dry and the roots were not in the water yet. I raised the water just enough that the longest root that was sticking out is now hitting the water. 2/8/2023 Day 7 - Germination Everything looked good while checking in on them this morning number 3 is now full up and no droop again. 2/9/2023 Day 8 - Germination T-2 days until Plant into Forever Pods and we start week 1 of Veg .. :-) Surprising thing to me is that number 1 and 2 were later in popping then 3 and 4 but the roots are growing longer in 1 and 2. 2/10/2023 Day 9 - Germination Number 1 and Number 2 are definitely ready for transplant today.. Based on how they were yesterday and where they are today I am hoping by tomorrow 3 and 4 are ready. Today they look to me where 1 and 2 did yesterday.. I really hope 3 and 4 catch up by tomorrow since.. T-1 day until transplant to new/ final home for grow. Need the roots long enough to have some clay down in the basket to keep the root riot out of the water and only roots in the water.. 2/11/2023 Day 10 - Germination Today they got placed in thier forever Home, 7 days from Sprout and 7 days until Week 1 Start. PPM- 180 this is water out of the Tap Temp Water: 70.7 Temp Tent: 77 Humidity: 40% I have a humidifier going 24/7 to try and bring this up.. I also have Humidity Domes on each plant. 2/12/2023 Day 11 - Germination Sprayed the domes, all are looking good.. Nothing much to do at this phase but Keep monitoring the PH level in the system and making sure they have a comfortable home. T-6 days until Week 1 start 2/13/2023 Day 12 - Germination Sprayed the domes, They were looking a little yellow today so I moved the light down to assist. Nothing much to do at this phase but Keep monitoring the PH level in the system and making sure they have a comfortable home. T-5 days until Week 1 start 2/14/2023 Day 13 - Germination Sprayed the domes, They were looking a little Florissant yellow today, with what looks like slight burn on the tips, I talked with a fellow grower and we agreed that It was probably that I was drowning them, Yes you can drown you plants even in Hydro, but only early on.. :-) It usually happens with the water being too high, which soaks not only the roots but the medium (root Riot plug in this case). I lowered the water from touching the bottom of the pot to about 1" away. This will probably take 3-4 days to resolve. I will continue my daily monitoring. T-4 days until Week 1 start 2/15/2023 Day 14 - Germination Sprayed the domes, continue my daily monitoring they look a little darker green instead of lime green now that I lowered the water levels in the system, so I think that I might have resolved the issue but it will take a few days for recovery to happen. T-3 days until Week 1 start 2/16/2023 Day 15 - Germination I looked in on them this morning, 3 and 4 look like they are doing well and recovering nicely. Number 1 not so much it has brown spots on the leaves, this very well can still be a side effect of the overwatering but I decide to go ahead and add Nutes earlier than I was planning just incase. I was going to wait until Saturday but I think intervention is necessary now especially after drowning them early on. I added 1/2 what I am planning on adding for week 1 start. I also think I am going to adjust my chart to add 1/2 2 days after plant from now on. I don't think it would hurt it to have some Nutes to pull from. .25ml/Gal Calmag = 12.5ml 1ml/gal GH FloraMicro= 50ml 1ml/gal GH FloraGro = 50ml 1ml/gal GH FloraBloom = 50ml T-2 days until Week 1 start = I will drain the system and start it over on Saturday with Week 1 Nutes. 2/17/2023 Day 16- Germination I didn't even want to post today after looking in on them this morning, 3 of the 4 are now showing signs of dronwing.. Brown spots on the leaves, the water levels were still too high.. I drained about another inch out of the tanks.. Will see how quick they recover.. I start week 1 tomorrow and will have to ensure my water levels are at least 1" away from the basket on this round.
Likes
22
Share
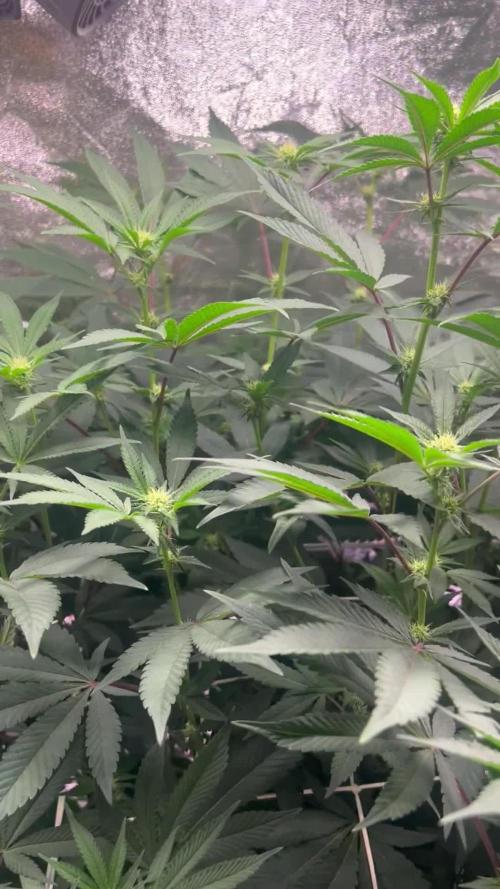
Starting Week 7 Veg defoliated 10% Brewing a light prebloom cocktail (ACT) for 30 hrs . Nutrients should be ready for switch 2 bloom next week.😁 (EJ Grow, Bloom, Meta-K, MIcroblast,Catalyst, Hi-Brix) @ 30% strength
Likes
16
Share
Day 57 No water new bigger fan loosely tied her in and dropped net an inch - most hopefuls had made it up there themselves but some need encouragement - anyway pics speak for themselves Day 58 500ml plain rain She looks a little confused - she hasn't got all the stuff off from underneath yet - just letting a couple of latecomers get to the net, then I'll whip the lower factory leaves off and fim for last time Day 59 Just 100ml plain rain - nutes tomorrow Day 60 2:1000ml TIger Bloom Grow Big 1.5:1000ml Calmag 3:1000ml Big Bloom 7:1000ml Unsulph Molasses in 700ml pH6.7 water Temp 27C rH55 Last Grow Big - Bloom all way now Day 61 Got the temp / rH just right now she is drinking 800ml 6.5pH rain water in 24hr period - lights good height but loads of room to raise so that's cool. Checked for mites - found a black one a week ago and squished it - defoliation prob helped a great deal coz no signs anywhere of any larvae, Love the genetics of this plant. The uniformity of the leaves just stunning - would be a good mother - did try cloning a few cuttings but 3 wks into flower... It is a myth you can't do cuttings in early flower but it is way harder than doing them like 2 wks before and before you throw the hormones all over the place by transitioning LOL and as I can't be bothered to do it properly - they will most likely all die 😁 just did coz hate to throw away a stem cutting 😏 - lol they all died Day 62 300ml ph6.5 water Day 63 3:1000ml Big Bloom 2:1000ml Tiger Bloom 1.5:1000ml Calmag 7:1000ml Unsulphured Molasses in 670ml pH6.5 rainwater
Likes
30
Share
@TightNugs
Follow
Plant 2 still in flower,gonna give her another week or 2. Split her to get some light in,only feed overdrive for another 5 days. 🤞🏴󠁧󠁢󠁷󠁬󠁳󠁿🍁 Light-Voost VST 120 veg,VST 240 flower. https://voost.com/ 🍁🍁🍁🍁 Breeder- white label purple bud auto
Likes
69
Share
@Natrona
Follow
Sour Jealousy Auto FastBuds 2025 Outside Grow Week 7 May 11-17 FLOWER 1 Sour Jealousy has started to flower. She is 18” now after a 6-inch spurt. She really benefitted from last week’s rain. This week’s weather has been cloudy and sunny but the temps ranged from 93 high and low of 53 at night. I watered and fed 2x with Kelp 30 ml/g and TPS1 4ml/g. I included some garden pics and some cool boats. I live in a coastal area with 6 bridges. Since maritime law still governs commerce, the boats have the right of way to vehicles. On this day I got stopped by the bridge opening and was close enough to see the boats. A parade were luxury yachts. Your likes and comments are appreciated. Thanks for stopping by. Growers love 💚🌿 💫Natrona💫
Likes
11
Share
Vamos familia, actualizamos la cuarta semana de floración de estas Lemon Cherry Runtz de FastBuds. La temperatura que estuvo entre los 24-26 grados y humedad dentro de los rangos correctos. En cuanto a las plantas las veo verde sano, estiraron bien y ensancharon bastante también. Se nota que los nutrientes de la marca Agrobeta cubre todas las necesidades de cada ejemplar. Las flores empezaron a formarse, por el momento todo correcto, os dejé también alguna novedad y un cambio en la sala, agradecer al equipo de Mars hydro por el nuevo TSW2000. (los últimos 5 años cultive solo con los leds de esta marca) los cuales probé, TS600, TS1000, TS3000, TSL2000. - os dejo por aquí un CÓDIGO: Eldruida Descuento para la tienda de MARS HYDRO. https://www.mars-hydro.com Hasta aquí todo, Buenos humos 💨💨💨
Likes
4
Share
Start of week 6, day 45, 7th oct. All topped, and have had a problem with little caterpillars, switch to flower soon, so far so good.😜
Likes
11
Share
@GrowShock
Follow
Очень липкие цветы, при дефолиации ножницы склеиваются после 5 листика, местами начала сочится гуттация. Запах на столько сильный что весь дом пропитан уже этим ароматом терпенов. Неделя промывки и Харвест как же долго я её жду, честно говоря уже устал
Likes
82
Share
Heeey all! Sorry for the huge amount of photos but this week was crazy. So many things happened and my lack of knowledge clearly showed up. I ended stressing one of my plants for no reason! 😱 At the start of the week everything was normal until I noticed that one of Roko's buds looked weird. It seemed to be too dry and orange for my tastes and I didn't know what it was. Obviously I started to ask around and I got so many mixed messages haha. Some people said it was nothing and I should not worry about it and others said they were 100% sure it was botrytis or budrot... aaaaaaaand I got paranoid lol. 😵😨 At first I tried to keep calm and ignore it for one day but the next one the bud looked even worse and that's when I feared the worst. What if it's really budrot? In general the values I write in here are approximates or an average of the week.. and usually my tent never goes over 60% of RH (in the dark it stays between 50% to 60% when I water them and on some rare occasions it reaches 65%). This time, after I checked the thermometer it said "75% of RH" but I did not know if it was during their sleep time or maybe some time after the lights went on) so once again I feared the worst! What if the plants stayed all the night with that amount of RH? Was that enough time for them to develop budrot? What if it's still nothing? Yikes. 😭 I had to do something and I did, I wasn't going to risk everything! I started removing the worst looking leaf to see if there was anything mushy or ugly between it and the pistils but I didn't see anything (maybe I was safe and that was something else? Or maybe the budrot was even deeper and I could not see it?) After reading I realized that the best idea was to cut the bud in half and then slice it to "see" if there was anything inside... so I did it and absolutely nothing showed up 😖! Those were good news! Sadly tho the poor plant had to go thru some stress after cutting that bud in half (at least from what I saw the insides were tightly packed and the photos showed some really cool stuff) The rest of the week was uneventful (compared to what I feared haha) and some leaves started to change even more in color (I love it). I think I'll start with the flush next week or the one after that one. There are some amber trichomes...! Thanks all for checking my diary! Hopefully you'll all find the pictures interesting! PD: None of the plants have seeds in them, even when one of the sliced buds seemed to be making them!