
Processing
Likes
Comments
Share


@dutchMASTAkilla
Follow
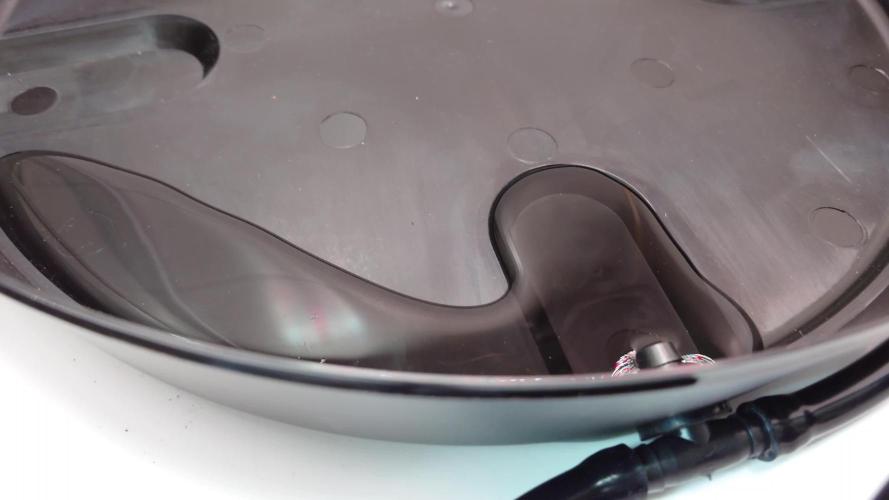
Added frame to keep tent from being sucked in by filter fan.

Likes
12
Share


@iLoveGoodWeed
Follow
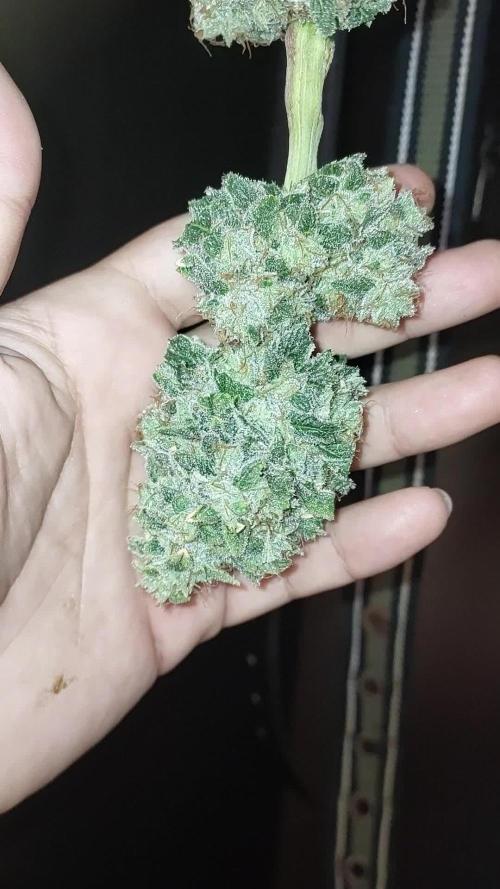
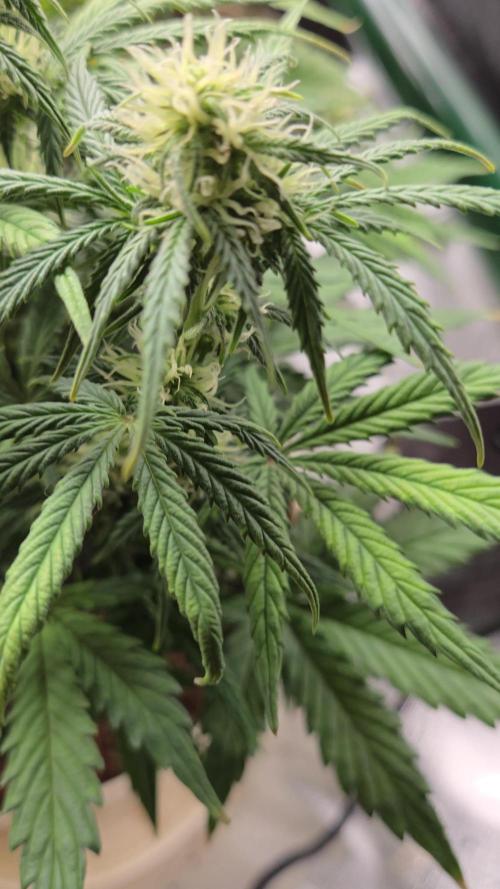
The plant have nuts lock I did flush her bud maybe a bit late and it's not looking good for this one buds hope fully she will recover a bit

Likes
63
Share

@SundancerS
Follow
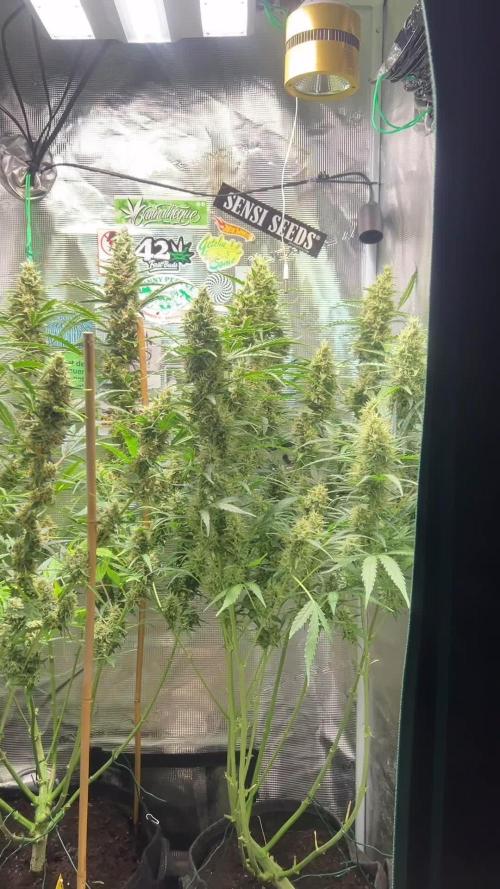
Aufgrund eines spontanen Urlaubstrips haben wir für 4 Tage das automatische Bewässungssystem von Spider Farmer aufgebaut.Eine heikle Angelegenheit in der Endblüte, aber hey, wer nicht wagt, der nicht gewinnt, oder?
Spoileralarm: Alles lief besser als erwartet und die Broccoli hat den Wasserspender einfach als ihren persönlichen All-You-Can-Drink-Pool genutzt. Sie hat sich mehr als 2 Liter pro Tag gegönnt, als ob es keinen Morgen gäbe. Allerdings hatte Sie nur Wasser ohne Dünger im Reservoir.
Die Buds? Nun, die sind mittlerweile so massiv, dass wir die Pflanze kaum noch sehen, sie hat sich mittlerweile mehr in einen „Budbaum“ verwandelt. Die Broccoli hat quasi das „More is more“ als Lebensmotto adoptiert. Sie bleibt trotzdem erstaunlich stabil und es gibt keine umknickenden Äste, was wieder für eine Top-Genetik von Zamnesia spricht!
Alles in allem: ein völlig entspannter Urlaub für die Pflanze, bei dem sie uns quasi mit einem Bud-Marathon überrascht hat. Sie hat ihren Job gemacht und wir freuen uns auf die nächste, wahrscheinlich letzte Woche. 😎 😊 😘

Likes
13
Share


@ChitownCannaChica
Follow
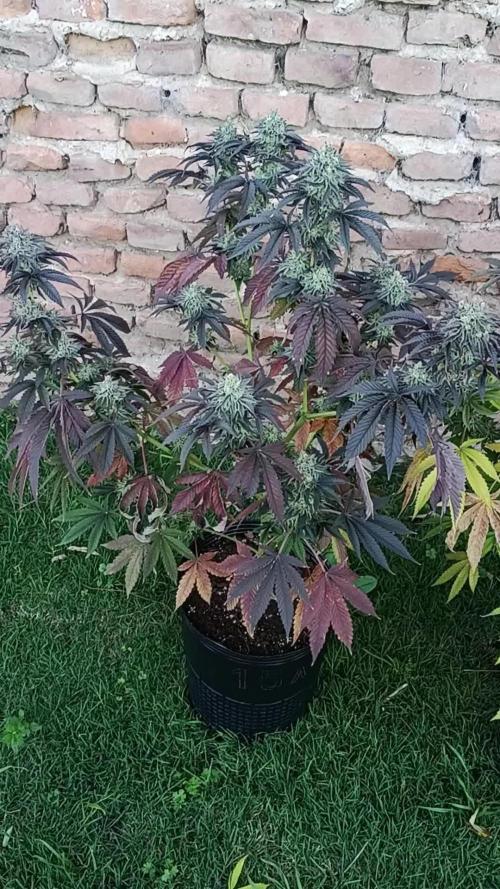
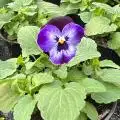
Been hard to keep the water levels correct and having to up the feeding! Have a little dose of dynomyco and greenhouse too dress. Excited to see she is a purple pheno.
✌️💚🌿💨

Likes
19
Share


@Iamdisabl3dsgirl
Follow
Stacking nicely as we finish off week 7 of these two 420 fast buds Gorilla Glue autos.
Likes
2
Share

@MafuMome
Follow
O fenótipo #1 foi colhido com 56 dias. O fenótipo #2 foi remanejado e permanece na tenda por mais uma ou duas semanas.

Processing
Likes
12
Share


@PacoMendoza420
Follow
The seedlings came out 2 days after being planted straight into the medium, watered with a few drops per day to keep up the moisture.
Mimosa Evo is a new strain at Barney's and it will be interesting to see how it grows and reacts to mainlining.

Likes
1
Share

@Danger_Mouse
Follow
Plantas super faciles de cultivar y muy resistente a Botritis (las 3 Radical Juice fueron las unicas que no tuvieron ni el mas minimo sintoma a pesar de que 6ta y 7ma semana de floración fueron dias de muchisima humedad ambiente). Hare la reseña final cuando este secos los cogollos. El olor en verde recuerda un poco a Tangilope, Clementine, NYC Diesel.


Likes
6
Share


@Northern_Ent
Follow
Sep 7: surprise hailstorm at about 8 pm did minor damage to other plants but these were fine. Harvest continues.
Likes
17
Share


@ArtisticGrown
Follow
Here we are with the papaya bomb!!! Lets go! I did some serious defoilation coming into this week! You can see the healing from the Hst, and Lst I've been using. I had a really busy week last week and wasnt able to update! Argggg I always feel bad when I dont! But its okay we are here! She is doing great looking strong and getting stronger day by day! Im looking to make the flip to 12/12 in about 1 more week! I dont wanna push this plant to be too big as she is only in the 2x2. I have intentions of focusing on a few main coals! Try to get em big outta the living soil bed! Learning a lot on living soil while all organic! Any tips tricks let me know

Likes
6
Share


@Growingbythemasses
Follow
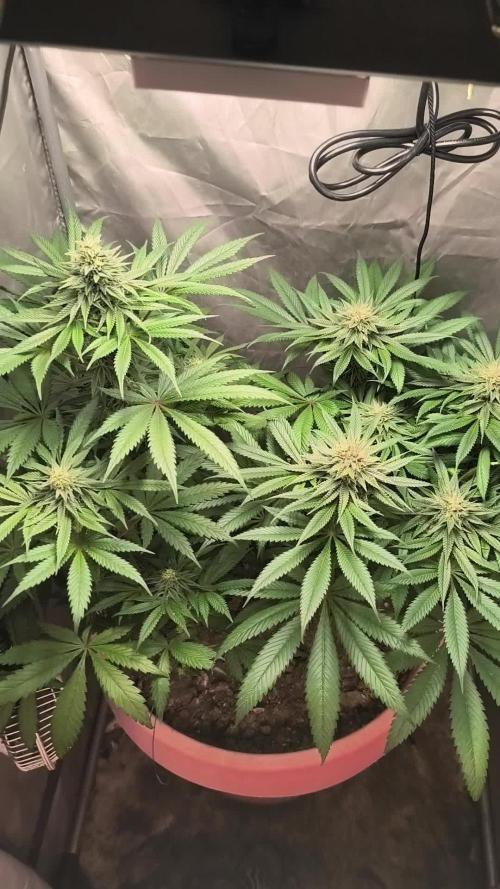
3 week flush. Keep in mind this my first grow so I’m open to criticism. Can anyone predict the yield?

Likes
6
Share


@EKWCR
Follow
The Black Cream on the left corner stretch a lot and on of the Red Poison is a little bit late and smaller than the other. She just start to flower.
All the plants need very few fertilizer, i already have tip burn but nothing terrible.
They flower a lot faster than i tought.
Right now i'm trying to limit the stress of the plants and give them 25% of the recomended dosage every 3 watering.
They are vigorous and react pretty well to "intense" LST.
Likes
11
Share


@Keep_it_Cleannabis
Follow
It's water day, everything is going good, although it smells more citrus the the gass I was hoping for but we shall see how it turns out

Likes
37
Share


@AutoCrazy
Follow
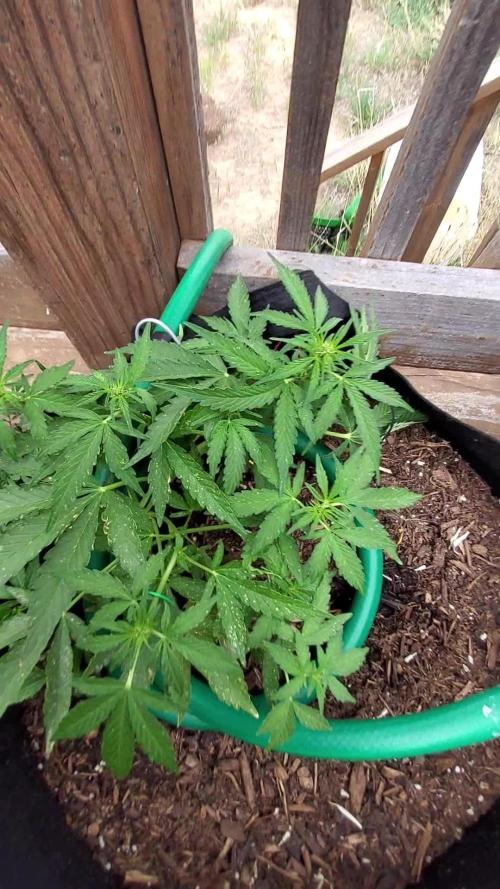
Well this plant is starting to take off exponentially in her new pot. I may have to do a big round of topping to keep her height down as I want to have the option to cover her up with the structure she is under and she is getting damn close to being to tall at this point as I anticipate there is going be some stretch once she starts to flower.
I have done a bunch of cleanup of lower and inner growth this week but she seems like she almost needs more again lol.
I can’t wait to see this lady in flower.
😎🍿🍻🌱

Likes
7
Share

@bkickstand
Follow
📋 Grow Diaries: Week 2 of Flowering – The Northern Lights Auto Sisters
The Northern Lights Autoflower sisters, Charlotte and Makayla, have confidently stepped into Week 2 of true flowering. The initial transition phase is settling, and both girls are busy stacking up distinct pre-flower clusters on the deck.
Because these are autoflowers tracking on a fixed schedule, this week clearly illustrates how a complete divergence in training strategies can entirely alter the plant's architecture and budding profile.
🎀 A Study in Contrast: Natural vs. Pinned Down
While sharing the exact same indica-dominant genetic backbone, the structural contrast between the two sisters is night and day right now:
Charlotte (The Natural Tree):
Training: Left completely alone to do her own thing, Charlotte has been allowed to grow naturally.
Structure & Flowering:** She is exhibiting a textbook, upright Christmas tree shape with a strong apical dominance. Her primary central cola towers over the rest of the plant, heavily stacking clusters of white pistils along a single vertical pillar. Her side branches gracefully skirt the main trunk, catching excellent sun from her upright stance.
Makayla (The Pinned-Down Canopy):
Training: Placed under intensive low-stress training, Makayla has been meticulously pinned down closer to the soil.
Structure & Flowering: By forcing her main stem down horizontally, her natural apical dominance was broken. As a result, her side branches have been thrown into the spotlight, rising up to create a much flatter, bushed-out tabletop canopy. She sits significantly lower to the pot than her sister but features multiple evenly distributed budding tops across her wider footprint.
The Mid-Bloom Menu: Dialing in FOOP Organic Bloom
To fuel this rapid flower production without stalling their internal clocks, the girls have been transitioned onto a premium organic bloom regimen:
FOOP Bloom 1 & Bloom 2: This core base duo is delivering a highly bioavailable punch of organic phosphorus, potassium, and fish-based micronutrients to accelerate calyx stacking and strengthen stem development.
FOOP Sweetener: Infused into the feed to load up the root zone with complex carbohydrates, driving up microbial activity in the soil and giving the sisters the raw fuel they need to crank up early resin and trichome synthesis.
Irrigation Setup The green automated drip rings (1000003513.jpg) ensure this organic blend is evenly distributed across the entire surface of the fabric pots, feeding the root zones consistently without creating dry pockets.
Pistil Development: White hairs are actively grouping up at every node site, most prominently on Charlotte's dominant main tower
Foliage Check: The fan leaves on both plants remain an incredibly vibrant, healthy green (1000003325.jpg), showing that the FOOP nutrient uptake is smooth and perfectly balanced for this stage of life.
Grower's Note: Watching a single strain express itself in two totally distinct structural shapes because of a simple twist in training is what makes grow diaries so rewarding. Charlotte is maximizing her main vertical column, while Makayla is converting her flat footprint into a broad field of tops. Next week, the bud swelling truly begins!

Likes
13
Share


@WeedM8
Follow
Hello m8 welcome to this journey with me in this diary will have very interesting strains hope u find something useful
Persian Girl 🏝️🧞♀️
- [ ] 1st week Veg: germinated in substrate lighting very close so it jets medium high humidity after the 3rd day they started sprouting
- [ ] 2nd week Veg: this week my ventilator broke down and as the temperature stayed very warm nothing developed much
- [ ] 3rd week Veg:fortunately this week i had fixed the ventilation and the temperature has go down a bit allowing the little plants to develop and reinforce
- [ ] 4th week:very good developments in this week I already started feeding a bit two times but i didn’t have to…once was enough
- [ ] 5th week Veg:this week they were very strong green i only had to water them good and keep the ventilators going no stop .They have good hight already ,but as i have to strains together. I want to transplant them when the hight of the other one have stretched… I’m thinking to transplant next week if not the next one Hello m8 welcome to this journey with me in this diary will have very interesting strains hope u find something useful
- [ ] 1st week Fl: first week of flowering they started stretching and looking very heal
- [ ] 2nd week Fl this week I’ve been away i had a friend taking care of them they stretching very well i hope that she starts putting energy into the flo
- [ ] 3rd week Fl they are streaching very well ..getting the light very well making flowers very nice
- [ ] 4th week Fl:its going very well so frosty already its giving me goos
- [ ] 5th week Fl
- [ ] 6th week Fl
- [ ] 7th week Fl
if this was useful please like and follow

Processing
Likes
5
Share


@xxBudgetAutosxx
Follow
Started watering plants every 72hours with a pint of water.
Seem to be starting to grow faster now and I can now tell which one is the sweet tooth auto 😂😂😂

Likes
2
Share

@MrGrowDiarie
Follow
Day 49
Today the plant stands confidently in the center of the tent, showing clear signs of being deep into its flowering phase. The top colas have become denser and more defined compared to last week, with bright white pistils stretching outward like tiny antennas searching for light. The aroma has intensified as well, carrying a sweet, herbal scent that becomes noticeable as soon as the tent is opened.
The leaves around the upper canopy are a lively green, although some of the older lower leaves are beginning to fade, which is typical at this stage. The plant’s structure is compact and bushy, with multiple flower sites forming evenly across the branches
Likes
9
Share
@chrizzle
Follow
Went back up to 25ml/10L ‚Autoflower-Supermix‘ as one of my ladies started showing first signs of a Nitrogen defifiency.
Likes
6
Share


@Finsfan
Follow
I planted this into its final container.. I did some light defoliation this week to expose all the bud sites in hopes they fatten up and then to frosty mcnuggets.. never really Defoliate autos but trying something new...
At that point of putting on its weight so I jumped the nutes up a bit more.
Had some slight light burn during veg and early flower.. brand new hlg blackbird.. I justvput it up to 70% at about 24 inches away.. 60% was too much during veg so kinda touch and go but keeping an eye on her.
