
Likes
Comments
Share


@Z420Organics
Follow
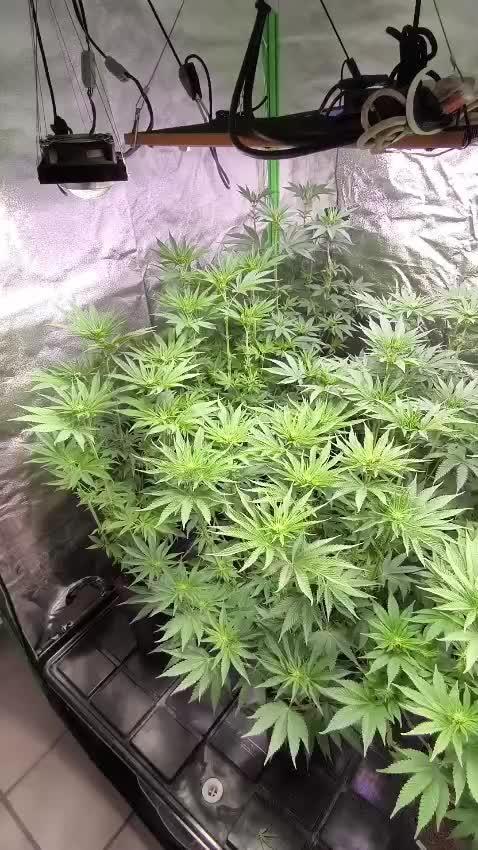
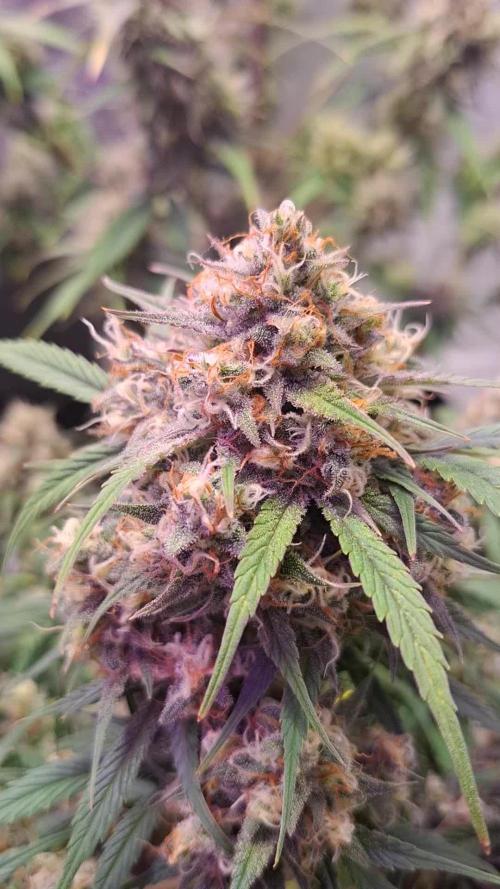
Kannabia Run – Flowering Day 1 🌸
Today we flipped the lights to 12/12 and officially enter the flowering stage! 🌞🌙
In just one week, the plants have taken off, looking strong and healthy. 💪🌿
The Cherry Dreams, which had shown signs of stress, have fully recovered and are now ready for the next stage. One of them has an incredible aroma — fruity with a unique hint that reminds me of sweet candy and something wild 🍑
It would be perfect for cloning, but I haven’t started a mother plant program yet. Someday, I definitely will! 🌱
Everything looks beautiful and full of promise as we begin this journey! ♥️
Good luck on this run, Kannabia! 🚀

Likes
8
Share


@Jonny_Blaze269
Follow
Wk5, Day29, 5/4/22, Lost top and 2 side branches on #2 from tie downs... Still has 6-8 cola sites, still early in stretch, should bounce back
Wk5, Day 34, 5/9/22, Bud sites have formed, heavy defoliation and tie downs, auto watering hooked up
Wk5, Day 35, 5/10/22, video posted

Likes
27
Share


@Ganjagrandaddy
Follow
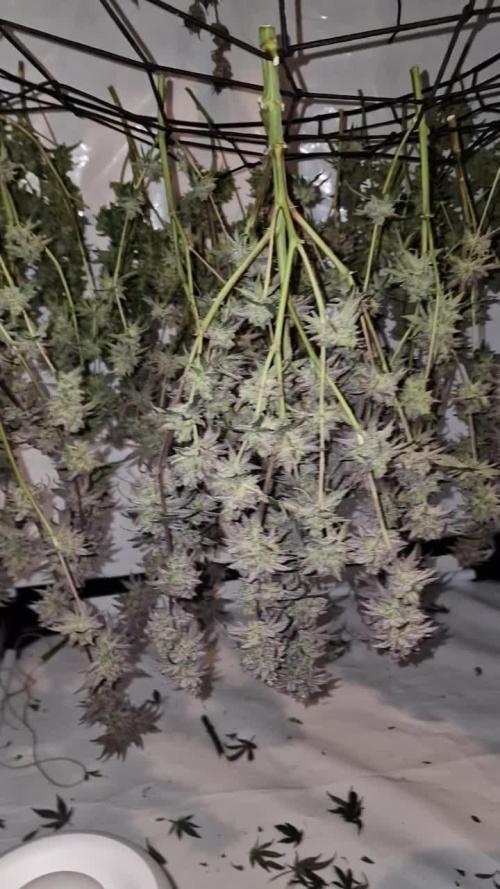
Day 56 Flowering: Hi growmies. I hope we are all well and still sane during this madness.
Here we are at the harvest window for the Glueberry now and she is certainly up for it now. Her buds are stinky and sticky with the right amount of ripened pistils to cover around 60-70% of her structure. The next few days I will be using the microscope to keep watch on the trichromes for their sweet spot over the next few days.
Shebhas been an easy grow but I wish I had stripped her lower scrub out early on in flower now. She didnt look recovered enough to strip out at the time but her leaf and scrub are filling the pots interiors so I need to keep on the air flow checking to avoid any budrot issues.
Mimosa Lemon is everywhere!! She has been such a productive plant from the beginning. Her bud structures are very , very loose and I am dreading the dry and trim that will be awkward as to what to take off. while there are a lot of flowers , they are so loosely structured that it is very deceptive on appearances. Her Limonene is honking from her now and I can see her Lemon tag being so appropriate. The potency is becoming obvious by smell alone and her tacky feel at the slightest touch is a great sign too. I did quite a brutal defol and strip out very early in flower but she still threw so many mains out . This is one of the most productive flowering plants I have grown to date . I don't expect the yield to show this in totals but for bud growth and vigour , she has no rival so far. Another week for her at least but seeing the new pistils kicking out , it could be possibly 2 more.
Let's see what the next few days bring for them.
be safe and sane folks.


Likes
5
Share


Likes
17
Share


@Nicogreen
Follow
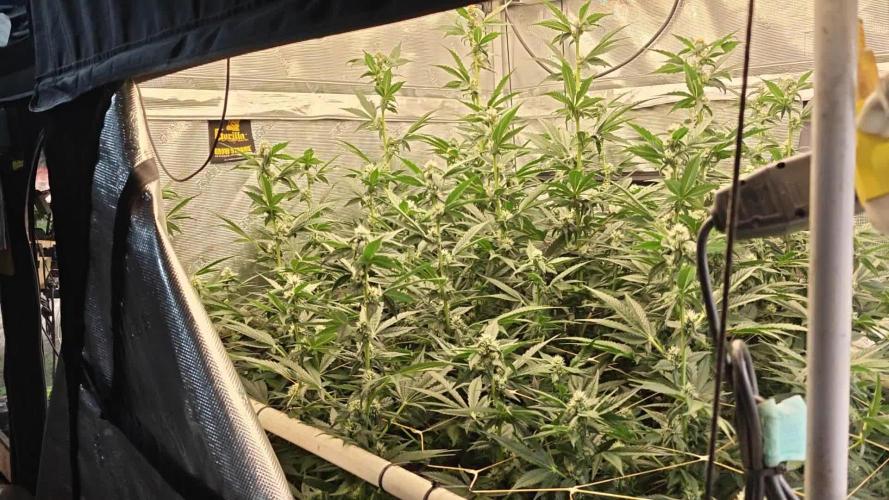
Glæd jer til at se mere om mit nye gro rum nu med 2 telte hydro osv. Telt nr 2 kommer desværre ikke i brug før om Ca til 5 dage, da jeg glemte at bestille ventilation og kulfilter
Likes
33
Share

@GrowBro1981
Follow
Beeindruckende Pflanze!! Von oben bis unten feste Buds 💪 ein Traum für jeden Grower 😎
Dunkel lila, schon fast schwarze Blätter, ein Hingucker sag ich euch 🤗😉
Wie immer, für mehr Infos, Bilder und Videos auf meine Facebook Seite kommen 😁🤗
"Green Room Anbau und Austausch"
Ich erwarte euch dort und freu mich auf euch


Likes
2
Share


@BigBuds95
Follow
Happy with her, really starting to ice up, buds are swelling nice. Super skunky smell, Day 47
Likes
14
Share

@Erik99
Follow
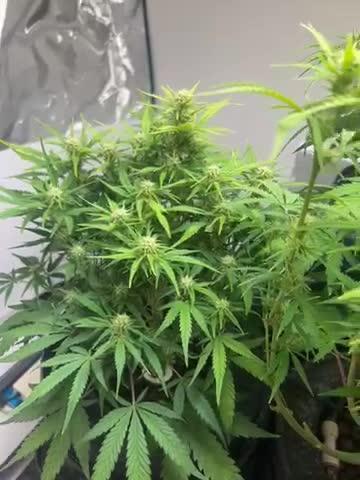
Ya se puede ver el inicio de la preflora, se ha aumentado muy levemente la dosis de fertilizante y estimulador de flora, se puede empezar a ver el estirón de preflora.


Likes
36
Share


@Sweetie420
Follow
26.12.2021
Everything is fine. Finally i have my lamps so now we waiting. The plants feel good. I make a lot of humidity. Happy growing guys


Likes
10
Share


@Green_Dream
Follow
I'm quite impressed by this week's development. The girls are starting to show their fatness. I did a flush at the beginning of the week and it helped a lot. Now I'm starting to give them less and less nuts, as they show obvious tip burns.
They are getting so so packed with crystals!

Likes
23
Share


@Herbman420
Follow
This week was ok I have noticed that she is started to go into pre-flower may be my last week on grow. I don't think she's going to be a big plant because she is going into flower at that size . but I have a lot of work to do with them autos anyway and I knew that from the start .The other plant that I have I've noticed may have a calmag issue. so I have added sensei calmag extra to the mix I would normally do that in coco anyway but didn't think it would need it in the soil but obviously does. I will post a question with a picture of it today to so you can have a look and decide what the issue is but I think it may be a calmag issue thank you for looking at the update and we'll be one every week 👍
Likes
15
Share


@Nvchods3
Follow
se nota la diferencia de genetica, unas mas avanzadas que otras.
green punch
Likes
5
Share

@Chef_LA
Follow
Kaum noch Wachstum nur die Buds werden etwas größer. Leider wieder starker Trauermücken befall. Werde Neemöl verwenden aber denke bis das wirkt habe ich geerntet. Ca. 2,5 Wochen dann müssten sie soweit sein. Die Pflanze mit dem eigen hergestellten Dünger musste ich mit kommerziellen Dünger behandeln da sie doch einige Mangelerscheinungen hatte. Jetzt weiß ich aber worauf ich nächstes mal achten muss.
Ja und jetzt bloß keinen Fehler machen😉
Likes
2
Share

@Drtomb
Follow
Beginning week 5 of Flower, day 29 of Flower. Already past the half way mark. Thos strain goes between 50-55 day for the right amount of trichome ratio that i like to harvest. Ive grown this plant out a few times now. Never ceases to amaze on the outcome. Stay tuned!


Likes
36
Share


@SAC87
Follow
Update: Took less than 3 days for all 3 seeds to pop. They’re all looking good, standing tall. Couple shells stuck to cotyledon leaves. I’m just going to leave them there. In the past my OCD has wanted them off and I’ve F’d up the leaf. I’m going to leave them covered with the cups until tomorrow, hopefully true leaves will be starting then.
I got an email from FastBuds and it showed their suggested feed schedule so I’ll try that and see how they like it.
Hi Growers. The sponsored FastBuds Auto seeds have arrived!!!! I decided to run the Pineapple Express and the Blue Dream. According to the grow info on the website they seemed to be in the same size and duration range. It should also give me a wider variety of effect as well.
I planted 3 seeds of each strain directly in 3 gal fabric pots of new Sunshine #4 mix and lightly watered with RO water. They’ll be lit by a Spider Farmer SF4000 which is on 24 hrs at the moment at 30% around 30 inches high.
I have enjoyed the FastBuds seeds I’ve grown before and was very happy to receive this sponsorship. It was very kind. Thank you.
I have always wanted to grow the Pineapple Express and am glad to have this opportunity. 👍🏻👍🏻
Anything with Blueberry genetics has always been good for my GI disorder and Blue Dream specifically has always worked well for that. My wife finds it’s great for her PTSD and anxiety too. I’ll be happy to have a bunch of bud from these two around fairly soon.
Happy Growing 🌱