
Likes
Comments
Share

@Borberad
Follow
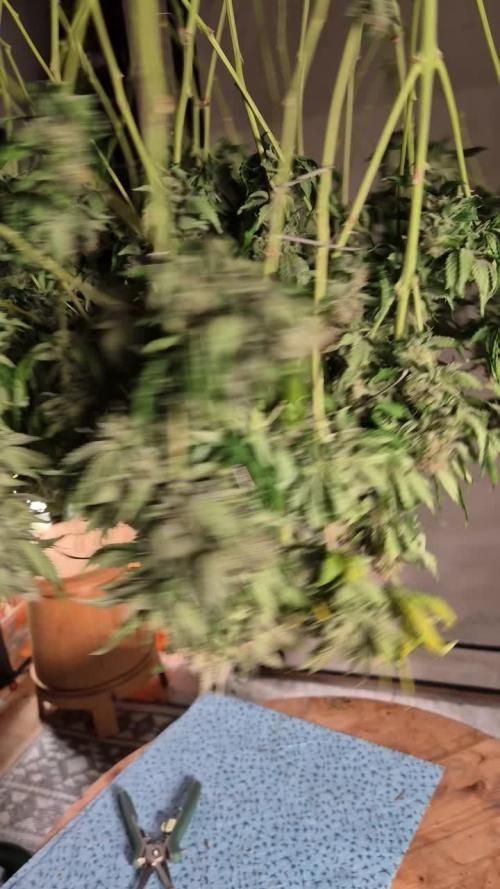
Die Ernte ist trotz der an den Schimmel verlorenen Buds mehr als ausreichend gewesen. Der Geruch in der letzten Woche war sehr intensiv gasig.

Likes
4
Share

@Ninjabuds
Follow
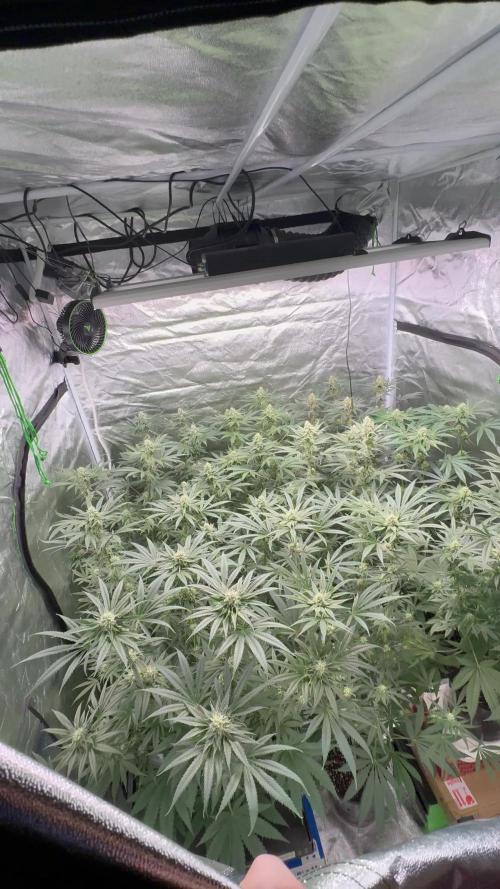
Everything is looking great for now. Busy week. Check back next week for individual photos of he plants will be starting to be pretty fat by then

Likes
6
Share


@thisisgroot
Follow
Another Barney's run!
This time FEM only.
2 bottoms are Glookies, 2 tops are Critical Kush
Been in veg for exactly 5 weeks from seed.
Looks totally great as for now.
Been using Sensi Bloom A+B from the start, like 1/4 of the recommended amount. I use high ppm tap water...


Likes
4
Share


@HomegrownGenetics
Follow
Just shy of 3 pounds, love the density on these nugs- definitely running this strain back.
Likes
16
Share


@NMGDOC
Follow
Seguimos utilizando los mismos productos que la semana pasada, solo que esta vez aumentando el EC a 1,2.
Hoy 26 de febrero lavamos las raíces. Yo creo que tal vez estaban con un bloqueo de nutrientes, no se ve como si estuvieran sobre fertilzidas porque creo que las hojas estarían más de un color verde oscuro y duras, como cuando parecen casi de plásticos. Ahora las hojas están como caídas, con esas puntas amarillas, lo cual me preocupa. Espero que con el lavado de raíces vaya mejor.
No hemos podido controlar bien la temperatura y ha llegado a 26 durante algunas horas, podría la temperatura causar este efecto en las plantas?
Gracias por leer y cualquier concejo es bienvenido 💚

Likes
8
Share


@Rinna
Follow
Just a perfect outdoor grow, after last year I wasn't very confident that the plants would finish, but the dry weather helped a lot. It's about the journey too for me, just love to see them grow everyday, combat problems and have a big community here that's always willing to help!

Likes
21
Share


@Herbman420
Follow
This week went ok she started expanding her leaves and geting bigger. I'm still feeding her the same amount of nutrients and pH of 6.5 .she has nice purple stripes in the stems which I'm quite pleased about so hopefully she will turn out a nice looking plant. She will be going outside later on this month with a supplemental lighting at the end of the day and maybe flowered towards the end of this year or during the summer . Thank you for looking at the diary and we'll be an update next week and remember it's 420 somewhere
Likes
6
Share


@Valmont505
Follow
There are plenty of show off buds especially from the one plant with 4 Queen kola thickenfrosty bitch buds.
They did drop a lot of weight in the dry, but all are very solid, very sticky nice buds. I will say that I was away for 9 days and my goddam dehumidifier snorkel fell off and the plants went on a pogo ride of humidity for fuck sakes. leading to one plant having a herm - just a
few I noticed at the base. Everything else looked amazing!!!
Classic Wedding Cake buds fresh out the Box! & now into MY curing jars!
Super excited as this is one of my favorite strains -- r


Likes
3
Share


@Ogbangbang2981
Follow
still spraying tiresias mist Sunday gonna be my last day of the mist and sit back and wait for pollen sacks (or as I like to say nut sacks )

Likes
2
Share


@Ensign420
Follow
|»» LOG DISCLAIMER: Not intended as a grow guide. Grow log entries are usually posted 3-4 weeks later and are for my learning reference. ««|
Introduction - Week 20 Summary -
Ensign's log, stardate 17741.4,
Another grow week.
In the main tent, nothing but general checkups with a few leaf defoliations. Added more mulch to the top of each pot.
In the veg tent, topped all mothers and took more clone cuttings. Now have the cuttings rooting in Coco Coins.
Anyways, onwards to next week Ensign.
[START OF WEEK 20]
==========================================================
---------- [ 3x3 VEG TENT - GR3 ] ----------
Heady OG BX1 #1 - WEEK 12 - Full Veg
TKO #2 - WEEK 02 - Full Veg
Chill Out OG #3 - WEEK 09 - Full Veg
Chill Out OG #2 - WEEK 05 - Full Veg
---------- [ 4x4 MAIN TENT - GR30 ] ----------
Chill Out OG #2 - WEEK 20 - Full Bloom Wk6
TKO #2-2 - WEEK 14 - Full Bloom Wk6
Heady OG BX1 #1 - WEEK 16 - Full Bloom Wk6
03/16/26 → 03/22/26 [WEEK 20]
This Week's Estimated Goals
----------------------------------------------------------------------------------------------
DLI: ~22 mol/m²/d
PPFD: ~500 μmol/m²/s
VPD: ~1.2 kPa
This Week's Meter Readings & Averages
----------------------------------------------------------------------------------------------
Light On/Off: 16:00 - 10:00 | Wattage: ~386.3W [LV05]
Distance From Canopy: ~[21”, 3.5”, 9”]
Plant Height: ~[31”, 48.5”, 43”]
Max Plant Height: ~52” [Lamp-to-Soil Distance]
DLI: ~53.31 mol/m²/d
PPFD: ~520 μmol/m²/s
VPD: ~0.64 kPa
Soil %: ~[51.4, 41.6, 47.3, 41.9, 54.7, 64.6, 48.0, 63.9, 50.9, 70.7]
==========================================================
Day 01 - Monday - 03/16/26 - Total Days: 131
-----------------------------------
Daily Averages ~[+01:00]
- Temps: 78.9°F [26.1°C]
- Humidity: 83.6%
- VPD: 0.55 kPa
- Soil %: [52, 41, 46, 43, 53, 63, 49, 63, 51, 69]
-----------------------------------
- [21:26]: Night check on the 4x4 tent.
--- The garden is looking great.
--- All phenos are in full bloom and terpenes are getting louder.
--- The under canopy is looking clean and pots look good.
- [21:40]: Checked the Ecowitt soil moisture sensor data:
------------------ [ 3x3 VEG TENT – GR3 ] ----------------
------ 51% - [CH01 » M1 » VBL – Heady OG BX1 #1]
------ 41% - [CH02 » M2 » VBR – TKO #2]
------ 46% - [CH03 » M3 » VFL – Chill Out OG #3]
------ 43% - [CH04 » M4 » VFR – Chill Out OG #2]
----------------- [ 4x4 MAIN TENT – GR30 ] ---------------
------ 53% - [CH05 » P1 » FLT – Chill Out OG #2]
------ 62% - [CH06 » P1 » FLB – Chill Out OG #2]
------ 49% - [CH07 » P2 » BLT – TKO #2-2]
------ 62% - [CH08 » P2 » BLB – TKO #2-2]
------ 51% - [CH09 » P3 » FRT – Heady OG BX1 #1]
------ 69% - [CH10 » P3 » FRB – Heady OG BX1 #1]
--------- Veg: ~38%-45% | Flower: ~45%-55%
--------- General: ~30% [Dry] «| ~45-60% [Moist] |» ~70% [Wet]
- [21:43]: Checked the 3x3 veg tent.
--- Veg garden is looking great.
--- Mothers and clones look good.
--- Two solo cups need watering..
- [21:59]: Here are the starting initial watering ranges:
------ Heady OG BX1 #1-1 » 256.9g → 353.3g
------ Gorilla Goat #1-1 » 287.0g → 325.2g
--------- General Weight Range: [Dry] ~275g «| [Dryback] ~300g |» ~325g-400g [Wet]
--- Both cups were last watered 3-4 days ago.
--- Took the starting weight of both clones before watering,
------ Heady OG BX1 #1-1 » 295.7g
------ Gorilla Goat #1-1 » 276.9g
--- While on a scale,
--- Evenly misted the top of both cups with RO water.
--- Did not spray the top growth.
--- Misted 10-20 sprays. Waited a moment, then misted again.
--- Repeated this process until both cups weighted at least 300g.
--- There was no runoff.
- [22:35]: Took the saturated weight of both cups after watering,
------ Heady OG BX1 #1-1 » 355.9g
------ Gorilla Goat #1-1 » 370.1g
--- Updated the wet weight and watering dates for both cups.
--- Placed both cups back into the tent.
- [22:59]: Checked the humidifiers.
--- Tanks are still full and no leaks found.
Day 02 - Tuesday - 03/17/26 - Total Days: 132
-----------------------------------
Daily Averages ~[+01:00]
- Temps: 81.5°F [27.5°C]
- Humidity: 82.2%
- VPD: 0.65 kPa
- Soil %: [52, 41, 45, 42, 52, 62, 48, 62, 51, 68]
-----------------------------------
- [16:06]: Evening check on the 3x3 veg tent.
--- Veg garden looks healthy.
--- Two solo cups need watering..
- [16:12]: Here are the starting initial watering ranges:
------ TKO #2 » 252.5g → 335.5g
------ Gorilla Goat #1-1 » 287.0g → 325.2g
--------- General Weight Range: [Dry] ~275g «| [Dryback] ~300g |» ~325g-400g [Wet]
--- Both cups were last watered 2-5 days ago.
--- Took the starting weight of both clones before watering,
------ TKO #2 » 294.3g
------ Gorilla Goat #1-1 » 297.2g
--- While on a scale,
--- Evenly misted the top of both cups with RO water.
--- Did not spray the top growth.
--- Misted 10-20 sprays. Waited a moment, then misted again.
--- Repeated this process until both cups weighted at least 300g.
--- There was no runoff.
- [16:24]: Took the saturated weight of both cups after watering,
------ TKO #2 » 355.4g
------ Gorilla Goat #1-1 » 375.1g
--- Updated the wet weight and watering dates for both cups.
--- Placed both cups back into the tent.
- [16:34]: Checked the Ecowitt soil moisture sensor data:
------------------ [ 3x3 VEG TENT – GR3 ] ----------------
------ 52% - [CH01 » M1 » VBL – Heady OG BX1 #1]
------ 41% - [CH02 » M2 » VBR – TKO #2]
------ 46% - [CH03 » M3 » VFL – Chill Out OG #3]
------ 42% - [CH04 » M4 » VFR – Chill Out OG #2]
----------------- [ 4x4 MAIN TENT – GR30 ] ---------------
------ 52% - [CH05 » P1 » FLT – Chill Out OG #2]
------ 62% - [CH06 » P1 » FLB – Chill Out OG #2]
------ 49% - [CH07 » P2 » BLT – TKO #2-2]
------ 62% - [CH08 » P2 » BLB – TKO #2-2]
------ 53% - [CH09 » P3 » FRT – Heady OG BX1 #1]
------ 68% - [CH10 » P3 » FRB – Heady OG BX1 #1]
--------- Veg: ~38%-45% | Flower: ~45%-55%
--------- General: ~30% [Dry] «| ~45-60% [Moist] |» ~70% [Wet]
- [22:12]: Checked the 4x4 tent.
--- The garden is looking and smelling incredible.
--- Bud growth is coated in trichomes and water leaves are resin-railed out. Nice.
--- The under canopy is looking clean.
- [22:20]: Checked the humidifiers.
--- Tanks are still full and no leaks found.
Day 03 - Wednesday - 03/18/26 - Total Days: 133
-----------------------------------
Daily Averages ~[+01:00]
- Temps: 82.7°F [28.2°C]
- Humidity: 81.3%
- VPD: 0.71 kPa
- Soil %: [52, 41, 47, 42, 53, 62, 49, 62, 52, 67]
-----------------------------------
- [16:02]: Evening check on the 3x3 veg tent.
--- Veg garden is looking good.
--- With the exception of Chill Out OG #2, going to top all mothers.
--- Will also be taking several clone cuttings of Chill Out OG #3 and Garlic Budder OG#1
- [16:13]: Filled a measuring cup with 1.5 cups of RO water.
------ Added 1/8tsp of Horticultural Aloe
--- Mixed the solution and poured it straight into a clear solo cup.
--- Placed the PVC rig into the cup just above the aloe water.
--- Using a pair of clean trimmers,
--- Topped and defoliated each mother plant.
--- Removed a decent amount of growth which lowered the canopy by a good 12-13 inches.
--- Mulched the trimmings into a 5-gallon bucket.
- [16:59]: Also cut several clonal cuttings from each mother plant.
--- Only need one cutting to root, but to ensure successful rooting, took multiple cuttings of each cultivar.
--- Made sure to trim most of the branches leaving a top node or two.
--- Did not cut any leaf fingers and made sure to cut the tip of the stalk (about 45-degree) before placing each cutting into the cup of aloe solution.
--- Made sure each tube on the PVC rig had the correct names labeled.
--- Wow the canopy looks a lot cleaner and lower.
- [17:09]: Placed the cup into the veg tent.
--- Have the cup resting in the propagation tray.
- [17:11]: Decided to cull the Garlic Budder OG#1-1 clone.
--- Mulched the trimmings and soil. Placed everything into the 5-gallon mulch bucket.
- [19:14]: Checked the 4x4 tent.
--- The garden is looking good and terpenes are smelling great.
--- Wow the canopy looks stacked with Heady OG’s top buds swelling up and looking uniform.
--- The under canopy looks clean.
- [19:24]: Checked on the BluMat soil moisture sensors:
------ Chill Out OG #2 » 58mbars
------ Heady OG BX1 #1 » 48mbars
------ TKO #2 » 55mbars
--------- Watering Range: [Too Wet] ~25mbars «| [Ideal Target] ~40-80mbars |» ~125mbars [Too Dry]
--------- BluMat Max Values: [10mbars «||» 750mbars]
- [19:26]: Took the 5-gallon mulch bucket with clippings from earlier.
--- Evenly spread the trimmings on top of all 3 pots in the tent.
--- Tried to keep everything within the BluMat drip-tape watering loop.
- [19:35]: Decided to make a slight adjustment to Chill Out OG #2’s watering carrot.
--- Using the BluMat key, increased the water moisture by rotating the tension cap slightly counter-clockwise.
- [19:44]: Quickly checked on the RO reservoir and auto-watering system.
--- Everything looked good and no leaks detected.
--- The gravity feed was holding steady at ~2.1 psi of pressure at ~22” from the floor.
- [19:47]: Checked the humidifiers.
--- Tanks are still full and no leaks found.
Day 04 - Thursday - 03/19/26 - Total Days: 134
-----------------------------------
Daily Averages ~[+01:00]
- Temps: 83.0°F [28.3°C]
- Humidity: 81.6%
- VPD: 0.70 kPa
- Soil %: [52, 42, 49, 42, 60, 69, 49, 65, 52, 73]
-----------------------------------
- [16:03]: Evening check on the 3x3 veg tent.
--- Veg garden is looking good.
--- Two solo clones need watering..
- [16:12]: Here are the starting initial watering ranges:
------ Heady OG BX1 #1-2 » 255.4g → 335.4g
------ Gorilla Goat #1-2 » 294.4g → 325.4g
--------- General Weight Range: [Dry] ~275g «| [Dryback] ~300g |» ~325g-400g [Wet]
--- Both cups were last watered 5-6 days ago.
--- Took the starting weight of both clones before watering,
------ Heady OG BX1 #1-2 » 299.0g
------ Gorilla Goat #1-2 » 283.1g
--- While on a scale,
--- Evenly misted the top of both cups with RO water.
--- Did not spray the top growth.
--- Misted 10-20 sprays. Waited a moment, then misted again.
--- Repeated this process until both cups weighted at least 300g.
--- There was no runoff.
- [16:31]: Took the saturated weight of both cups after watering,
------ Heady OG BX1 #1-2 » 355.2g
------ Gorilla Goat #1-2 » 370.1g
--- Updated the wet weight and watering dates for both cups.
--- Placed both cups back into the tent.
- [16:41]: Time to swap the aloe water out.
--- Filled a clear cup with fresh RO water (1.5cups).
--- Gently lifted the PVC rig out of the cup of aloe water and set it gently into the RO cup.
--- Going to let these soak for another day before transplanting into Coco Coins for rooting.
- [16:44]: Checked the Ecowitt soil moisture sensor data:
------------------ [ 3x3 VEG TENT – GR3 ] ----------------
------ 52% - [CH01 » M1 » VBL – Heady OG BX1 #1]
------ 45% - [CH02 » M2 » VBR – TKO #2]
------ 67% - [CH03 » M3 » VFL – Chill Out OG #3]
------ 42% - [CH04 » M4 » VFR – Chill Out OG #2]
----------------- [ 4x4 MAIN TENT – GR30 ] ---------------
------ 58% - [CH05 » P1 » FLT – Chill Out OG #2]
------ 68% - [CH06 » P1 » FLB – Chill Out OG #2]
------ 49% - [CH07 » P2 » BLT – TKO #2-2]
------ 67% - [CH08 » P2 » BLB – TKO #2-2]
------ 53% - [CH09 » P3 » FRT – Heady OG BX1 #1]
------ 73% - [CH10 » P3 » FRB – Heady OG BX1 #1]
--------- Veg: ~38%-45% | Flower: ~45%-55%
--------- General: ~30% [Dry] «| ~45-60% [Moist] |» ~70% [Wet]
- [20:14]: Checked the 4x4 tent.
--- The garden is looking and smelling great.
--- The under canopy is looking clean and pots look good.
- [20:20]: Checked on the BluMat soil moisture sensors:
------ Chill Out OG #2 » 35mbars
------ Heady OG BX1 #1 » 42mbars
------ TKO #2 » 44mbars
--------- Watering Range: [Too Wet] ~25mbars «| [Ideal Target] ~40-80mbars |» ~125mbars [Too Dry]
--------- BluMat Max Values: [10mbars «||» 750mbars]
Day 05 - Friday - 03/20/26 - Total Days: 135
-----------------------------------
Daily Averages ~[+01:00]
- Temps: 82.3°F [27.9°C]
- Humidity: 82.9%
- VPD: 0.64 kPa
- Soil %: [51, 42, 48, 42, 56, 67, 47, 66, 50, 73]
-----------------------------------
- [22:35]: Night check on the 4x4 tent.
--- The garden is looking healthy and terpenes are getting louder and smelling gassy.
--- Bud growth is stacking up and the canopy is continuing to gain weight. Nice.
--- The under canopy is still clean and pots look good.
- [22:41]: Checked the Ecowitt soil moisture sensor data:
------------------ [ 3x3 VEG TENT – GR3 ] ----------------
------ 51% - [CH01 » M1 » VBL – Heady OG BX1 #1]
------ 41% - [CH02 » M2 » VBR – TKO #2]
------ 49% - [CH03 » M3 » VFL – Chill Out OG #3]
------ 42% - [CH04 » M4 » VFR – Chill Out OG #2]
----------------- [ 4x4 MAIN TENT – GR30 ] ---------------
------ 55% - [CH05 » P1 » FLT – Chill Out OG #2]
------ 66% - [CH06 » P1 » FLB – Chill Out OG #2]
------ 47% - [CH07 » P2 » BLT – TKO #2-2]
------ 66% - [CH08 » P2 » BLB – TKO #2-2]
------ 50% - [CH09 » P3 » FRT – Heady OG BX1 #1]
------ 74% - [CH10 » P3 » FRB – Heady OG BX1 #1]
--------- Veg: ~38%-45% | Flower: ~45%-55%
--------- General: ~30% [Dry] «| ~45-60% [Moist] |» ~70% [Wet]
- [22:44]: Checked the 3x3 veg tent.
--- Veg garden is looking great.
--- Growth seems to be recovering well from the topping.
--- Two solo cups need watering..
- [22:49]: Here are the starting initial watering ranges:
------ Heady OG BX1 #1-1 » 256.9g → 353.3g
------ Gorilla Goat #1-1 » 287.0g → 325.2g
--------- General Weight Range: [Dry] ~275g «| [Dryback] ~300g |» ~325g-400g [Wet]
--- Both cups were last watered 3-4 days ago.
--- Took the starting weight of both clones before watering,
------ Heady OG BX1 #1-1 » 287.6g
------ Gorilla Goat #1-1 » 265.6g
--- While on a scale,
--- Evenly misted the top of both cups with RO water.
--- Did not spray the top growth.
--- Misted 10-20 sprays. Waited a moment, then misted again.
--- Repeated this process until both cups weighted at least 300g.
--- There was no runoff.
- [23:19]: Took the saturated weight of both cups after watering,
------ Heady OG BX1 #1-1 » 360.7g
------ Gorilla Goat #1-1 » 375.1g
--- Updated the wet weight and watering dates for both cups.
--- Placed both cups back into the tent.
--- Time to start the veg cutting’s rooting process.
- [23:43]: Filled a measuring cup with 1.5 cups of RO water.
------ Added a pinch of Quillaja Saponaria Extract [60]
------ Added 1/64tsp of Horticultural Aloe
------ Added 1/32tsp of Mycrobe Complete
--- Mixed the solution thoroughly.
--- Dropped 4 Coco Coins into the measuring cup.
--- The coins immediately started to expand.
------ [» ~5 MINUTES LATER «]
--- Placed each fully saturated Coco Coin into half-cut solo cups.
--- Using a squeeze bottle filled with Clonex,
- [23:55]: Gently filled each pre-made hole with Clonex rooting gel.
--- Using a pair of clean trimmers, made a final 45° cut.
--- Also stripped and scrapped some of the stem’s outer membrane.
--- To help with planting, gave each Coco Coin a squeeze to loosen the coco.
--- Made sure to insert each stem straight and snug with the tip about a 1/4 inch from the bottom of the Coco Coin.
--- Also secured the stem by pinching and pressing in the top of the Coco Coin.
--- Once each cutting was planted,
- [+00:16]: Placed each Coco Coin into the propagation dome’s tray.
--- Made sure to keep each cutting properly tagged.
--- Did not spray the top growth with any water.
--- As far as PPFD,
--- At the lowest light intensity (and raised ~14 above the tray), the PPFD is around 42 μmol/m²/s which gives a DLI of 2.72 mol/m²/d under an 18/6 light cycle
--- Mulched the extra veg cuttings.
- [+00:22]: Checked the humidifiers.
--- Tanks are still full and no leaks found.
Day 06 - Saturday - 03/21/26 - Total Days: 136
-----------------------------------
Daily Averages ~[+01:00]
- Temps: 81.0°F [27.2°C]
- Humidity: 82.9%
- VPD: 0.62 kPa
- Soil %: [51, 43, 48, 41, 55, 65, 47, 65, 50, 73]
-----------------------------------
- [19:08]: Night check on the 4x4 tent.
--- The garden is smelling great.
--- Terpenes are getting louder and bud growth is continuing to swell and stack. Nice.
--- The under canopy also looks good.
- [19:15]: Checked the Ecowitt soil moisture sensor data:
------------------ [ 3x3 VEG TENT – GR3 ] ----------------
------ 51% - [CH01 » M1 » VBL – Heady OG BX1 #1]
------ 42% - [CH02 » M2 » VBR – TKO #2]
------ 50% - [CH03 » M3 » VFL – Chill Out OG #3]
------ 41% - [CH04 » M4 » VFR – Chill Out OG #2]
----------------- [ 4x4 MAIN TENT – GR30 ] ---------------
------ 54% - [CH05 » P1 » FLT – Chill Out OG #2]
------ 65% - [CH06 » P1 » FLB – Chill Out OG #2]
------ 47% - [CH07 » P2 » BLT – TKO #2-2]
------ 65% - [CH08 » P2 » BLB – TKO #2-2]
------ 52% - [CH09 » P3 » FRT – Heady OG BX1 #1]
------ 73% - [CH10 » P3 » FRB – Heady OG BX1 #1]
--------- Veg: ~38%-45% | Flower: ~45%-55%
--------- General: ~30% [Dry] «| ~45-60% [Moist] |» ~70% [Wet]
- [19:21]: Checked the 3x3 veg tent.
--- Veg garden is looking good.
--- Misted the veg cuttings in the propagation tray with RO water.
--- Oops. The TKO #2 solo clone needs watering.
- [19:34]: Here is the starting initial watering range:
------ TKO #2 » 252.5g → 335.5g
--------- General Weight Range: [Dry] ~275g «| [Dryback] ~300g |» ~325g-400g [Wet]
--- Been 4 days since the last watering.
--- Took the starting weight before watering,
------ TKO #2 » 288.6g
--- While on a scale,
--- Evenly misted the top of the cup with RO water.
--- Did not spray the top growth.
--- Misted 10-20 sprays. Waited a moment, then misted again.
--- Repeated this process until the cup weighted at least 300g.
--- There was no runoff.
- [19:47]: Took the saturated weight after watering,
------ TKO #2 » 365.5g
--- Updated the wet weight and watering date.
--- Placed the cup back into the tent.
- [19:55]: Checked the humidifiers.
--- Tanks are still full and no leaks found.
Day 07 - Sunday - 03/22/26 - Total Days: 137
-----------------------------------
Daily Averages ~[+01:00]
- Temps: 81.2°F [27.3°C]
- Humidity: 83.1%
- VPD: 0.62 kPa
- Soil %: [50, 41, 48, 41, 54, 64, 47, 64, 50, 72]
-----------------------------------
- [19:02]: Night check on the 4x4 tent.
--- Flowering day 56 and the garden is looking and smelling great.
--- The under canopy is also looking clean and pots look good.
- [19:07]: Checked on the BluMat soil moisture sensors:
------ Chill Out OG #2 » 48mbars
------ Heady OG BX1 #1 » 51mbars
------ TKO #2 » 57mbars
--------- Watering Range: [Too Wet] ~25mbars «| [Ideal Target] ~40-80mbars |» ~125mbars [Too Dry]
--------- BluMat Max Values: [10mbars «||» 750mbars]
- [19:12]: Checked the Ecowitt soil moisture sensor data:
------------------ [ 3x3 VEG TENT – GR3 ] ----------------
------ 50% - [CH01 » M1 » VBL – Heady OG BX1 #1]
------ 41% - [CH02 » M2 » VBR – TKO #2]
------ 49% - [CH03 » M3 » VFL – Chill Out OG #3]
------ 41% - [CH04 » M4 » VFR – Chill Out OG #2]
----------------- [ 4x4 MAIN TENT – GR30 ] ---------------
------ 53% - [CH05 » P1 » FLT – Chill Out OG #2]
------ 64% - [CH06 » P1 » FLB – Chill Out OG #2]
------ 47% - [CH07 » P2 » BLT – TKO #2-2]
------ 64% - [CH08 » P2 » BLB – TKO #2-2]
------ 51% - [CH09 » P3 » FRT – Heady OG BX1 #1]
------ 72% - [CH10 » P3 » FRB – Heady OG BX1 #1]
--------- Veg: ~38%-45% | Flower: ~45%-55%
--------- General: ~30% [Dry] «| ~45-60% [Moist] |» ~70% [Wet]
- [19:22]: Checked the 3x3 veg tent.
--- Veg garden is looking great.
--- Both Gorilla Goat solo clones need watering..
- [19:30]: Here are the starting initial watering ranges:
------ Gorilla Goat #1-1 » 287.0g → 325.2g
------ Gorilla Goat #1-2 » 294.4g → 325.4g
--------- General Weight Range: [Dry] ~275g «| [Dryback] ~300g |» ~325g-400g [Wet]
--- Both cups were last watered 2-3 days ago.
--- Took the starting weight of both clones before watering,
------ Gorilla Goat #1-1 » 289.1g
------ Gorilla Goat #1-2 » 278.4g
--- While on a scale,
--- Evenly misted the top of both cups with RO water.
--- Did not spray the top growth.
--- Misted 10-20 sprays. Waited a moment, then misted again.
--- Repeated this process until both cups weighted at least 300g.
--- There was no runoff.
- [19:55]: Took the saturated weight of both cups after watering,
------ Gorilla Goat #1-1 » 375.6g
------ Gorilla Goat #1-2 » 375.3g
--- Updated the wet weight and watering dates for both cups.
--- Placed both cups back into the tent.
--- Propagation tray cuttings look good.
--- Misted the top growth with RO water.
- [22:34]: Back in the main tent,
--- Did a bit of defoliation focusing on the front buds.
--- Wow the terpenes are becoming more distinct and have a more greasier feel with a strong gas and fuel from both Heady OG BX1 #1 and TKO #2.
--- Both have their differences with Heady OG leaning more towards a lemon-pine profile whereas TKO has a more citrus-rubber but both are definitely in the fuel category (Earthy, Fuel, Floral, and Fruity).
--- As for Chill Out OG #2, on the nose, she’s more in the earthy category with refined mix of grape and citrus-vitamin.
--- Planning to check trichomes soon.
--- Anyways.
- [22:41]: Checked the humidifiers.
--- Tanks are still full and no leaks found.
--- Another grow week done.
--- Hmm.
--- Been neglecting both PPFD and plant height checkups but oh well..
--- Onwards to next week.
[END OF WEEK 20]

Likes
8
Share


@Dysons12
Follow
Nutrients completed on majority of the plants some smaller plants will remain being fed until Wednesday before flushing
I rearranged the tents ready for drying purposes with 4 plants that were flushing in the dry room. I came gone to find one had collapsed. This is the heaviest plant (I am interested to see what it yields)
Because it snapped at the stork I hung it up to dry and will be dry Tuesday 29th this week
The rest will be ready after a successful flush.
Earlier in my diary I did a test for which coco was the best. I can assure you that coco eco-thrive produced the tallest and most stacked plants
Plain coco was the next which produced a medium yield plant of medium height.
Last was coco with pebbles. I wanted this to win but believe me it has the worst growth and the least yields for this particular grow.
So I would advise buying the eco thrive coco. It is such a good product if you can get your hands on it.
It’s a very strong smelling this grow please note this when you start. But to be honest value for money I will definately grow this again. (Under $2.00 per seed
This will probably be the last post before the chop.
Stay tuned
05-07-20
30-09-20

Likes
14
Share


@Azazel420
Follow
Siamo arrivati alla terza settimana di fioritura. Tutto procede bene. Si incomincia a sentire il suo leggero odore. Mi piace davvero tanto. Penso che la prossima volta ne farò 4 in cocco. Grazie a tutti che mi seguite


Likes
12
Share


@BUZIMAN
Follow
Tout ce passe bien, elles continuent à prendre en volume, la Gelonade continue de consommer a max d’eau, la Milky Way a l’air elle d’en avoir de moins en moins besoin. Ça commence à sentir bon 🍋

Likes
2
Share


@Strangelet
Follow
Harvest day 74. 10g dried after 4 days.
Little plant and little yeald.
Didn't respond well to topping, problems with over feeding in late flowering. Also began to foxtail in last week, probably due to 40°C at daytime.
Will update the smoke test curing.
Likes
39
Share


@eldruidamx
Follow
Day 57. Watering with clean water.
The light schedule has been changed (12x12). Replaced lamp.
Day 58. Watering with fertilizers.
Day 59. Watering with clean water.
Day 60. Watering with fertilizers.
Day 61. Watering with clean water.
Day 62. Watering with fertilizers.
Day 63. Watering with clean water.

Likes
7
Share


@Nikkov
Follow
well, another week goes by and it's growing not like I expected hehehe but that's ok, living and learning, and for now I'll just wait for this cycle to end to start a new one and post it here and I'll tell you right away that I ordered a kit advanced nutrients starter and will test it on the new cycle. =D