
Likes
Comments
Share

@GREENPHOENIX6262
Follow
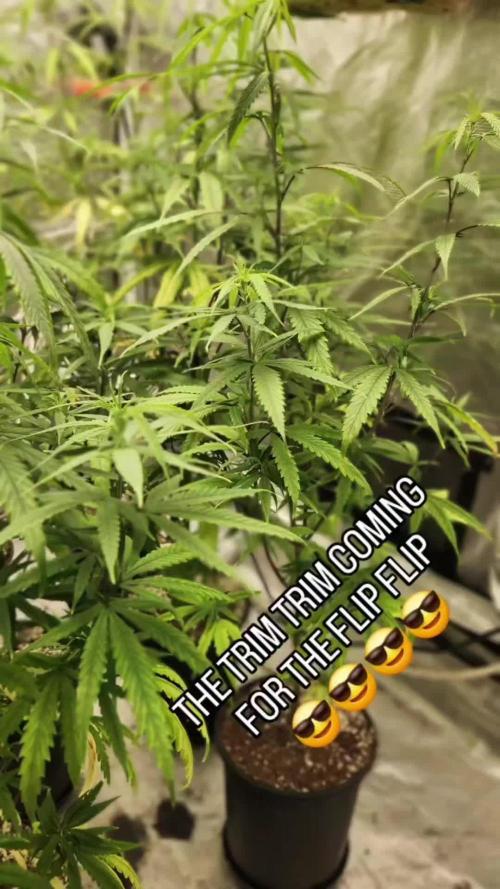
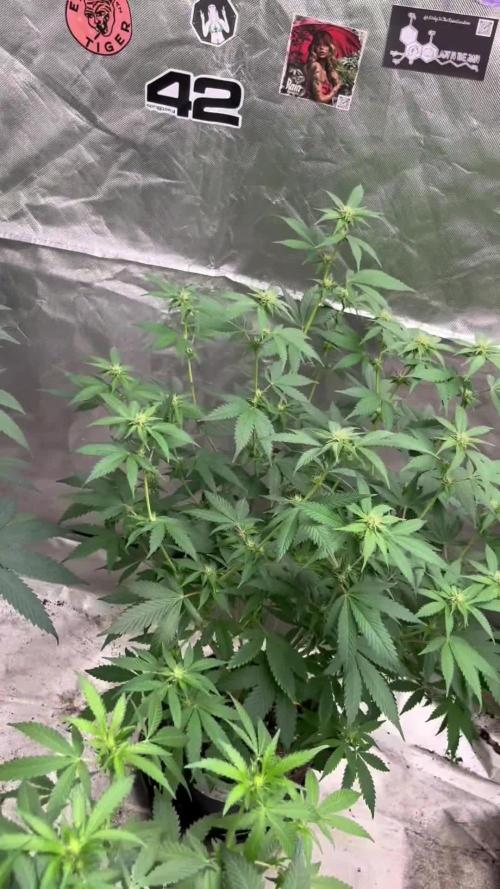
11/03 - 2x2 (6 clones) 4x4 (11 clones) - 4x4 trimmed and ready for flip this week - 2x2 being trimmed this week and flipped same time as the 4x4 - Only clean water and carbo flush feeds for this week. Drip line emitter added to the 2x2 with a 5 gallon res - each pot has 2 lines.
11/07 - Heavy water flush - Prep for trim & flip - heavy defol - dropping net - clean water feeds till next week - both tents will be flipped at the same time.
11/09 - 4x4 - 2x2 clones running efficiently - Hard defol in the 4x4 - Hard defol for 2x2 coming - flipping both tents on Wed - Hard flush out this week - running high humidity for the next 2 or 3 weeks.

Likes
19
Share


@A_Rolling_Stoner
Follow
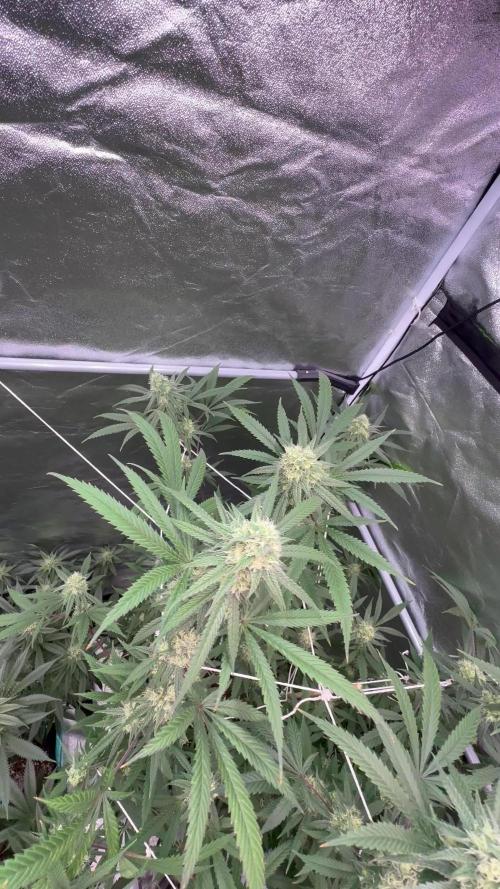
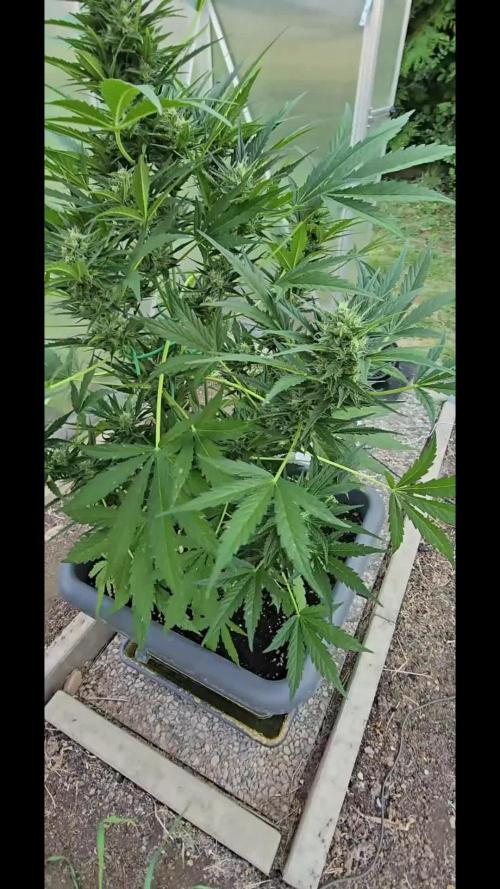
Now all plants are fully blooming and producing buds.
The two plants on the back are really difficult for me to reach, so they'll have more leaves as I can't trim em. Especially the rigt back corner one, it's way bushier.


Processing
Likes
59
Share


@Silverback_Guerilla
Follow
TUESDAY 1/15:
MuthaPHucking PH fluctuations again!!!!! 😖
I calibrate my 2 cheapo- ph pens everymotherPHucking day and STILL it happens....PHuck the dumb shit....I just ordered a $100+ Apera tester.👈
I watered everybody with about a half-gallon of water, plus heavy boomerang and calimagic, some bud candy, some terpinator, some kelp me kelp you, some armor silica, and the bloomers got their first dose of open sesame..no big bloom or grow big for anyone.
WEDNESDAY:
I foliar fed them a few times and calibrated my new ph tester.
The big C4 is branching like crazy...the little one is flowering now..hopefully she stretches really well too.
All 3 WW's have started flowering. I FIM'd the last 2 WW's today, so everybody's done.
Debbie Diesel is looking strong..big thick main stalk. The Northern Lights is also showing me some vertical growth now. All 3 Candy Canes are budding up nicely.👍
FRIDAY:
I fed everybody about a half-gallon and foliar fed them a couple of times.
SATURDAY:
Foliar fed a few times
The Candy Canes have stretched so much that I may need to raise my lights a little..they are about 16 inches from the tops now....monitoring...
SUNDAY:
Foliar fed a few times
Still no sign of light burn on the CC's, so I'm leaving the lights where they are.
MONDAY:
Still moist..will water tomorrow with my new pump-driven system👍


Likes
9
Share

@Ninjabuds
Follow
I wish I had a clone of this plant it was a best of a grower also the buds just keep gettting fatter and fatter they buds have a crazy dank smell and the structure of the buds is nice very low leaf to calex just an all around winner for sure


Likes
7
Share


@High_And_Hydro
Follow
- Ich hab die erste Woche des Biobizz Allmix Düngeschemas gestartet und gebe wie immer erstmal vorsichtige 100%, da meine Erde an sich durch den Kompost recht potent sein sollte.
- Außerdem hab ich mit meinem Calmag-Rechner mein Leitungswasser angepasst. Die Werte könnt ihr auf den Bildern sehen.
- Den PH-Wert passe ich ebenfalls auf 6,5 an.#
- Die Lampe bringt zur Zeit etwa einen PPFD-Wert von 350 - 360 µmol/s/m² bei 18 Stunden Beleuchtungszeit (DLI von 22 - 23 mol/d/m²). Sie wird aber nur eingesetzt bis es warm genug draußen bleibt. Tagsüber stehen sie jetzt schon draußen, sofern es nicht regnet oder stürmt.
Die Papaya Cookies macht sich hervorragend und sie ist sehr uniform mit den anderen Fastbuds Strains bis jetzt. Sieht gut aus finde ich 💪😁👍
Likes
5
Share

@pHilosophy420
Follow
Day 70 - Power at 85% lamp distance 45cm.
The buds are getting more dense now and she is growing all good no issue. Looking forward to harvest soon 3-4 weeks👊👍
Processing
Likes
12
Share


@2Stones1Bird
Follow
Checkout my Instagram @smallbudz to see the Small budget grow setup for indoor use, low watt, low heat, low noise, step by step.
27/12/2019 - Fed her 1.5l of 6.4PH water with 0,5ml of each: Grow, Bloom and Max, and 1ml of each: Heaven, Alga-mic and Vera, I use about 1/3 of the nutrient dosage on the chart, to achieve about 200/300PPM (500 scale).
01/01/2020 - Fed her 1.5l of 6.4PH water with 0,25ml of Grow, 0,75ml Bloom and 0.5ml Max, and 2ml of each: Heaven, Alga-mic and Vera, mesured about 280PPM (500 scale).

Likes
16
Share

@BLAZED
Follow
Week 18 (26-5 to 1-6)
26-5
Temps: 19.5 to 24 degrees
Humidity: 44% to 58%
Watering: Both 1000 ml. EC: 1.3
27-5
Temps: 19.8 to 25.9 degrees
Humidity: 48% to 58%
Watering: Both 1000 ml. EC: 0.3
28-5
Temps: 20.4 to 25.9 degrees
Humidity: 49% to 60%
Light set from 75% to 70% strength.
29-5
Temps: 20.5 to 26.2 degrees
Humidity: 52% to 59%
Watering: Both 1000 ml. EC: 0.3
30-5
Temps: 21.8 to 26 degrees
Humidity: 54% to 62%
Watering #1: 1000 ml. #2: 750 ml. EC: 0.3
Light set from 70% to 60% strength.
31-5
Temps: 22.1 to 25.9 degrees
Humidity: 52% to 60%
Watering: Both 1000 ml. EC: 0.0
1-6
Temps: 20.5 to 24.9 degrees
Humidity: 49% to 61%
Watering: Both 1000 ml. EC: 0.0
Will harvest next week!


Likes
2
Share

@Majikninja
Follow
🏆 Grower’s Spec Sheet: "The Monster"
Cultivar: [unknown]
Harvest Date: March 6, 2026
Total Flower Time: 8 Weeks, 6 Days (62 Days)
📊 Technical Data
System: VIVOSUN Wicking Reservoir (1.6 Gal)
Medium: [Soil/Coco/Pro-Mix]
Lighting: Full Spectrum LED
Atmospheric Peak: Daytime 1.5 kPa VPD / 73.2°F
Nighttime "Color Trigger": 1.3 kPa VPD / 67.6°F
Final Flush Baseline: 234 PPM at pH 6.2
Finishing Technique: 48-hour Arctic Root Shock (35°F Ice Flush)
🌿 Organoleptic Profile (The Senses)
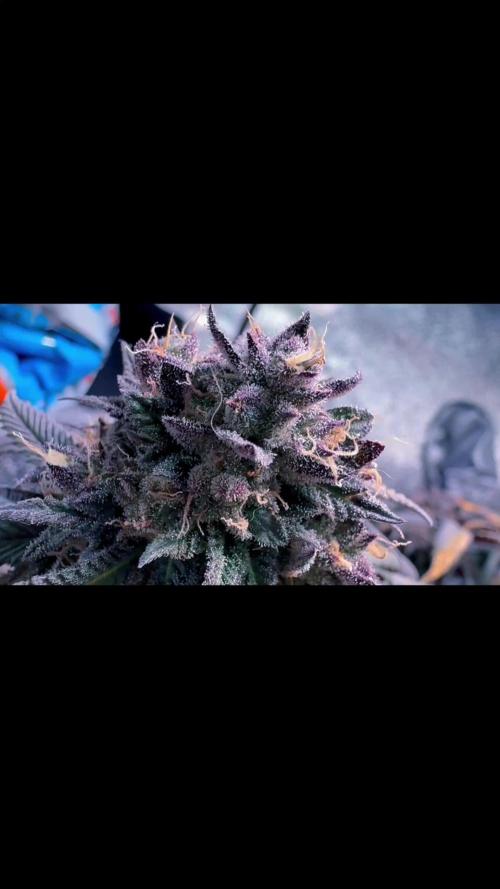
Aroma: Deep "sweet-honey" notes with a fading chlorophyll background. High terpene retention due to sub-75°F daytime finish.
Visuals: Heavy anthocyanin expression (Deep Purple/Violet) across 85% of fan leaves and calyxes.
Resin: High-viscosity "glass-bead" trichomes; milky heads with approx. 10-15% amber transition for a balanced cerebral/body effect.
🖋️ Grower’s Notes
"The Monster responded exceptionally well to a late-stage thermal drop. By maintaining a strict 1.3–1.5 kPa VPD throughout the final 14 days, we pushed resin production to its genetic limit. The final 48-hour ice flush was utilized to maximize the contrast between the dark purple leaf tissue and the heavy white frost for high-definition photography."
🏆 Final Harvest Summary: "The Monster"
Total Grow Time: 14 Weeks
Flowering Time: 8 Weeks, 4 Days
Final Flush Peak: 826 PPM (Purge) / 683 PPM (Settled)
Final Environment: 70.9°F / 52% RH (VPD 1.2 kPa)
📝 Grower’s Final Notes:
"We officially crossed the finish line with 'The Monster.' This run was a masterclass in environmental manipulation. Using the VIVOSUN Smart Controller, I was able to taper the temperatures down to a chilly 70.9°F in the final 48 hours to trigger a massive anthocyanin surge, resulting in deep violet and plum-colored colas.
The Arctic Flush: I performed a cold-shock flush using 44°F ice water. The plant responded immediately, purging stored minerals and causing the reservoir PPM to jump from 254 to a peak of 826. This 'internal detox' successfully removed the harshness, leaving behind the 'sweet' terpene profile confirmed in pre-harvest testing.
Final Results: The buds are dense, heavily frosted with trichomes, and exhibit the classic 'magazine-look' structure. The trellis system was essential in supporting the weight of these purple colas. Total success.
🏆 Final Harvest Report: "The Monster"
Genetics: [Insert Strain Name]
Total Cycle: 14 Weeks
Flowering Time: 8 Weeks, 6 Days (Final Chop: March 6th)
Medium: Coco/Perlite in VIVOSUN Wicking Reservoir
📊 Final Environment & Technical Specs
Final Temp (Blackout): 66.3°F (Triggered deep purple/black hues)
Final Humidity: 55% RH
Final VPD: 1.0 kPa
Lighting: VIVOSUN LED (100% Intensity final week / 24h Final Blackout)
Nutrient Management: VIVOSUN Wicking System
❄️ The "Arctic Flush" Results
To ensure the cleanest possible flavor and a smooth white ash, I performed a strategic cold-shock flush:
Pre-Flush Baseline: 254 PPM
Ice Water Shock (44°F): Triggered a massive mineral purge.
Peak Waste Discharge: 826 PPM (Confirmed successful salt removal)
Final Stable PPM: 577 PPM (Perfect landing zone for harvest)
📝 Grower’s Notes:
"The Monster exceeded all expectations. By utilizing the VIVOSUN Smart Controller, I was able to drop temperatures into the mid-60s during the final 48 hours, which caused the anthocyanins to explode. The canopy shifted from a forest green to a deep, royal violet.
The Arctic Flush was a game-changer. Seeing the PPM jump from 254 to over 800 proved that the ice water shock physically forced the plant to dump stored minerals back into the reservoir. The result is a heavy, resin-coated flower that smells incredibly sweet and lacks any chemical 'harshness.' This was a smooth, high-performance run from start to finish."
👅 Flavor & Aroma Profile
Primary Terpenes: [E.g., Sweet Berry, Fuel, Citrus]
Bud Density: 10/10 (Rock hard, thanks to the trellis support)
Bag Appeal: 10/10 (Deep purple with high-contrast white trichomes)
Time,Internal Temp,Internal RH,VPD,Fan Setting,Notes
12:21 PM,62.6°F,55%,0.9 kPa,Level 2,Humidity dropping fast; surface moisture evaporating.
8:47 PM,61.9°F,57%,0.8 kPa,Level 1,PRO MOVE: Dropped fan to buffer against dry basement air.
11:15 PM,60.8°F,58%,0.8 kPa,Level 1,"Achievement: The ""58/58 Handshake"" (Tent RH matches Grove Bag target)."
📓 Grow Diary: The unknownDrying Phase
Day 1: The Harvest & Hang
Action: Whole-plant hang of the "unkown”.
Initial Stats: High humidity in the tent due to the massive moisture content of the fresh colas.
Strategy: Establishing the airflow and setting the VGrow to manage the initial moisture dump.
Day 2: The "Danger Zone" Pivot
Challenge: Humidity spiked to 67%—risking mold and "wet" odors.
Correction: You successfully navigated the spike by adjusting settings, bringing the humidity back down into the safety zone (below 62%). This was the first sign of an "Advanced" grower at work.
Day 3: Setting the Baseline
Observation: Buds still felt damp/wet to the touch.
The Goal: Aiming for a 10-day dry due to the extreme thickness of the colas.
Stability: Environment stabilized at 62.6°F / 55% RH, establishing a solid foundation for the second half of the dry.
Day 4: The "Precision Craft" Transition (Current)
Tactical Change: Dropped Exhaust Fan to Level 1 to shield the tent from the dry basement air.
Texture: Buds transitioned from "wet" to "less wet/tacky." Small sugar leaves started feeling crisp while the core remained soft.
The Achievement: Hit the "58/58 Handshake" at 11:15 PM (60.8°F / 58% RH).
Decision: Committed to Grove Bags for the cure and the Frenchy Cannoli "Warm Bottle Roll" for the kief processing.
📊 Summary Stats (Day 1 – Day 4)
Coldest Temp: 60.8°F (Day 4)
Peak Humidity: 67% (Day 2)
Current VPD: 0.8 kPa (Perfectly steady for 11+ hours)


Likes
8
Share


@Tye91
Follow
This will be the last week until harvest. It has been a decent grow had a few nutrient problems but I am happy with the turn out. I snipped off a tester bud and it got me pretty ripped once it was dry. That immediately made me antsy for the rest of the plant. Lol ... I will make another update next week at harvest. This northern lights will have gone 13 weeks at harvest. That is 5 weeks longer than the breeder said on the pack of seeds. Even though it was longer than expected I'm still super happy, she is alot bigger than most autos so no complaints here.


Likes
7
Share


@Sunstonedgrows
Follow
A tad late, but on Dec 20th we started flower! The pics and video are all from dec 20.
To kick it off we did a small feed (1tbsp) of veg nutrients and over the next few weeks will transition to flower blend.
So far she's taken well to the training and looks very strong overall.
Cheers til next time
-Dj Sunstone

Likes
2
Share


@Islandgrowbro
Follow
First time using diaries just getting accustomed to everything as a new grower.
Second crop grown these are all clones from that first grow from seeds.
Faced a lot of issues in the first grow was a major learning curve. Produce some average buds. But I think I got a handle of things now.
Feel free to leave a comment tell me what you think!
First batch of clones done right. Still lost a lot due to humidity and moisture but 80/100%.
Planted clones placed under 24/7 light to start the veg. Will replant soon.

Likes
5
Share


@Misterindoor
Follow
Esta semana pasa a floracion y continua la estimulacion con delta 9 y mañana cambia el fotoperiodo a 12 /12


Likes
38
Share


@DudeGrowsWeed
Follow
Boax plants coning along strong. Grew about 2 inches this week. One plant is 19 inches, the other is 17 inches, I averaged the height as 18 inches for this weeks update. I'm going to take cuttings for clones from these girls soon. If you check the pics you should see that the taller of the 2 plants has a "Y" where the main stem split for some reason. I'm thinking cutting at the bottom of the Y would give me a good cutting/clone. But I'm open to any other advice/input on taking cuttings and cloning. I've done it once before successfully, but I'm no expert. Thanks all!