
Likes
42
Share


@MadeInGermany
Follow
Info:
Unfortunately, I had to find out that my account is used for fake pages in social media.
I am only active here on growdiaries.
I am not on facebook instagram twitter etc All accounts except this one are fake.
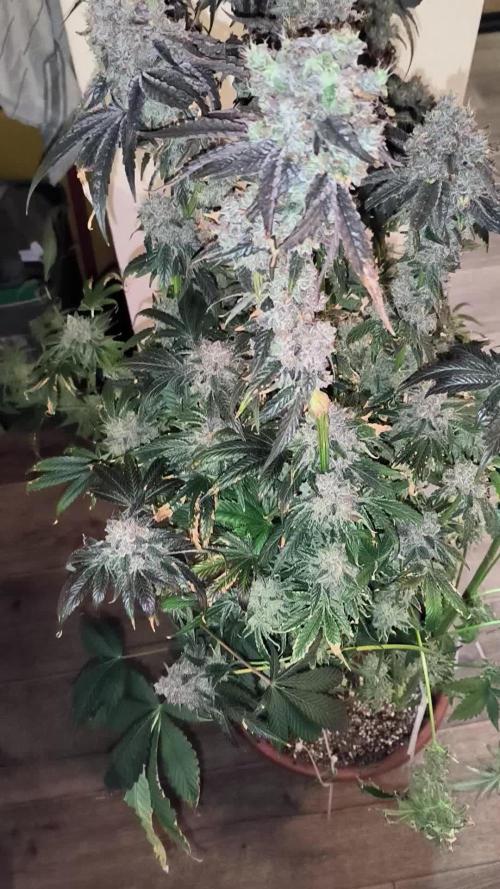
Flowering day 29
since time change
to 12/12 h.
Hey guys :-)
Once again a nice week has passed in which the lady has developed super :-).
The buds start to grow and are now getting more pk.
This week it was poured 3 times with 1.2 l each (nutrients see table above).
Fresh osmosis water was filled in canisters for the next 2 weeks.
Everything was cleaned and the plant was checked for health :-).
I wish you a lot of fun with the update and stay healthy 👍
You can buy this Nutrients at :
https://greenbuzzliquids.com/en/shop/
With the discount code: Made_in_Germany you get a discount of 15% on all products from an order value of 100 euros.
You can buy this Strain at :
https://sweetseeds.es/de/cream-caramel/
Type:
Cream Caramel
☝️🏼
Genetics:
Blue Black
x
Maple Leaf Indica
x
White Rhino
👍
Vega lamp:
2 x Todogrow Led
Quantum Board 100 W
💡
Bloom Lamp :
2 x Todogrow Led
Cxb 3590 COB 3500 K 205W
💡💡☝️🏼
Soil :
Canna Coco Professional +
☝️🏼
Nutrients :
Green Buzz Liquids :
Organic Grow Liquid
Organic Bloom Liquid
Organic more PK
More Roots
Fast Buds
Humic Acid Plus
Growzyme Big Fruits
Clean Fruits
Cal / Mag
Organic Ph - Pulver
☝️🏼🌱
Water:
Osmosis water mixed with normal water (24 hours stale that the chlorine evaporates) to 0.2 EC. Add Cal / Mag to 0.4 Ec Ph with Organic Ph - to 5.8 .

Likes
6
Share


@Cultivandomedicinanatural
Follow
En esta ocasión tenemos algunas plantas más grandes que otras, tenemos las red hot cookies miden 17 y 20 cm. Las tropicanas 15 y 20 cm y la purple punch og 16 cm.
Vamos a hacer una agua con concentración de 1.35 para las grandes y de 1.2 para las que son un poco más pequeñas.
Seguimos con un ph de 5.8 y se va notando ya la corrección de las carencias iniciales.


Likes
62
Share


@ButterfliesLittleFarm
Follow
Hello Diary,
The second week of flowering is over and as you can see from the photos, Medusa is developing incredibly fast.
The flowers are filling up really nicely, taking on an already beautiful scent that overwhelms me when I open the Farm's door.
All in all, both plants are beautiful, although they differ in structure, the flowers are almost identical on both plants.
It's unbelievable to me that it's only the fifth week since the beginning of the vegetation, they are really developing very quickly.
They stagnated in height growth, only a few centimeters this week, so they reached their maximum height of about 50 cm.
This requires more frequent watering, so I increased the amount when watering and the time interval between each watering decreased.
The conditions are good, the temperature is around 25 degrees while the humidity is around 45%.
Here's what it looked like last week.
22/02/2023. - Day 29.
Watering. I prepared 8 liters of water, lowered the pH. at 6.0 and I watered both plants evenly with that amount.
26/02/2023. - Day 33.
Watering. This time I added Bigger Flowers and Thicker Flowers from the Bio Flowering Booster palette. I also removed a couple of leaves at the very bottom of the plant to make watering easier.
28/02/2023. - Day 35.
Photographing and measuring plants.
Medusa F1 #1 - 50 cm
Medusa F1 #2 - 47 cm
That's all for this week, see you soon.

Likes
11
Share


@artems
Follow
Marker didn't take well to the mainlining process; as a result, one cola was almost entirely consumed by mold. However, overall, things are looking good. I ended up with a small, resilient plant with a nice aroma of pineapple and Skittles, with hints of gas towards the end. 🍍🌿 Towards drying and curing now! 🌬️🎊

Likes
26
Share


@pifflestikkz
Follow
Day 29
29/07/24 Monday
Nice feeding today with De-chlorinated tap water pH 6.
Gave her 300 ml and she had a small run off.
Getting chunky in the stem now 💪💚
Day 31
31/07/24 Wednesday
De-chlorinated water pH 6 today with Plagron pk13-14 5ml to 5L
Plagron power buds 5ml to 5L
Used 300ml of the 5L solution.
I will be using these on water days from now on as they are advised to be used every irrigation.
We'll see how they perform 💪💚
Day 32
01/08/24 Thursday
Another feed today using de-chlorinated tap water pH 6, there now taking 300ml every evening.
Day 35
04/08/24 Sunday
END OF WEEK 😁
De-chlorinated tap water pH 6 today with Plagron products. 300ml each.
Had a issue with leaf invaders this week, I have treated and am checking every 48 hrs so far seems ok and not progressive.
All plants look great, very healthy, one of the Overdose is way behind and due to space maybe culled at flower I'll see how she gets on.


Likes
11
Share


@Jacks_Pot
Follow
Not so much to say about this week. The condition of the plants stayed the same.
Buds are starting to fatten up and smell is very noticable.
This I gave them this week:
Day 1 → Dry
Day 2 → Each 1250 ml (0.33 gallon) ph adjusted tapwater (ec 0.48– ph 6.5)
Day 3 → Dry
Day 4 → Each 1250 ml (0.33 gallon) tapwater with Plagron nutrients (see above for which and how much)
Day 5 → Dry
Day 6 → Each 1250 ml (0.33 gallon) ph adjusted tapwater (ec 0.45– ph 6.5)
Day 7 → Dry
The cobs are now at 45 cm (17.7 inch) with 296 watt → DLI 41/PPFD 949
Temperatures stayed between 21.9 – 29.1 °C ( 71.4 – 84.3 °F) and humidity levels between 46 – 68 %
Till next week!
Do you want to grow this strain?
👉 https://www.barneysfarm.us/pineapple-chunk-weed-strain-15 👈

Processing
Likes
Comments
Share


Likes
17
Share


@Hashy
Follow
Week 8
Light cycle=12/12
Light Power=180w
Extractor controller settings
High temp=24c
Low temp= c
Temp step=0c
High Rh= 50%
Low Rh= %
Rh step=0%
Speed max=10
Speed min=1
Smart controller settings (during lights on).
Lights on=10.01-21.59
Radiator on= below 22.0c
Radiator off= above 23.0c
Smart controller settings (during lights off).
Lights off=22.00-10.00
Radiator on= below 18c
Radiator off= above 19c
Fri 9/2/24
#1 (Day 50)(Day 12 flower)
📋 H=81cm D=23cm DLI=43.0
HST 1 cola
Sat 10/2/24
💧💧💧💧💧💧💧💧💧💧💧💧💧💧💧💧
Method= automatic
Feed=bloom nutes.
Neutralise=0.1ml/L
Silicon=1.0ml/L
Calmag=1.0ml/L
Terra Bloom=4.0ml/L
Sumo Boost=1.5ml/L
Roots=0.2ml/L
Easy Ph down=0.115ml/L
Ec=1.9 PH=6.3/6.5
Time start=12.00pm
Finish time=13.45pm
(11×5 minute runs with 5 minute gaps)
Total flow rate=190ml/min
Flow rate per plant=47ml/min.
Total volume made=13L(13.5L)
Total volume left=3L
Total volume used=10.5L
Volume per plant=2.6L (Est)
Runoff.
Total runoff=1.0L
Ec=2.3 PH=6.0/6.2
💧💧💧💧💧💧💧💧💧💧💧💧💧💧💧💧
#1 (Day 51)(Day 13 flower)
📋 H=83cm D=21cm DLI=43.0
Raised light to maximum height.
180w
H=83cm D=30cm DLI=40.0
HST 1 cola and snapped it, should be OK.
The way she is growing reminds me of some girl scout cookie seeds I did a while back.
Sun 11/2/24
#1 (Day 52)(Day 14 flower)
📋 defoliation on some lowers.
Mon 12/2/24
#1 (Day 53)(Day 15 flower)
📋 H=89cm D=24cm DLI=52.8
Tue 13/2/24
💧💧💧💧💧💧💧💧💧💧💧💧💧💧💧💧
Method= automatic
Feed=water
Neutralise=0.1ml/L
Roots=0.2ml/L
Easy Ph down=0.02ml/L to much
Ec=0.2 PH=5.3/5.7
Ec=0.2 PH=6.1/6.2 after 3L top up.
Time start=12.00pm
Finish time=13.45pm
(11×5 minute runs with 5 minute gaps)
Total flow rate=190ml/min
Flow rate per plant=47ml/min.
Total volume made=13L(16L)
Total volume left=6.L
Total volume used=10.L
Volume per plant=2.5L (Est)
Runoff.
Total runoff=1.2L
Ec=1.95 PH=6.1/6.3
💧💧💧💧💧💧💧💧💧💧💧💧💧💧💧💧
#1 (Day 54)(Day 16 flower)
📋
Wed 14/2/24
#1 (Day 55)(Day 17 flower)
📋 H=95cm D=18cm DLI=60.2
HST multiple colas.
Thur 15/2/24
#1 (Day 56)(Day 18 flower)
📋 H=95cm D=18cm DLI=60.2
Hst, remove some side branches.
She is now to tall, it's been a bit of a battle to try and keep this one as low as possible. Lowering the DLI for the 1st part of flower definitely seems to have caused her to stretch lots and quickly. Doubt I'll do that again. I'm going to struggle with pictures from now on because of lack of head space.
Back soon.
Take it easy.
Likes
53
Share


@Roberts
Follow
Grand Daddy Purple auto is doing good. She has acclimated, and started make some good growth. The spots on the tip of the leaves never spread. So that was good. Everything has been looking really good. Nothing more to report at the moment. Thank you ILGM, and Medic Grow. 🤜🏻🤛🏻🌱🌱🌱
Thank you grow diaries community for the 👇likes👇, follows, comments, and subscriptions on my YouTube channel👇.
❄️🌱🍻 Happy Growing 🌱🌱🌱
https://youtube.com/channel/UCAhN7yRzWLpcaRHhMIQ7X4g

Likes
11
Share


@Bread_n_Buds
Follow
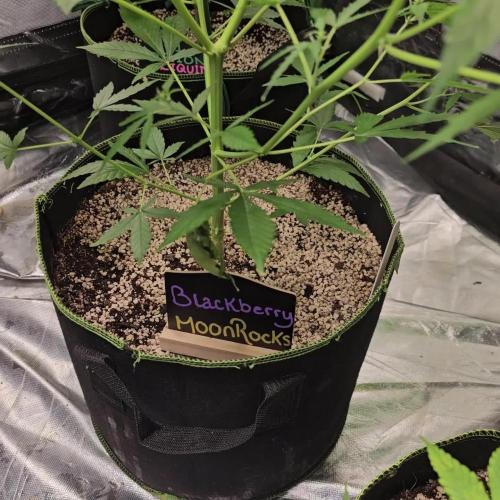
Our #3 or rather this new creation by Seeds Mafia that we are growing with love is starting to get serious.
autoflowering like this. She's a bit floppy and not in good shape but we hope she recovers
We have started with fertilizers for growth which we give in reduced doses together with the rooting agent for the entire vegetative phase.
Music of the week provided by Radio Nula from Slovenia.
https://radionula.com/
Thanks to friends of Seeds Mafia try this and their other creations
seeds > https://seedsmafia.com/en/
Light and tent > https://marshydro.eu/products/marshydro-sp3000-led/?lang=it
Likes
10
Share


@Naujas
Follow
77 days have passed very quickly, at the beginning of this week I was a little worried that something was wrong with the girl, but after talking to my Teacher, he explained to me that it is genetics that do not affect the general health of the plant and those dark purple leaves are not something wrong, this calmed me down and I continue to grow successfully, I have not had a purple variety yet :) this is my first lady like this :) from tomorrow - she will have more space in the growing box, which she will really like, soon she will face considerable defoliation, because there are really a lot of leaves and small branches :) good luck to everyone.

Likes
6
Share

@Patres
Follow
Pěstování king kartier mě bavilo. Odrůda je neuvěřitelně silná a odolná, po celou dobu vykazovala silný a hutný růst. A v pozdních fázích masivní nabývání pupenů. Byla i celkem dost tolerantní k nějakým těm chybičkám. Celkově bych doporučil na tuto odrůdu větší prostor a nějaký ten trénink. Pupeny jsou na omak tvrdé, trichomy mléčné. Konec 10. Týdne
Likes
22
Share


@Njaak
Follow
All in all she's doing pretty well. Growth is pretty much all in the buds and the room now smells strongly of lemons :) yum yum yum. Wanna lick my fingers after touching the plant.
She is starting to show some leaf damage. I'm not certain what it is but could be light burn? That light burned the shit out of my wife's plants last winter (she upgraded to Spider Farmer)... so could be. pH is pretty stable and checked every day or two. Temp and humidity are mostly steady. Nutes are maybe a touch low? I am purposefully keeping a modest feeding concentration but pretty sure it's well within safe range. I think it basically leaves the light or some sort of root issue but those roots are just so good looking.
Tapering off the nutrients now into the home stretch. No more Big Bud to be added and as of next week she's in flush. Very excited. See the picture of the nutrient schedule for anyone interested... and feedback if you have any 😎
I added another mature plant to the room. A friend's attempt at soil growing did not work out (did not use proper grow light) so I'm trying to help her produce at least a few decent buds 😕. No harm, there's space in the place and plenty of light to go around.
Anyone reading - do you have experience water washing? That's my plan for this lady.
Likes
16
Share


@Big_Rade_SCLA
Follow
Week is going great everyone. The canopy allowed all the plants to green up. I guess they were getting sun/heat stressed and it caused them to yellow. At first I thought it was over watering, but not watering did nothing. I'm actually watering a bit on the heavy side this week. I'm also thinking it's about time to add some worm castings.
1 girl identified on DAY 57 (she's tall and leafy, has a little red on one of the lower leaves' stem). I'm going to bend her a little and have her angled across the pot. She has one companion that hasn't been identified.
3 males identified as of DAY 63 --all three tall--one thicker than the others--all 3 taken down--great roots--orange danky aroma--not planning on keeping males this year--but it still hurts a little to take a plant down. :-(
Thank you to all the likes and everyone else viewing. The outdoor season is in full effect. Happy growing!


Likes
47
Share

@MadeInGermany
Follow
Info:
Unfortunately, I had to find out that my account is used for fake pages in social media.
I am only active here on growdiaries.
I am not on facebook instagram twitter etc All accounts except this one are fake.
Have fun with the update.
Hey everyone 😀.
A week with a wonderful development is over again 😃.
I decided to stay in the vegi for another 10-14 days and to top it off a few more times.
Then it is put into bloom.
Until then, I wish you all the best 🙏🏻.
You can buy this Strain at :
https://www.exoticseed.eu/
Type:
Herz Og
☝️🏼
Genetics:
Larry OG X Kosher Kush
Indica 60 % / Sativa 40 %
👍
Vega lamp:
2 x Todogrow Led
Quantum Board 100 W
💡
Bloom Lamp :
2 x Todogrow Led
Cxb 3590 COB 3500 K 205W
💡💡☝️🏼
Soil :
Canna Coco Professional +
☝️🏼
Fertilizer:
Green House Powder Feeding
☝️🏼🌱
Water:
Osmosis water mixed with normal water (24 hours stale that the chlorine evaporates) to 0.2 EC. Add Cal / Mag to 0.4 Ec Ph with Organic Ph - to 5.5 - 5.8 .

Likes
10
Share


@indoorontario
Follow
Day 89: sad to see those beautiful fall colors go but I had to remove to allow the light through to the lower buds.
Day 94: harvest tomorrow

Likes
28
Share


@Luv2Grow
Follow
Day 64 - Starting week 10 today and she was dried out and read for water so she got two gallons of plain pH’d water. Other than that, there’s not much to speak of other than I’ll do a little defoliating on Thursday so a couple lower bud sites will be opened up more.
Day 68 - All looking good still and looking like she doesn’t have much more time left, she’s finishing quicker than I thought. Her trichs are about 75% milky and 25% clear so I think she’s got about 2 weeks or so left. She was pretty dry so she got one more round of nutes and then will be just plain water till the end.
Day 69 - She’s still chugging along nicely. No issues from her feeding of nutes yesterday and she’s still fattening up each day. Couple little spots where she could definitely still fill in but she’s got a little bit of time left so I’m sure she will.
Day 70 - The end of week 10 and looking over the trichs today, she’s just about all milky, was pretty hard to find any clear and picked out a couple amber in there. So it’s looking like she’s got a week or a little more left but will make my decision to chop when she has the amber I’m looking for, about 25-30%.
Likes
16
Share

@Kirsten
Follow
The plant has just switched into the flowering stage, I meant to train her this week b tying some branches down as she is getting tall, however I didn't get round to it.
18.7.25:
I watered with 3ltrs of dechlorinated water PH'd to 6.4, containing the following nutrients;
💜 2ml Ecothrive Trace
PH: 6.4
PPM: 365
20.7.25:
I watered with 2ltrs of dechlorinated water PH'd to 6.3 containing the following nutrients;
💜 2ml Ecothrive Trace
💜 1/4 TSP Ecothrive Biosys
25.7.25:
I watered with 3ltrs of dechlorinated water PH'd to 6.5, containing the following nutrients;
💜 2ml Ecothrive Trace
💜 1/4 TSP Ecothrive Biosys
PH: 6.5
PPM: 361
28.7.25:
I watered with 6.5ltrs of dechlorinated water PH'd to 6.0 with;
💜 7ml Trace
💜 1.5 TSP Ecothrive Biosys
PH: 6.0
PPM: 351
Thank you for checking in this week and hanging out in the comments 😁💚✌️🌱🙌