


Likes
Comments
Share


@Simba732
Follow
🔘 We’ve wrapped up another week, folks!
🔘 She’s officially in full bloom now
🔘 Over the next few weeks we can expect another stretching also her buds to start bulking
🔘 I’ve begun dialing back the Grow nutrients and switched up my additives for this stage. Added Big Bud and Ancient Soil, both from Advanced Nutrients.
🔘 No training was done this week. Since she was shifting into her bloom phase, I wanted to let her breathe a bit. She’s gotten very bushy which is great but I’ll be doing a light defoliation in the coming week. Gotta keep insects and mold far away.
🔘 Happy growing 💚

Likes
22
Share


@DankBudz
Follow
Well tying down is no longer an option, now the fight is to get them to stand up!! #shittyproblems
No let up on white hairs yet!!
It makes me sad and happy at the same time lol

Likes
30
Share

@All_our_small_plants
Follow
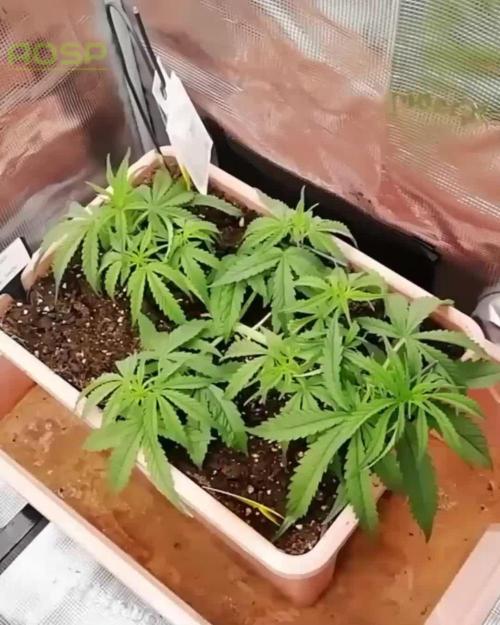
Bewässerung: 500 ml jeden 3 Tag in der siebten Woche
pH-Wert: 6
EC-Wert: 1,8 mS/cm
Temperatur: 30ºC
Luftfeuchtigkeit: 55%
Schädlingsbekämpfung: im Moment haben wir keine Anzeichen das es was zu bekämpfen gibt, sobald die ersten Anzeichen da sind werden wir handeln :), aber zur Sicherheit haben wir wieder ein paar Raubmilben an die Pflanzen gehenkt.
PPFD: 600 µmol/m²/s
DLI: 38 mol/m²/Tag
Düngemittel: Sie bekommt CalMag von BioBizz zu Prävention. Ab Tag 18 haben wir angefangen sie mit einem Mineralischen NPK Dünger (NPK 10-4-7) zu Gießen .
Besonderheiten: Sie ist nun seit einer Woche im Großen Zelt und macht sich ganz gut.
-Tag 37 heute wurde sie wieder entlaubt und wir haben das LST fortgeführt, sie sieht sehr gut aus. Außerdem hat sie wieder Wasser mit Dünger bekommen 😌
-Tag 40 wie man auf den Bilder erkennen kann ist sie nun in der Vorblüte und wird die nächsten Tage in die Blüte wechseln.
-Tag 41 Letztes LST angewendet nun wird nur noch entlaubt und Gegossen :)
-Tag 42 Heute nur Wasser gegeben.

Likes
83
Share


@Anonymous_2022
Follow
💚💚Diary just for MEME Uploads 💚💚
⭐️⭐️⭐️⭐️⭐️⭐️⭐️⭐️⭐️⭐️⭐️⭐️⭐️⭐️
🌲 🌲Thanks for the love Growmies 🌲🌲

Likes
9
Share


@DaddyPrime2
Follow
9/22 topped them at 4th node. some of them are looking better for mainlining that others. some of them i may not mainline and others i left an extra node in case i want to keep clones around.
#1 is looking happy with the topping and looks really good.
#2 is the only one thats been praying and is the tallest and strongest looking all around.
#5 short and such tight internodal spacing that it makes it hard to see whats all there. just looks like a bunch of small leaves until they grow out. i may not mainline this one either be cause of it being so tightly packed it may make it
9/27/24
day 20 theyre growing quite well. #1 i ended up taking the bottom nodes. i was originally goi g to use them as clones later on but decided to just let her go with her 4 nodes. #5 is so tightly packed, she has like 8 mains all in such a small space, its hard to even make sense of it all.

Likes
24
Share

@Wondrej
Follow
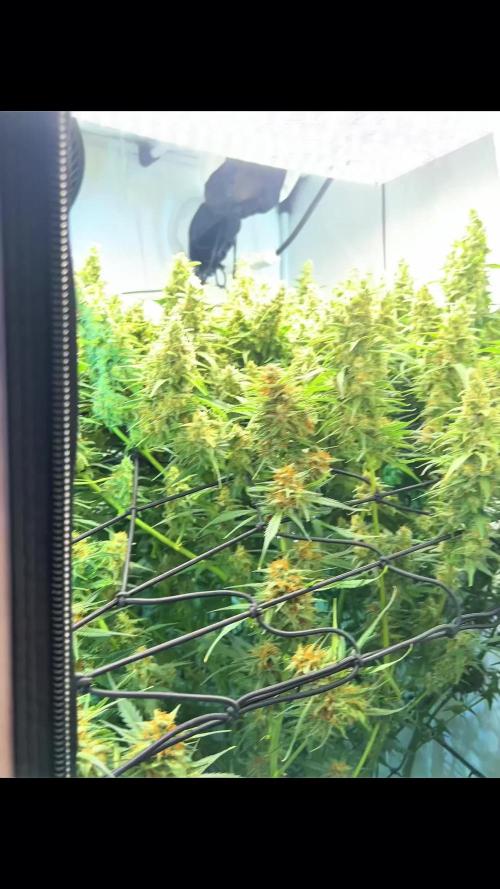
🎼 Week 13: The Grand Finale Approaches (Flower Week 8)
One love growmies, we still not done yet with this BPP auto 😻🤤 I’m giving them like 2 more weeks maximally.
The finish line is in sight, and the symphony is reaching its crescendo!
This week has been all about patience and classical vibes. I’m still playing B. Smetana - Vltava every morning, and I swear the trichom production is responding to those majestic crescendos. Some buds are becoming rock-hard and the scent is so heavy it almost has a texture.
📈 Final Weeks Strategy:
I’m starting to taper off everything. Just pure, clean water from here on out to let the plant finish its cycle naturally in the living soil. No more top-dressing, just letting the biology do the final touch-up.
Girls are almost ready to graduate. It’s been a long journey from that first Scrog tucking to this massive sea of purple and green. Trichoms still not even cloudy so stay tuned, the harvest is just around the corner!
UPDATE- Last days of week 13 video
Likes
1
Share

@Franco123
Follow
hi, the plants are not doing well due to a deficiency problem due to the pH, I realized that the meter I was using is off for now or I corrected the ph using litmus papers while waiting to go and buy the new ph test, I hope to get these plants again
I will try to pollinate a plant with the pollen of a male japonica (wild) hop to see if it is possible to create a hybrid

Likes
17
Share


@JonnyKush
Follow
hey growmies I decided to switch to flowering, I am using ADV nutes with the dosage recommended by them and they seem to me in great shape, tonight I will do a defoliation in order to breathe better and get as much light as possible. I'll keep you up-to-date. good growth and happy day 💚🌳

Likes
36
Share


@TerpTurtle
Follow
Introducing some carbs this week (Bud candy & molasses) 🍬
some additional mycorrhizae (great white) with the Liquid Karma every water 🍵
will end the week with a final defoliation 🍅


Likes
104
Share


@Lordshiva83
Follow
Olá amigos! Mais uma nova Semana, a minha árvore começou a florir 🙌💪 🤩 e continua a crescer está com 2,20m e 2,50m de diâmetro 🤩, esta semana fez 40 graus c, fez muito calor, folhas velhas ficaram amarelas e caíram.. fiz uma limpeza de folhas amarelas por dentro da planta e por baixo mas tudo parece estar bem com a planta, está semana adicionei a rega mais uma vez com BactoHemp 3ml e 1ml de bactobloom para activar a floração, fiz prevenção de pragas com insecticidas bio, fiz mais uns tutores para suportar o peso da planta para não se partir nenhuns ramos, acho que estou a preparar a minha árvore para uma boa floração 💪💪✌️🌲🌳

Likes
17
Share


@MoneyGrowup
Follow
Things are looking good, started with some lst with my hands at first now I've secured them with ties. The gelato looks like it finally want to start its growth due to whatever stress it was going through. Happy with how things are picking up
Likes
4
Share

@Grasshopper96
Follow
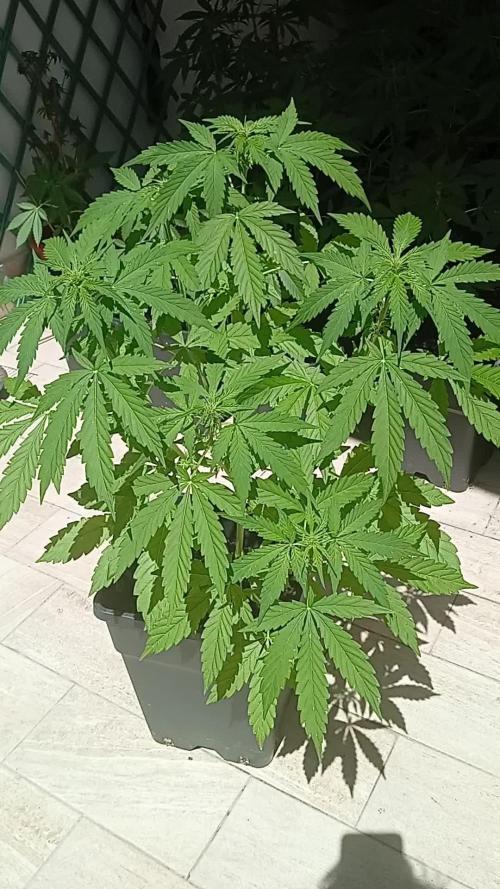
Let's start flowering oh my peshmerga squad, thiss Is a Hope for free and indipendente Kurdistan,and peace in mid orient than ukraina, when a run start to flower i belief most , the flowering of weed Is a message of peace older than man and woman 💛
I decide: thiss morning i do pooja to Shiva for the peace in the Word for the frist time, no for me but for all the Planet, this afghan kush grow up me?! And my Spirit?!
PS the photos are picked saturday, tomoroow i do Better photo
Likes
10
Share


@Murojuanna
Follow
Gave each medium around 15L water flushing,
Will continue to give only water for the next 14 days or so.
Flush began 30tht August.


Likes
6
Share

@Philhsy
Follow
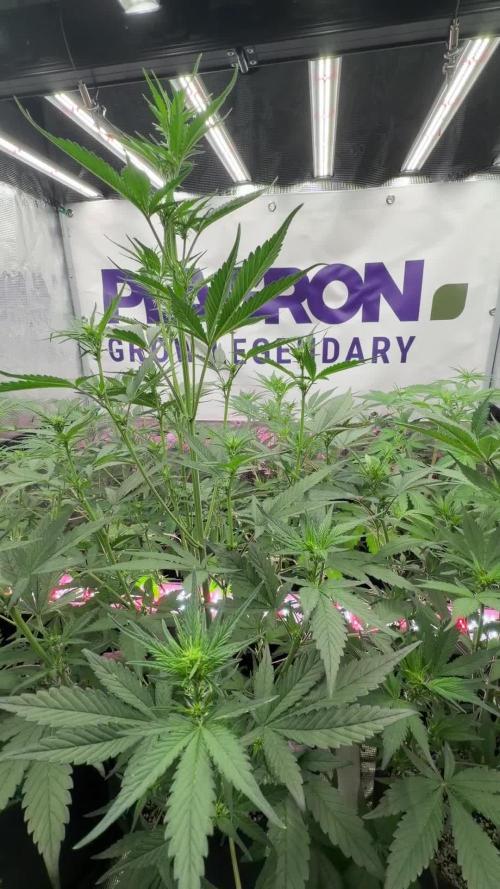
Week 4 – Guava Sundae Auto 🍨
Guava Sundae has officially entered the flowering stage and is making the transition beautifully. The stretch has started, new pistils are appearing daily, and the plant is maintaining a healthy, vibrant green color throughout the canopy.
This week I introduced the Plagron nutrient line at half strength, and she has adjusted very well to the new feeding schedule. Growth remains strong and steady with no signs of deficiencies or nutrient burn. To keep up with the increased growth rate, I raised the light slightly and increased the intensity to provide more energy during early flower.
A gentle round of LST and light defoliation has helped expose more bud sites and improve airflow through the canopy. I’ve also switched on the under-canopy lighting to ensure the lower growth receives adequate light as flowering progresses.
Overall, Guava Sundae is looking healthy, vigorous, and ready to take full advantage of the flowering phase. Very happy with her progress so far and excited to see those buds start stacking
Likes
22
Share

@Ultraviolet
Follow
In 1995, scientists placed human DNA inside a sealed, air tight tube with photons. Without the DNA, the photons arranged themselves in a random scattered pattern, but when the DNA was inserted, the photons formed an alignment.
Are there metaphysical, multidimensional aspects to our DNA? Have we just begun to understand what DNA is and what it represents?
Vladimir Poponin is a well known Russian scientist who in 1995, with his colleagues, including biophysicist Peter Gariaev, conducted a very interesting experiment during their time at the Russian Academy of Sciences. In their paper (P.P. Gariaev and V.P. Poponin. Vacuum DNA phantom effect in vitro and its possible rational explanation. Nanobiology 1995 (in press)), Poponin states, in the introduction of the report, that, “We believe this discovery has tremendous significance for the explanation and deeper understanding of the mechanisms underlying subtle energy phenomena including many of the observed alternative healing phenomena.”
Why did he feel this way? We will get to that.
Poponin and Gariaev tested the behaviour of DNA on photons, little tiny bits of matter, in the “quantum” that our world is made up of. They put photons into a tube specially designed to simulate a vacuum, just like the vacuum of space. With no air inside, they inserted the photons as they wanted to see what they did and how they behaved. The photons were distributed in a way that was completely unordered and random, scattered all over the container. This of course was what the team of researchers expected.
Next, samples of human DNA were placed inside the tube with the photons, and what happened next is what’s truly mysterious. The photons reacted to the DNA, and changed their pattern and formed a specific alignment. In the presence of living material, the human DNA, the photons organized! This signified that the DNA was clearly having a direct influence over the photons. It’s one of many examples hypothesizing that something within us has a direct affect on the physical material matter outside of us. This experiment was repeated and confirmed, and it was further observed that human DNA has a direct affect on the quantum ‘stuff’ that our world is made up of. Fascinating to say the least.
The Next Big Surprise
The next big surprise was observed when the researchers removed the DNA from the container. The scientists assumed that the photons would simply return to their original scattered state, but this didn’t happen. Instead, the photons remained ordered as if the DNA were still in the tube. Poponin described the light as behaving “surprisingly and counter-intuitively.”
The researchers hypothesized and were “forced to accept the working hypothesis that some new field structure is being excited.” Is there something being left behind? Something in non-physical form? This experiment tells us that DNA is communicating with the ‘stuff’ our world is made of, and that there is some sort of invisible field that exists. Perhaps DNA represents a place of storage and communications to the past? To the future? To others in the universe who have left their mark, so to speak. Who knows.
Quantum Physics and Consciousness
Nobel laureate of the twentieth century Richard Feynman once said, with regards to quantum mechanics, “we choose to examine a phenomenon which is impossible, absolutely impossible, to explain in any classical way, and which has in it the heart of quantum mechanics. In reality, it contains the only mystery.”
Another great quote that comes to mind anytime the world of science dives deep into the mysterious world of quantum physics:
There seems to be a deep concern that the whole field will be tarnished by studying a phenomenon that is tainted by its association with superstition, spiritualism and magic. Protecting against this possibility sometimes seems more important than encouraging scientific exploration or protecting academic freedom. But this may be changing.” – Cassandra Vieten, PhD and President/CEO at the Institute of Noetic Sciences.
The reason why the association with superstition, spiritualism and magic mentioned in the quote above exists when it comes to examining certain phenomenon is simply because the observed phenomenon is unexplainable. But it’s important to remember, just because something is unexplainable does not mean that it’s not real, it simply means we don’t fully understand it yet. Academia has a long history of rejecting phenomenon, that’s clearly real, yet simply unexplainable.
Quantum physics clearly has a strong connection to consciousness and metaphysical phenomenon. Max Planck, a physicist who originated quantum theory, regarded consciousness as “fundamental,” and matter as “derivative from consciousness.” He said that “we cannot get behind consciousness. Everything that we talk about, everything that we regard as existing, postulates consciousness.”
This has been demonstrated quite clearly by multiple experiments, like the quantum double slit experiment.
A paper published in the peer-reviewed journal Physics Essays by Dean Radin, PhD, explains how this experiment has been used multiple times to explore the role of consciousness in shaping the nature of physical reality.
In this experiment, a double-slit optical system was used to test the possible role of consciousness in the collapse of the quantum wave-function. Photons were shot through two slits, in multiple different ways. The study found that factors associated with consciousness “significantly” correlated in predicted ways with perturbations in the double slit interference pattern. In this experiment, tiny bits of matter (photons, electrons, or any atomic-sized object) are shot towards a screen that has two slits in it. On the other side of the screen, a high-tech video camera records where each photon lands. When scientists close one slit, the camera will show us an expected pattern, as seen in the video below. But when both slits are opened, an “interference pattern” emerges — they begin to act like waves.
You can refer to the actual study to find out more about that if you want to see a visual demonstration of the quantum double slit experiment. The point is, consciousness changes the behaviour of the particles.
“Observation not only disturbs what has to be measured, they produce it. We compel the electron to assume a definite position. We ourselves produce the results of the measurement.”
The study cited above points out that “factors associated with consciousness, such as meditation experience, electrocortical markers of focused attention, and psychological factors including openness and absorption, significantly correlated in predicted ways with perturbations in the double-slit interference pattern. The results appear to be consistent with a consciousness-related interpretation of the quantum measurement problem.”
The Takeaway
DNA is fascinating, and it’s probably the least understood part of our biology. There are definitely interesting metaphysical non-material aspects to our DNA, and changes to our DNA can come as a result of our thoughts, feelings, and emotions alone. HeartMath researchers have shown that physical aspects of DNA strands could be influenced by human intention. The article, Modulation of DNA Conformation by Heart-Focused Intention – McCraty, Atkinson, Tomasino, 2003 – describes experiments that achieved such results.

Likes
48
Share


@DudeGrowsWeed
Follow
Fast Buds Tangie'Matic is growing strong. Still feeding Recharge only and she's loving it. She still has plenty of stretching to do, it should be an exciting week ahead! 👍
Likes
109
Share


@Prototype0181
Follow
Didn't Pay to much attention to em this week😅
Deu to a shopping Spree😉 Got a new light and tent this week 😁
Light: Geeklight Geekbeast pro 630w
Tent: Budbox pro xl 120x120
Expecting a lot from this upgrade stay tuned😉


Likes
28
Share


@WEED_SPACE
Follow
September 8 will be considered a day for the first time, Day 1
and I’m desire to call names Auto acid is “Tiwa” and Auto Kong 4 is “Ratree”
🍀🍀🍀🍀🍀🍀🍀🍀🍀🍀🍀🍀

Likes
24
Share


@MediciGrade
Follow
End of Week 4 of Flower (day 28):
Some flowers look like they're starting to swell. Resin production has begun in earnest.
I put a tower fan with 180 deg. oscillation into the tent in order to increase overall airflow.
Noticed a slight tip burn showing up on some of the leaves and realized I had stopped getting adequate runoff after each fertigation event. I increased the volume (+16%) of nutrient solution they were getting during each of the 5 daily feedings and there have been no further spread of the tip burn.
Seems like the plants are all on cruise control. Here's hoping I can avoid any stupid mistakes the rest of the way. Until next week!
