
Likes
Comments
Share


Likes
24
Share


@DeepRootsGrowTrees
Follow
COLOMBIAN JACK by KANNABIA
Week #15 Overall
Week #4 Flower
This week this lady is starting grow her buds hopefully the topping and trimming helps her focus her energy and she produces some great buds!! She's getting a nice aroma to her as well!! Stay Growing!!
kannabia.com COLOMBIAN JACK


Processing
Likes
9
Share


@Lazuli
Follow
Defoliation slowed her flowering time down a bit, today is day 35
Not too fat yet but she will be soon

Processing
Likes
62
Share


@OwlGang_Uk
Follow
Happy 1 Month To My Girls (Inserts Celebration Emojis)
I’m Very Proud Of The 1st Month’s Progress These Girls Has Really Exceeded My Expectations.
I’m Very Proud Of The Of The Purple Power If You Go Back To Week 1 You Will See That She Started Off The Slowest But She Is Now The Tallest In The Pack Standing At 21 Inches (that’s without adding the few cm I covered with soil) She Has Also Shown Signs Of Purple In Her Bud Development (Favourite Color) Can’t Wait To See Them, You Go Girl!
I’m Also Proud Of The Gorilla Glu (12 inches) Stardawg (17 inches) And Girls Scout Cookies (16 inches) Development, They Are My Favorite Buds Here In The UK. They Are Very Bushy & Branchy And Their Stems Are Very Thick. They Have The 3 Main Pillars To Accommodate BIG Buds.
Happy Growing Everyone. #OwlGang #AGrowingEmpire


Processing
Likes
7
Share


@Smiffy
Follow
The topped gorilla is 55cm, untopped 80cm, pulling it sideways for a few days or a week. All is well, watering at 6.3 this week, big bud and cal mag. With the LED long gone now im in flower, im using a 450w CFL red, for flower, with a reflector. Not planning on doing any defoliation for a while now, wishing i hadnt been so harsh a few weeks ago, trimming. Be careful guys.
Have given the plant a slight hst, the 80cm bothered me, im sure it will knuckle up even though i am in flower. Not ideal.
My inkbird was £35 well spent. Maintaining the temperature very well. 26* consistently
Likes
10
Share


@wheedtobeus420
Follow
Day 57 she’s beautiful happy loving life. I can’t wait for her to be done. Mhhhhh my
Favorite.

Likes
4
Share

@cdxxbuds
Follow
Chop day. Whe hella flora funky. And nugs are hardrock. After all the stress they performed better than expected.

Likes
5
Share


@lonelystoners
Follow
Totally forgot to change the status to flowering haha. 8 weeks in, i see some cloudy trichomes but hope that they will grow a few weeks more for a thicc harvest!
Likes
13
Share


@gr3g4l
Follow
Empezamos la semana cambiando los nutrientes al observar ya unos pequeños pistilos o estigmas , en definitiva, empezaron a mostrar tímidamente el sexo. Empiezo con poco y iré subiendo la dosis hasta 4ml/L hasta que vuelva a cambiar de nutrientes.
Creo observar del Lumatek ATSpro que le fataria un punto de luz en el centro del panel. Por lo general con otras luminarias la planta del medio me solia crecer mucho mejor y esta vez está quedando retrasada. Seguiré cultivando y si me sigue pasando lo mismo entonces no tendré ninguna duda, por ahora solo son conjeturas, xd
De lo anterior rectifico , tengo que decir que pasados dos dias lo estoy viendo diferente, la del medio parece que sigue por buen camino, ahora apenas notaria la diferencia.
La semana anterior, la sexta, se les hizo una segunda pulverización con dosis alta de 3ml/L con spiderbloom ( "fitofortificante de impacto muy rápido") pero de nada sirvió, durante esta semana subió la temperatura a 30ºC un par de dias y las arañas salieron a pegarse el gran festín.
Una vez constatada la existencia de araña roja correteando por el envés de las hojas solo toca desinfectar bién el armario, lavarlas a todas una a una con agua corriente para arrastrar el máximo de arañitas y una vez secas darles con algun acaricida químico. De no hacerlo ahora me seria imposible más adelante y no tengo ningunas ganas de dejar perder este cultivo. No soy partidario de lo químico pero menos de dejarlas perder.

Likes
4
Share


@Willy_Balls
Follow
After a long time I think we got to an end of this story. Especially the gelato was tough battle. It started with no clones surviving from the veg of original plant. Then of course it turned out to be the best one from probably 20 or 30 seeds ive had of this strain. Reveg of this one was very complicated. She didn't want to grow from the buds I left on. Maybe due to them being very meaty not much leaf there just a couple of very chunky calyxes. I was kind of accepting it's not going to happen. Unexpectedly tiny growth started to show near the bottom of the main stem. Steadily but surely it slowly grew.
Unfortunately after reaching around 15 cm new problems arose. She started drooping badly. I think I she started having root issues. It was rather big pot of roots for such a small growth and they started dying. I also might overwatered it a little. I must have taken action or she would be lost again. I took a chance and took clones from the small and droopy growth. After a long few days there perked right up. I knew they started getting more nutrients and water from the cut little stems then they've had from the dying roots. Another few days flew by and, success the withe fuzzy growth appeared from the easy plugs. We had roots! Now I have 3 beautiful clones of her and she's going in for the next round.
Ice cream cake was a breeze in comparison. Maybe it was due to rock wool cube breaking a little better than 7 l coco. Or the buds were more prone to reveg. She started growing beautiful shoots left and right fast. I took probably 30 clones off of her. 9 best are currently growing in small turn and are stunning. Very healthy, very vigorous, praying all the time. Just perfect. Can't wait to see these dark purple buds again.
Till the next time.

Likes
54
Share


@FavoriteCookie
Follow
Hey guy's
Ok so here we are at day 74.
Girl scout cookies, First of all DAMN what a smell straight up cookies like some mint and a faint liquorice notes to it. But this girl is picky and i learned a lot for my first run of this pheno, Next time around she will go straight up organic with only 6.5 ph water from the Blumat and i topped her to grow 4 tops next time around that will help her breathe better against mold (i think).
The main cola single top was so "sappy" and so dense and so fat it was thicker then both my fists together (I have big hands too), so at day 69 i spotted some mold on on her.......... i though i was doomed and all work for nothing i though i would never get to try it this time around after all this time and care. No i cut the main cola cut all the mold i could see with magnifier microscope and rinsed her in clean spring water then dried for a week, i might have lost a few nice buds but hey i saved her fruit in the end and i let the rest of the plant flower out until tonight 00.01 my time. need 75 to feel good about my self 😬. I didn't get the chance to take better quality pictures i am sorry friends i hope that okay with you 😬, due to work and kids i had little to no time this week, but here is the result. 😀
Edit: I will update with dry weight when all of it is dried.
If you enjoyed this journey with me please leave a like and until next time, Cheers So after drying and trimming we are finally have our dry weight 70.2 G Solid bud i made hash of the trim and baked cookies and munched on them all weekend 😬. Smells amazing but i kinda messed up the grow so she lack trichomes. I'll grow her one more time before i decide if she is a keeper, but i will most likely try a different pheno in the future.
Cheers!


Likes
36
Share


@nonick123
Follow
Día 37 (08/07) Ajustes de LST en todas las plantas! 🚀
Día 38 (09/07) Ajustes de LST en todas las plantas. Las ramas inferiores están creciendo como un cohete! 🚀😍
Riego con 250 ml H2O pH 6,5
Día 39 (10/07) Las plantas se muestran sedientas! Creo que el cepellón está lleno de raíces y piden el trasplante!
El crecimiento no se ha visto afectado de momento
Riego con 500 ml H20 pH 6,5
Día 40 (11/07) Paso a regar con 500 ml / día, ya que hace mucho calor (30 ºC) y efectivamente las plantas ya han copado la maceta de raíces
Las ramas de nodo inferior se han quedado enanas tras el entrenamiento, de modo que las elimino y aplico canela en polvo en los cortes
Riego con 500 ml H20 pH 6,5
Día 41 (12/07) Riego con 500 ml H20 pH 6,5
Clones! Mi experimento vuelve a demostrar que NO necesitas complejos productos de clonación ni sistemas para obtener clones!
Hace 15 días puse 2 clones con el tallo sumergido en miel durante 5 minutos en una maceta de 400 ml con PRO-MIX HP BACILLUS + MYCORRHIZAE
He mantenido la humedad alta con una cúpula de humedad casera hecha con una botella de agua PET de 5 litros cortada por la mitad y pulverizando a diario.
Han estado los 15 días en mi terraza con luz indirecta, y temperaturas que rondan los 30 - 32ºC durante las horas centrales del día
Hoy los he trasplantado a una maceta de 1 litro porque ya habían formado raíces y empezaban a formar nuevas hojas!
🐥🐥🚀🐥🐥
Día 42 (13/07) Riego con 500 ml H20 pH 6,5
Día 43 (14/07) Trasplante a maceta definitiva de 21 litros de ROOTPLUS Pot de GSKOREA GLOBAL!
Estas macetas son una maravilla!
Proceso de trasplante:
Se prepara con 17,85 Litros (85%) de sustrato PRO-MIX HP BACILLUS+MYCORRHIZAE + 1,05 Litros de Humus de Lombriz (5%) + 2,01 Litros de Insect Frass (10%) + 210 gramos de Earth Vibes Super Soil (10 g/L substrato)
Se llena la maceta de sustrato con las manos (limpias) y rompiendo los trozos más gruesos, para que el sustrato esté aireado y esponjoso, sin presionar
Se coloca una maceta vacía de 6,5L para que quede la forma perfecta de la maceta donde están actualmente
Se espolvorea la parte proporcional de la probeta de microorganismos sobre el agujero de trasplante
Se saca la planta de su maceta actual (bonitas raíces 😍) y se coloca en la maceta final
Se riega muy lentamente hasta percolación profunda con H2O EC 0,5 pH 6,5
Una vez asentada, complemento con un riego de 500 ml con 25 ml/L de Humus de Lombriz Liquido
Se coloca mulch (acolchado) de paja para evitar traspiración excesiva y cuidar a los microorganismos del suelo
A ver como reacciona al trasplante!
Aplicación foliar Kelp hidrolizado de Lurpe Solutions a 0.25 ml/l
Realizo ajustes de LST aprovechando el trasplante a la nueva maceta. De momento tienen una canopia muy bien formada!
💦Nutrients by Lurpe Solutions - www.lurpenaturalsolutions.com
🌱Substrate PRO-MIX HP BACILLUS + MYCORRHIZAE - www.pthorticulture.com/en/products/pro-mix-hp-biostimulant-plus-mycorrhizae

Processing
Likes
15
Share


@Dico29
Follow
5th week of flower, the plant has stopped growing and focused on the buds.
Both plants look nice, I’m hoping the 3 gallon plant gets fatter before the end though.

Likes
Comments
Share


@Geili_Seili_fireinfireout
Follow
Last week not much happen. But i see this since 2 days they get fat now. 2-3 weeks left. I will see whats happen. But i love this cut realy much
Likes
21
Share


@Top_shelf_grower
Follow
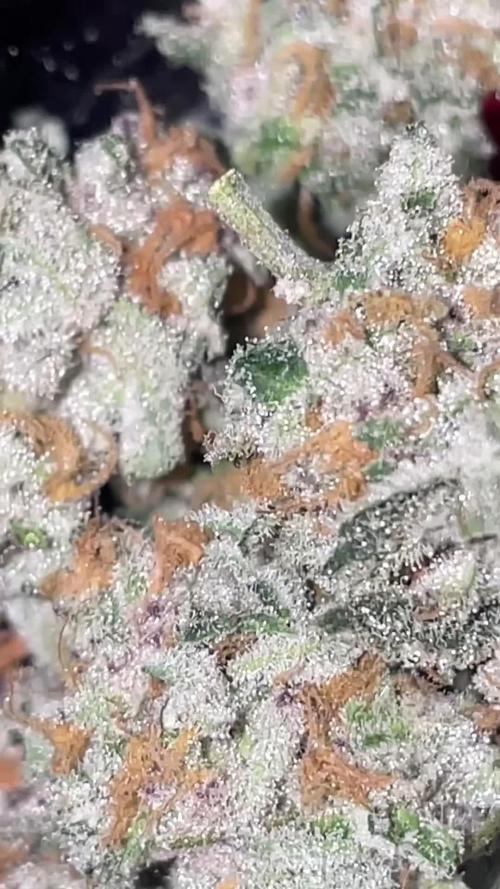
She’s just getting frostier and heavier by the day now. In love with the main long thick big cola

Likes
22
Share


@Njaak
Follow
One out of two germinated seeds have now sprouted. Started the seedling nutrient diet. As you can see, I've moved the rockwool cube to the hydro setup. The tap root was showing so it was time.
My nutrient schedule is in the pictures. For reference, I'm using a total volume of 24 L between the two buckets.
For now we're enjoying the summer harvest. Well, we are harvesting. A lot. I'm questioning my sanity growing yet more, lol. I do it for the fun and glory. Also, yay pot!
Processing
Likes
19
Share


@xbabybitchx
Follow
I just transplanted these two into 1L pots from solo cups, fed PH balanced water. Not much to report on, besides growing fast! I'm wondering if these two will grow how the other GB is.. short n bushy.
2019.12.29 still good, just installed a fan into small tent for these girlies, put the auto great white sharks in the tent too- they are thriving.

Likes
25
Share


@pifflestikkz
Follow
(END OF QUARANTINE)
Now I have put them to finish underground a 600w hps under 12/12 schedule with the Divine Black opium.
Luckily no more mould has spread, and all plants look happy healthy and still developing.
Day 72
12/09/24 Thursday
De-chlorinated tap water pH 6 today with Plagron products.
Finally a video and pictures update
✌️💚
Day 74
14/09/24 Saturday
De-chlorinated tap water pH 6 only today
Day 76
16/09/24 Monday
Feed today using de-chlorinated tap water pH 6.
Will update all videos and pics tonight 😁
Day 77
17/09/24 Tuesday
Feed today using de-chlorinated tap water pH 6.
Seeing good developments, buds forming nicely, divines are smaller denser structures but the buds are not lacking!
Damn I'm surprised by 2L pots.

