
Likes
Comments
Share

@GERGrowDesigns
Follow
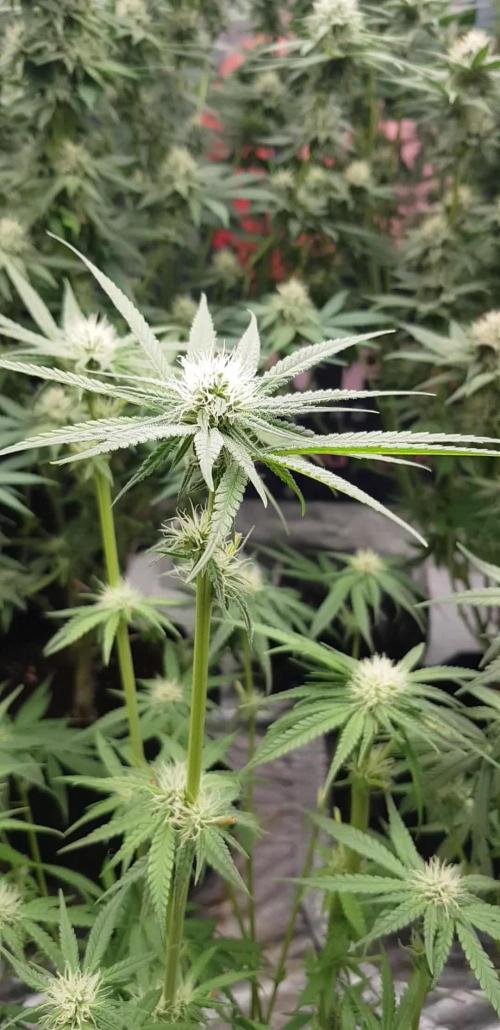
Welcome to Flower Week 3 of Divine Seeds Divine Rapier
I'm excited to share my grow journey with you from my
Sensi Seeds Project . It's going to be an incredible ride, full of learning, growing, and connecting with fellow growers from all around the world!
For this Project , I’ve chosen the Feminized Photo Strain Divine Rapier:
Here’s what I’m working with:
• 🌱 Tent: 120x60x80
• 🧑🌾 Breeder Company: Divine Seeds
• 💧Strain Info : 29%
• ⏳ Flowering Time: 6-7weeks

Likes
12
Share


@Chubbs
Follow
Weekly update on these big girls. I decided to take out some of the lower branches, giving more airflow at the top of the pot level. Overall they've exploded with growth this week. I'd say they're getting close to 4ft tall. I sprayed some BT spray for ipm this week since I don't want catapillers showing up unannounced. All in all Happy Growing.

Likes
2
Share


@NocturnalGardner44
Follow
Continued training and caring for the life in the soil... I'm trying to think of it as growing soil more then growing plants


Likes
5
Share

@TerpCloudzZz
Follow
Start Woche 6: Jetzt wird final “gesetzt”. Nach dem strukturierten Aufbau in Woche 5 liegt der Fokus diese Woche darauf, die Pflanzen in eine stabile, performante Endform zu bringen: gleichmäßiges Canopy, saubere Lichtverteilung und eine Rootzone, die das Topfvolumen aktiv nutzt. Ziel ist, dass jede Top-Zone unter vergleichbaren Bedingungen arbeitet – das ist die Grundlage für eine effiziente nächste Phase. 🌿✅
Canopy / Training
• Feintuning statt Stress: LST wird nur noch gezielt nachjustiert, um Tops auf eine Ebene zu bringen und Schattenzonen zu minimieren.
• Struktur sichern: Triebe werden so geführt, dass Luftfluss im Inneren bleibt und keine überlappenden Blattpakete entstehen.
• Priorität: gleichmäßige Spitzenhöhe + klare Triebführung → maximale Nutzfläche unter der Lampe.
Klima & Licht (Wachstum pushen, ohne zu überfahren)
Woche 6 entscheidet oft, wie “smooth” der Übergang später läuft. Daher:
• Klima stabil halten, sodass Transpiration sauber läuft (keine kalten Bremsen, kein stehender Dampf).
• Licht/Abstand so einstellen, dass die Pflanzen aktiv wachsen, aber ohne unnötigen Stress (Leaf-Pray, keine aufrollenden Kanten).
Bewässerung / Rootzone
Mit 7-L Pots ist jetzt wichtig, dass die Rootzone konstant arbeitet:
• Rhythmus beibehalten, nicht hin- und herspringen.
• Ziel: gleichmäßig feucht + maximaler Sauerstoff → aktive Wurzelspitzen = schnellerer Zuwachs.
• Wenn der Topf schneller leicht wird, ist das ein gutes Zeichen: mehr Wurzelmasse, höherer Verbrauch.
Plan für diese Woche
Diese Woche wird die Form final fixiert: Canopy glätten, Mikroklima verbessern, Rootzone stabil halten. Wenn alles sauber läuft, ist das die perfekte Ausgangslage, um die Pflanzen kontrolliert in die nächste Phase zu führen. 🔥🏆


Likes
2
Share


@brown_tattooz
Follow
Week 2 transplanted from solo cups to 5 gal pots an 1 into 7 gal grow bag. Plants had good healthy roots in solo cups..plants keep growing vigorously from the start!!!
Likes
9
Share


@I_Identify_As_A_Dan
Follow
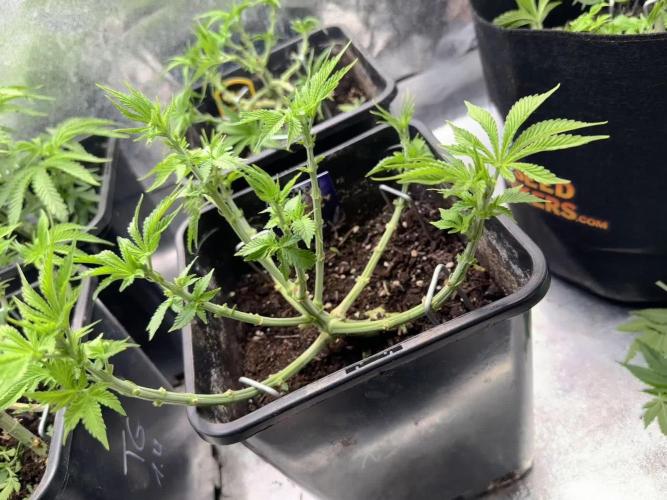
Week 5 for Black Lebanon by SSSC,
Have to point out shes my best growing plant to date id say, just wont stop pushing in size😂 Her lower branches caught up with the tops so i have also topped those, I will be transplanting her to a big 250L pot outdoors today & stretching her out as much as i can. Cant wait to see how she reacts to a bigger pot with unlimited room for root growth. I was going to keep her indoors for longer but shes going from full pot with water to fully dry in just under 2 days, her roots are DRINKINGGG. 😬 Im sure she will be getting another topping to her top branches my next week sometime again.


Likes
11
Share


@eldruida_lamota
Follow
Que pasa familia, vamos con la séptima y última semana de floración de estas Gorilla cookies Auto de FastBuds.
Por el momento todo va bien tienen buen color, van madurando esas flores.
Llevan solo agua toda la semana.
Por supuesto el ph se mide en cada riego y se mantiene en 6.2 y riego en intervalos de 48h.
La temperatura está entorno al 22/24 grados y la humedad anda sobre el 50%.
La verdad para ser autos es que me han hasta sorprendido , buena estructura, resistentes , fáciles, huelen fuerte y están llenas de resina. Qué más puedo pedir?
Mars hydro:
Code discount: EL420
https://www.mars-hydro.com/
Agrobeta:
https://www.agrobeta.com/agrobetatiendaonline/36-abonos-canamo
Hasta aquí todo, Buenos humos 💨💨💨
Processing
Likes
3
Share


@Bankir
Follow
На этой неделе частично срезал и высушил часть растихи. Остальную часть буду держать до коричневых трихом.

Likes
12
Share


@Staffedition
Follow
Привет друзья. Моей растихе сегодня 43 дня.
Начал применять LST технику на 19 дне и продалжаю применять её через день, а 18 августа добавил ДЕФОЛИЗАЦИЮ
С 20.08 ДЕФОЛИЗАЦИЮ делаю каждые 3,4 дня
С 20.08 LST технику делаю каждые 4.6 дней
На сегодняшний день влажность 70%
Чувствуется по листьям много влажности.
Буду что решать с этим вопросом, ведь впереди цветение.
Не смотря на высокую влажность растение растёт хорошо. генетика радует.
Всем мира и добра!
https://t.me/smail_seeds
#Smail_Seeds
Likes
37
Share


@iMpulsive_Grow
Follow
Day 29!
Will slowly start incorporating some nutes or maybe on week 6
Day 30! And day 28’s
The leaves are getting really sticky ....
-There’s little light burn on a few leaves due to turning up my wattage on my grow lights way to high. 🤦♂️🏼dimmed my lights and all good now.🌱🌱🌱☺️
Day 31!
Started to do lst all of them with a simple technique. Just a piece of tape...
Day 32!
Not much to say other than they are loving life
Day33!
Improved the lst by giving the bottom of the stem some support. I also added my first video 🌱🌱🌱
this strain it’s average height is 3 ~feet
Day 34!
The low stress training has made them so happy and grow faster. The other 2 are at day 32
Day 35!
She is fkn awesome with her two young’s

Processing
Likes
48
Share


@Miss_Greenthumbs_Garden
Follow
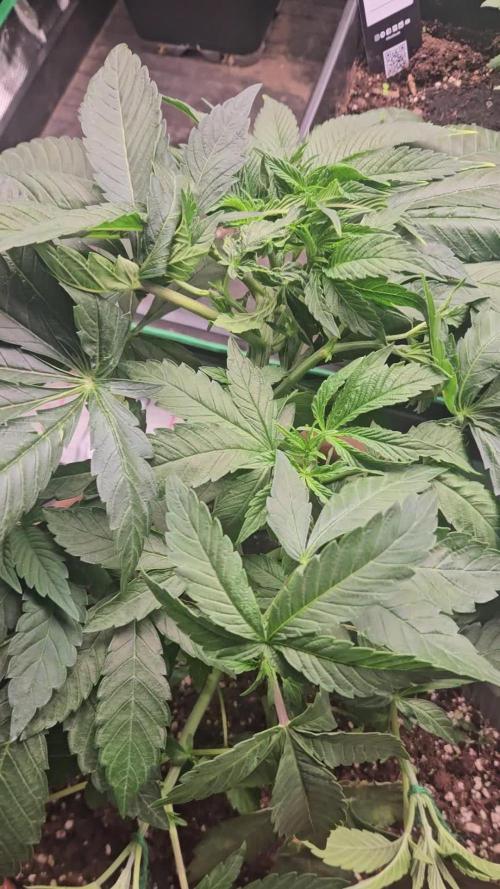
This will be their last week in vegging 😊 will all be defoliated and vegged for a few days then flipped into flower 🌺🌷 also will all be going into a new 80x80x160cm tent . Had a few condensation problems this week too but all under control now .

Likes
Comments
Share

@eldruida_lamota
Follow
Vamos familia, actualizamos la cuarta semana de floración de estas Sagrada amnesia de Seedstockers, salieron las 5 de 5, 100% ratio éxito.
Aplicamos varios productos de Agrobeta, que son increíbles para aportar una buena alimentación a las plantas.
Temperatura y humedad dentro de los rangos correctos dentro de la etapa de floración.
La tierra utilizada es al mix top crop, por cambiar.
De 5 ejemplares seleccioné los 3 mejores para completar el indoor y trasplanté directamente a macetas de 7 litros, el fotoperiodo a 12/12, también aplique una buena poda de bajos, se ven bien sanas las plantas, tienen un buen color y progresan a muy buen ritmo por el momento, ya progresan las flores, llevan ya una tricomada… increíble.
Agrobeta:
https://www.agrobeta.com/agrobetatiendaonline/36-abonos-canamo
Hasta aquí todo, Buenos humos 💨💨

Likes
16
Share

@discopriest379
Follow
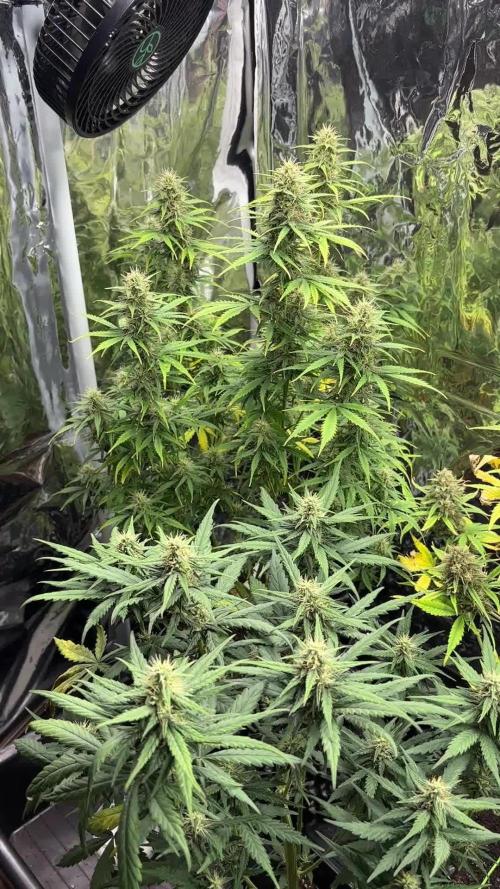
Runtz is heading into the final stage — this is her last week, so I’m watering daily with plain water only 💧
She smells absolutely amazing, and I really enjoy it every time I open the tent — she easily overpowers the aroma of Lemon AK and Break-Up 🍓🔥
Break-Up and the Lemon AK plants still have about two to three weeks to go, and they’re growing without any issues.
Break-Up is stacking a lot of buds — she’s completely covered, and I’m really curious to see how she’ll turn out 😄🌸
And the last photos are tomatoes… 😄🍅 it’s a full-on jungle at this point — I probably started them a bit too early, but oh well, it happens.
The greenhouse is already completely full too… 😄🌿
I’m thinking I might keep updating this journal from time to time with how the tomatoes and perennials are doing — just for fun 🍅.

Likes
7
Share


@darb35
Follow
Still did not get to smoke it, will let it cure for a few weeks.
Many of the lower buds were very fluffly, in total there was around 140G dry, but around 40 grams will be kept with trim for cooking maybe.
So 100 grams dry flower is pretty sweet outcome.
Likes
2
Share


@High_Grade_Dadli
Follow
Had a bit of nute burn and potassium deficiency had to increase potassium to balance it out.....other than that she is doing well....u know it's getting closer to the end the stem along with the branches are showing there purple genetics
Likes
1
Share


@Teddy01500
Follow
Bonjour à tous, ces derniers jours ce sont bien passé pour mes petit bébés elles grandissent doucement mais sûrement.C’est la première fois que je travail avec cette gamme de produits (je vous est mis des photos des produits 😉) pour l’instant j’en suis satisfait après, il faut voir le résultat final ce qui est moins facile 😂. Mes petit bébés commence leurs 5ème semaine (je me suis trompé d’une semaine 😕 désolé 😉) trop pressé!!! 😂 de mettre de nouvelles photos 😜. Je vous dis à là semaine prochaine vivement 😉 bonne journée à tous. Je vous remercie 😉.
Likes
22
Share


@J_diaz420
Follow
Una cepa muy estable , muy semejante entre las 4 que cultive, venía ya probando la que coseche con anterioridad y vaya que exquisita variedad muy recomendable, en las foto no está el peso de la cosechada con anterioridad pero sume sus gramos al peso final, muy contento, me gustan estos cultivos fuertes y estables 💪👌✌️🍀

Likes
7
Share


@Smokesomeweed
Follow
Thanks Pyramid Seeds for your good genetics. Not my first experience with PS, like them so much. I was happy to grow this baby. It my first experience with coco. No pH or ppm meters, nothing just my eyes and feeling whole process.
Thanks to ru brend Plantators for good feedings and stims for awesome price.
You always can ask me about everything, I'm always in connection.

Likes
11
Share


@Inceptionist
Follow
Sooo... The King's Juice Auto wasn't placed back into the tent as you can see and she also wasn't really developing the pistols properly. Gave me a bit of worries but I think/hope she just needed some time to get used to the outdoor conditions.
The last few days she started to develope quite well again. So far I could see any male traits... I hope it stays that way and she actually stays a female and only a female.
Putting her back alone into the tent unfortunately just wasn't efficient at all. I switched the plants around and my tent is now a 3 plants flower tent with 12-12 cycle, so the King's Juice Auto probably wouldn't have had a lot of fun in the tent anymore.
Also if the KJA decided to hermaphrodite as well, I wouldn't know if she was pollinated already or if my tent is still holding on to some pollen from before and I just HAVE to know if my tent is safe now.
I just hope outdoor conditions stay like this. It's very sunny, hot and dry right now