


Likes
26
Share


@Nistnov
Follow
I did partily harvest the Special Queen the microscope shows some orange/brown trichomes they are not enough to call her ready to harvest but just like with the Painkiller im scared of bud rot and next week will be raining non stop again so saftey first thats also the reason why i removed almost all the leaves, to improve airflow.
Honey Cream receives a good amount of fertilizer not sure if shes able to use it all since its getting cold and the sun is almost never shining.
I water with a concentrated solution because the ground is already soaking wet.
I guess i'll harvest the rest of the special queen this coming week.

Likes
2
Share

@BudBeezy
Follow
Welcome to week 9 of my grow diary. In the middle of the week, I decided to pull the four main shoots apart using plant wire and binder clips, as the side shoots in the middle weren't getting enough light. Fortunately I couldn't find any more mildew. The weather continues to be great.
See you next week!

Likes
5
Share

@Kocicak
Follow
Zdarec ;)
Začínáme 7. týden květu a holkám očividně všechno chutná 😎 Zdají se spokojené, krásně bobtnají a začíná to být pořádně cítit 👃🔥 Palice nabírají objem každý den a je radost to sledovat.
Rychlá Chew půjde nejspíš dolů začátkem příštího týdne. Teď měla týden jen základ. už jen dozrává a finišuje 🍂✂️
Na zbytek si ještě chvíli počkám, odhadem tak 3–4 týdny, ale uvidíme podle holek, jak si řeknou 😁
Díky všem za a ať to roste! 🌱💚


Likes
4
Share


@Satax
Follow
Start to flush expect one that i put alone in one DW système to continue.
I decrease the EC progressively


Likes
22
Share


@Zengrower
Follow
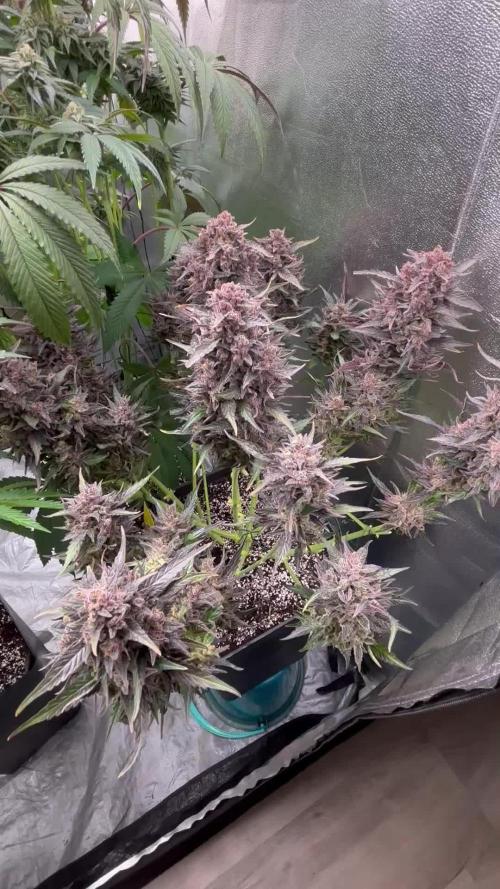
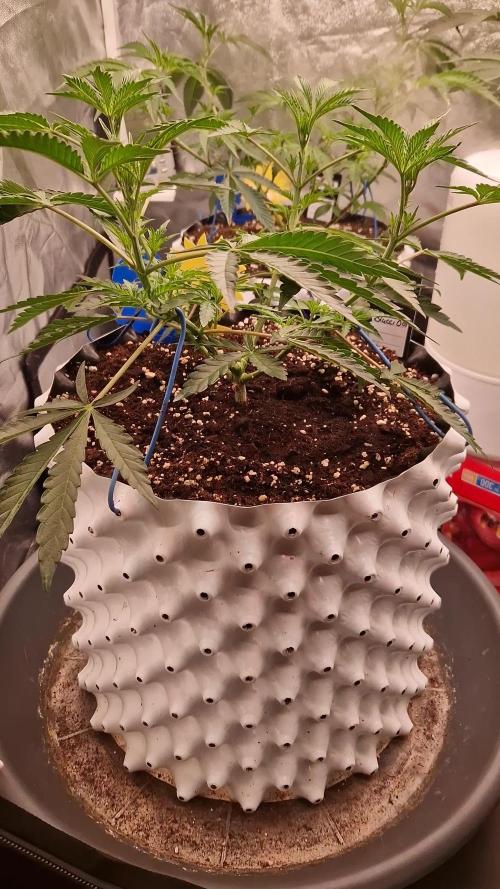
The Titan is growing beautifully and the smell keeps getting better by the day. This is the first time using an Airpot to grow and I noticed the plant does need more water compared to a Geotextile pot. Luckily I can check up on her a few times a day and give water when needed. Not much to do in terms of training as this lady practically trained herself ¯_(ツ)_/¯
I add updated daily instead of at the end of the week, so more pics and video's coming up in the next few days.
Likes
8
Share


@Mr_nugs_lover_David
Follow
I Have changed the light cycle on December 22nd to 12 hs on and 12hs off which marks the start of the Flowering stage! So let's see how this lady develops and hoping for a beautiful stretch!

Likes
36
Share


@codebase
Follow
2021-01-06(day 57): Entering the 5th week of flowering all looks pretty good. She's still budding up and smelling beautifully. Fed her with 2.5l of ph'ed water.
I also defoliated her so the light can reach the lower buds.
2021-01-09(day 60): Fed with 3l nutrient solution as given above.
2021-01-12(day 63): Fed with 3.5l of ph'ed water. Looks like she's putting some weight on! 😁 Trichome pictures are for test purposes.

Likes
35
Share


@NorCalCloset
Follow
At day 84 from seed, 38 days since the switch to 12-12, she is a little closer to my light than I want. She looks happy to me though so I hope I get away with it. She is just entering that part of her life cycle where she is developing and putting on weight. Not much to do much wait and see if she ends up too close to my light and if she'll need support later in flower.

Processing
Likes
22
Share


@Hawkbo
Follow
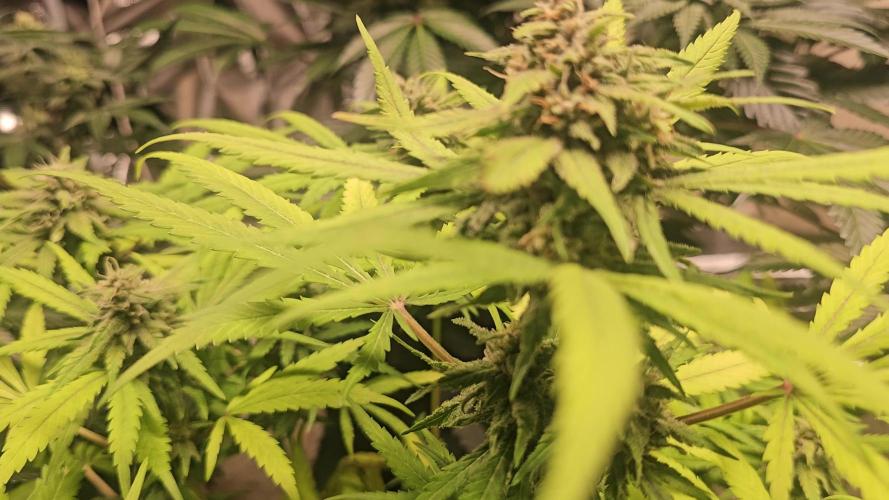
Finally got my buddy to come out and add in a 20 amp outlet so I can fire up a better light. Still using quantum boards but with a 4500k spectrum. Got in a foliar with the Growzyme from green buzz liquids. Fed them right before I took the pics they look a little sad but hopefully they bounce back quickly. Not much else going on.
The code bangdang will get you discounts at..
Gorillagrowtent.com
Rainsciencegrowbags.com
KindLEDgrowlights.com and more (see Instagram Bio for @bangdangbuds)
Also check out my Instagram if your interested in entering a giveaway for a green buzz liquids starter kit including some living organics, fast plants spray and some seeds of the winner choice.
Likes
14
Share


@MG2009
Follow
06/16/2021
More to come once harvest is dried and cured see you soon!
06/29/2021
1 week dry 1 week in jar, stinks the whole house up she has cat spray grapefruity smell. See ya soon for taste and effects, and final weight she is pretty dense.
Ps..
Above were it says taste that is her smell. I can only hope that it translates into her flavor!
07/22/2021
After one month cure she has grapefruit smell but more mellow doughy- ness to it, I don't quite know how else to describe.
If you are high as I it will make sense.
Lol
Ps.
Note
She had slightly airy buds, I was hoping it would have been denser buds. When I resume growing I will cross her back to my cookie cake I could pull a great male plant and cross to this ones clone that I took in beginning and should help some. If you are still reading thanks! Writing about plants is addictive as growing I warn you!
Likes
7
Share


@Cultivatorcarlos
Follow
No bug or disease problems. I even took her off veg nutes way too soon and she recovered like a fucking champ. I’m popping two more this week. Unfortunately i didn’t weigh it because Of some very unfortunate circumstances that I was dealing with at the time. I essentially had to vacate my premise within 24 hours. A few days after harvest. Anyways. I ended up smoking the whole thing with my friends and it was straight fire. The terps were crazy also. Super sweet. After curing she had a very sweet smell like bubblegum / grape. This was only my second harvest ever.

Likes
22
Share


@Slobasian
Follow
Love every plant each one is growing differently stacking different even the visual difference of one strain growin two different ways combined smells of diesel, pez candy and lemons


Likes
12
Share

@TrickzGrowz
Follow
Servus Moin!
Der Stretch fängt bereits für die Blucci OG an und man sieht deutlich wie die unteren Triebe nach dem defolieren jetzt nach oben wachsen wollen.
Likes
13
Share


@AutoCrazy
Follow
This plant is coming along nicely. Starting to bud up a little bit now. Haven’t had any issues crop up this week. She will be getting a top dress soon to keep her happy.
😎🍿


Likes
30
Share


@coyote2thick
Follow
Great week! She grew 10in and responds well to the full dose of nutes. Cut back on the Gro and upped Bloom. Smell up 1100sq feet nicely. She’s been under a 600w and will be put in a 5x5 soon with a 1000w LED.
