


Likes
Comments
Share

@DogDoctorOfficial
Follow
🌿 Nectar Drip – Week 6 Report
Early–Mid Vegetative Development (12/12 from Seed)
Zamnesia Seeds x TICAL – Pack #268
Timing clarification (as always):
This is logged as Week 6 on GrowDiaries, while in real plant development we are closer to Week 5 of vegetative growth.
The offset comes from an early, photo-heavy germination phase. We’ll continue clarifying this weekly for consistency.
⸻
🌱 Growth Overview – Divergence & Character
This week, the Nectar Drip really began to separate into personalities. Same genetics, same room, same feeding — but very different expressions depending on training intensity and structure guidance.
We’re now clearly working with multiple plant strategies inside the same tent.
⸻
✂️ Training Breakdown – Plant by Plant
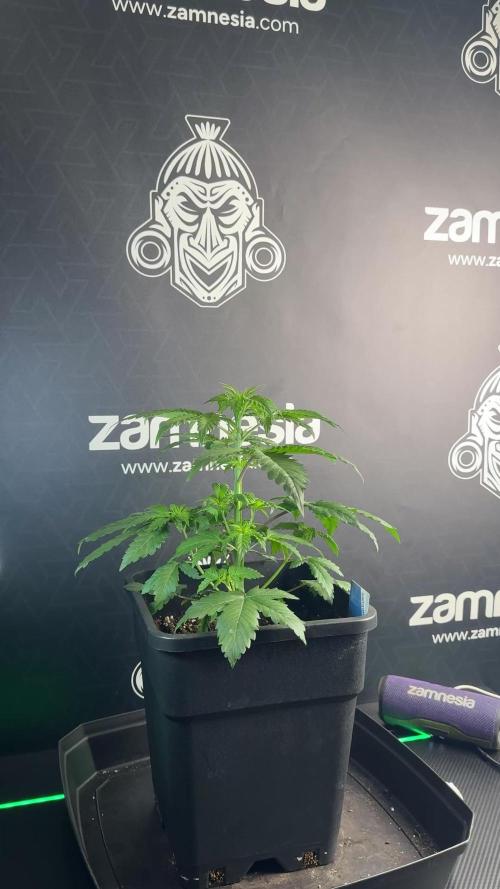
🌿 Plant A – Leaf Work & Gentle Guidance
This plant is trained using leaf bending and leaf tucking only.
• Large fan leaves are tucked under neighboring leaves
• Growth tips are exposed naturally
• No clamps or hard bending
Response:
Absolutely thriving. She’s growing tall, wide, and fast, now reaching roughly 8–9 nodes, with beautiful branching and strong vertical momentum. This is a great example of how far simple leaf management can take a healthy plant.
⸻
🌿 Plant B – Aggressive Opening with Plastic Clamps
This plant started similarly to Plant A, but quickly outpaced the rest in size.
This week, we:
• Introduced plastic clamps
• Opened her aggressively
• Focused on redistributing energy from top dominance to lower branches
Response:
Outstanding. She accepted the harder intervention without stress, opened up beautifully, and continues to push growth across the canopy. Her size advantage is now being converted into structure, not just height.
⸻
🌿 Plant C – The Heavy LST Experiment
This is the plant we’ve been focusing on since last week — the smallest of the group, but the one receiving the most intensive training.
• Strong horizontal bending
• Continuous opening of leaves
• Structural redirection from early on
Response:
She’s thickening, branching, and responding incredibly well. While she is still behind in height (which is expected), she’s building a dense, intentional structure. This plant is also the most delayed in showing pre-flower signs, which is completely normal under 12/12 from seed when subjected to stronger training.
She may never be the tallest — but she is quickly becoming one of the most interesting.
⸻
🌸 Pre-Flower Signals
Some plants are now showing early pre-flower signs. Nothing dramatic yet, but the transition is clearly approaching.
As expected:
• The most heavily trained plant is the most delayed
• The more upright plants are moving faster
This confirms that structure and stress management play a significant role in timing under a 12/12-from-seed regimen.
⸻
🌡️ Environment – Weather-Driven Adjustments
This week brought real-world challenges.
Outside conditions:
• ~5 °C
• 92% relative humidity
Inside the tent:
• Temperature: ~21.8 °C
• Relative Humidity: ~58%
Despite cooler and more humid ambient conditions, the plants are showing no complaints whatsoever. This range is manageable, and the canopy looks relaxed and happy.
⸻
💡 Lighting – Letting Plants Decide
We are now running approximately 700–850 PPFD, depending on plant height and canopy position. Smaller plants receive less, taller ones naturally receive more.
This is intentional.
The plants are:
• growing into the light
• dictating their own intensity
• transitioning naturally toward flowering
I’m not pushing — I’m responding.
This run is about listening, especially under 12/12 from seed.
⸻
🌬️ Airflow – Vortex Method
Airflow is dialed in using a vortex-style circulation:
• Fresh air enters from below
• Warm air exits higher up
• Side fans encourage circular movement
• Central fans gently disrupt stagnation without collapsing the vortex
This creates:
• even temperature distribution
• stable humidity
• strong gas exchange
• minimal microclimates
Air is moving around the plants, not blasting them — exactly what we want at this stage.
⸻
Nutrition – Adjustment for Water Quality & LEDs
💧 Water Source
We are now using a mix of:
• rainwater
• dehumidifier-collected water
Starting EC is extremely low (~0.2), so supplementation became necessary.
CalMag Introduction
We introduced Plagron CalMag Pro at 1 ml/L as a preventive measure, especially important under high-intensity LED lighting, where calcium and magnesium demand increases.
Current Hand-Watering Parameters (Nectar Drip Plants)
• EC: ~2.29
• pH: ~6.0
• Water Temperature: ~22.8 °C
🚰 Reservoir / Autopot Clarification
The tent contains six plants total, not all Nectar Drip.
• Autopot reservoir currently runs Terra Grow + CalMag only
• Organic inputs are excluded from the reservoir (not compatible)
• Reservoir EC: ~1.43
• Reservoir pH: ~5.9
Autopot plants are occasionally top-fed by hand to receive the full recipe. For future runs, the feeding strategy will be simplified and better aligned with autopot systems.
⸻
Special Guest – Mr. Baggy Joins the Team
This week we were joined by Mr. Baggy, a fluffy inspector and proud GrowDiaries “Diary of the Month” prize winner.
He’ll be making more appearances from now on — every good grow needs an official supervisor.
⸻
🔮 What to Expect / What Not to Expect
Expect:
• more pronounced pre-flower expression
• increasing structural differences
• trained plants staying shorter and wider
• untrained plants stretching sooner
Don’t Expect:
• uniform behavior
• identical flowering times
• forced transitions
This run is about letting plants speak.
⸻
🤝 Gratitude
Huge thanks to:
• Zamnesia Seeds
• TICAL
• Plagron
• Future of Grow
• Lumiflora
And to the entire GrowDiaries community — supporters, critics, silent readers, and longtime friends.
Everything shared here reflects my personal experience, philosophy, lessons, and mistakes. The goal is learning — together.
⸻
🌟 Week 6 Summary
• Training is defining structure
• Plants are choosing their own rhythm
• Light intensity is earned, not forced
• Environment is stable despite harsh outside conditions
• The 12/12-from-seed experiment continues to teach
A lot of files.
A lot of data.
A lot of learning.
And we’re just getting started.
Growers love always 💚
Community Note
Due to YouTube community guidelines, our educational channel was taken down.
While we firmly believe the content was purely educational, we respect YouTube’s decision and are actively exploring alternative platforms to continue sharing this work.
📡 Please stay tuned.
🙏 Thank you for your patience and continued support.
FOR DISCOUNT CODES AND MORE JUST FOLLOW THE LINK https://website.beacons.ai/dogdoctorofficial
📲 Don’t forget to Subscribe and follow me on Instagram and YouTube @DogDoctorOfficial for exclusive content, real-time updates, and behind-the-scenes magic. We’ve got so much more coming, including transplanting and all the amazing techniques that go along with it. You won’t want to miss it.
GrowDiaries Journal: https://growdiaries.com/grower/dogdoctorofficial
Instagram: https://www.instagram.com/dogdoctorofficial/
YouTube: https://www.youtube.com/@dogdoctorofficial Deleted by Youtube
Vimeo : https://vimeo.com/dogdoctorofficial Under construction stay tuned ⸻
Explore the Gear that Powers My Grow
If you’re curious about the tech I’m using, check out these links:
🔆 Lighting & Environmental Control
• Future of Grow — Advanced LED lighting technology
https://www.futureofgrow.com/
DISCOUNT CODE: DOG20
• Lumiflora — Under-canopy LED lighting
https://lumiflorade.com/
• TrollMaster — Environmental controllers and automation gear (past collaboration)
⸻
Genetics
• Zamnesia Seeds — Genetics used in this project
https://www.zamnesia.com/
⸻
🌱 Soil, Substrates, Boosters & Root Support
• Plagron — Substrates, bio mixes, and supportive products
https://plagron.com/en/
⸻
🎒 Storage, Curing & Preservation
• Grove Bags — Curing and storage solutions
https://grovebags.com/
⸻
📸 Photography Equipment & Tools
(Not sponsors, but part of my creative toolkit)
• Sony A6700
• Sony full-frame macro lens + few more
• Stacking photography workflow - learning
• iPhone (for behind-the-scenes shots)
We’ve got much more coming as we move through the grow cycles. Trust me, you won’t want to miss the next steps, let’s push the boundaries of indoor horticulture together!
As always, this is shared for educational purposes, aiming to spread understanding and appreciation for this plant. Let’s celebrate it responsibly and continue to learn and grow together.
With true love comes happiness. Always believe in yourself, and always do things expecting nothing and with an open heart. Be a giver, and the universe will give back in ways you could never imagine.
💚 Growers love to all 💚
📸 P.S. – The Eye Behind the Lens
All photos in this diary (for now — except for the ones showing the camera, which I took with an iPhone) are taken with a Sony A6700 paired with a Sony full-frame macro lens and a few more.
Photography is part of the story — it’s how we share the fine textures, the glow, and the quiet details that words can’t always capture.
I’ve also started experimenting with photo stacking — a technique where multiple images, each taken at a slightly different focus point, are layered together to create one perfectly sharp image from front to back.
It’s not digital enhancement or AI; it’s pure photography — a way to reveal the plant’s beauty in microscopic depth, from trichome to petal.
You’ll even see a few shots of "ghost me" capturing the shots — camera, lens, setup — because every grow deserves not just to be cultivated, but documented like art.
FOR DISCOUNT CODES AND MORE JUST FOLLOW THE LINK https://website.beacons.ai/dogdoctorofficial
NEW DISCORD - Official Server Invite Link : https://discord.gg/ksjAkA5T74

Likes
8
Share


@AERO_Grower
Follow
4° Semana- Aeroponía - Mejoría apreciable, las raíces están 100% sanas y la velocidad de crecimiento comienza a ser mayor, además el área de las hojas que realizan fotosíntesis es mayor. Se aumenta concentración de nutrientes.
---------------------------------------------------------------------------------------------------------------------------------------------------------------------------------------------------------------------
4th Week- Aeroponics - Appreciable improvement, the roots are 100% healthy and the speed of growth begins to be greater, in addition the area of the leaves that carry out photosynthesis is greater. Also increasing the concentration of nutrients.


Likes
10
Share


@Cr4zyElite
Follow
Sixth Week / 13.06.24 - 19.06.24
Week 6 continued with smooth growth and development! 🌿 Focused on optimizing light exposure to each bud site using the SCROG technique, ensuring all buds are getting the attention they need. ☀️
The pistils are looking healthy and vibrant, showing promising signs of robust flowering. 🌼
Excitingly, Apollo F1 is already starting to develop its first trichomes, a sign that things are progressing well. ✨
Everything is on track, and the plants are thriving in their environment. 🚀

Likes
86
Share


@Tropicannibis_Todd
Follow
ALRIGHTY THEN .........
It's Harvest Time 😎
Being it was my very first purple 👈 I couldn't of been any happier 😁
I will definitely be growing this again soon 👈
I big thanks to Fastbuds for the seeds 👏
And a big thank you to NutriNPK for the nutrients 👏
www.nutrinpk.com right now get 10% off using SPRING2022 as the coupon code ....
And most of all , I would like to 👉Thank everyone who has checked out my diaries and left comments and likes 👍 It's very much appreciated👈.......
UNTIL NEXT TIME 👋👋👋👋👋👍
Likes
88
Share


@No_Clout
Follow
15/08/18 - all looking good got loads of roots piercing out the sides of the smart pot , I’m thinking of adding cannazyme soon to break up all the dead roots etc, I’m feeding them the usual tonight and 2 litres each 💧and I’m done with LST now im just gonna let them start to stretch🙏🏻🙌🏻
17/08/18 - saw some weird marks on a leaf or two this morning and then later on it look like the pic above, it’s only happening on older leaves it’s not affecting any new growth, I’m out of grow questions so any help would be grear ✌️🏻
20/08/18 - just watered them with the above ☝️🏻 All looking good think I’m half way through the stretch so I’ve started to add some canna boost to the solution , probably gonna do some LST later on this week.


Processing
Likes
17
Share


@EduP0812
Follow
En general han mantenido un crecimiento estable y continuo, la White Widow que presentaba carencia de azufre, ha evolucionado muy bien, esta fue la ultima semana de la fase de crecimiento, pasando a fase de floración, cambiando a foto periodo 12/12, al igual que se aplicó de forma foliar Delta 9 (estimulante de floración).
Likes
21
Share


@Adriplnks
Follow
Les hago una defoliación cada 2 días para que los nuevos brotes tengan bastante luz.
Empiezo con revienta cogollos a media dosis.
He alzado la más pequeña que se queda atrás, la más grande la voy doblando sin problemas.
De momento siguen creciendo.


Likes
7
Share


@Chucky324
Follow
Hello. This is the end of week 9 and the beginning of week 10 of veg.
Quite week for the plants and us. It's above freezing now, but it's one storm after another here.
The plants are dong well and I'll turn over to flowering next week. I'll make clones at that time.
I'm after the best plant so I'll whittle the 14 plants down to 1 or 2 plants when I'm done.
But I have to take 3 clones of each to be sure I get 1 to regrow when it's done. So I'll be doing that this week.
My next trim/prune will be before the 3 week of flowering, before the resin starts to flow.
Through this veg I've been giving a full feeding and then just watering and then a full feeding and then just watering.... You get the idea...
I let the pots dry and hopefully water/feed before I get any wilting.
We've started a new Freak Bros. book. Comic Book #10 Published in 1987. It's the 3rd in the trilogy.
You'll find the first 2 comic books in the story in other diaries. Have a look around in my other diaries and you'll find them.
OK. Have fun out there.
Chuck
Likes
17
Share


@killachronic
Follow
Ok had to keep ph at 7 even after finding out last week of ph burn got it under control all plants lost some sun leaves but are healthy. Cheese 1 is almost done smells like cheese and fruit. Cheese 2 is at 46 inches wouldn’t stop growing she is budding well. Cream 1 is moved is in shock recovering in veg. And cream 2 is about 30 inches and buding up fat been good week cheese 1 about ready in week or two others shortly behind.

Likes
96
Share


@CBD_Sweden
Follow
The growing cycle it self worked out as expected, except that the pH-level was way off from where it should be, and I found out a bit too late. Because of this the outcome of the harvest didn't say much about the potential of this strain, but as soon as I got enough time and space, she will get a new chance to shine.
----------------------------------------------------------------------------------------------------------------------------------
2018-02-27.
This is my review / smoke report of this lovely cbd flower.
There are rock hard buds and almost no give at all, even in those smaller buds.
When you grind it the scent will appear more than just smelling on the buds.
It smells a little weak of grass, hay, pepper, some spicy and sweet.
The taste is grass, soil, pepper and exceedingly sweet fruit.
The effect is directly, the thc feeling above the eyes and in the forehead.
A little light ringing in the ears and a dry mouth.
After 10 minutes, the cbd kicks in and one feels that the neck and shoulders begin to relax and the feeling continues down over the back and chest down to the stomach.
A calm and well-being is found in the body.
After 15-20 minutes it is down in the legs.
But in a strange way, you also feel like doing something, or meeting some friends and just sitting and talking about fun things.
It is a very well-balanced strain and it fits in all sorts of contexts.
I also think it might be good for someone who needs something that makes you more social and dampens enough anxiety and rushing thoughts effectively.
I think this is a lovely strain and I highly recommend it to everyone but especially for more inexperienced people who want to soften with a pleasant medicine.
Likes
33
Share


@Weird_Jimmy
Follow
✋Wk 8: Time slows down, as buds build and plants are thirsty.
👉One of the best part about growing cannabis, and actually fun plants of any variety, is that the anticipation of the final results seemingly makes time slow down. When I hit 40 it was like I had hit the top of the hill and everyday since then has seemed like it was getting shorter and time was going by much more quickly. I started growing herbs and peppers on the patio a few years ago the race towards the inevitable has seemed to mellow out. A year ago I started growing LEGAL cannabis! I had dreamed of this since I was in college. The risk was too great to get busted for growing even a small plant. Seeing the plants grow a little each day is amazing. Seeing the progress of just one month is amazing. The days seem to take longer as a pleasant side effect of my impatience for the finished product. I have grown lots of different plants, and cannabis is definitely the most magical to watch grow.
👉The 1 gallon is starting to build out its buds. The shape of the plant is amazing, all the secondary branches are almost the same height! The branches are very stout and have grown straight up. I have supports installed and may start by just making a simple hoop around the plant with some soft garden wire to keep them from spreading out. The frost is starting to form on the one gallon buds as well. The frost is extending out onto the leaves. I haven't removed any leaves or larf sites in a couple weeks. The leaves went from big and fat fans to smaller skinny fingers much like you'd expect from a Sativa dominant strain, yet this is an Indica dominant strain. Its making for much better light penetration so minimal larf and fatter colas perhaps. When fertigating it takes a few minutes to be able to get all the sulution to the plant. This is from the density of the roots. Its been soaking up the water and nutrients very well. Towards the end of the week I was getting less run-off and the run-off EC was climbing. I will probably do a good low EC fertigation next week.
👉The 3 gallon is a dense bush. I haven't taken any of the secondary branches. I have taken some interior shaded small branches from the big branches. I have also taken some of the interior leaves that were totally shaded. Ive have also removed almost all the large early growth leaves as they got more in the way of air circulation and access to the media for watering and observation. The main cola is barely indetifiable as the main cola so far. The symetry of the plant is very nice and I hope it stays this way. Its also behind the 1 gallon plant and will finish 2-3 weeks after it. I am guessing 6 more weeks max. Even if its not ready I will have to harvest it 6 weeks form now because I have to go out of town for business for a week. I will take it as far as it can go. The plant is drinking alot and I am giving it as much as 5 liters a day. The run-off has also gone down and as a result the run-off EC has been creeping upwards as well. The coming week I will be giving it a goof low EC fertigation and increase the volume of inflow. My target for inflow EC is mid range on the General Hydroponics Flora Series Drain to waste nutrient schedule.
👉 I have included pix of my fertigation log. The log show tents conditions, inflow stats and run-off stats. Both plants are soaking up the fluids. Both plants are getting the full line of the General Hydroponics Flora series nutrients/supplements and mixed full strength in RO water from an industrial RO water machine. This week I increased the amount of Cali-magic about 25%. There are some purple stems around and want to keep it from becoming a leaf issue if its form a slight lack of Ca/Mg. Next week I will continue the higher level of Calmag and also will do at least one low EC fertigation. When I do a low EC fertigation I only have Armor Si and Calimagic in the solution. I will follow the low EC event with a small dose of regular nutrient solution.
👉I am sure that the way I am doing this diary is probably pointless in terms of interest to others. I am doing it in the spirit of a true diary and for my own personal use as a record. I am trying to make it understandable and comprehensive for others. I'm sure that is folly in the long run but I do enjoy being able to review my work in a comprehensive way.

Likes
18
Share


@Wenz004
Follow
Blüte und Stretch in vollem Gange nun.
Letzte Woche sehr stark beschnitten.
Hat die Woche auch 3.5 Liter Komposttee bekommen...ansonsten trinkt die zur Zeit so 2 Liter pro Tag...hoffe das werden nicht 6 Liter irgenwann wie bei meinem F-MILF Projekt...kaum noch händelbar wenn man dann wegfährt.
Ansonsten voll zufrieden 😃
Likes
9
Share


@Sativa763
Follow
Hiya Day 40 today. 09.06.
still some problems (as you can see on the most of the leaves).
but we will get this to an end and the smell is already amazing.
really sweet aroma in the tent and I´m already excited what the smoke will taste like.
this week only water. and maybe the last PK boost next week.
fingers crossed 😅
happy growing my friends.

Likes
10
Share


@BR1CK_SANCHEZ
Follow
Simply planted the seeds a half inch below soil and watered them in... they each sprouted within 3-4 days.
Likes
20
Share


@Elpicor
Follow
D 114 05/09
Maybe 1 or 2 weeks for harvesting, she take flowering stage of 10-12 weeks

Likes
20
Share

@Gympaddy
Follow
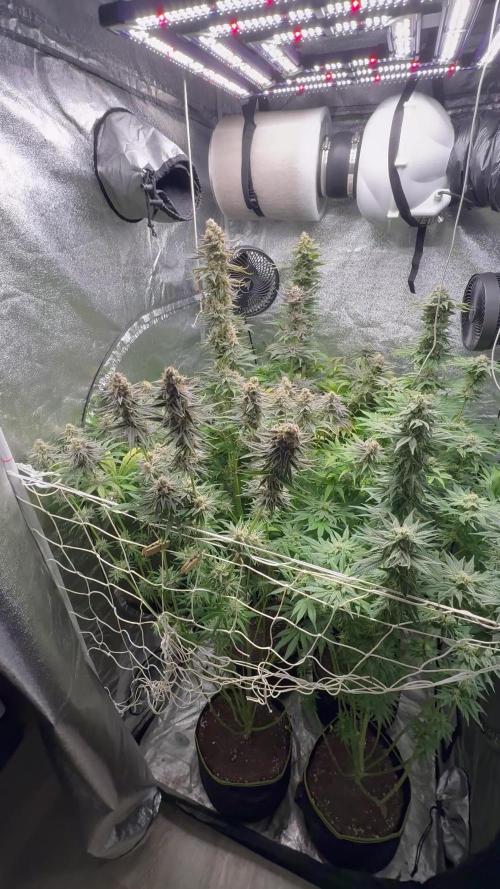
So, my fertilization plan is nearing its end; from now on it's just water, and probably the final harvest will be at the end of next week, maybe a little later.

Likes
16
Share


@Gulliver
Follow
Эти девушки очень много сахара произвели за неделю и плотность бетоном очень увеличиваеться!
Прекрасный рост.


Likes
12
Share

@Z420Organics
Follow
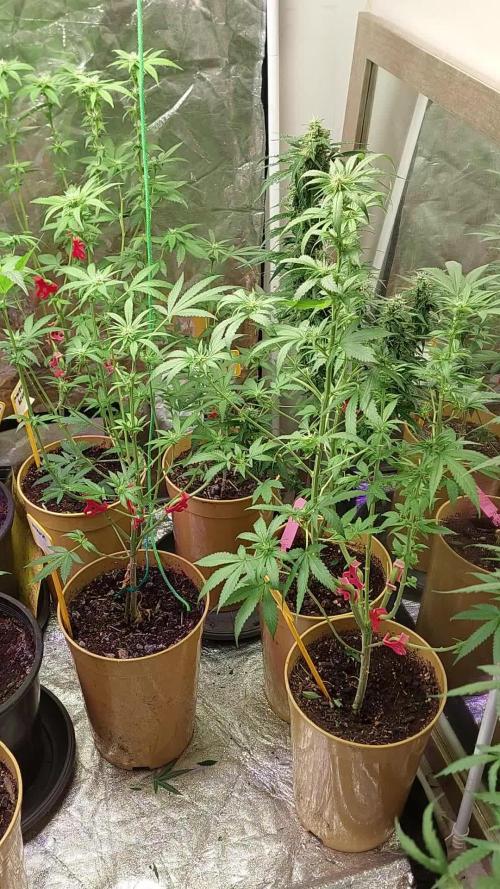
This week brought some unexpected challenges
My dehumidifier broke down, and until I fix it or find a replacement, the humidity has been spiking really high — definitely not ideal for flowering. 💦🌫️ I need to resolve this as soon as possible before it causes serious problems.
Aside from that, the plants are thriving and almost running on autopilot! 🌱💚
They did show some stress after the recent demolition and lollipopping session, so I decided to lower the light intensity a bit to help them transition through this phase more smoothly. 💡✨
Despite the humidity issue, everything still looks promising — just hoping I can get the environment back under control soon! 🌿🤞
