Processing
Likes
Comments
Share
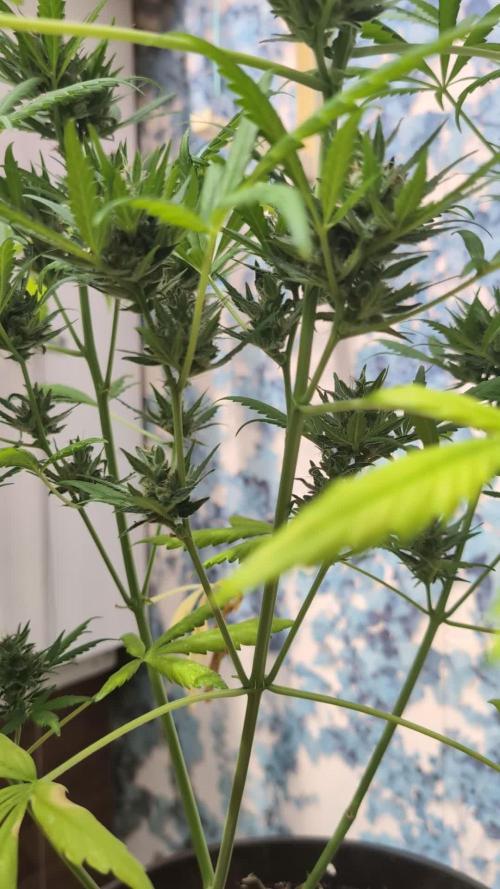
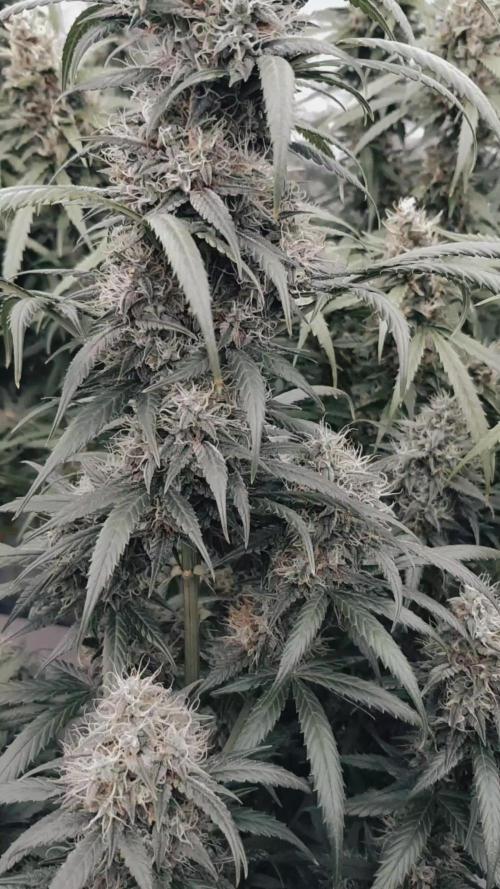
Welcome to the fifth week of flowering ... The smell is strong enough. The tops are getting hard and filled with resin, the pistils are getting dark and some violet shades are noticed. Unfortunately for the hydroponic system my water pump broke when it was still in veg and as soon as I inserted the bloom the air pump broke too. I could not replace either of them and therefore the results in hydro are not abundant but the smell is very good. With the help of ga3 I produced some male flowers only on the Cranberry and therefore some seeds on the smaller flowers ... Happy growing to all

Likes
8
Share
Last week gonna harvest these soon everything looks beautiful…another o for the books room 10k hps apple fritter and Sunday driver clones I ran before
Processing
Likes
16
Share
@MrWolfe
Follow
Moved the tents outta here 😂 switched some ventilation up and added two more dumps, I need to get more fans down here lol these girls look great all day every day, can't wait to see how it goes! They are all loving life, smaller clones have even had an awesome rebound the last few days since they got topped so that's cool. This week went great, started out stripping and topping everywhere I could and ended with beautiful roots going up to three fallon pots, gave a nice full watering to all of the and will see how they drydown tomorrow, I'm gonna guess they won't want water until the day after, I want them to really reach out into their new pots.
Likes
7
Share
@Shinobi
Follow
Nevidel som ich 2 týždne🤪🤪veľké búrky dažde vyzerali pripravené.trichomy mliečne90%hnedé blizny.pre mňa výborné.mier
Likes
13
Share
@J_diaz420
Follow
Solamente defoliación mientras las veo crecer en su prefloracion.
Likes
46
Share
@Dr_Rook
Follow
Esta semana todo sigue acorde lo esperado, las flores empiezan a invadir mi jardín y ya se ven las primeras capas de resina. He hecho una segunda poda de bajos, rellenado tierra y sujetado varías de ellas a sus tutores. Varios días han pasado demasiado frío tras apagarse las luces, nada bueno para ellas, pero he conseguido un mini calefactor cerámico que lo está combatiendo muy bien. Espero que la próxima semana siga la invasión de flores en mi jardín
Likes
15
Share
@BruWeed
Follow
🍀13/06 - Empieza su tercera semana en etapa de floración. 🍀Se encuentra muy saludable y fuerte, hasta el momento no tuve ningún problema con ella. 🍀Ya los cogollos se pueden ver perfecto y hasta los tricomas. 🍀Esta semana solamente le puse Top bloom y Top candy. 🍀Cumple 69 días de vida en total desde su germinacion. 🍀En estos dias seguire subiendo mas imagenes. 🇦🇷😶‍🌫️🍀Podes seguirme en Insta gram como @bruweed_arg 🇦🇷😶‍🌫️🍀
Likes
30
Share
@BC_Green
Follow
It has been another amazing week of the plants growing. I have been watching as the Fruity Freak leaves become progressively more fern-like, and ornamental as a result! Based on my Banizzle grows, I knew I needed to understand plant nutrients in a more meaningful way if I wanted these plants to thrive. So, I decided to get a soil test (see Ref. 1 below on how to perform a test) to understand what nutrients my plants needed. The report I received advised that I needed to add 200 lbs/acre of nitrogen, 150 lbs/acre of phosphorus, and 190 lbs/acre of potassium (see picture labeled Pic.1 (FYI you can't see these images unless you login to growdiaries)). I then researched what to do with my results (Ref. 2 helped), and I figured out that my nutrient needs of 200-150-190 fall close to a 2-1-2 ratio. I then looked at different types of organic fertilizers (see Ref. 3 and Ref. 4) and considered that I already had a 3-10-5 fertilizer (Vermibloom) on hand. I discovered Dr Earth’s Alfalfa Meal is 2-1-2 and includes beneficial bacteria and mycorrhizae (to promote healthy plant growth and disease resistance). However, I knew I would be low on nitrogen if I only used those two fertilizers. Therefore, I decided to buy some blood meal (12-0-0). I also liked that blood meal is more fast acting while the other two are more moderate. I hunted around for a solid fertilizer calculator and found an amazing tool from the University of Georgia Extension (Ref. 5). I entered all three fertilizers into the calculator, and it kicked out the exact amount of each fertilizer I needed to apply to 1 square foot (see Pic. 2). As I am using 10-gallon fabric pots (that can hold 1.5 cubic feet, but I put stone on the bottom and there’s space left at the top) I decided to use the one square foot application rate as I can always add more later, but I can’t take it away. Not only did I want to understand the nutrients I needed, but I also wanted to understand the structure of the soil (as it was not included in my test results). North Dakota State University has a nice page that discusses this (Ref. 6), and I performed a soil ribbon test (see Video 1) based on this information. I determined my soil to be medium textured (which is great), but I have seen occasional water pooling on the surface, suggesting that it may be more of a medium-fine. This means adding peat moss, coco coir, or other amendments might improve drainage (and plant hydration) and allow for roots to grow more easily. In the long run, I plan to use compost to enhance the soil structure and nutrients. I filled the bottom of my 10-gallon fabric pots with a ½” of pea stone to allow for drainage (Pic. 3). I then partially filled two 5-gallon buckets with topsoil from near where I will plant (but not in an area the roots will reach). I used a digital scale to measure the amount of fertilizers recommended by the calculator (Pic. 4, 5, and 6) and added it to one of the 5-gallon buckets (see Pic. 7). I mixed the fertilizers into the soil as evenly as possible (Pic. 8 and 9). I then poured a two-inch layer of non-fertilized soil, then peat moss, and then fertilized soil (in a roughly 2:1:1 ratio) and blended them together. I repeated this until the pot was full (getting additional soil as needed), and then I repeated the process for the other three pots. I set the filled fabric pots in my garage (Pic. 10) for two days to allow any upset bugs to flee into my garage instead of my house. I then moved the pots (wrapping them in a contractor garbage bag to prevent making a mess) into the room with the grow light. I placed a board on top of the fabric pots to insulate the plants (in their smaller pots) from the cold soil (Pic. 11). Once the soil in the fabric pots reaches room temperature, I will transplant. (Ref. 1) This video shows the method I used to take a soil sample. I didn’t have a field to test, so I took four samples from the area where I will eventually plant outdoors and blended them together. I then mailed my soil sample off to the lab, and about a week later, I received an email with a PDF of my results (included with my pictures this week). https://www.youtube.com/watch?v=N9AwxmFxBwg&t=8s (Ref. 2) This video from the University of Minnesota Extension (many universities have agriculture extensions that can assist you with soil testing and growing information for your area) discusses what to do with your soil testing results: https://youtu.be/HYrkcfE62Pg (Ref. 3) This is a nice article that discusses organic fertilizer solutions: https://www.grow-it-organically.com/npk-fertilizer.html (Ref. 4) This article lists the NPK values of many organic fertilizer solutions: https://www.epicgardening.com/organic-fertilizers/ (Ref. 5) Many websites tout a fertilizer calculator…but this one is hands down the best I have found. If you scroll down to the bottom, you can enter any fertilizer type you want (and the cost, if you want). It will give you the exact blend of multiple fertilizers to solve your nutrient deficiencies (I included a snapshot of the solution I used in my pictures). https://aesl.ces.uga.edu/soil/fertcalc/ (Ref. 6) This is an excellent article that discusses how to evaluate your soil: https://www.ndsu.edu/agriculture/extension/publications/evaluating-preparing-and-amending-lawn-and-garden-soil
Likes
3
Share
@BearBuds
Follow
New clones just arrived! Starting them off straight into coco coir this time. First transplant today into solo cups. They got a pretty heavy first watering with a PPM of about 425. Hoping to really start them off strong. I will be vegging them for much longer than usual. I typically veg my plants for 4 to 6 weeks and these girls will be vegging for 8 to 9. This grow will be a great chance for me to try some HEAVY plant training techniques.
Likes
14
Share
Showing signs of flower. Checking for stress seeds or hermie plants every time I water. So far so good though. Feeding schedule seems to be working great. I'm gonna really hit em hard with the florabloom next week.
Likes
63
Share
@Ferenc
Follow
Day 58, 7th of November 2020: The 6th day since the lamp switched to be 12/12... I raised up the nutrition intake as it can be seen above only the BioBizz family 2ml/l and removed some LST because the plant remains in shape or just set a bit but nothing significant.... Amazing....strech is on the way..... 😅 Nice fresh smell lovely, I love the structure. She does not strech that much so far but she is like a little more bushire a lotnof leaves and smaller ones... she looks different in "person" you would see more differences compare to other ones from the same breeder in this group ;) Nothing really to report there is crazy 2-3 weeks from now ;) ;)
Likes
9
Share
@Luv2Grow
Follow
Day 43 - The start of week 7 and she’s doing great and the purple is starting to show up pretty nicely now. She’s doing good since tying down some branches yesterday and will let her grow up as much as she wants now. Should be ready for some water tomorrow. Day 44 - Really starting to push out some purple. Gave her some water today, soil was completely dry. Just watching her as she starts to stretch a bit and might give some bone meal once she hits day 60, depending on how she’s doing. Day 45 - Not a whole lot happening right now, she’s looking good and starting to put on a lot a purple and loving it. Tucked a few leaves to keep her open. Day 46 - Nothing interesting going on with the girl right now. She’s filling in nicely and the purples look amazing. Probably another day or two before giving her some fresh water. Day 47 - Looking good and dropped the light to about 10” the other day and it really seems to be helping her bud up more. Pot is just about dried up so will be giving her some water tomorrow. Day 48 - She’s doing well, noticed a few lower leaves are becoming very light in color but all the rest seem to be doing ok. Not sure if I need to add another batch of bone meal to the soil or if she just needed a good watering so she got watered to runoff tonight and I’ll keep an eye on her for the next few days. Other than that, her bud sites are really starting to purple up. Day 49 - It’s the end of week 7 and getting a little worried about this girl and not sure what’s going on. Yesterday she looked great and all of a sudden today, all of her leaves have turned a really light shade of green. This soil is not supposed to need nutes but I’m thinking no nutes is good for veg but I need to add them for flowering so I went and gave her a feeding of the foxfarm trio with some cal-mag and I’ll give it a couple days to see if it helps. Buds are producing nicely but leaves look like they’re dying so hopefully the feed helps.
Likes
22
Share
GSC BY KANNABIA Week #21 Week #10 Flower This is the last week for feeding the plant trichomes are about 50% clear 50% milky so it's about that time. This plant is a beautiful lady!! Stay Growing!! Thank you for taking a look!!
Likes
8
Share
- 12/12: Transplanted remaining plants to 5 gal. pots. They seem to have taken it nicely and 24 hrs later I think they look bigger. - 12/12: Did some more defoliation on lower growth for light exposure. - 12/12: fed 0.5ml/L of alg-a-mic and 1ml/L root juice to transplanted plants and Bio Bloom 2ml/L + 0.5ml/L Cal-Mag feed for Cream Felanitx. Ph: 6.5 Saw some yellowing on lower big fan leave and lower leaves dropping because I was late for watering for 1 day. Some peole say the yellowing. is normal this far ir veg. Rest is ok and the plants seem to have loved their food.
Likes
10
Share
@valiotoro
Follow
Photoperiod buds 🤩 The smell is absolutely divine very fruity,sweet & tropical🍋🍊🍉🍌 Solid like a diamond 💎 Bay harbor butcher’s trim to show the density
Likes
9
Share
Se pegaron gran estirón y la floracion ya es evidente en todas las plantas a excepcion de lsd 25. El calor ya es altísimo debido al verano y se empieza a notar en las hojas superiores, sin embargo, todas las plantas tienen un aspecto sano.